How to Change DNS Server on Windows 11

When it comes to connecting to and accessing the internet, DNS or Domain Name System is extremely important as it maps domain names to IP addresses. This allows you to use a name for a website, such as techcult.com, instead of the IP address to find the desired website. Long story short, it is the Internet Phonebook, allowing users to reach websites on the internet by remembering names rather than a complex string of numbers. Though most users rely on the default server provided by their Internet Service Provider (ISP), it may not always be the best option. A slow DNS server can cause your internet connection to slow down and at times, even disconnect you from the internet. It is important to use a dependable and good-speed service to ensure stable internet connectivity. Today, we will teach you how to change DNS server settings on Windows 11, if and when need be.
How to Change DNS Server Settings on Windows 11
Some tech giants provide plenty of free, trustworthy, secure, and publicly available Domain Name System servers to help users be more secure and safe while browsing the internet. A few also provide services like parental control to filter out inappropriate content on a device their child is using. Some of the most trusted ones are:
- Google DNS: 8.8.8.8 / 8.8.4.4
- Cloudflare DNS: 1.1.1.1 / 1.0.0.1
- Quad: 9: 9.9.9.9 / 149.112.112.112.
- OpenDNS: 208.67.222.222 / 208.67.220.220.
- CleanBrowsing: 185.228.168.9 / 185.228.169.9.
- Alternate DNS: 76.76.19.19 / 76.223.122.150.
- AdGuard DNS: 94.140.14.14 / 94.140.15.15
Read till the end to learn how to change DNS server on Windows 11 PC.
Method 1: Through Network & internet Settings
You can change DNS server on Windows 11 using Windows Settings for both, Wi-Fi and Ethernet connections.
Method 1A: For Wi-Fi Connection
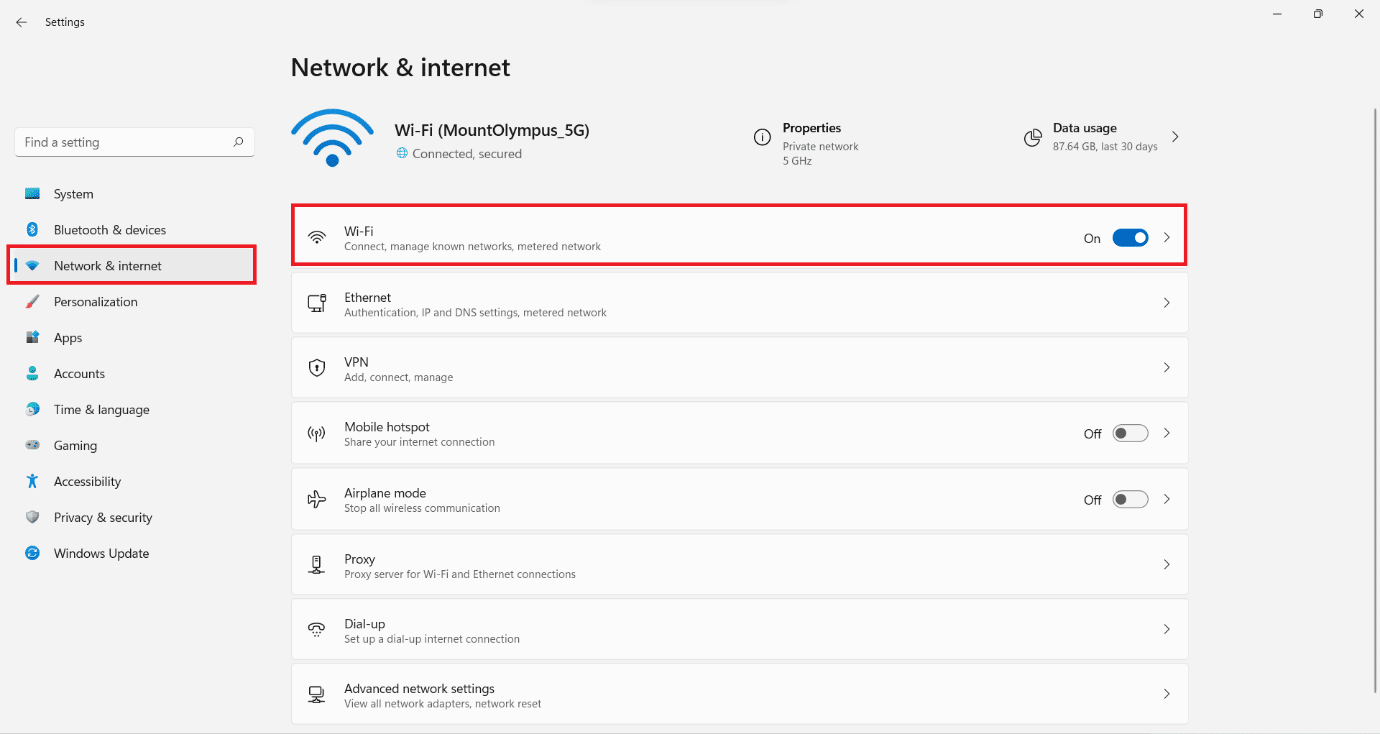
1. Press Windows + I keys together to open the Settings window.
2. Click on Network & internet option in the left pane.
3. Then, select the Wi-Fi option, as shown.
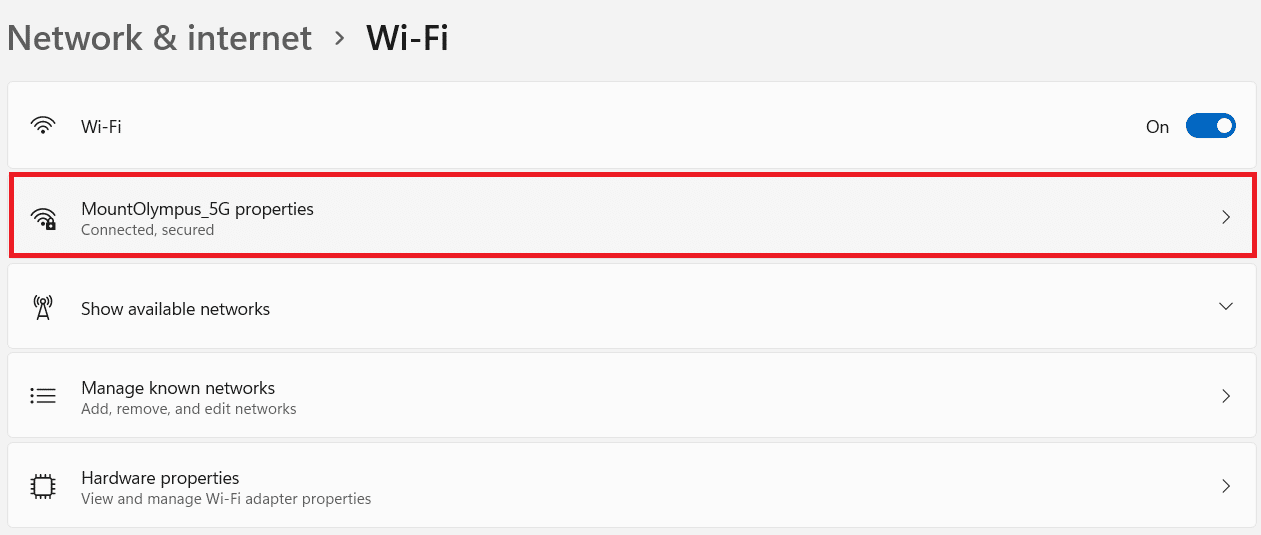
4. Click on Wi-Fi network properties.
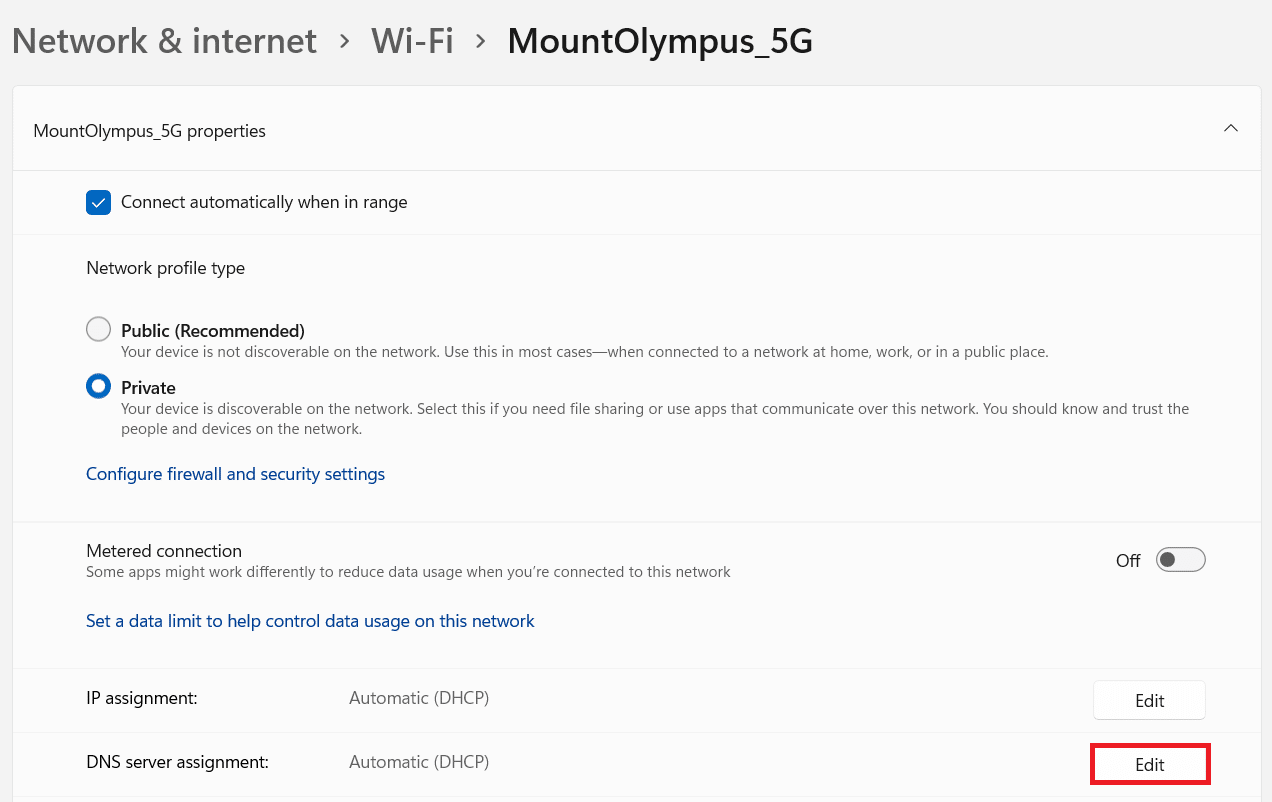
5. Here, click on the Edit button for the DNS server assignment option, as depicted below.
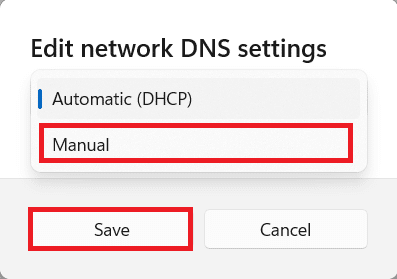
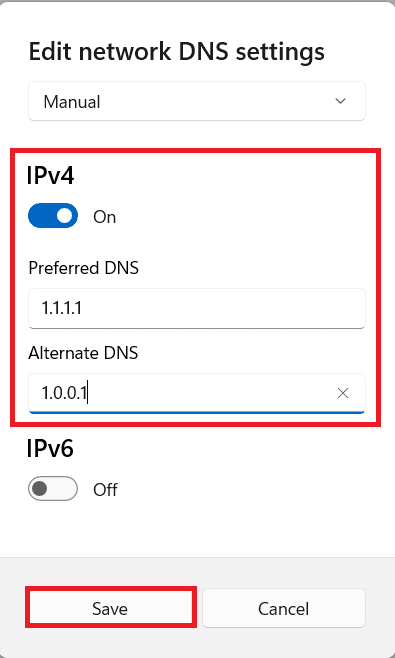
6. Next, select Manual from the Edit network DNS settings drop-down list and click on Save, as shown highlighted.
7. Toggle on the IPv4 option.
8. Enter the custom DNS server addresses in Preferred DNS and Alternate DNS fields.
9. Finally, click on Save and Exit.
Method 1B: For Ethernet Connection
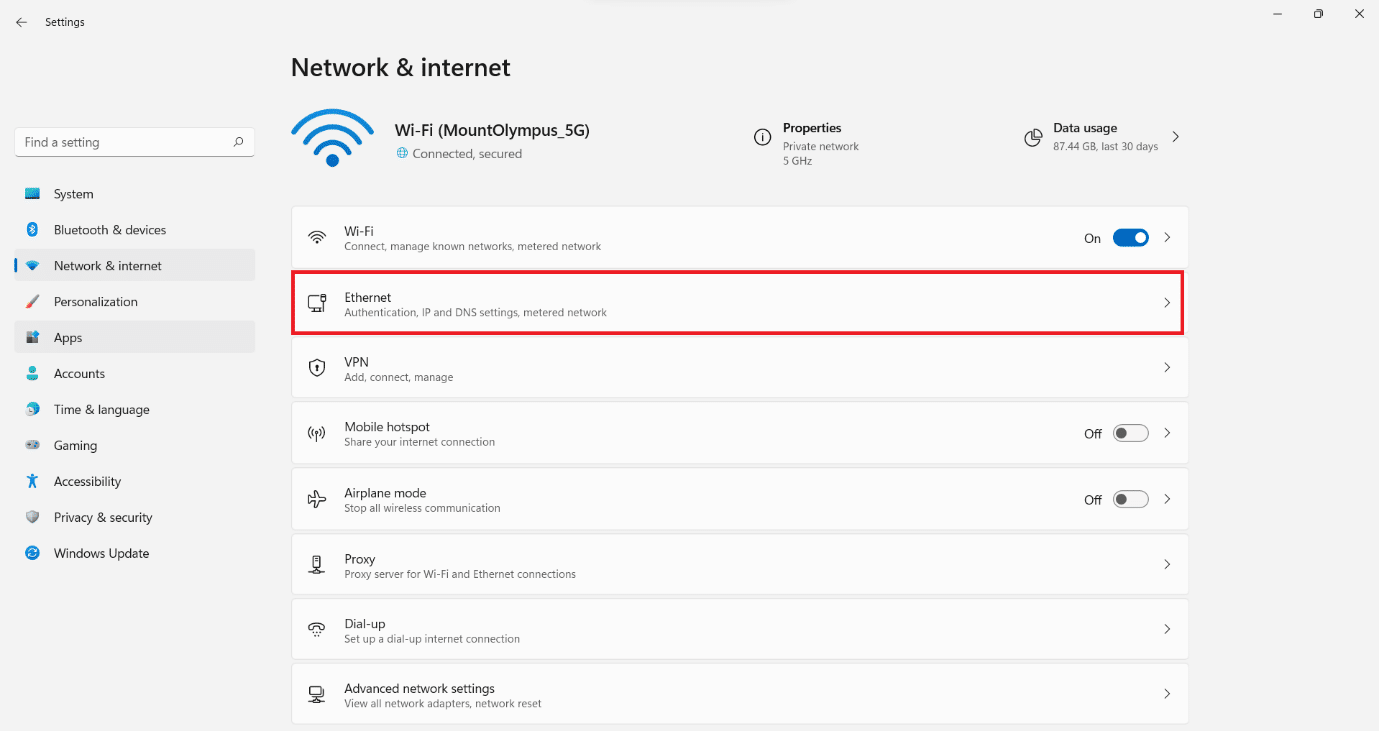
1. Go to Settings > Network & internet, as earlier.
2. Click on the Ethernet option.
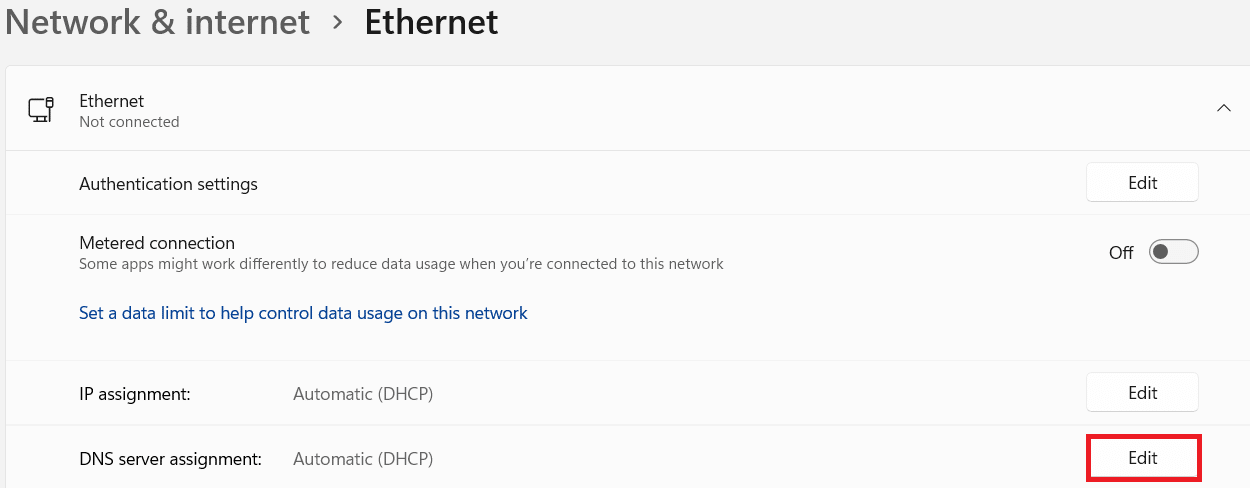
3. Now, select the Edit button for the DNS server assignment option, as shown.
4. Select Manual option under Edit network DNS settings, as before.
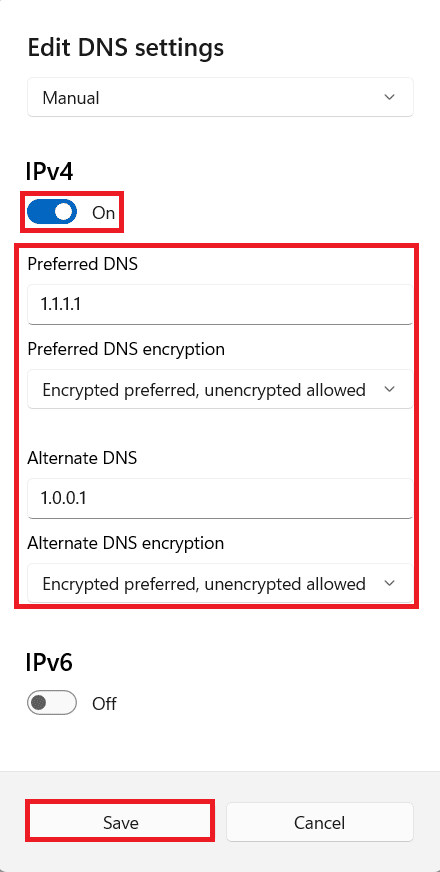
5. Then, toggle on the IPv4 option.
6. Enter custom DNS server addresses for Preferred DNS and Alternate DNS fields, as per list given in the beginning of the doc.
7. Set Preferred DNS encryption as Encrypted preferred, unencrypted allowed option. Refer given pic for clarity.
Also Read: How to Switch to OpenDNS or Google DNS on Windows
Method 2: Through Control Panel Network Connections
You can also change DNS server settings on Windows 11 using Control Panel for both connections as explained below.
Method 2A: For Wi-Fi Connection
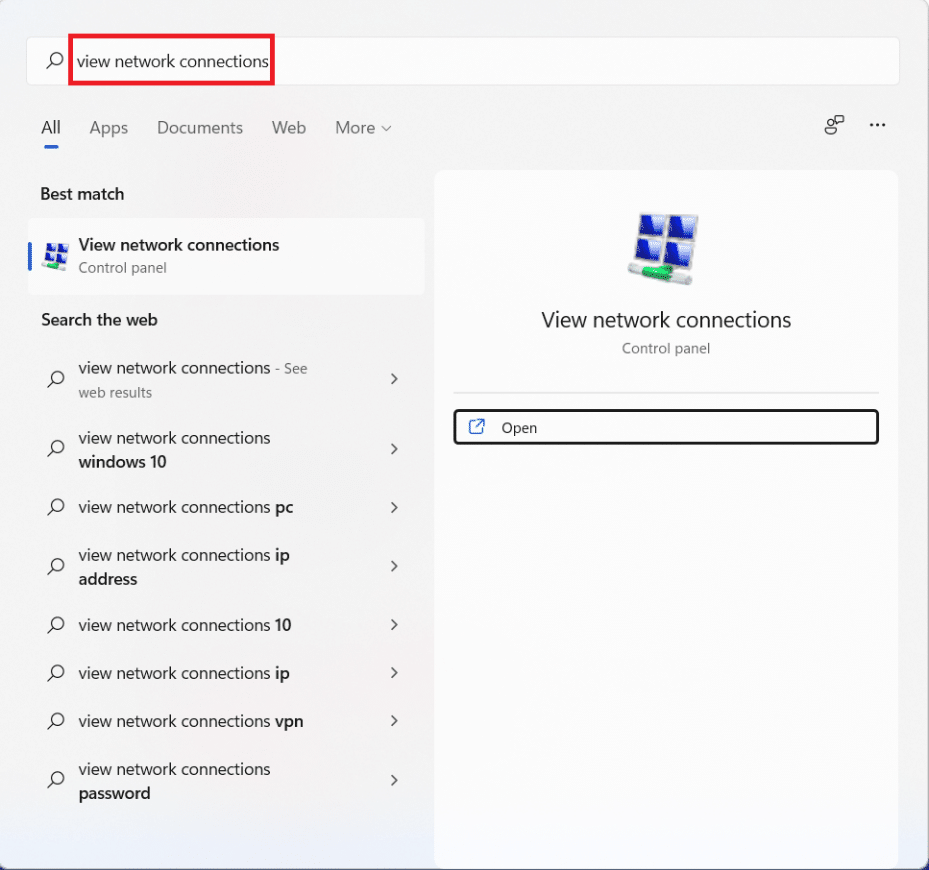
1. Click on the Search icon and type view network connections. Then, click on Open.
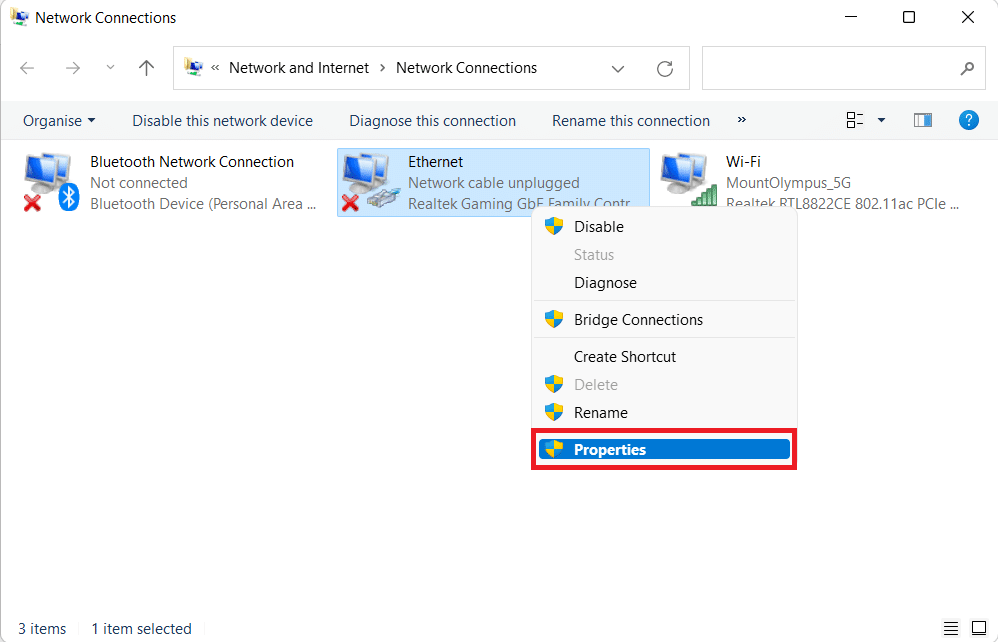
2. Right-click on your Wi-Fi network connection and select Properties, as shown.
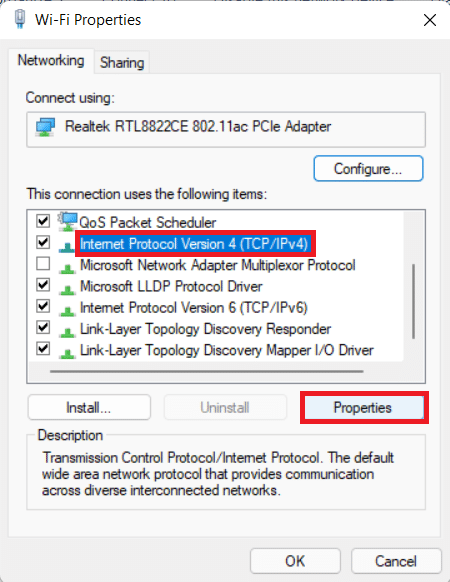
3. Click on Internet Protocol Version 4 (TCP/IPv4) and click Properties button.
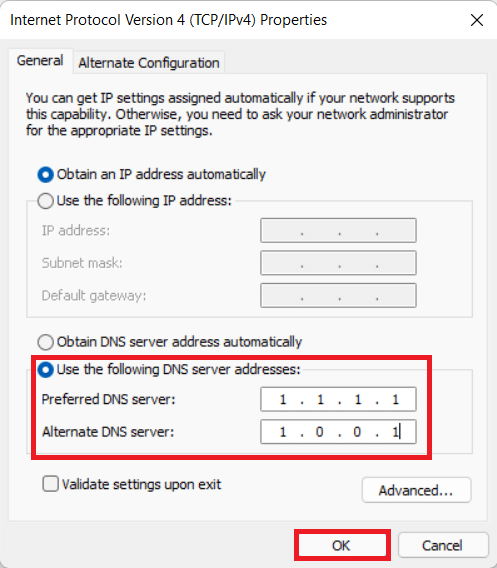
4. Check the option marked Use the following DNS server addresses and type this:
Preferred DNS server: 1.1.1.1
Alternate DNS server: 1.0.0.1
5. Finally, click OK to save changes and exit.
Method 2B: For Ethernet Connection
1. Launch View network connections from Windows search, as earlier.
2. Right-click on your Ethernet network connection and select Properties, as shown.
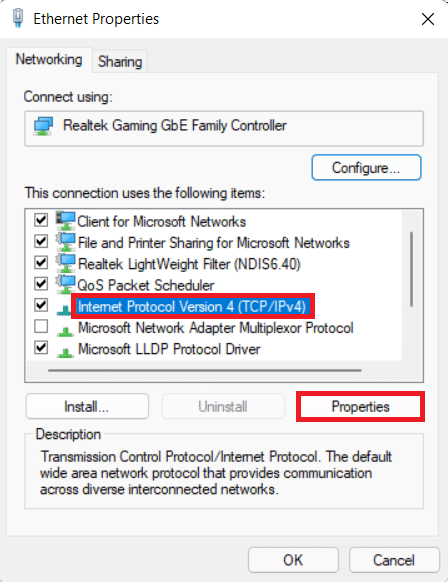
3. Now, click on Internet Protocol Version 4 (TCP/IPv4) and select Properties, as depicted below.
4. Follow Steps 4 – 5 of Method 2A to change DNS server settings for Ethernet connections.
Recommended:
We hope you could learn how to change DNS Server Settings on Windows 11. You can send your suggestions and queries in the comment section below. We would love to know which topic you want us to explore next.

