- in Windows 10 by Admin
How to Change the Windows 10 Startup Sound
Tired of that boring sound your Windows computer makes when it boots up? There are two things you can do about updating your Windows 10 startup sound. You can either turn off the startup sound or change it to your preferred jingle. Better yet, you can take things up a notch by customizing the Windows 10 startup sound. Perhaps to your favorite song or the theme song of your favorite TV show.
Modifying the startup sound of your Windows 10 computer is very easy. However, depending on your device’s configurations, you may encounter some difficulties in the process.
Not to worry, though, we’ll walk you through all the steps and troubleshooting methods involved.
Change the Windows 10 Startup Sound
Note: If you run an older operating system on your computer, refer to this guide on changing startup sound on Windows XP, Win 7, and Win 8.
Follow the steps below to change the startup sound of your Windows 10 computer.
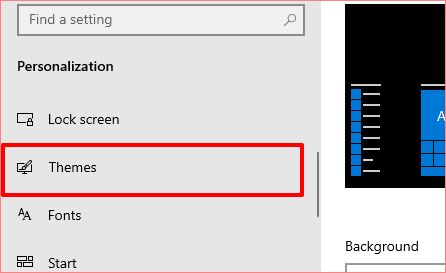
1. Go to Settings > Personalization and click on Themes in the right sidebar.
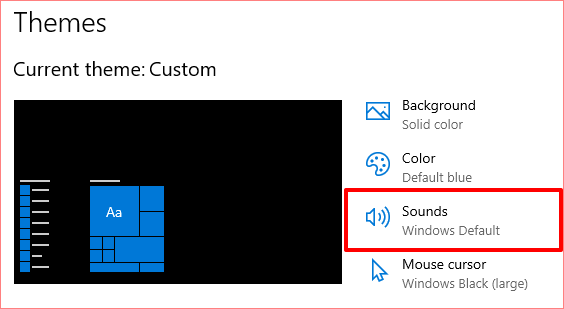
2. In the Themes menu, click on Sounds. That would open a new window where you can change your PC’s sound settings.
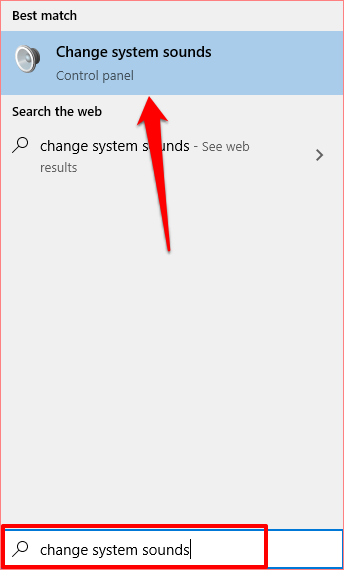
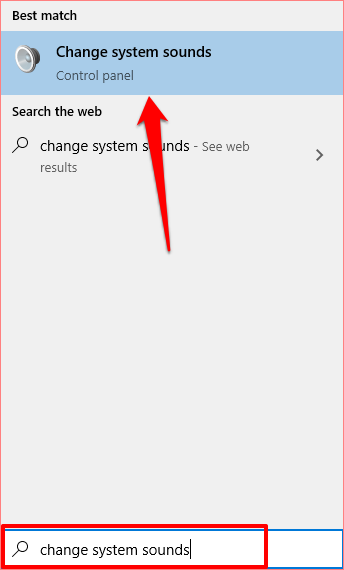
A faster alternative is to type change system sounds in the Windows search box and select Change system sounds; it’s the first option in the results.
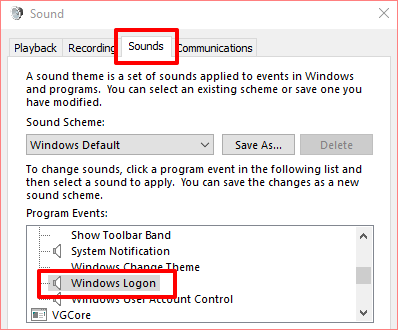
3. Navigate to the Sounds tab and locate Windows Logon in the Program Events section.
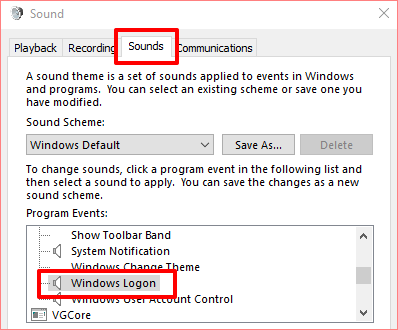
Note: If the Windows Logon option doesn’t exist in the Program Event box, you need to enable startup sound using the Windows Registry Editor. Refer to the (Modify Startup Sound Registry Files) section below to learn how it’s done.
4. Press the Test button to listen to your PC’s default/current startup sound. To change the startup sound to a system preset sound, tap the Sounds drop-down button.
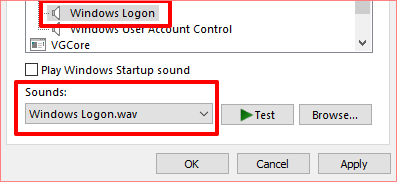
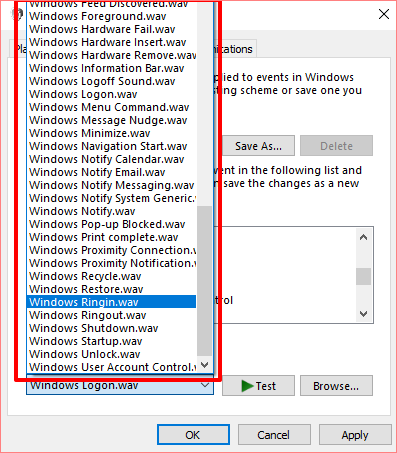
5. Scroll through the preset startup sounds and select whichever piques your interest.
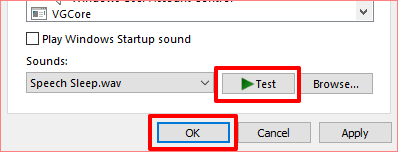
Click Apply and then OK to save the change. Remember to use the Test button to play and preview the sound before you make your selection.
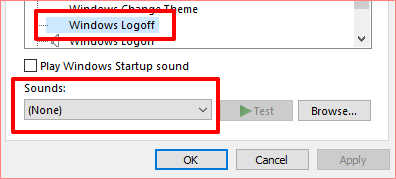
You can also follow similar steps to change your PC’s shutdown sound. In the Program Events window, click on Windows Logoff and select a preset startup audio from the Sounds drop-down menu.
If you’d rather use a custom or third-party audio as your PC’s startup or shutdown sound, follow the steps in the next section.
How to Set a Custom Sound as Your Windows 10 Startup Sound
Using a custom or third-party song/music as your Windows Logon sound can get a little tricky and requires some extra effort. But it’s a pretty straightforward process.
Before we get into the details, there are some things you need to know.
- The audio file must be located in the C:WindowsMedia folder of your computer.
- The audio file must be in .wav format.
If you have an MP3 file, you can convert it to WAV format easily using a free online tool like Convertio.co. We recommend that you keep the file size small, less than 1 MB if possible.
FreeConvert.com has an online WAV compressor tool for shrinking WAV files. If you’d be converting audio files very often, you should check out some great software apps that let you effortlessly convert music files to different formats.
Move the audio file (in WAV format) to Local (C:) > Windows > Media and follow the steps below to change your PC’s startup sound to the new custom sound.
1. Type change system sounds in the Windows search box and click on Change system sounds.
2. Navigate to the Sounds tab and locate Windows Logon in the Program Events section.
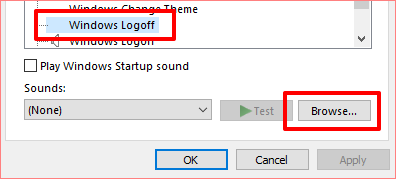
3. Click on Windows Logon and tap the Browse button.
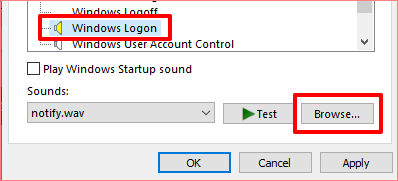
Note: To change the shutdown sound, click Windows Logoff and tap the Browse button.
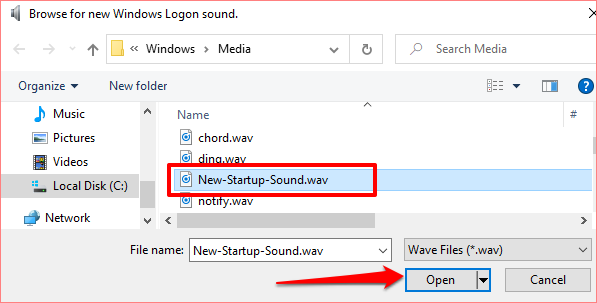
4. Select the audio file (in WAV) you moved to the Media folder and select Open.
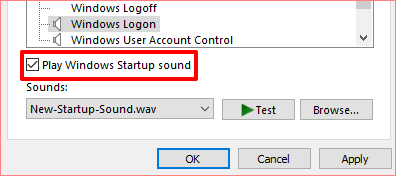
5. Finally, check the box that reads Play Windows Startup Sound. Select Apply and then select OK to save the changes.
Modify Startup Sound Registry Files
If the registry files responsible for both the startup and shutdown sound on your computer are excluded from the Control Panel, the Windows Logon and Windows Logoff options will be missing in the Sound settings menu.
Follow the steps below to modify the Logon and Logoff registry file. But before you do so, make sure you backup your PC’s Registry.
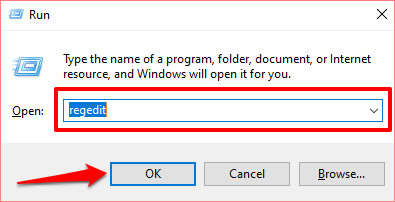
1. Launch the Run box (Windows key + R) and type regedit into the dialog box. Click OK to proceed.
2. Paste the directory below into the Registry Editor’s search box and press Enter on your keyboard.
ComputerHKEY_CURRENT_USERAppEventsEventLabelsWindowsLogon
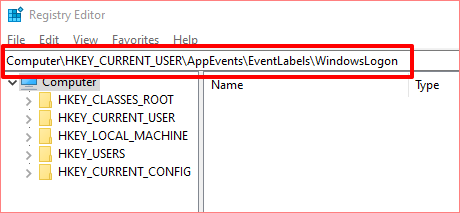
That would redirect you to the path where you’ll find the registry files powering Windows 10 startup sounds.
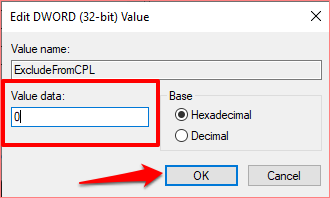
3. Double-click on the registry file named ExcludefromCPL.
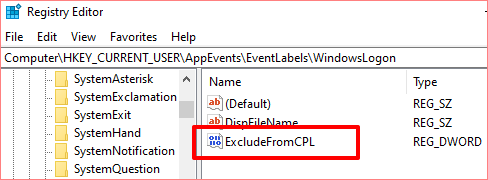
4. Change the Value data to 0. Leave every other option as is and select OK to proceed.
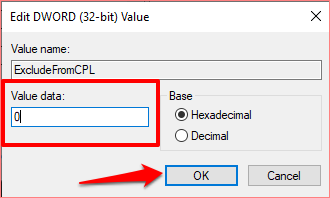
If you want your computer to make a sound when you shut it down, you can also modify the registry file responsible for shutdown or logoff sound on Windows 10. Proceed to step #5 to do that. Otherwise, jump back to the previous section to change your computer’s startup sound.
5. Paste the directory below into the Registry Editor’s search box and press Enter on your keyboard.
ComputerHKEY_CURRENT_USERAppEventsEventLabelsWindowsLogoff

6. Double-click on the registry file named ExcludefromCPL.
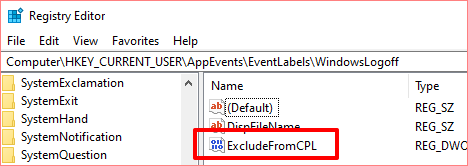
7. If the Value data is set to 1, change it to 0 and select OK.
Windows 10 Startup Sound Not Changing? Try This
If you’ve changed your computer’s startup sound but it still plays the default jingle, it’s most likely due to the length of the audio file. For Windows 10, the maximum length of a startup sound is between 4 – 6 seconds.
To fix the problem, trim the audio file (in WAV format, remember) to 6 seconds and try again. If the startup sound still doesn’t change, reduce the file length to 4 seconds. You can use an online audio cutter or trimmer (like Clideo.com) to trim the length of your audio file.
The same maximum length requirement also applies to the shut down sound on Windows 10. So, if you change the shutdown sound of your PC but it still plays the default sound, trim the audio file to a maximum of 4 – 6 seconds as well.