How to Configure Indexing Options on Windows 11
What to do when you need to access a file/folder/app but feel too lazy to browse through the storage on your computer? Enter Windows Search to the rescue. Windows Search Index provides search results quickly by looking for a file or app or setting from within predefined areas. Windows operating system automatically rebuilds its index and updates it regularly when you add a new location so that Windows can show new files from this updated index. Today, we will discuss how to configure & rebuild Indexing Options on Windows 11 manually.
How to Configure Indexing Options on Windows 11
Windows Search Index offers two modes: Classic & Enhanced. Now, when you switch the Windows Search Index modes, the index gets rebuilt. This ensures you get the results you are looking for after the index is rebuilt. Read here to learn more about Windows Search Overview.
- By default, Windows indexes and returns search results using Classic indexing. It will index data in user profile folders such as Documents, Pictures, Music, and the Desktop. To include more content, users can use the Classic indexing option to add additional locations as explained later on in this guide.
- By default, the Enhanced indexing option indexes all items stored on your computer. However, selecting the Enhanced indexing options may increase battery drainage and CPU usage. Because of this reason, it is recommended that you plug your computer into a power source.
How to Switch Between Indexing Modes
Follow the steps listed below to configure search indexing options in Windows 11:
1. Hit Windows + I keys simultaneously to open Settings.
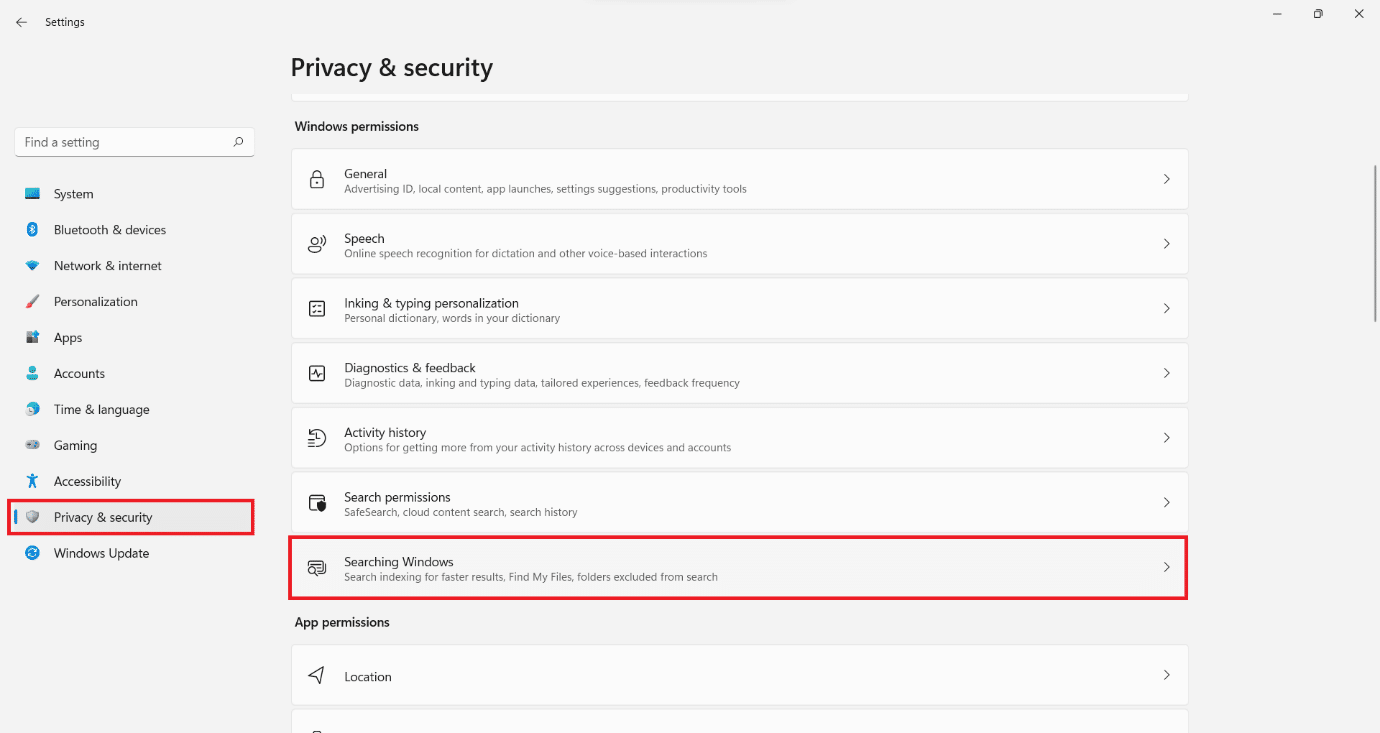
2. Click on Privacy & Security in the left pane.
3. Scroll down to Searching Windows and click on it, as shown.
4. Click on Enhanced under Find my files in the Searching Windows section
Note: If you want to switch back to Classic indexing mode, just click on Classic under Find my files.
Also Read: How to Change Desktop Icons on Windows 11
How to Change Search Indexing Options in Windows 11
In case you are not getting proper results, you need to update the index manually to allow the index to pick up the changes made and new files added. Follow the steps mentioned below to change indexing options in Windows 11:
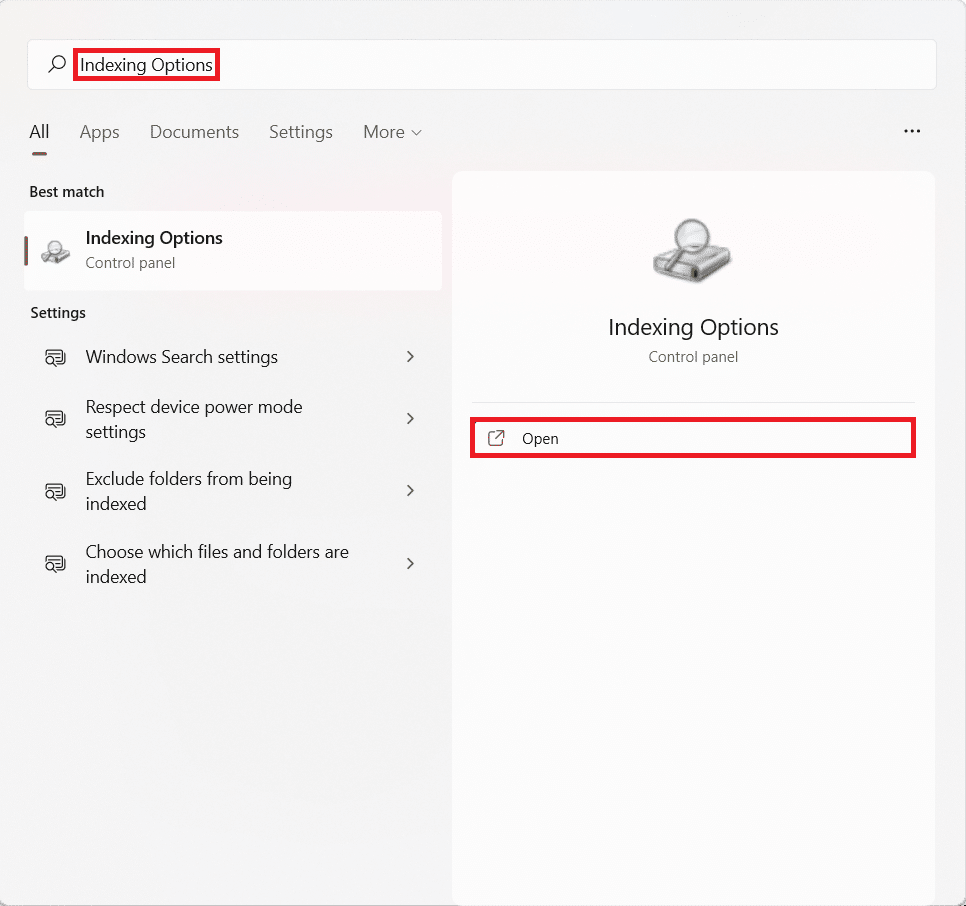
1. Click on the Search icon and type Indexing Options. Then, click on Open as shown.
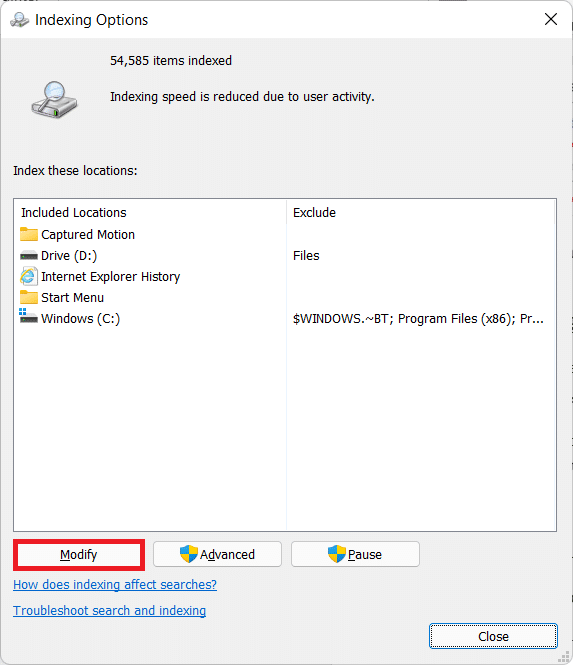
2. Click on the Modify button in the Indexing Options window.
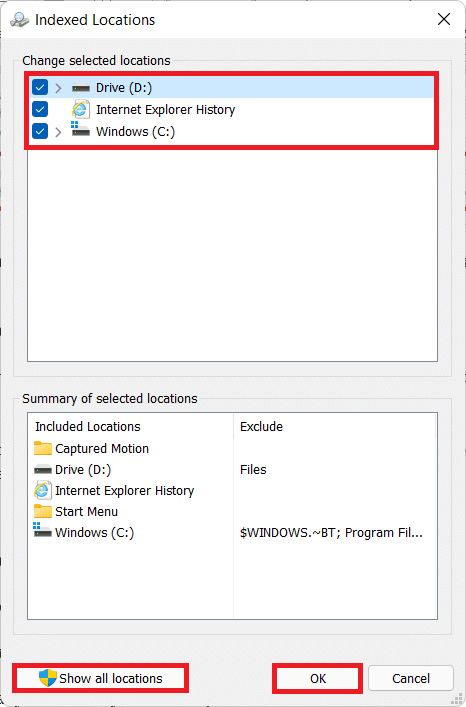
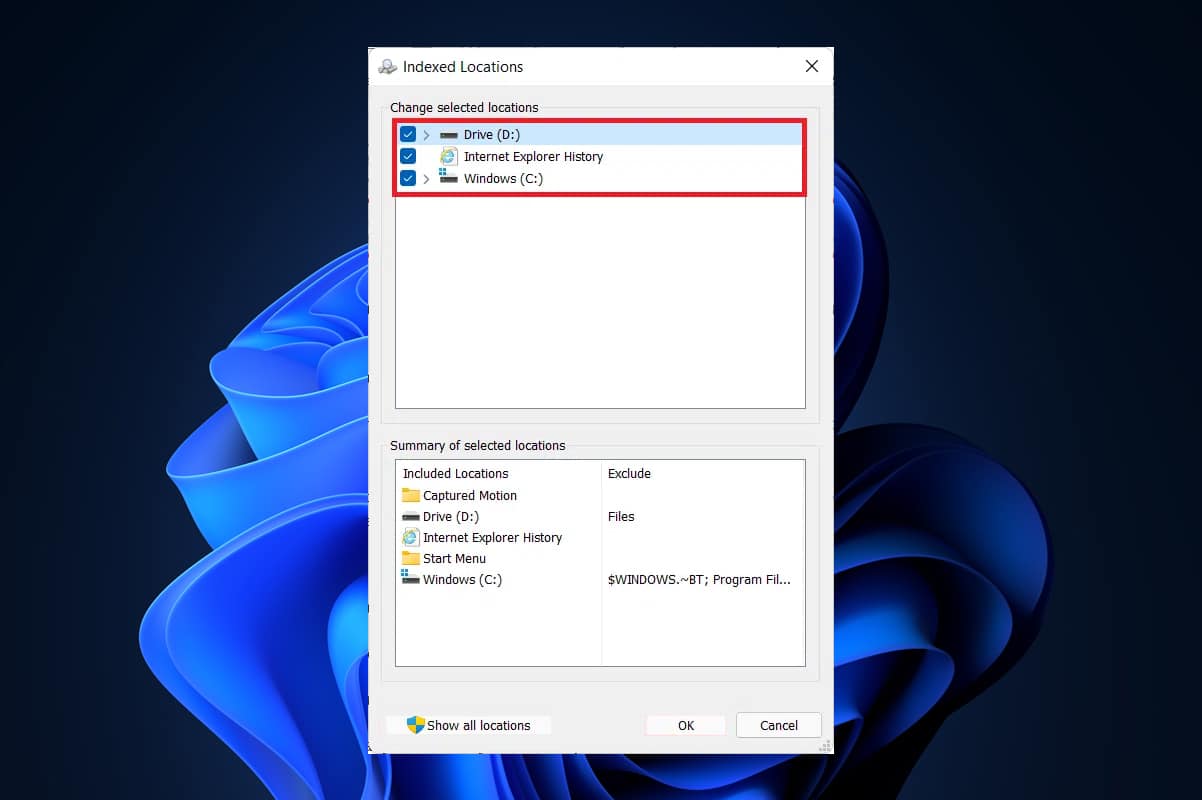
3. Check all the location paths you want to be indexed in the Indexed Location dialog box.
Note: You can click on the Show all location button if the directory you want to add is not visible in the list.
4. Finally, click on OK, as shown.
Also Read: How to Disable Online Search from Start Menu in Windows 11
How to Rebuild Search Indexing
To rebuild Windows Search Index, follow these instructions:
1. Navigate to Windows Settings > Privacy & security > Searching Windows menu as earlier.
2. Scroll down and click on Advanced indexing options under Related settings, as depicted below.
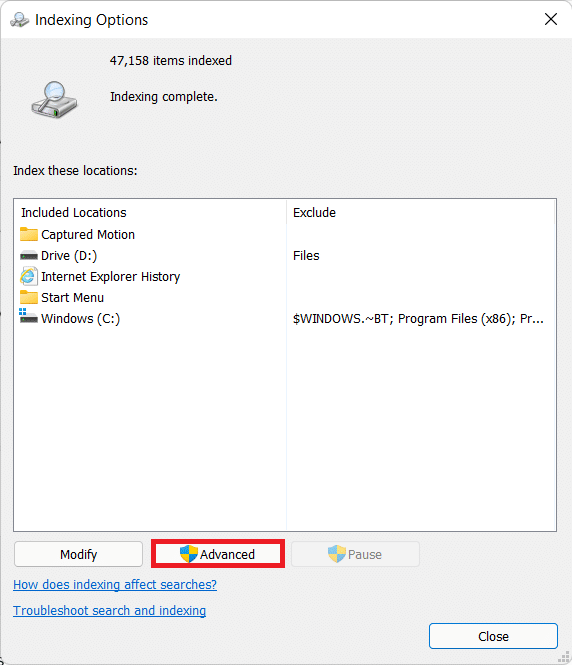
3. Click on Advanced in the newly opened Indexing Options window.
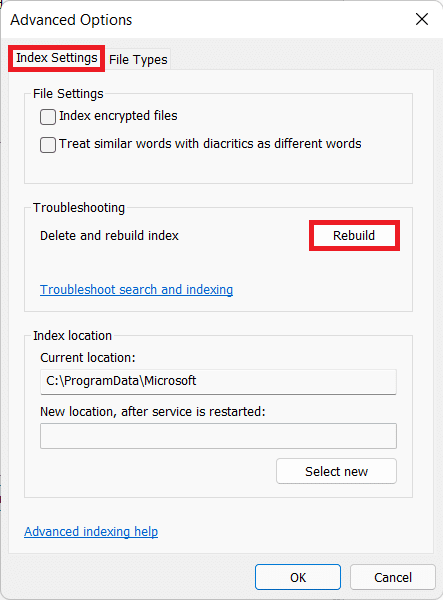
4. In the Index Settings tab of the Advanced Options window, click on the Rebuild button, shown highlighted, under Troubleshooting head.
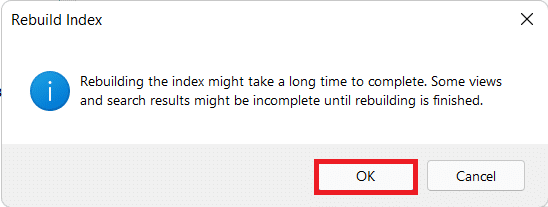
5. Finally, click on OK in the confirmation dialog box to Rebuild Index.
Note: This may take some time depending on the size of the index and the speed of your PC. You can pause the index rebuilding process by clicking the Pause button. You can see the Progress of Index rebuilding on the Settings page.
Recommended:
We hope this article would help you out on how to configure & rebuild Search Indexing Options on Windows 11. We love getting your suggestions and questions so you can go down in the comment section and let us know!
