Creating, Using, and Managing Passkeys on Windows 11
Passkeys are a new, more secure way to sign in to websites and applications on Windows 11. They replace traditional passwords with a combination of your device and biometric verification (like fingerprint or facial recognition). Here’s how to create, use, and manage passkeys on Windows 11:
Requirements:
- Windows 11 version 22H2 or later: Make sure your Windows 11 is updated to at least version 22H2 (KB5030310) to use passkeys. You can check your version by going to Settings > System > About.
- Compatible website or application: The website or application you want to use a passkey with needs to support the FIDO standard for passkeys.
Creating a Passkey:
- Open a website or application that supports passkeys.
- Go to the sign-up or login page.
- Look for a “Create Passkey” or “Use Passkey” option. This might be under a “Sign in with Windows Hello” or similar section.
- Follow the on-screen instructions. You’ll likely be prompted to use your Windows Hello PIN, fingerprint, or facial recognition to create the passkey.
- Save the passkey to your device. Windows will store the passkey securely on your device.
Using a Passkey:
- Open a website or application where you have a saved passkey.
- Go to the login page.
- Choose the “Sign in with Passkey” option.
- Windows will prompt you to verify your identity using Windows Hello. Use your PIN, fingerprint, or facial recognition to confirm.
- You should be logged in successfully.
Managing Passkeys:
While there isn’t a dedicated passkey manager within Windows 11 yet (as of May 15, 2024), you can still manage them indirectly:
- Go to Settings > Accounts > Sign-in options.
- Under “Windows Hello”, you’ll see a list of “Security keys” or “Passkeys” (depending on the terminology used). This list shows the websites or applications where you have saved passkeys.
- Click on a specific website or application to see details. You can’t directly edit the passkey itself here, but you can view information like the date it was created.
- To remove a passkey: Click on the website or application and then choose “Remove” to delete the saved passkey from your device. You’ll need to create a new passkey if you want to sign in to that website or application again using Windows Hello.
Additional Notes:
- Passkeys offer a more secure alternative to passwords as they are not stored on websites or applications and are more resistant to phishing attacks.
- You can use the same passkey on different websites and applications, eliminating the need to remember multiple passwords.
- Currently, passkeys can only be used on the device where they are created. There’s no option yet to sync them across multiple devices.
For more information on passkeys in Windows 11, you can refer to these resources:
- Microsoft Support: https://learn.microsoft.com/en-us/windows/security/identity-protection/passkeys/
- Learn about Passkeys on Windows: https://support.microsoft.com/en-us/windows/passkeys-overview-301c8944-5ea2-452b-9886-97e4d2ef4422
Key Takeaways
- To create a passkey, entry the account safety web page of a passkey-supported website or app, use the passkey creation choice, and save the passkey to your PC.
- To make use of a passkey, entry the login web page of a website or app, select the passkey authentication methodology, and use Home windows Whats up to log in to the service.
- To view saved passkeys, head into Settings > Accounts > Passkey Settings. To take away a passkey, click on the three dots subsequent to an merchandise and select “Delete Passkey.”
Passkeys are options to passwords and make signing in to your favourite web sites and apps sooner. We’ll present you the right way to generate, use, view, and delete passkeys in your Home windows 11 PC.
What Is a Passkey?
A passkey is a substitute on your web site or app account password. Whenever you create a passkey together with your favourite website or app, you should utilize your gadget’s authentication methodology to log in to that website or app.
For instance, with Home windows 11, you should utilize the Home windows Whats up performance to check in to numerous companies. This implies you should utilize your PIN, facial recognition, or fingerprint scanning to log in to a number of companies and apps.
Passkeys have a number of benefits over passwords. The primary one is that, not like passwords, it’s borderline unimaginable to steal passkeys. One other benefit is that passkeys are virtually utterly impervious to phishing. It’s comparatively straightforward to trick a human into coming into a password on a faux web site, however passkeys aren’t so simply fooled.
What Platforms Assist Passkeys?
Many common websites and apps assist passkeys, as this can be a fast and handy strategy to log in. Some companies that assist this function are:
- Adobe
- Amazon
- Apple
- Microsoft
- X (previously Twitter)
You’ll be able to find a list of passkey-supported platforms on the Passkeys site.
How you can Create and Save a Passkey to Your Home windows 11 PC
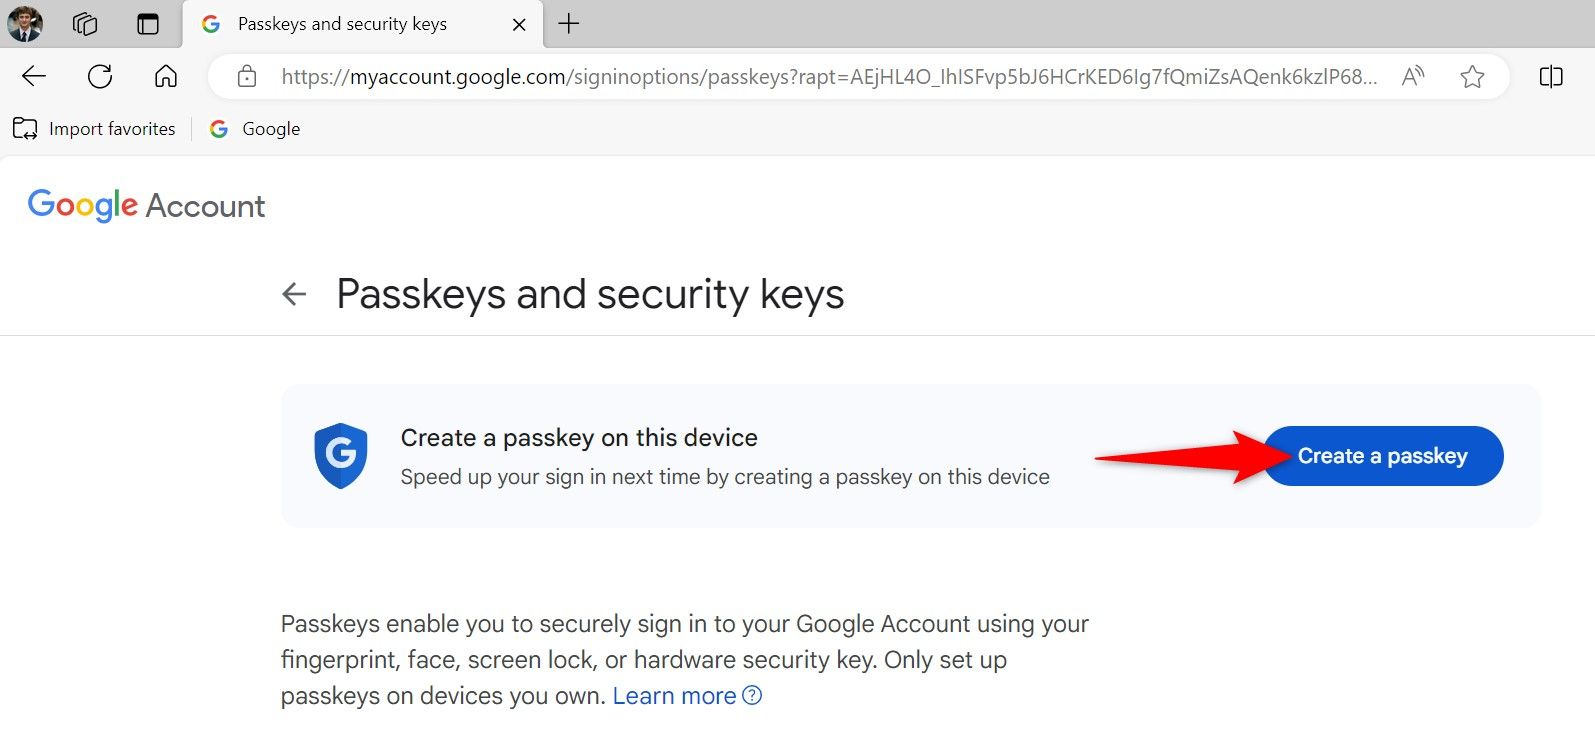
To generate and save a passkey, you will first go to your favourite web site or app’s account settings. From there, you’ll create the important thing after which reserve it to your PC. On this information, we’ll reveal how to do this with a Google account.
Start by launching Chrome, Firefox, Edge, or Courageous net browser in your PC. Head to Google’s My Account site and check in to your account.
After logging in, from the left sidebar, choose “Safety.” On the suitable pane, scroll all the way down to the “How You Signal In to Google” part and select “Passkeys and Safety Keys.”
You’ll see a “Home windows Safety” immediate. Authenticate your self utilizing your PIN, facial recognition, or fingerprint scanning.

You’ll see a “Passkey Saved” message confirming a passkey on your Google account was created and saved to your PC. Shut the window by deciding on “OK.”
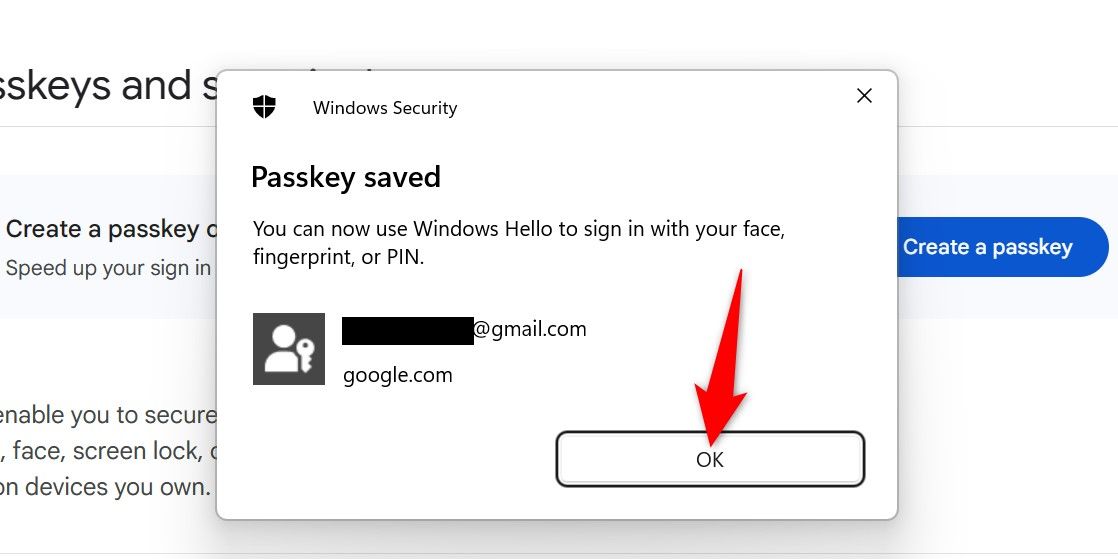
And that’s it. You’ve efficiently created a substitute on your Google account password.
How you can Use a Passkey to Signal In to a Web site or App
To make use of a passkey to check in to a website or app, entry that merchandise’s login web page and select passkey as an alternative of password. Right here’s how to do this for a Google account.
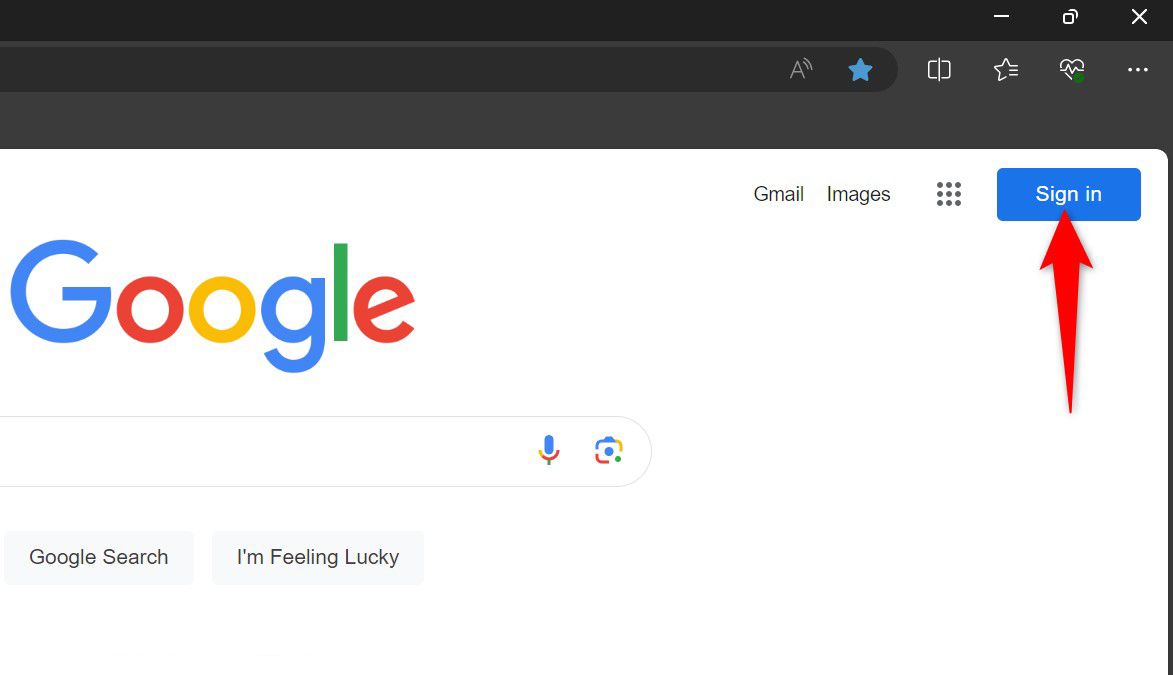
Launch Google.com and click on “Signal In” within the top-right nook.
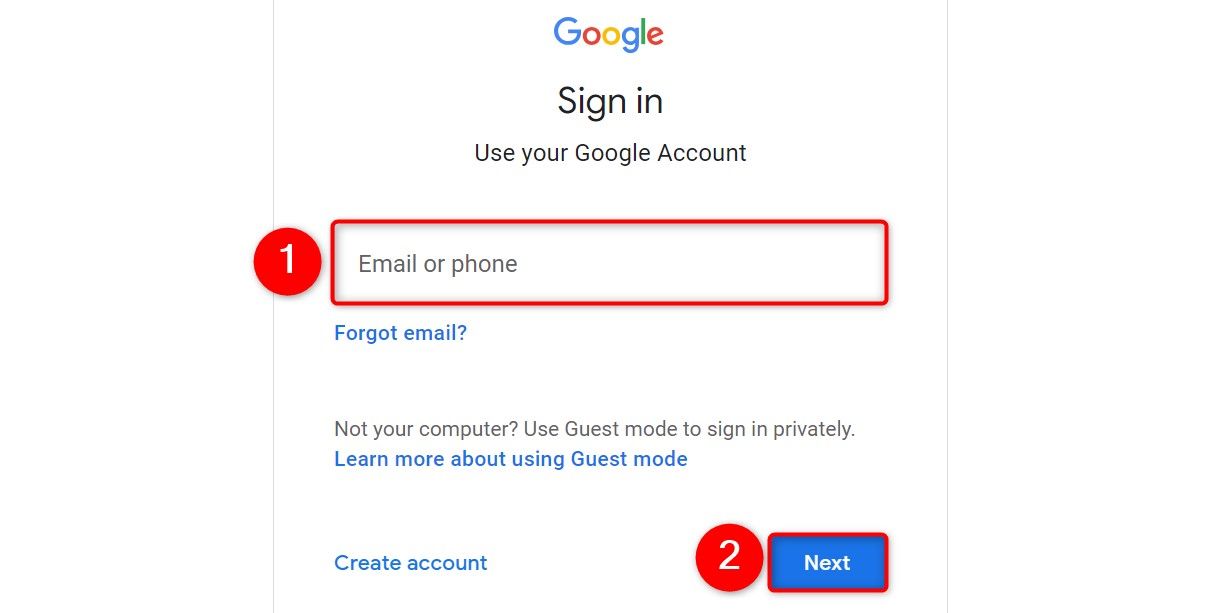
Enter your Google account username and click on “Subsequent.”
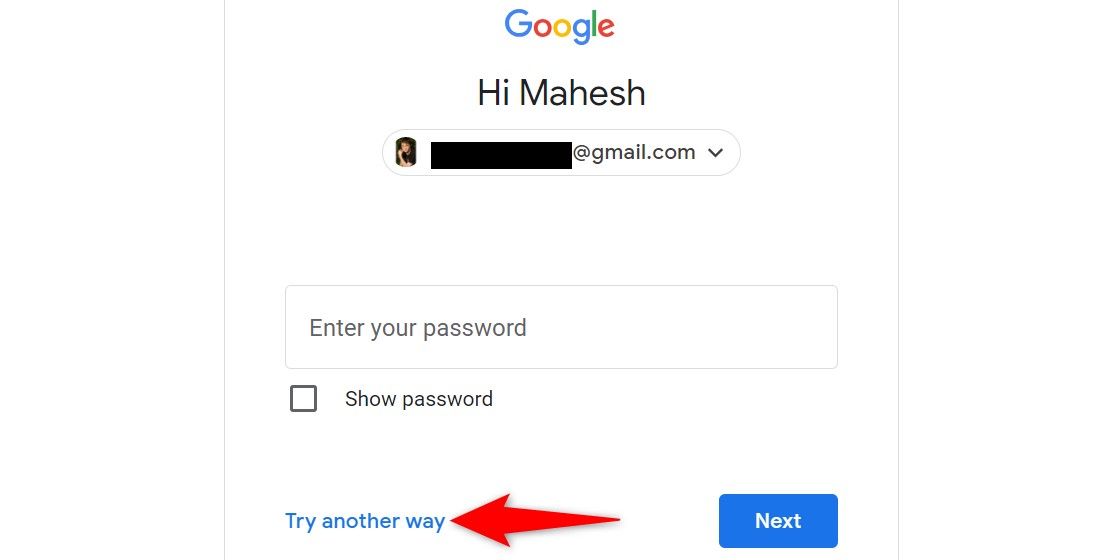
On the password web page, click on “Attempt One other Means” to see alternate choices.
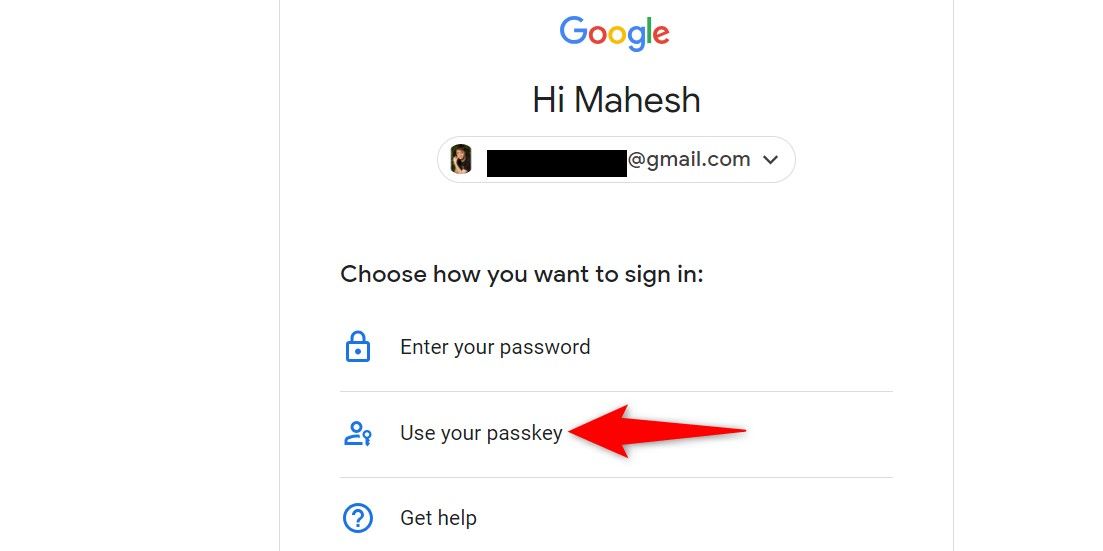
Choose “Use Your Passkey” to make the most of the saved passkey to log in to your account.
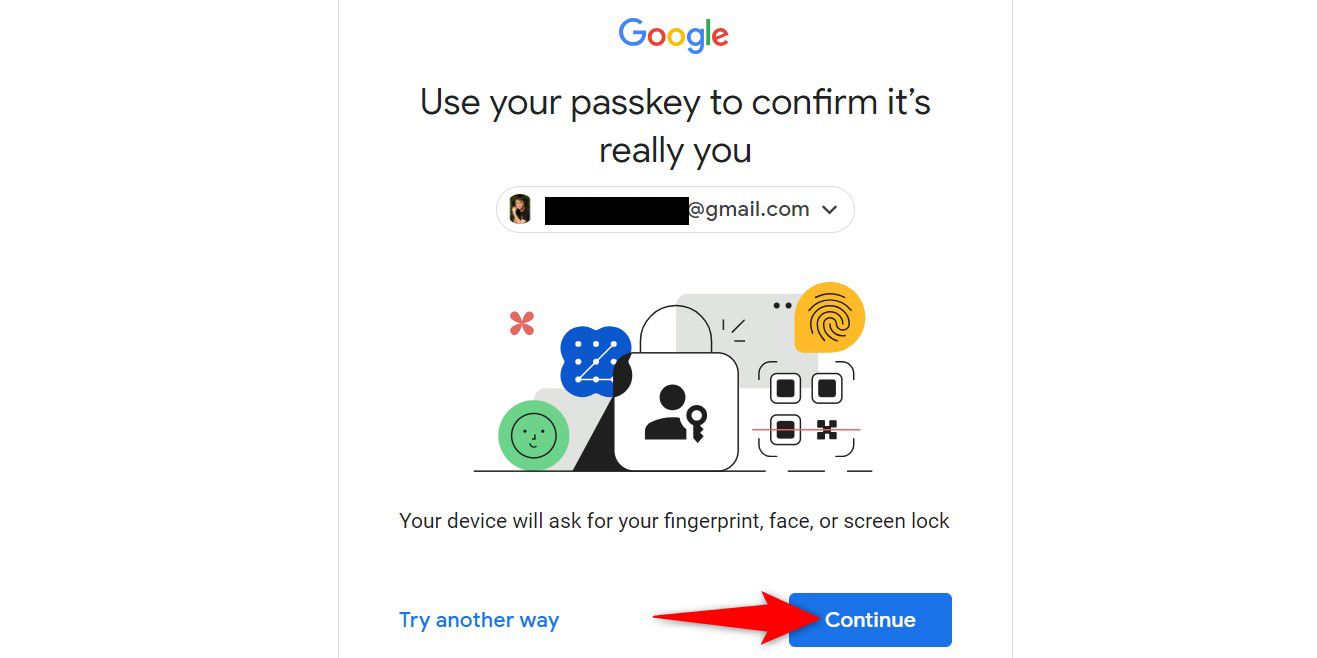
Choose “Proceed” and Google will set off the “Home windows Safety” immediate.
Within the “Home windows Safety” immediate, choose the PIN, facial recognition, or fingerprint scanning authentication methodology.
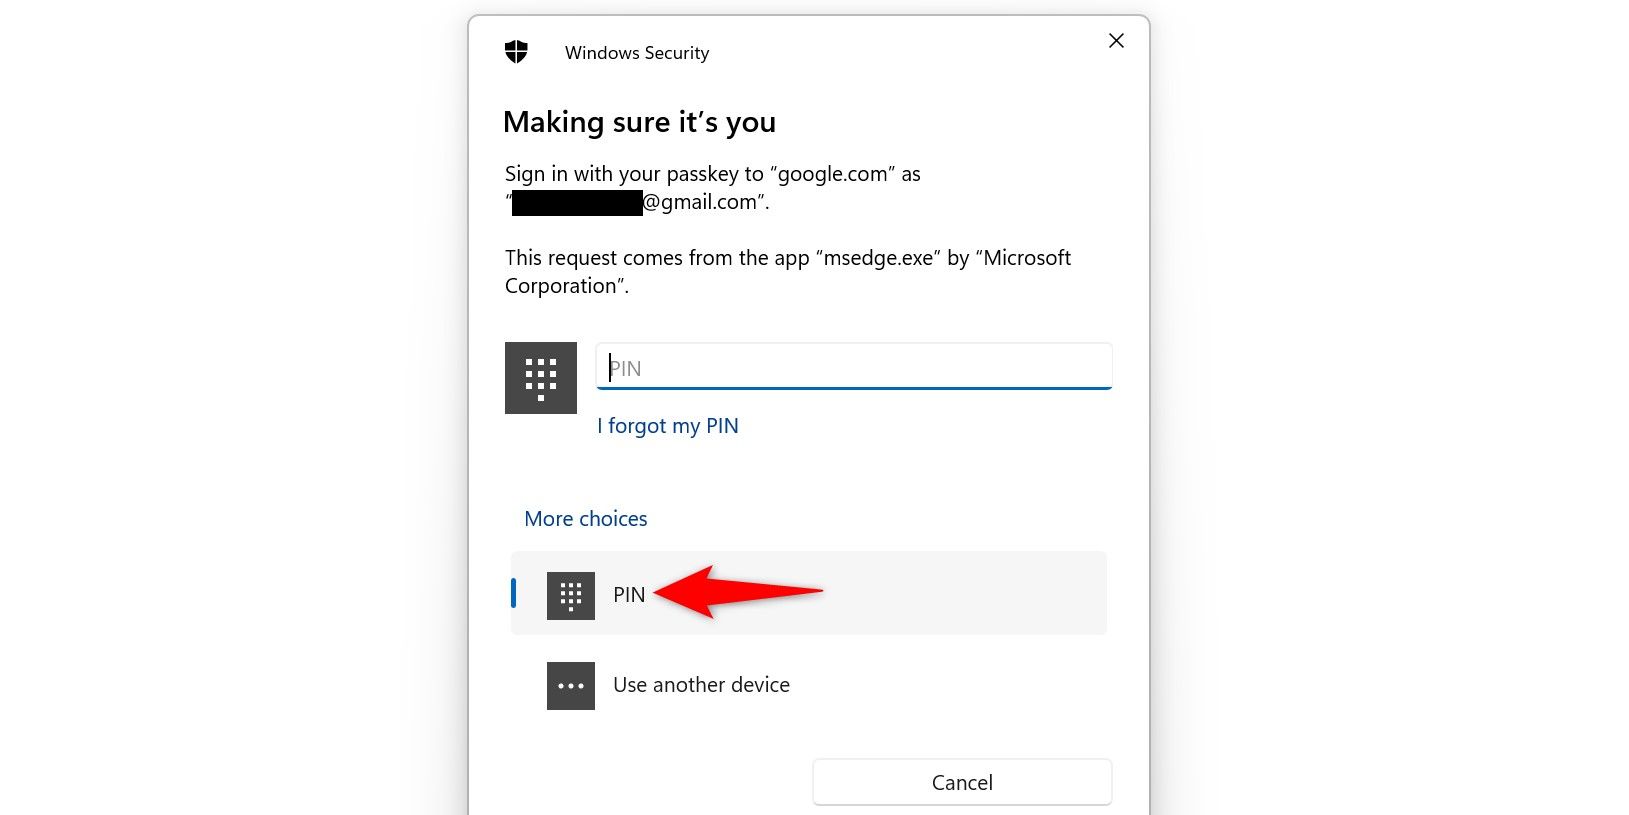
After you’ve authenticated your self, you’ll be signed in to your account.
How you can View and Delete Passkeys on Home windows 11
If you wish to see what passkeys you’ve saved, otherwise you need to delete a particular passkey, use the Settings app.
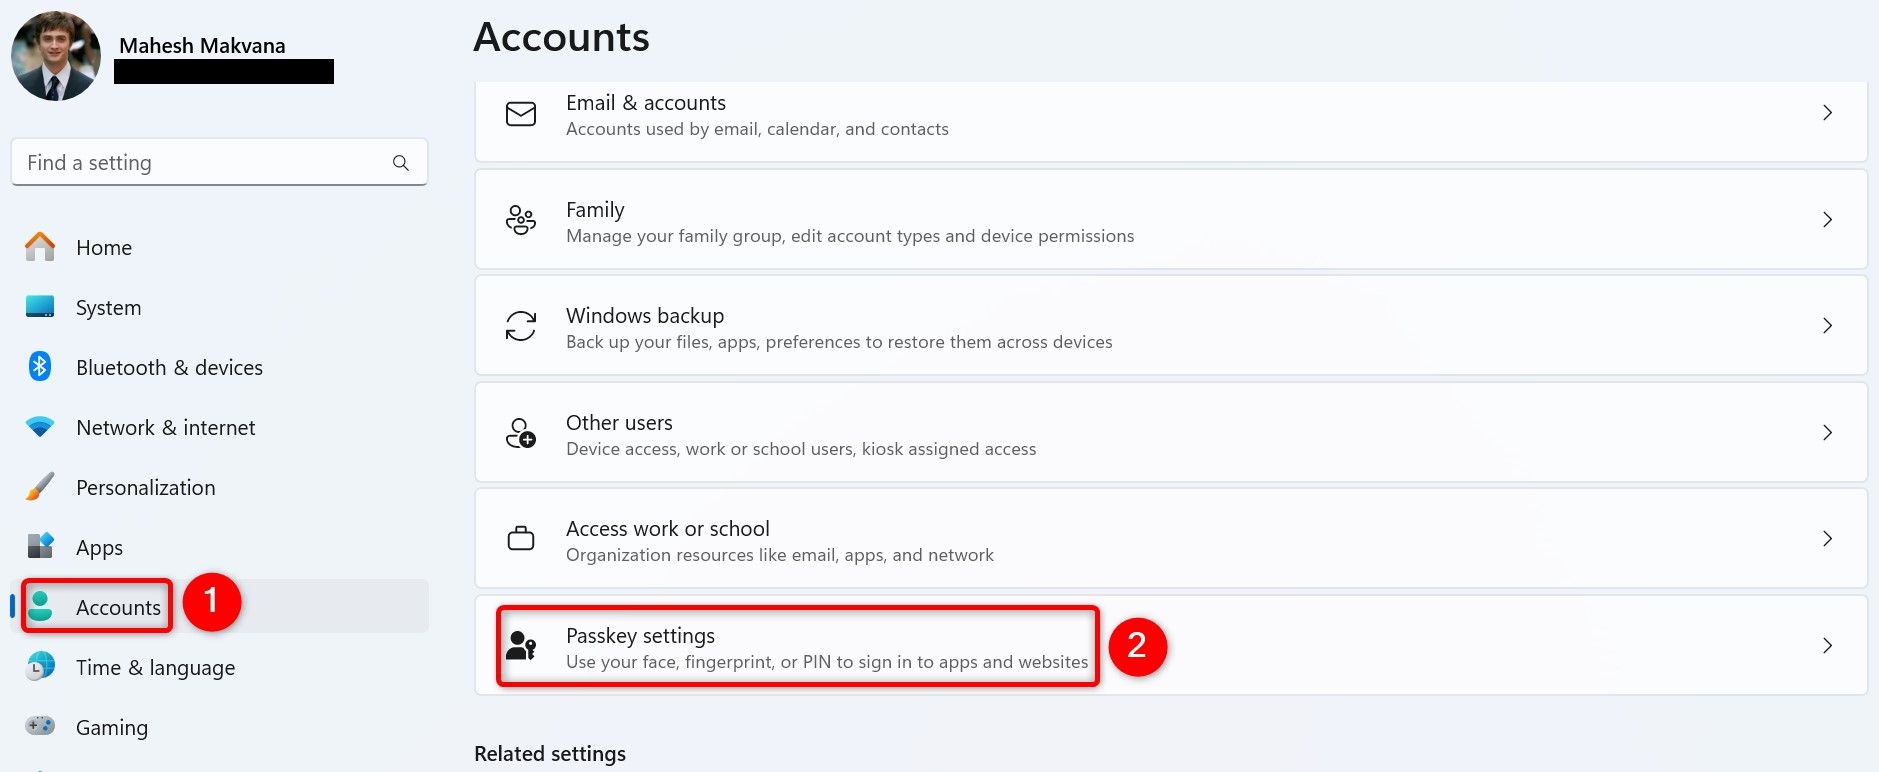
Open Settings utilizing Home windows+i. Within the left sidebar, click on “Accounts.” On the suitable pane, select “Passkey Settings.”
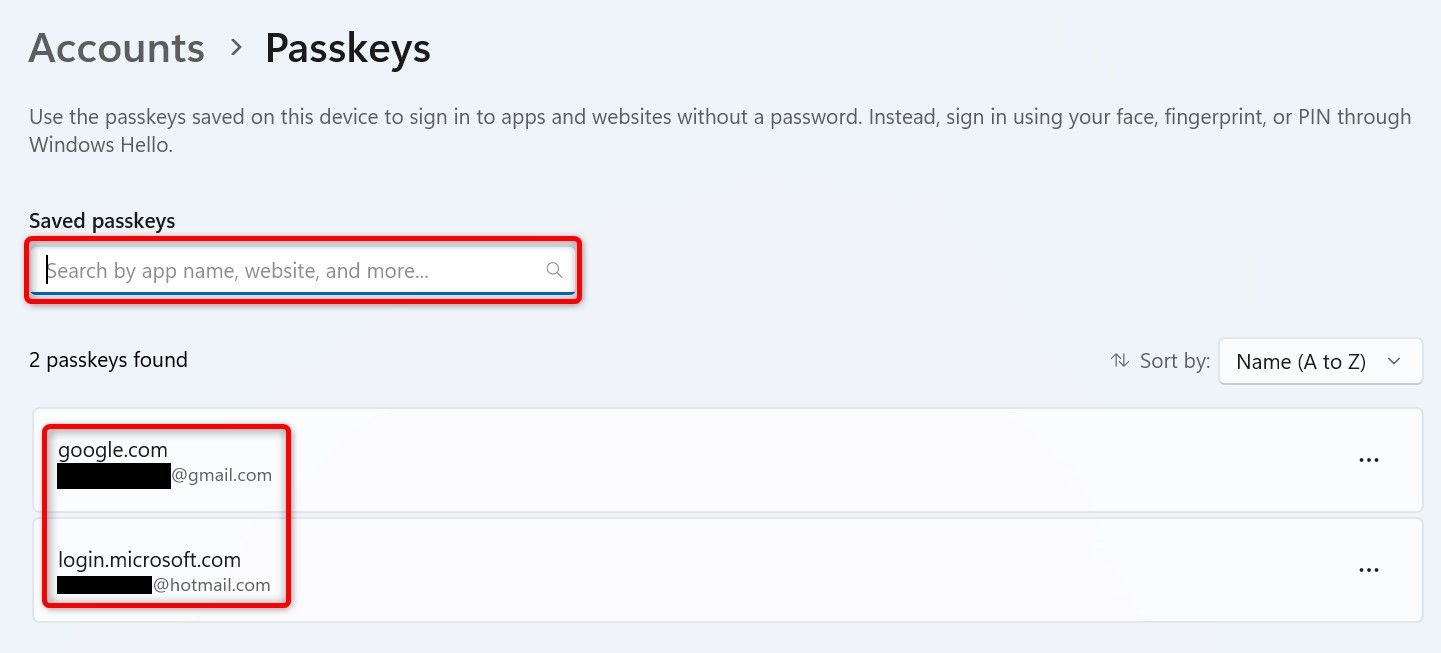
On the “Passkeys” web page, you’ll discover a record of saved passkeys. To retrieve a particular passkey, use the search field on the high.
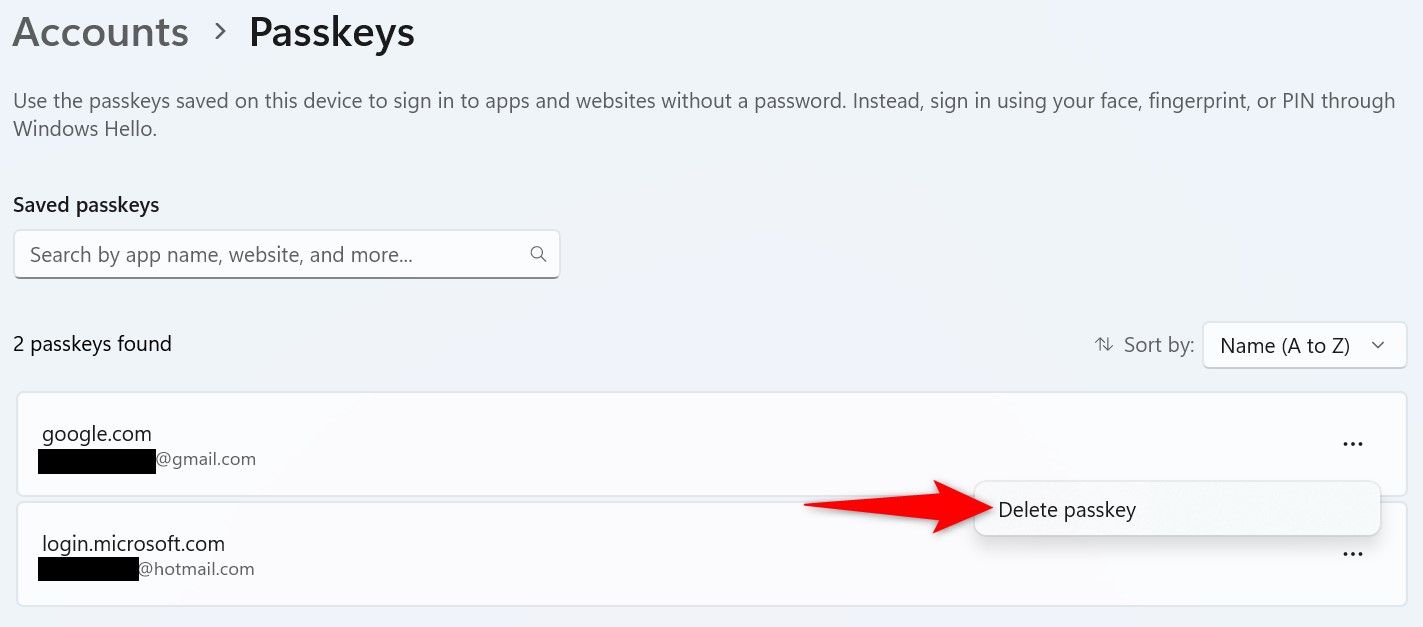
To take away a particular passkey, click on the three dots subsequent to that merchandise and select “Delete Passkey.”
Within the open immediate, verify your motion by deciding on “Delete.”
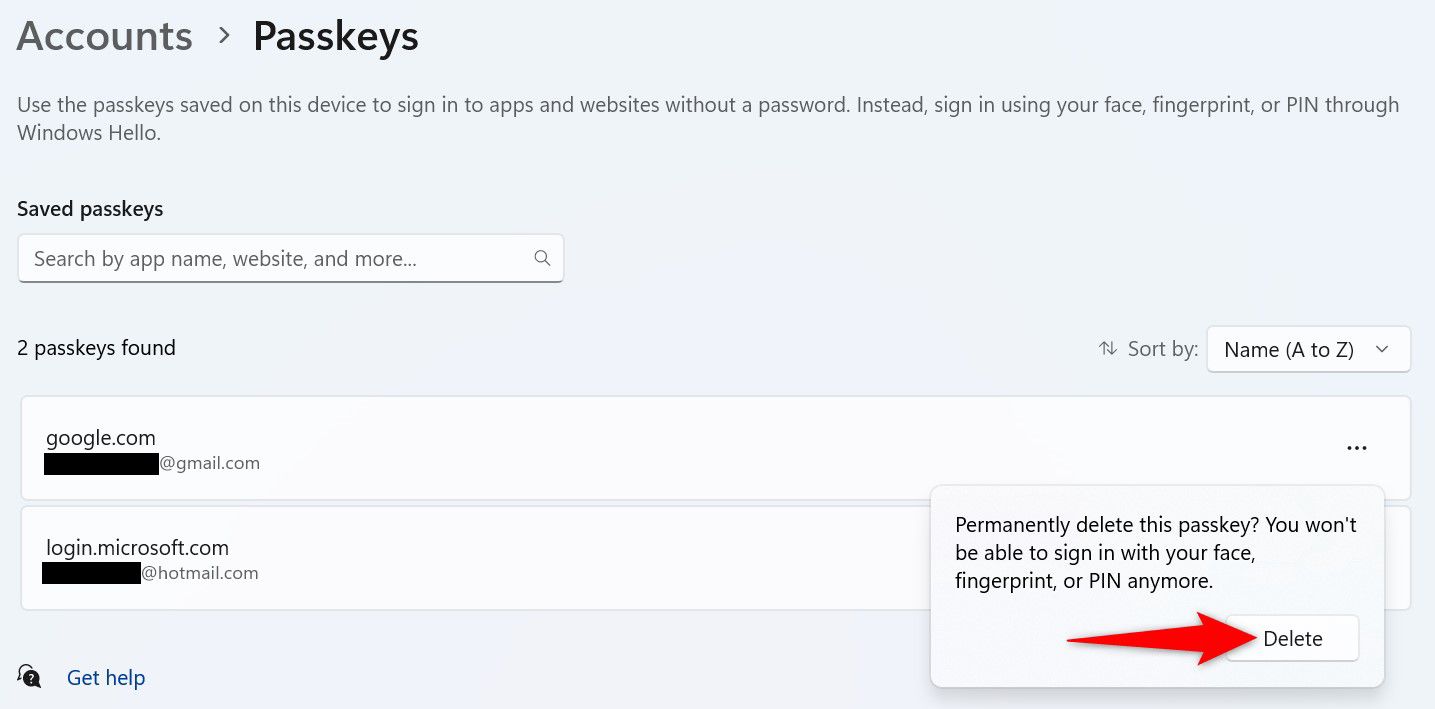
Home windows 11 has eliminated the chosen passkey from the database. You’ll be able to’t log in to that website or app utilizing your PC’s authentication methodology any extra (however you’ll be able to at all times re-create any required passkeys).
And that’s the way you make signing in to websites and apps sooner and extra handy in your Home windows 11 PC. Keep in mind to arrange two-factor authentication on all your vital accounts, too!