How to Delete Broken Entries in Windows Registry

What is Windows Registry? All low-level Windows settings and Application settings including, device drivers, user interface, paths to folders, start menu shortcuts, etc, are stored in a database called Windows Registry. The entries of this registry are relatively difficult to edit, but you can modify how programs and applications behave. Since Windows usually, does not delete the registry values hence, all unwanted broken registry entries get accumulated in the system when you run it for a prolonged period of time. Even more so, when you install or uninstall applications often. Moreover, it slows down the overall performance of the system. Therefore, it is necessary to remove these. If you want to do so, read below to learn how to delete broken entries in Windows Registry.
How to Delete Broken Entries in Windows Registry on Windows 10
What are Broken Registry Items?
Issues like abrupt shutdown, power supply failure, viruses & malware, damaged hardware, and software, etc., corrupt the registry items. These items get bloated and all these redundant files end up occuping most of the disk space. This leads to slow performance and startup problems in the computer. Hence, if your system is not functioning effectively or if you are facing issues with applications or programs, then delete broken registry items from your computer.
To understand it better, read our tutorial on What is Windows Registry & How it Works?.
Note: Since Windows registry is a collection of sensitive data files, all the deleting/formatting procedures must be handled carefully. If you modify/delete even single essential registry, then the functioning of your operating system will be disturbed. Hence it is recommended to backup all your files before deleting any data from the Windows Registry.
We have compiled a list of methods to remove broken registry items on Windows 10 PC and arranged them according to user convenience. So, let us begin!
Method 1: Perform Disk Cleanup
Follow the steps mentioned below to perform disk cleanup:
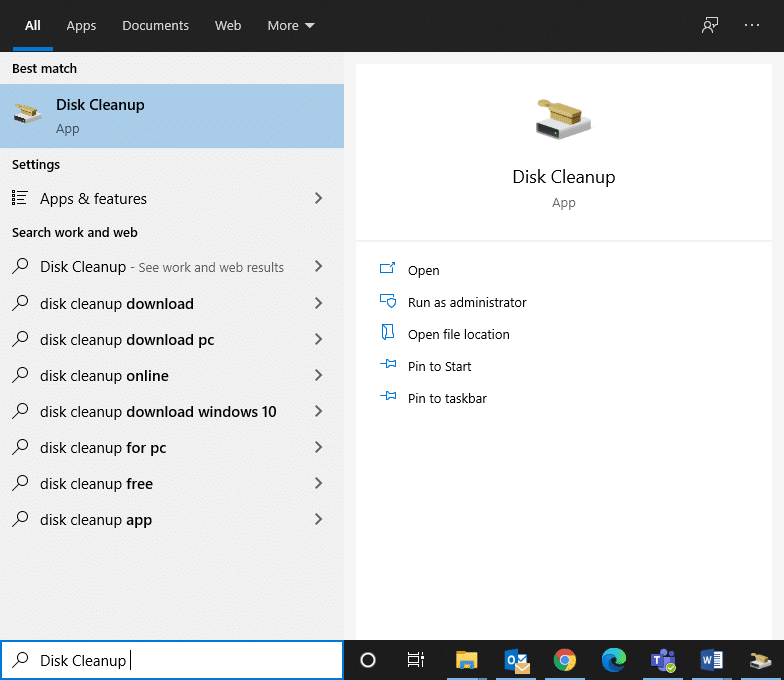
1. Press Windows key, type Disk Cleanup then, hit Enter.
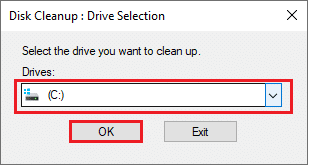
2. Select the drive e.g. C: and click on OK in Disk Cleanup: Drive Selection window.
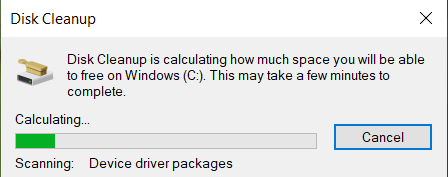
3. Disk Cleanup will now scan for files and calculate the amount of space that can be cleared.
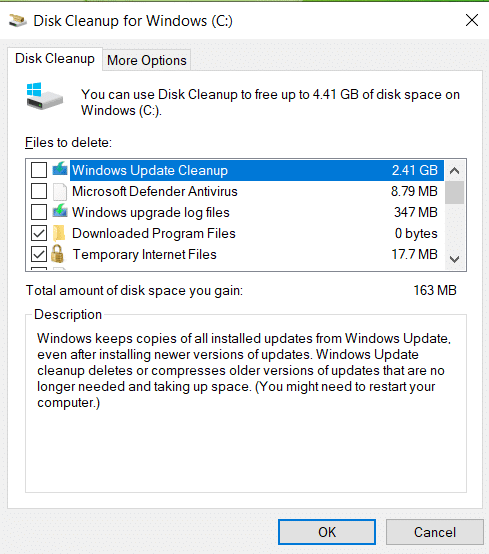
4. Relevant boxes are marked in the Disk Cleanup Window automatically.
Note: You can also check the boxes marked Recycle Bin & others to clear out more space.
5. Finally, click on OK, wait for the Disk Cleanup utility to finish the process and Restart your PC.
Also Read: How to Fix Corrupt Registry in Windows 10
Method 2: Run System File Checker
Windows users can automatically, scan and repair their system files with the help of the System File Checker utility. In addition, this built-in tool lets them delete files accordingly. Here’s how to clean the registry in Windows 10 using cmd:
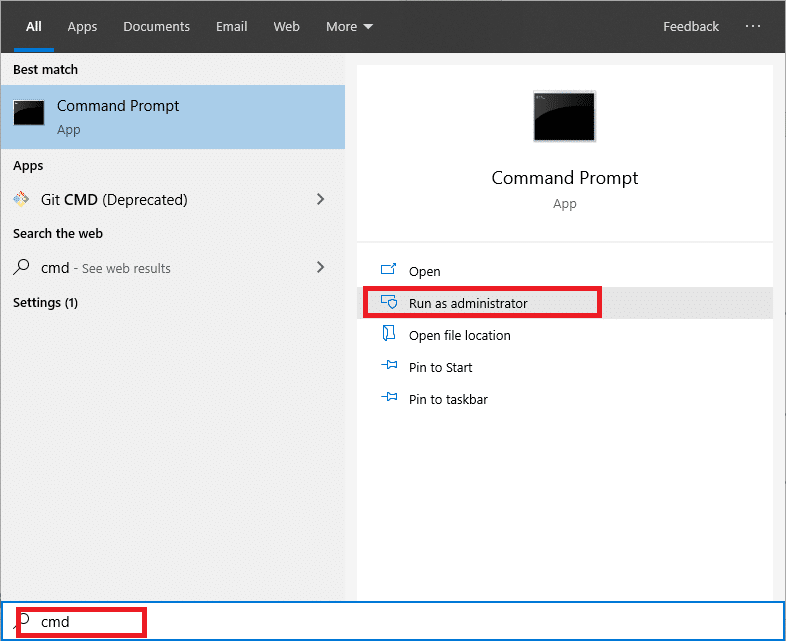
1. Type cmd in Windows search bar. Click on Run as administrator, as depicted below.
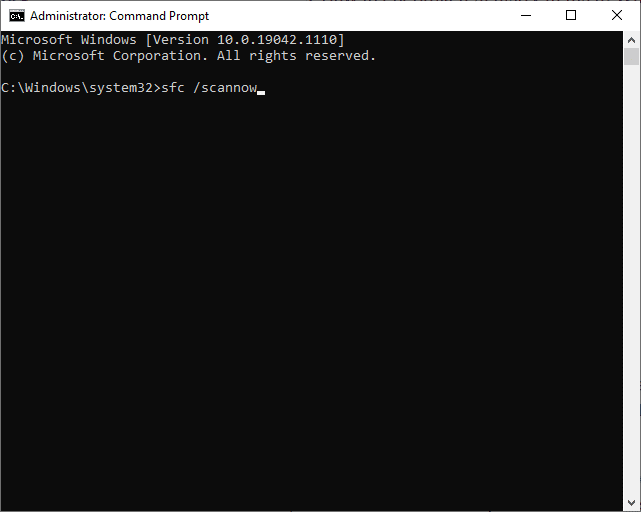
2. Type sfc /scannow and hit Enter.
3. System File Checker will begin its process. Wait for the Verification 100 % completed statement to appear on screen.
4. Lastly, restart your Windows 10 PC and check if the broken registry items on Windows are deleted.
Method 3: Run DISM Scan
Deployment Image Servicing and Management is an administrative command-line tool used to repair Windows Installation Media, Windows Recovery Environment, Windows Setup, Windows Image, and Virtual hard disk. Running DISM command is an alternative solution to how to delete broken entries in the Windows registry. Here’s how to clean the registry in Windows 10 using cmd:
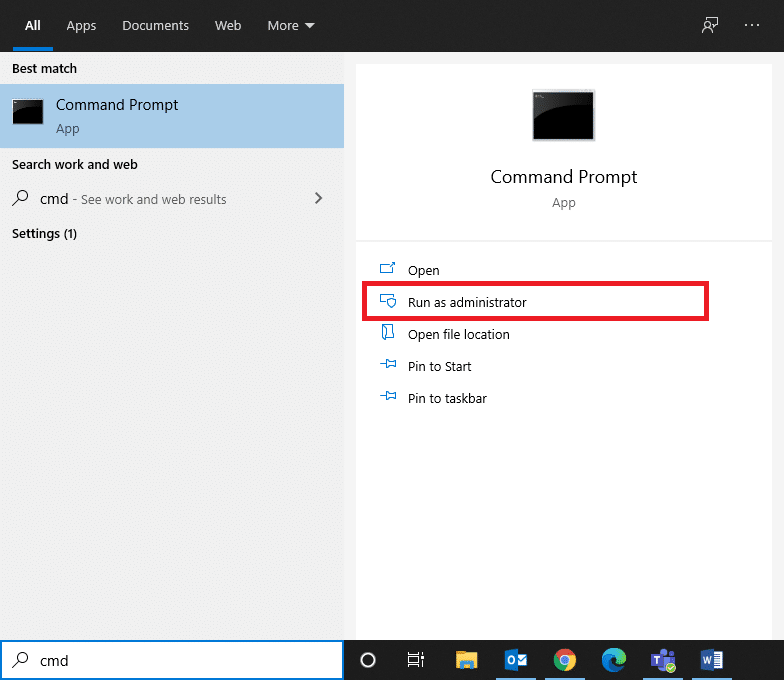
1. Run Command Prompt with administrative privileges, as earlier.
2. Now, type CheckHealth command given below and hit Enter to determine if there are any corrupt files within local Windows 10 image.
Dism /Online /Cleanup-Image /CheckHealth
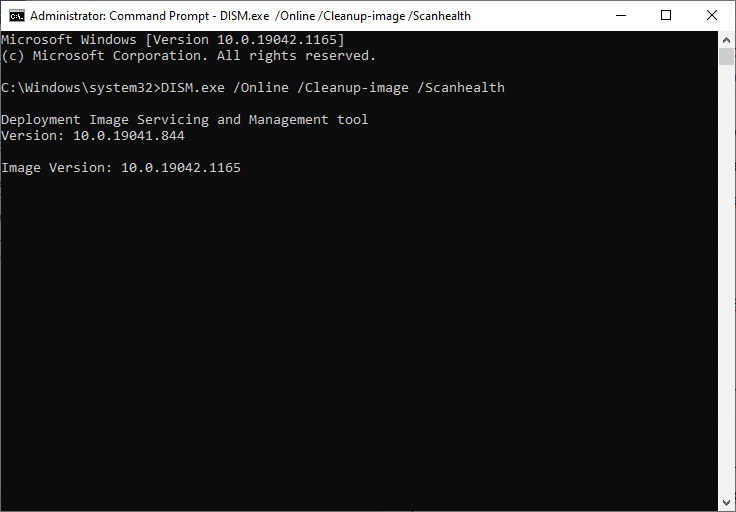
3. Then, execute DISM.exe /Online /Cleanup-Image /ScanHealth command similarly.
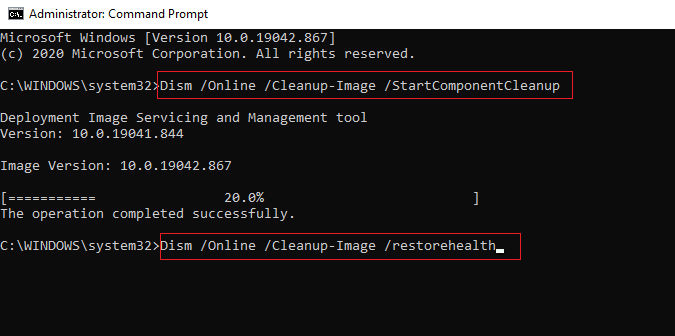
4. Again, type the given commands one-by-one and press Enter key after each to get rid of corrupt system files as well as registry items. In addition, it will help you save disk space by reducing the size of WinSxS folder too.
DISM /Online /Cleanup-Image /StartCompenentCleanup

DISM /Online /Cleanup-Image /RestoreHealth
5. Wait for the process to be completed and restart your computer.
Method 4: Run Startup Repair
Running the in-built automatic repair will help you to delete the broken registry items from your system with speed and ease, as explained below:
1. Press the Windows key and click on the Power icon.
2. Select Restart while holding the Shift key.
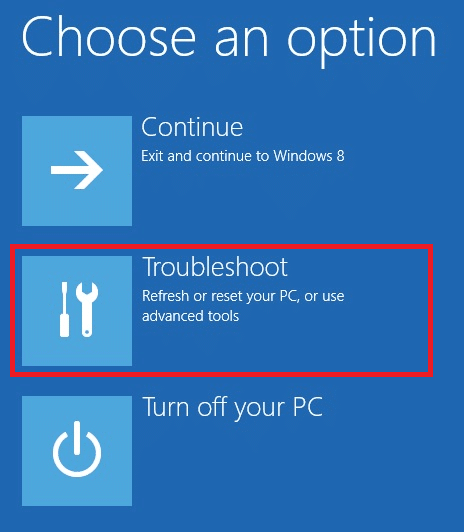
3. Here, click on Troubleshoot, as shown.
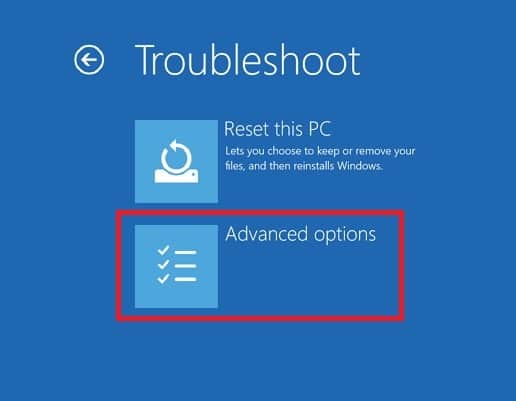
4. Select Advanced options in Troubleshoot window.
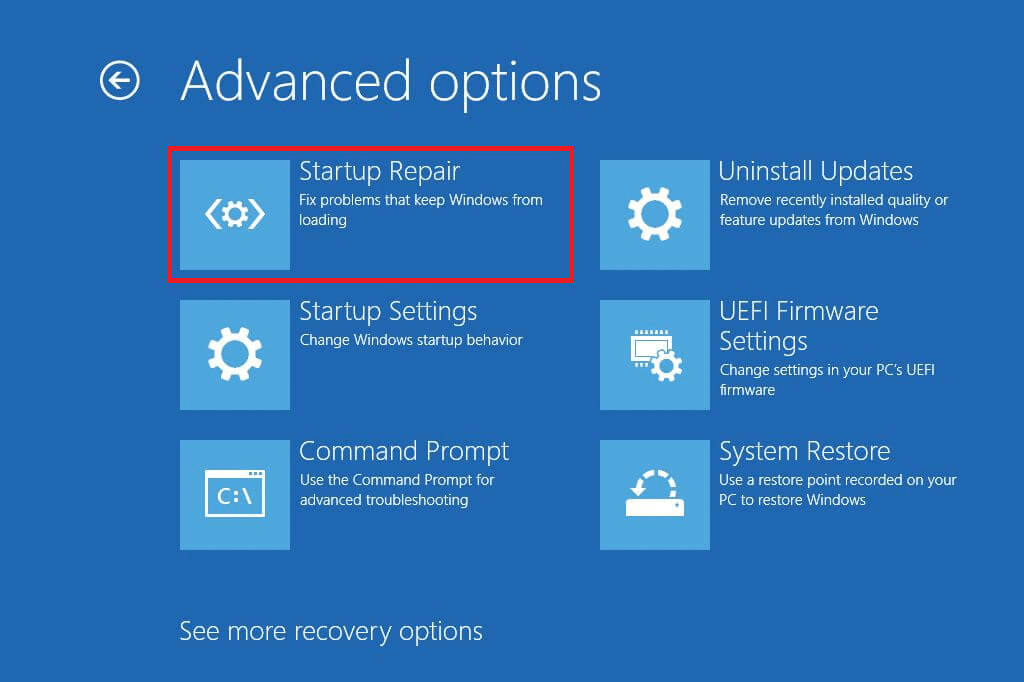
5. Now, click on Startup Repair, as highlighted below.
6. Click on Continue to proceed by entering your Password. The tool will scan your system and fix broken registry items.
Also Read: Fix DISM Error 87 in Windows 10
Method 5: Reset Windows
Sometimes, your device may not allow you to remove broken registry items from your system. Here’s how to delete broken entries in Windows Registry by resetting your Windows 10 PC:
1. Press Windows + I keys together to open Settings in your system.
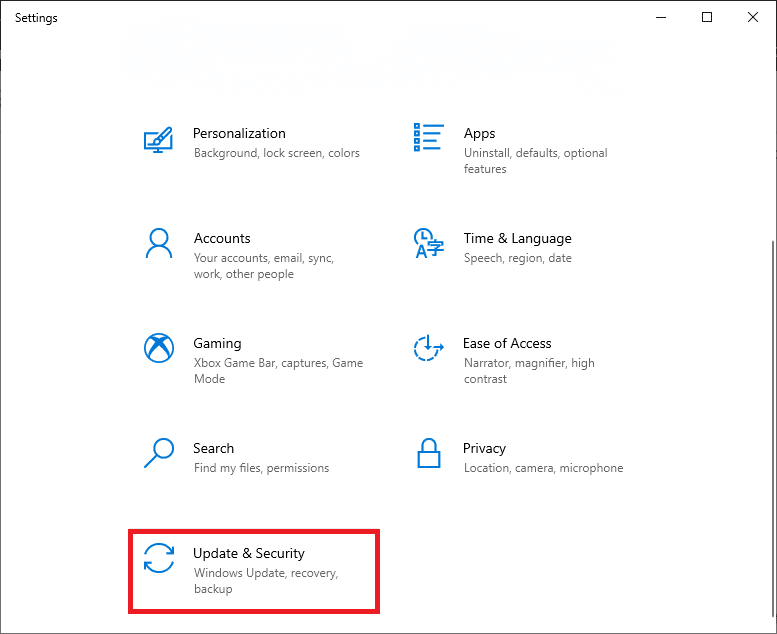
2. Now, select Update & Security, as shown.
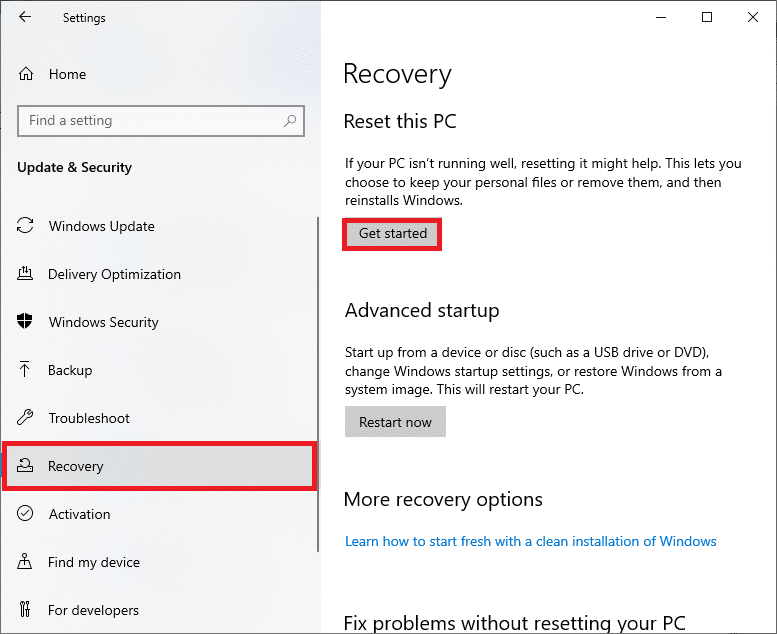
3. Here, click on Recovery in the left pane and Get started in the right pane, as highlighted.
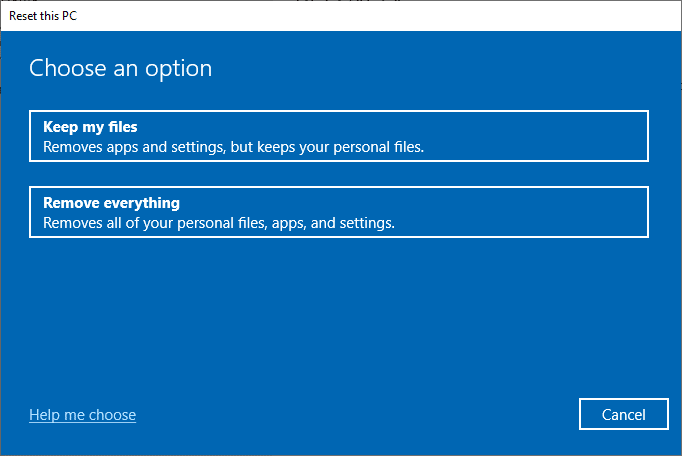
4. Now, choose an option from the Reset this PC window:
- Keep my files option will remove apps and settings but keeps your personal files.
- Remove everything option will remove all your personal files, apps, and settings.
5. Finally, follow the on-screen instructions to reset the computer and get rid of all corrupt or broken files.
Recommended
We hope that this guide was helpful and you could understand how to delete broken entries in Windows Registry. Let us know which method worked for you the best. Also, if you have any queries/suggestions regarding this article, then feel free to drop them in the comments section below.

