How to Enable or Disable Mobile Hotspot in Windows 11
Mobile Hotspot is a necessary feature to share your internet connection with other devices. This could be done either by a Wi-fi network Hotspot connection or Bluetooth tethering. This feature is already prevalent in mobile devices but now you can use your computer as a makeshift hotspot too. This proves to be quite beneficial in areas where you are experiencing network drops. Once enabled, other devices would be able to see your computer as an ordinary network connection point. Today’s guide will teach you how to enable or disable Mobile hotspot in Windows 11.
How to Enable or Disable Mobile Hotspot in Windows 11
You can use your Windows 11 PC as a hotspot for other devices. In this article, we have explained how to set up Mobile hotspot feature on your Windows 11 system and how to turn it on or off, as & when needed.
How to Enable Mobile Hotspot in Windows 11
Following are the steps to enable Mobile hotspot in Windows 11:
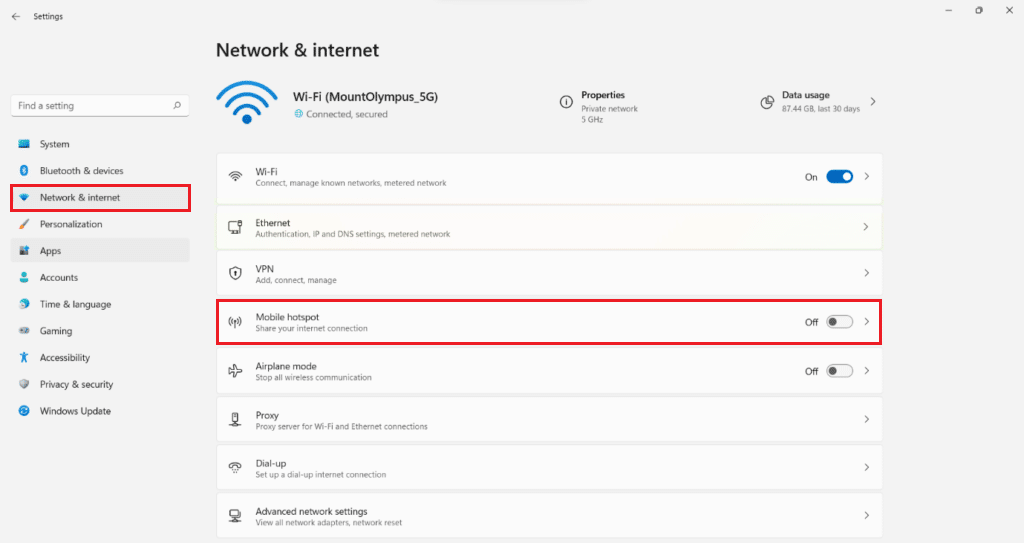
1. Press Windows + I keys together to launch Settings app.
2. Click on Network & Internet in the left pane and select Mobile Hotspot tile, shown highlighted below.
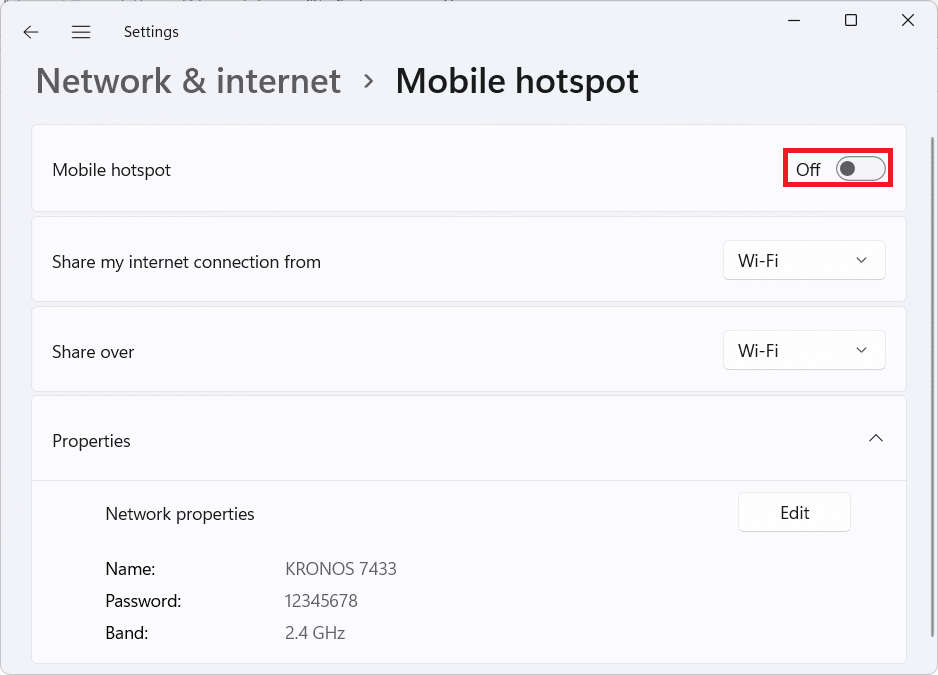
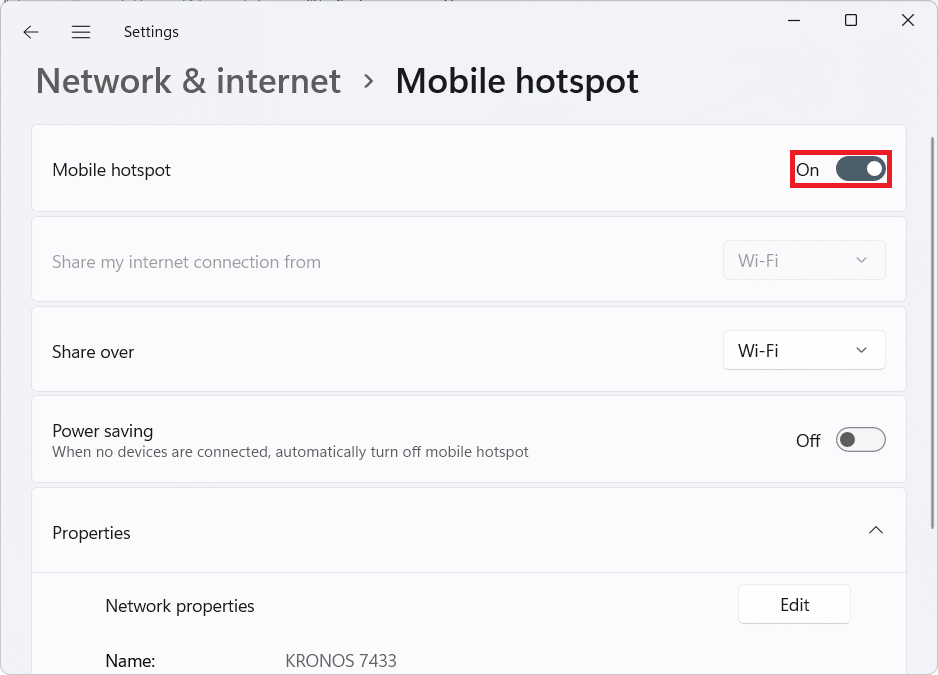
3. In the Mobile Hotspot section, switch On the toggle for Mobile hotspot to enable it.
Also Read: How to Hide WiFi Network Name in Windows 11
How to Set it Up
Now, after you enable Mobile hotspot on Windows 11, you can set up Mobile hotspot as follows:
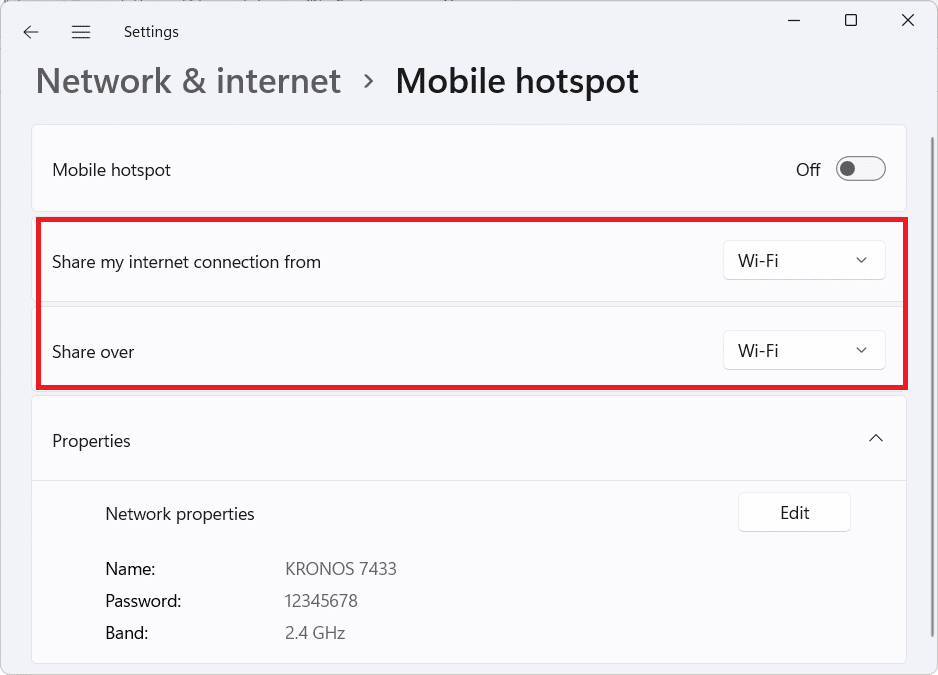
1. Navigate to Windows Settings > Network & internet > Mobile hotspot as earlier.
2. Choose the medium of network connections for the following options as Wi-Fi.
- Share my internet connection from
- Share over
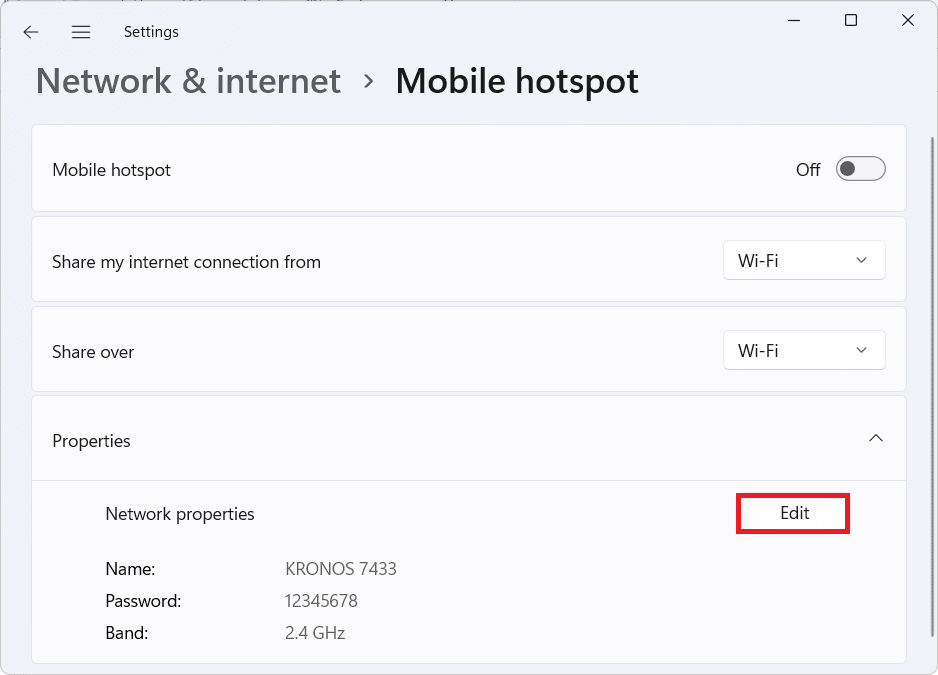
3. Click on Edit button under Properties tile to configure these settings:
- Mobile Hotspot name
- Mobile Hotspot Password
- Network Band
Also Read: How to Increase Internet Speed in Windows 11
How to Turn On or Off Power Saving Mode for Mobile Hotspot
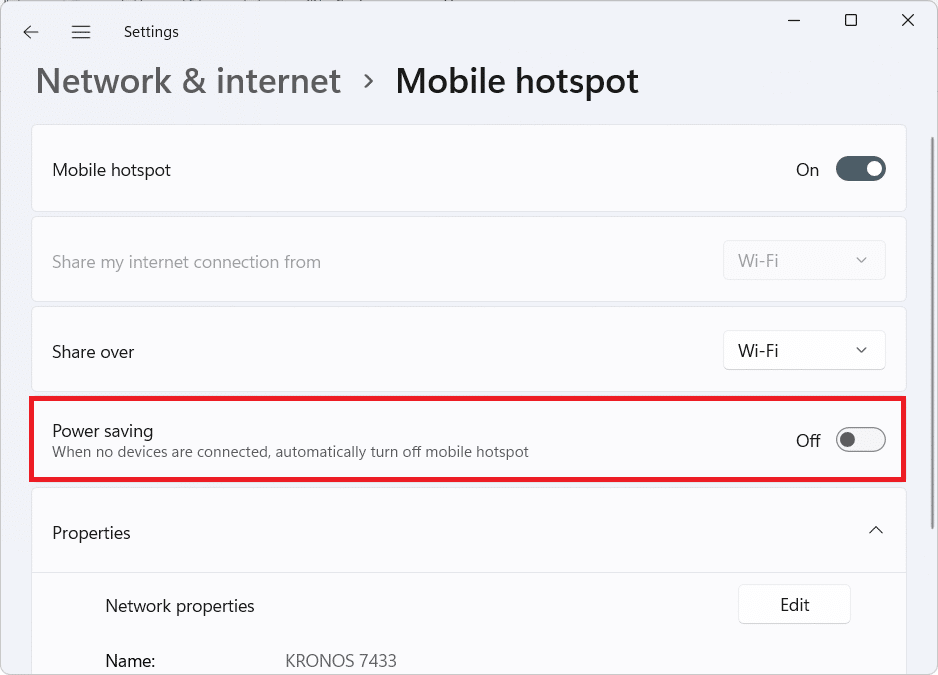
You can set Mobile hotspot settings to turn on or off Power Saving Mode. This will turn off Mobile hotspot automatically when no devices are connected with hotspot and thus, help save battery life of your laptop. Follow these steps to do so.
1. Navigate to Windows Settings > Network & internet > Mobile hotspot as shown.
2. Enable Mobile hotspot on Windows 11 by toggling the switch On.
3. Switch On the toggle for Power saving, as depicted below.
Note: If you no longer need it, then you can switch Off the toggle for Power saving in Step 3.
Also Read: How to Change DNS Server on Windows 11
How to Disable Mobile Hotspot in Windows 11
Follow the steps listed below to disable Mobile hotspot on Windows 11 when you are done working on the borrowed internet time:
1. Launch Windows Settings and navigate to Network & internet > Mobile hotspot menu as before.
2. In the Mobile hotspot section, switch Off the toggle for Mobile hotspot, shown highlighted, to disable it.
Recommended:
We hope you liked our nifty little guide on how to enable or disable Mobile hotspot in Windows 11. If you experience any troubles, or have any suggestions, let us know in the comments section below.
