The User Account Control, or UAC in short, was developed to ensure security in Windows computers. UAC does not allow any unauthorized access to the Operating System. UAC ensures that alterations in the system are made only by the administrator, and no one else. If the admin does not approve the said changes, Windows will not allow it to happen. Thus, it prevents any type of changes to be made by applications, viruses, or malware attacks. Today, we will discuss how to enable User Account Control in Windows 7, 8, and 10 as well as how to disable UAC in Windows 7 and later versions.
How to Enable UAC in Windows 10 PC
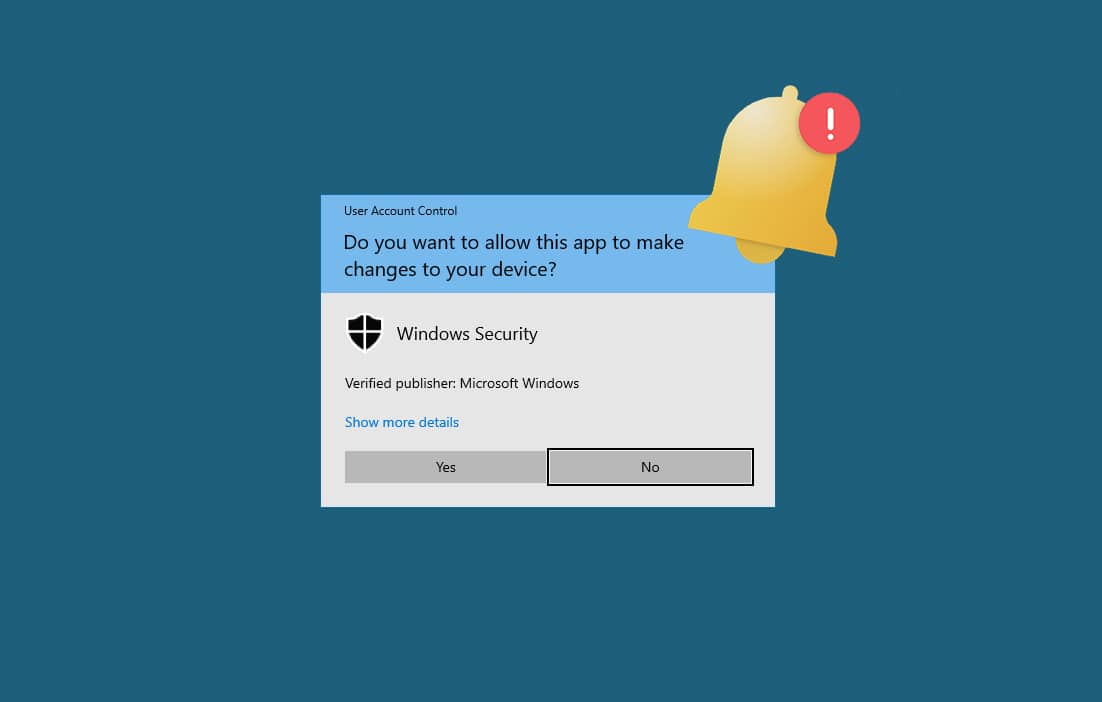
If you are an administrator, whenever a new program is installed in your system, you will be asked: Do you want to allow this app to make changes to your device? On the other hand, if you are not an administrator, the prompt will ask you to enter your username and password to access the said program.
User Account Control was a misunderstood feature when Windows Vista was launched. Many users tried to uninstall it without realizing that they were exposing their system to threats. Read the Microsoft page on How User Account Control Works here.
The features of UAC were improved in the succeeding versions, yet, some users may want to disable these temporarily. Read below to enable and disable User Account Control in Windows 8 and 10, as and when needed.
Method 1: Use Control Panel
Here’s how to enable UAC in Windows 8 & 10:
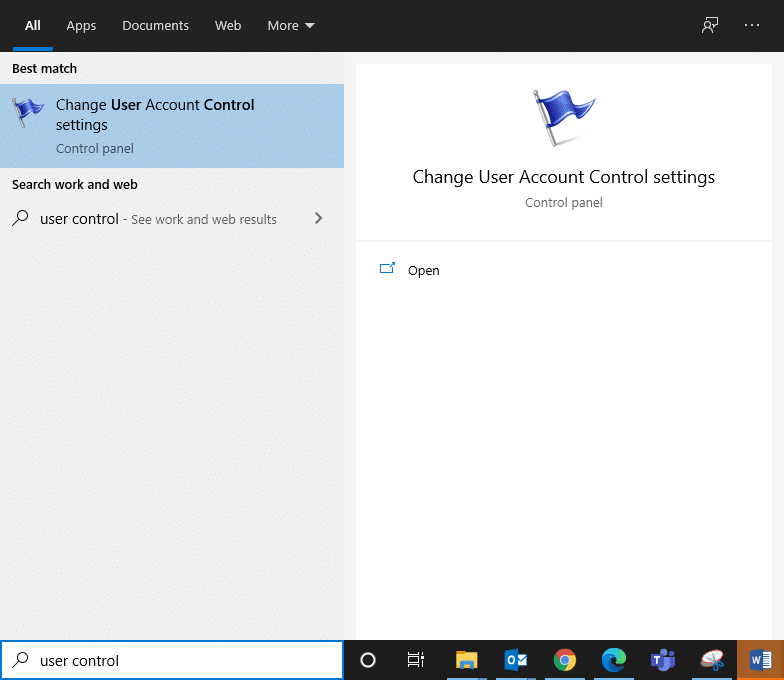
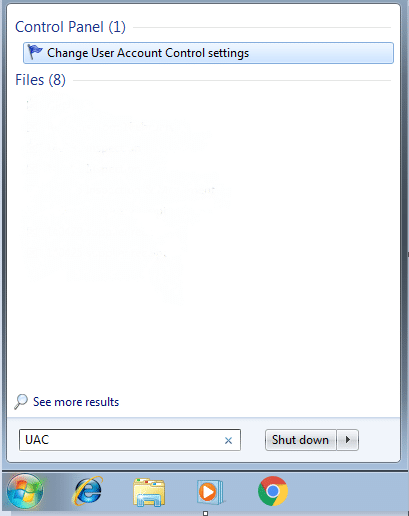
1. Click on your Windows key and type User Control in the search bar.
2. Open Change User Account Control Settings from the search results, as shown.
3. Here, click on Change User Account Control settings.
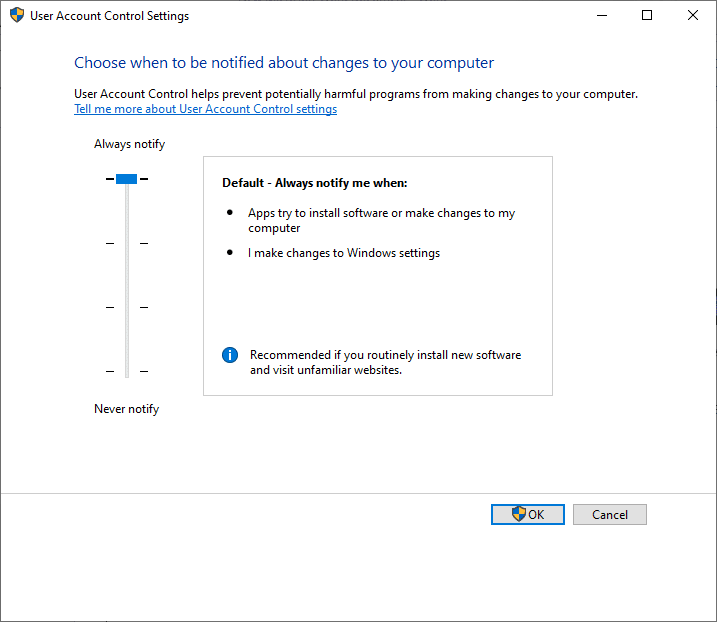
4. Now, a screen will be displayed where you can choose when to be notified about changes to your computer.
4A. Always notify- It is recommended if you routinely install new software and visit unfamiliar websites often.
Default- Always notify me when:
- Apps try to install software or make changes to your computer.
- I (user) make changes to Windows settings.
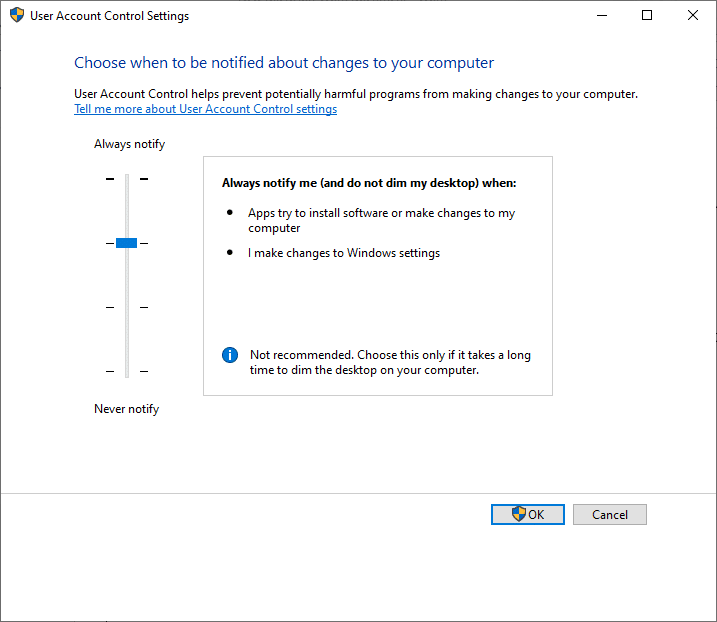
4B. Always notify me (and do not dim my desktop) when:
- Apps try to install software or make changes to your computer.
- I (user) make changes to Windows settings.
Note: It is not recommended, but you can choose this if it takes a long time to dim the desktop on your computer.
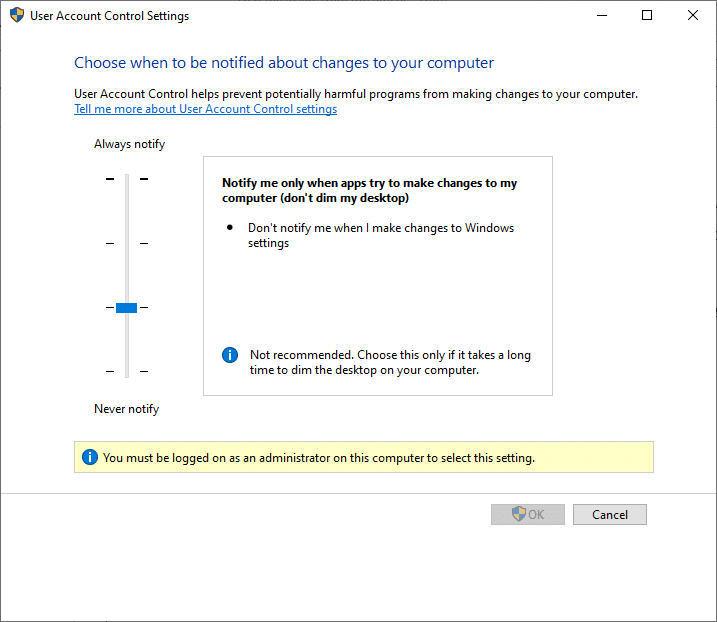
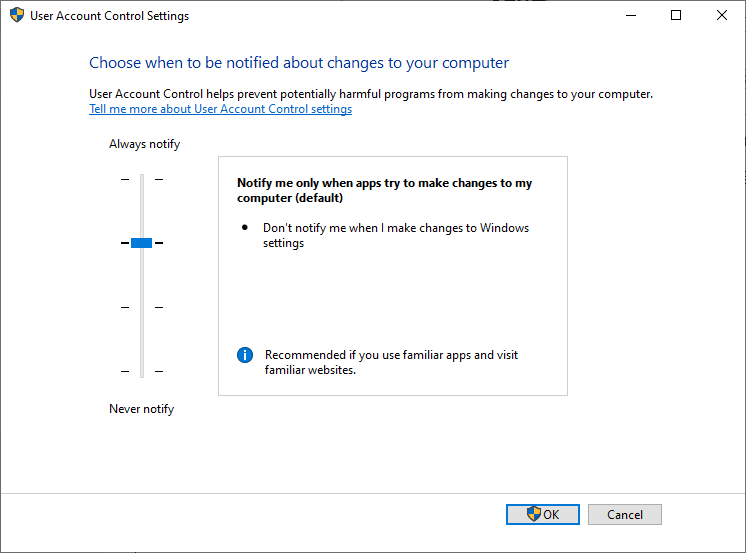
4C. Notify me only when apps try to make changes to my computer (don’t dim my desktop) – This option will not notify you when you make changes to your Windows settings.
Note 1: This feature is not recommended at all. Moreover, you must be logged in as an administrator on the computer to select this setting.
5. Choose any one of these settings depending on your requirements and click on OK to enable User Account Control in Windows 8/10.
Method 2: Use msconfig Command
Here’s how to enable User Account Control in Windows 8 & 10:
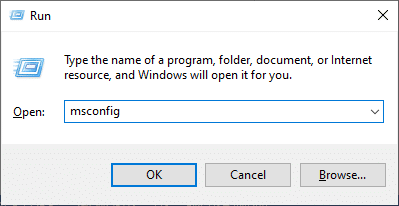
1. Launch the Run dialog box by pressing Windows + R keys together.
2. Type msconfig as shown and click OK.
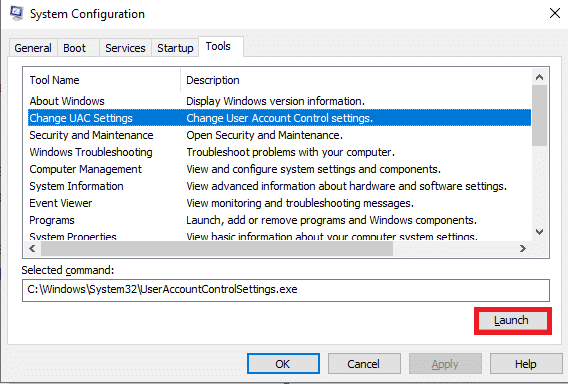
3. System Configuration window appears on the screen. Here, switch to the Tools tab.
4. Here, click on Change UAC Settings and select Launch, as highlighted below.
5. Now, you can choose when to be notified about changes to your computer in this window.
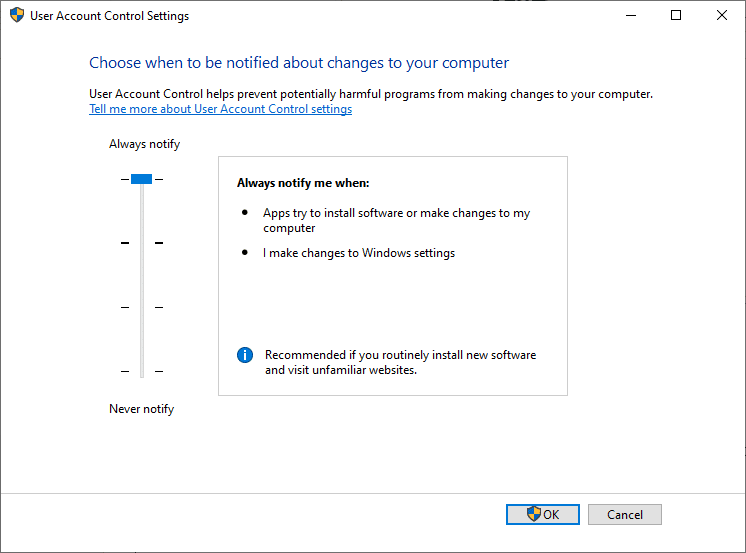
5A. Always notify me when:
- Apps try to install software or make changes to your computer.
- I (user) make changes to Windows settings.
Note: It is recommended if you install new software and visit unverified websites frequently.
5B. Notify me only when apps try to make changes to my computer (default)
This setting will not notify you when you make changes to Windows settings. It is suggested that you use this option if you access familiar apps and verified web pages.
5C. Notify me only when apps try to make changes to my computer (do not dim my desktop)
This setting will not notify you when you make changes to Windows settings.
Note: It is not recommended and you can choose this if it takes a long time to dim the desktop screen automatically.
6. Choose the desired option and click on OK.
Also Read: 6 Ways to Change User Account Name in Windows 10
How to Disable UAC in Windows Systems
Method 1: Use Control Panel
Here’s how to disable UAC using the control panel:
1. Log into your system as an administrator.
2. Open Change User Account Control Settings from the Windows search bar, as instructed earlier.
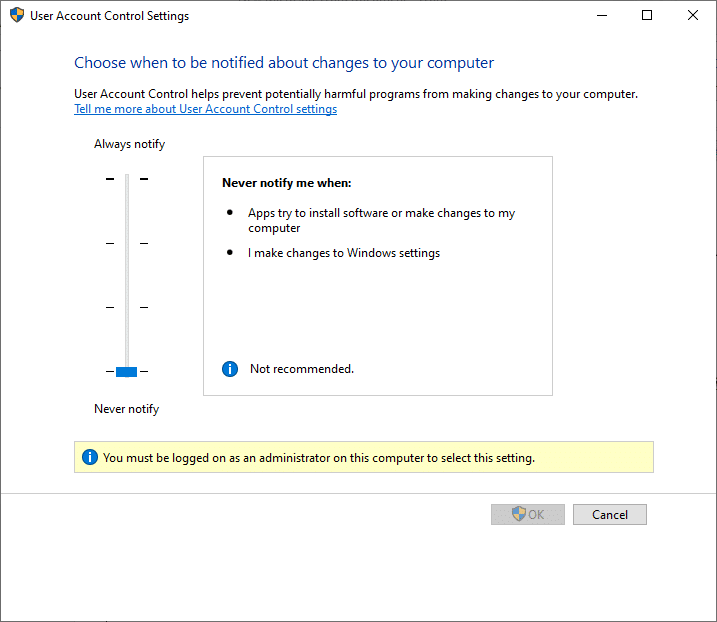
3. Now, a screen will be displayed where you can choose when to be notified about changes to your computer. Set the setting to:
4. Never notify me when:
- Apps try to install software or make changes to your computer.
- I (user) make changes to the Windows settings.
Note: This setting is not recommended since it puts your computer at a high-security risk.
5. Finally, click on OK to disable UAC in your system.
Method 2: Use msconfig Command
Here’s how to disable User Account Control in Windows 8, 8.1, 10:
1. Open Run dialog box and execute the msconfig command as earlier.

2. Switch to the Tools tab in the System Configuration window.
3. Next, click on Change UAC Settings > Launch as depicted.

4. Choose Never notify me when:
- Apps try to install software or make changes to your computer.
- I (user) make changes to Windows settings.
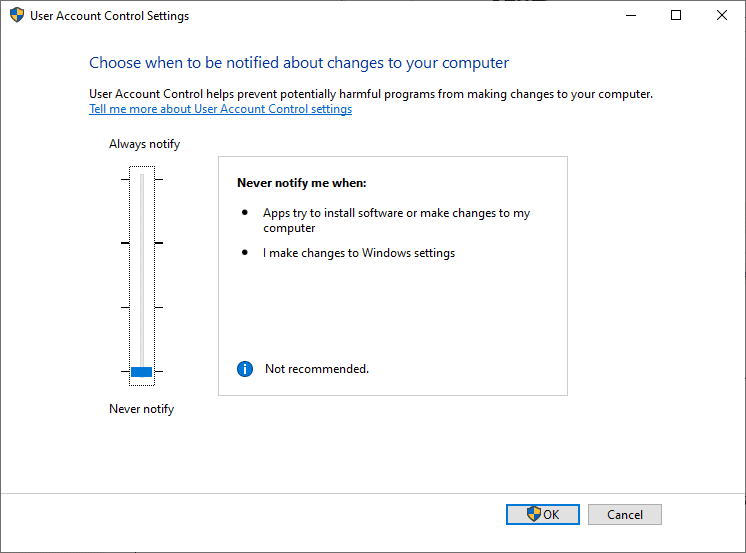
5. Finally, click on OK and exit the window.
Also Read: How to View User Account Details in Windows 10
How to Enable User Account Control in Windows 7
Here are the steps to enable User Account Control in Windows 7 system using Control Panel:
1. Type UAC in the Windows search box, as shown below.
2. Now, open Change User Account Control settings.
3. As discussed earlier, select any setting from the listed options.
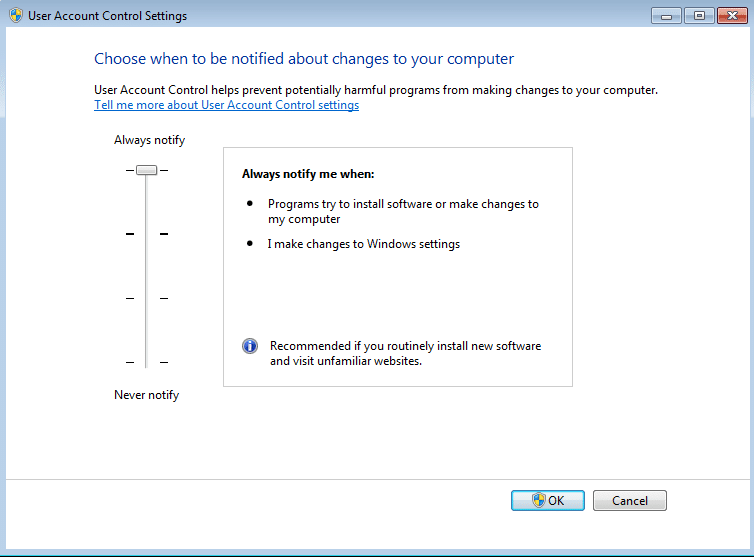
3A. Always notify me when:
- I (user) try to make changes in Windows settings.
- Programs try to install software or make changes to the computer.
This setting will notify a prompt on the screen which you can confirm or deny.
Note: This setting is recommended if you install new software and surf online frequently.
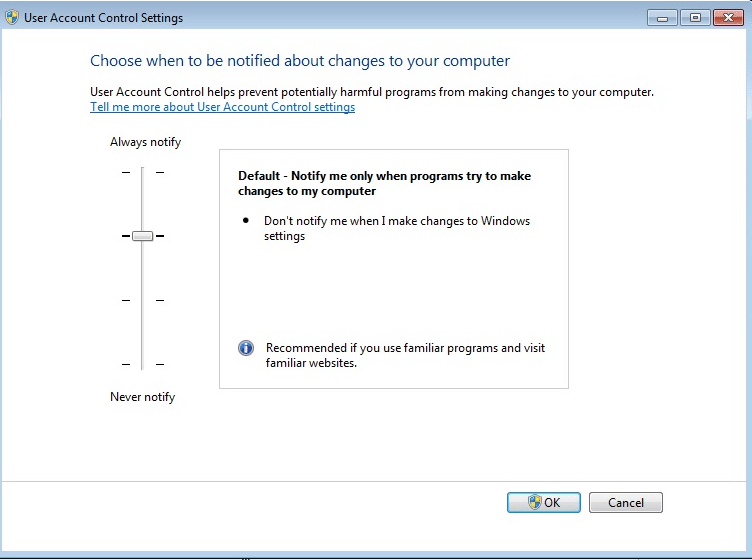
3B. Default- Notify me only when programs try to make changes to my computer
This setting will notify you only when the programs try to make changes to your computer, and will not allow notifications when you make changes to Windows settings.
Note: This setting is recommended if you use familiar programs and visit familiar websites and are at a lower security risk.
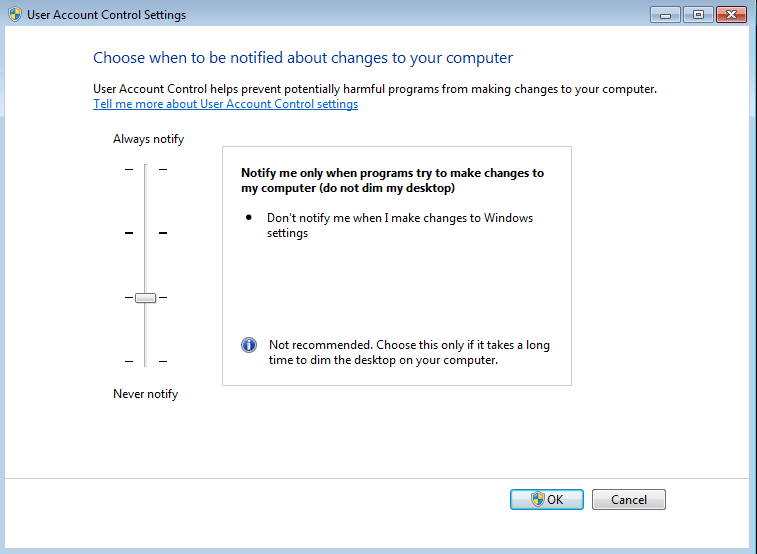
3C. Notify me only when programs try to make changes to your computer (do not dim my desktop)
When programs try to make changes to your computer, this setting gives you a prompt. It won’t provide notifications when you make changes to Windows settings anymore.
Note: Choose this only if it takes a long time to dim the desktop.
4. Finally, click on OK to enable UAC in Windows 7 system.
How to Disable User Account Control in Windows 7
Disabling UAC is not recommended. If you still wish to do so, follow the given steps to disable User Account Control in Windows 7 system using Control Panel.
1. Open Change User Account Control settings as explained previously.
2. Now, change the setting to:
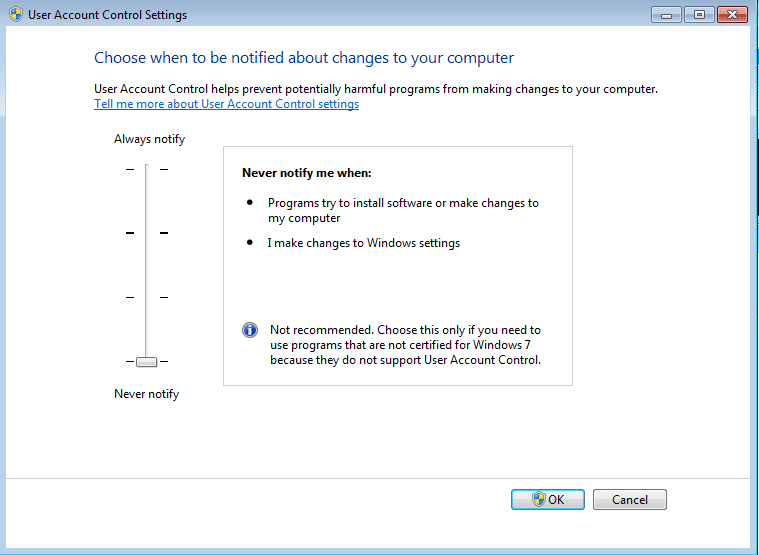
Never notify me when:
- Programs try to install software or make changes to my computer.
- I (user) make changes to Windows settings.
Note: Choose this only if you use programs that are not certified for use on Windows 7 systems and need to disable UAC because they do not support User Account Control.
3. Now, click on OK to disable UAC in your Windows 7 system.
Also Read: How to fix Yes button grayed out in User Account Control
How to Verify if UAC is Enabled or Disabled
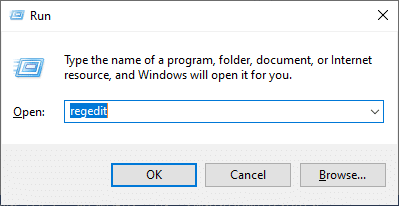
1. Open the Run dialog box by pressing Windows & R keys together.
2. Type regedit and click OK, as depicted below.
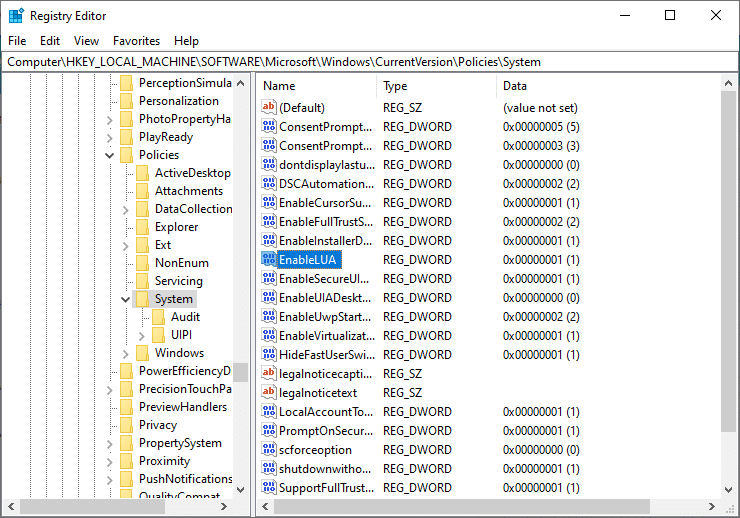
2. Navigate the following path
ComputerHKEY_LOCAL_MACHINESOFTWAREMicrosoftWindowsCurrentVersionPoliciesSystem
3. Now, double-click on EnableLUA as shown.
4. Refer to these values in the Value data field:
- If the Value data is set to 1, UAC is enabled in your system.
- If the Value data is set to 0, UAC is disabled in your system.
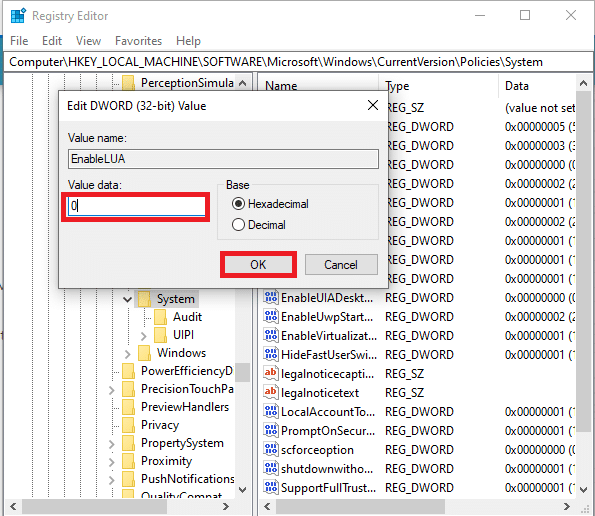
5. Finally, click on OK to save the registry key values.
As desired, User Account Control features will be enabled or disabled.
Recommended:
We hope that this guide was helpful and you were able to enable or disable User Account Control in Windows 7, 8, or 10 systems. Let us know which method worked for you. If you have any queries or suggestions regarding this article, then feel free to drop them in the comments section.