- in windows 11 by Admin
How to Find Out What Graphics Card is in Your Windows 11 PC
Your new Windows 11 app or game has a list of minimum and recommended hardware requirements. You’ll find a graphics card in that list, but how do you know which card you have in your PC?
There are several ways to identify your current graphics card. But before that, we need to take a moment to explain how graphics card names work.
How Graphics Cards Are Named
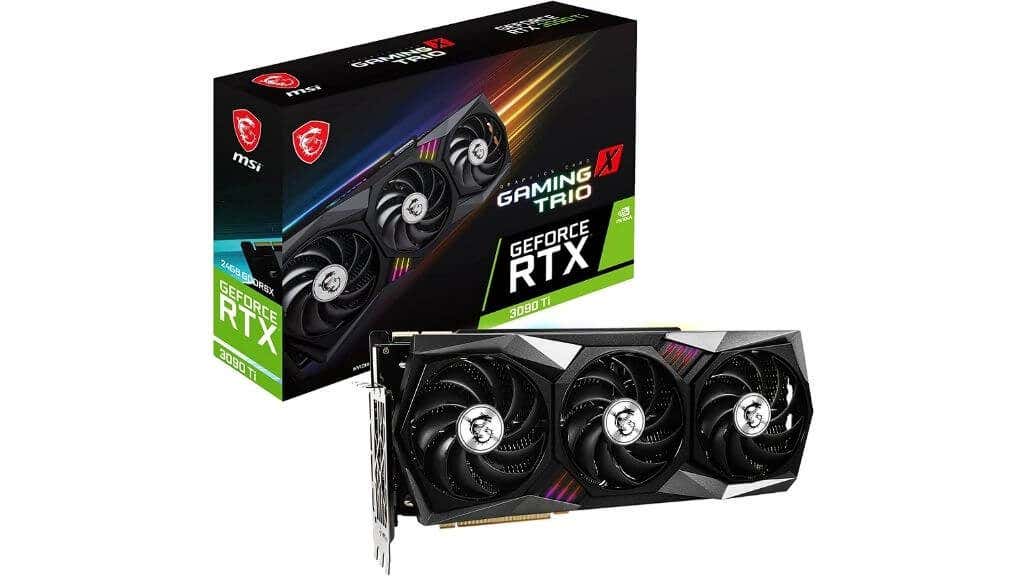
Desktop cards are usually designed and manufactured by third-party “board partners.” The first part of the name is the brand of that particular board partner. These include companies like Gigabyte, MSI, Asus, and so on.
The GPU maker also makes its cards in some cases. For example, Nvidia sells “Founders Edition” cards they make and market. In that case, Nvidia is both the card’s brand and the GPU’s.
The second part of the name is the GPU itself—for example, Nvidia RTX 3090 Ti, AMD Radeon 6950 XT, or Intel Xe. “Nvidia,” “AMD,” and “Intel” are the company names of the GPU (Graphics Processing Unit) chip manufacturer. Board partners may add something after the GPU name as well, such as “Black Edition,” “OC Edition,” or “Twin Frozr.”
Different GPU makers attach different meanings to their GPU model numbers. For example, with Nvidia cards, the first two digits represent the generation. The 1060 is, therefore, a 10-series, and the “60” tells us it’s the mainstream gaming card. Nvidia uses numbers like 30, 50, 60, 70, 80, and 90 to represent the card’s tier within its generation. So, the RTX 3090 is a 30-series card at the top of the stack.
Additionally, Nvidia sometimes uses suffixes such as “Ti” or Super” to mark cards that are half steps between tiers. So an RTX 3070 Ti is faster than a 3070 but slower than a 3080. This also means that, for example, an RTX 2070 may be faster than a GTX 1080, given they are a generation apart.
Similarly, AMD and Intel have their own independent naming schemes. We’re using Nvidia as an example here, but if you’re looking at a different brand of GPU, take the time to look up the meaning of the various model codes.
These additional bits of the name usually set the different customizations done by board partners apart. These include having unique cooling systems, higher than reference clock speeds, or anything else that differentiates cards with the same GPU.
Now let’s apply this information to the name of a real GPU—an ASUS NVIDIA GeForce RTX 3060 V2 12GB GDDR6 PCI Express 4.0 Graphics Card.
- ASUS: This is the brand of the card manufacturer.
- NVIDIA: This is the GPU brand.
- RTX 3060: The GPU model number.
- V2: This indicates that it’s the second revision of this card from ASUS.
- 12GB GDDR6: The capacity and type of memory this card uses.
- PCI Express 4.0: The type and generation of peripheral connection the card uses.
It should be noted that PCI Express is forward and backward compatible. So a PCIe 5.0 card will work in a 4.0 slot, and vice versa, as long as it’s physically long enough.
Finding Equivalent Graphics Cards
When a graphics card is listed in a set of requirements, the idea is that your GPU should either be the same model or another model that’s equivalent or better in performance.
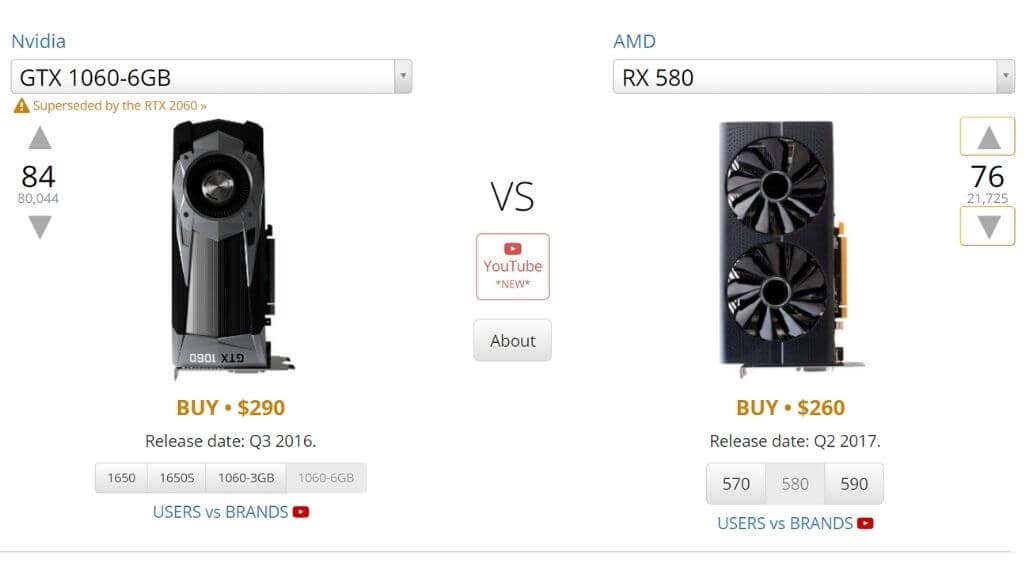
Unless you’re a GPU aficionado, it’s not obvious whether the GPU you have on your PC is as good or better than the one you need. The easiest way to check is to do an internet search for your card versus the one on the recommendation list. Sites like UserBenchmarks will show you an estimate of comparative performance.
You can also check the theoretical performance of your card compared to the one required on TechPowerUp. Look under “theoretical performance.” Specifically, you’ll want to compare the FP32 “Float Performance” number.
It’s crucial to know that laptop versions of GPUs, although they might have precisely the same name, are very different from each other. Remember to search for the mobile version of your GPU if it’s on a laptop!
Check Your GPU or Computer Box
Before getting into the technical ways of identifying your GPU, why not check the box it came in? You may still have the box the card came in, or your computer may have a sticker on its box listing the specifications.
Look Inside Your PC
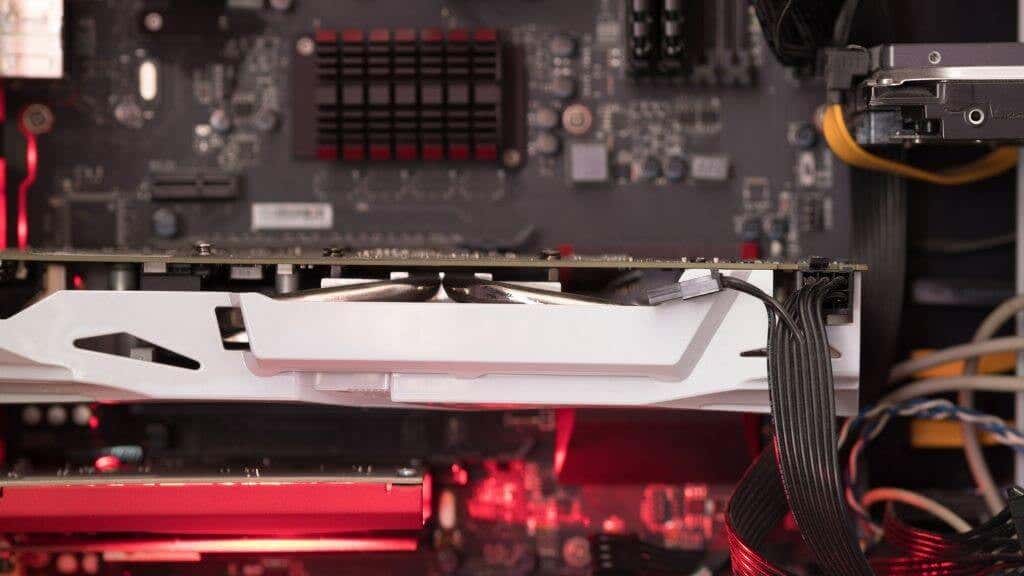
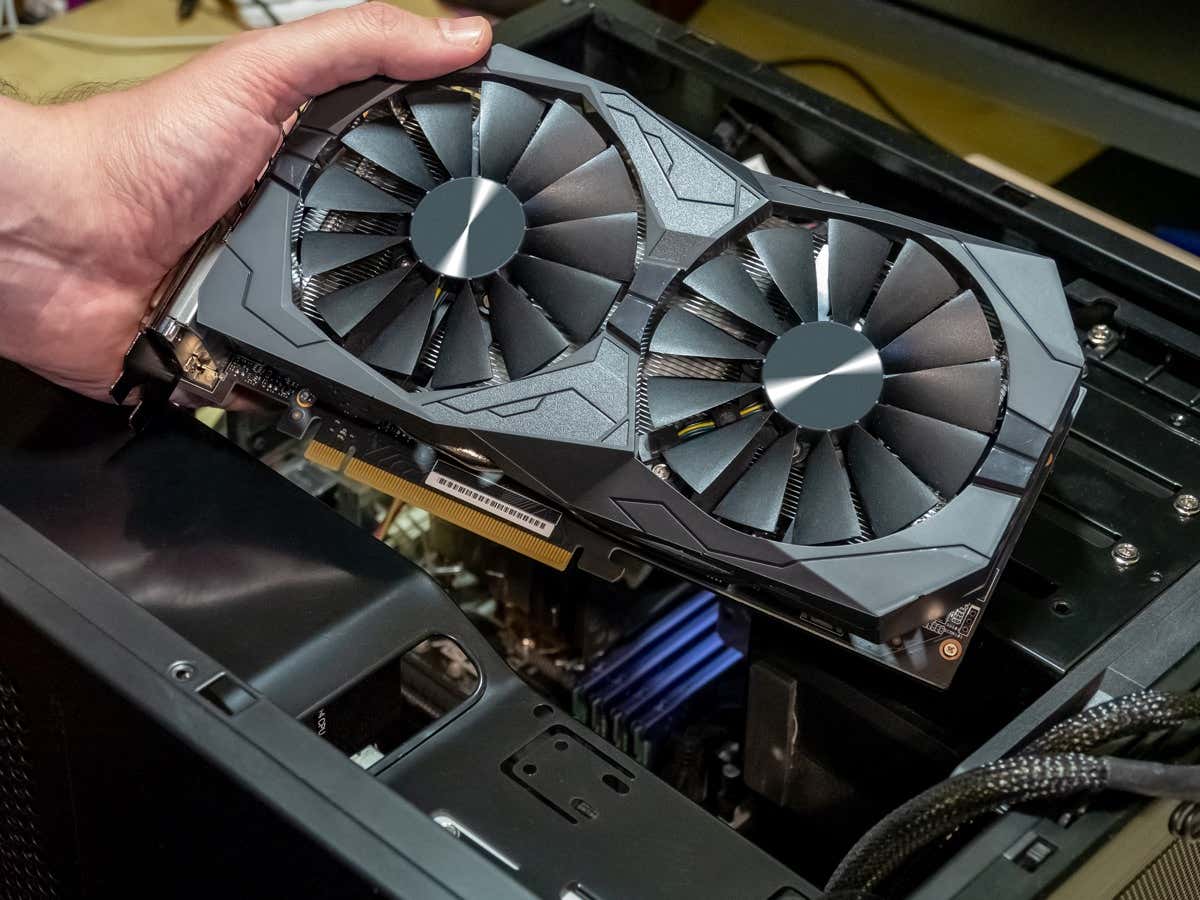
If you have a desktop PC and are comfortable opening it up, the quickest way to see which GPU you have might be to look at the card itself. It’s common for the GPU model to be written on the spine of the card. If you have a desktop PC with a side window, you can sometimes read this name without opening the system.
If your desktop system does not have a window, you can remove the side panel covering the spine of the card to check. We recommend that you shut down the computer before opening the side panel. If the side panel has a fan in it, be careful of the attached wire as you remove the panel. You may have to unplug it to remove the panel and reverse the process when you’re done.
Use Display Settings
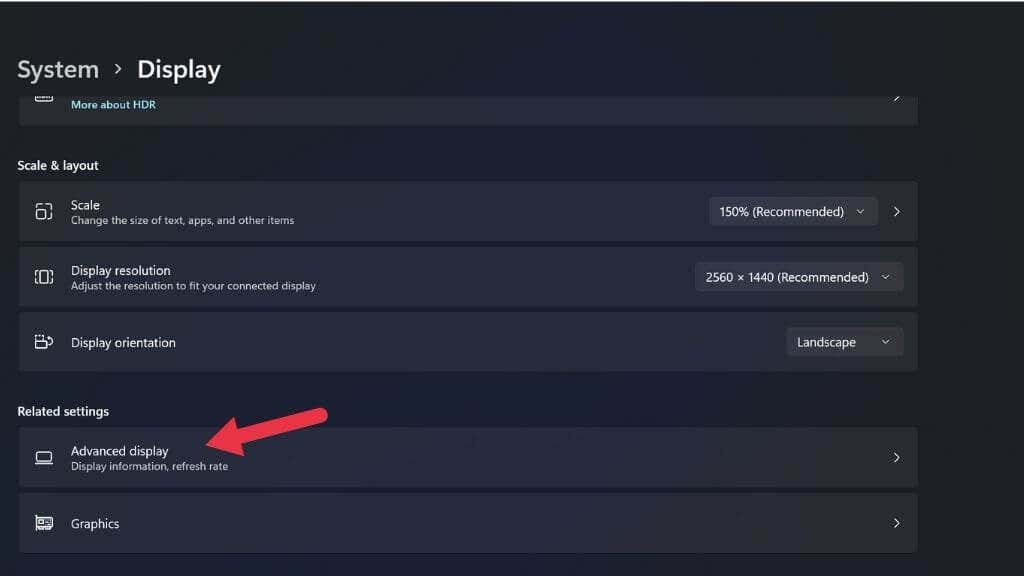
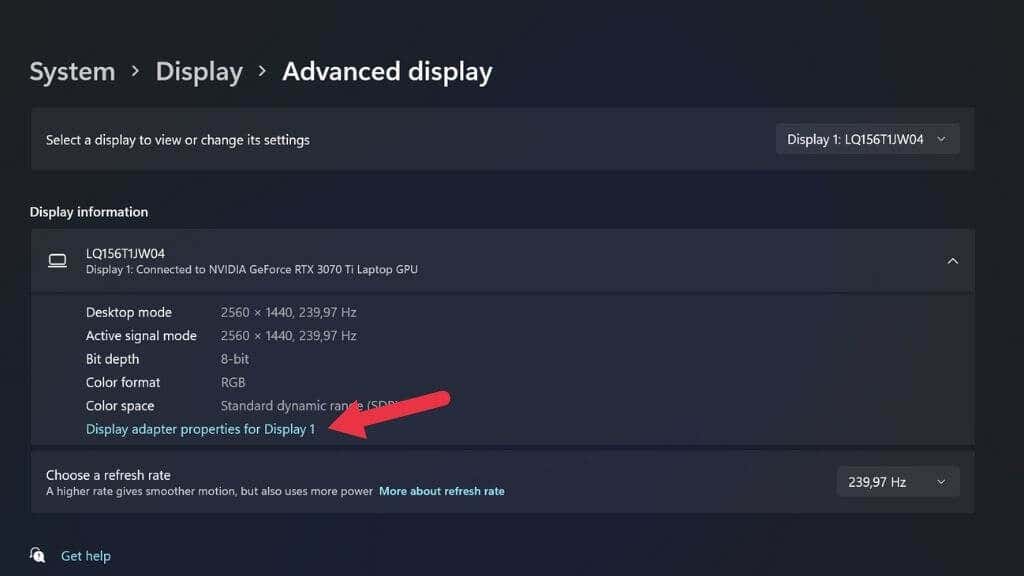
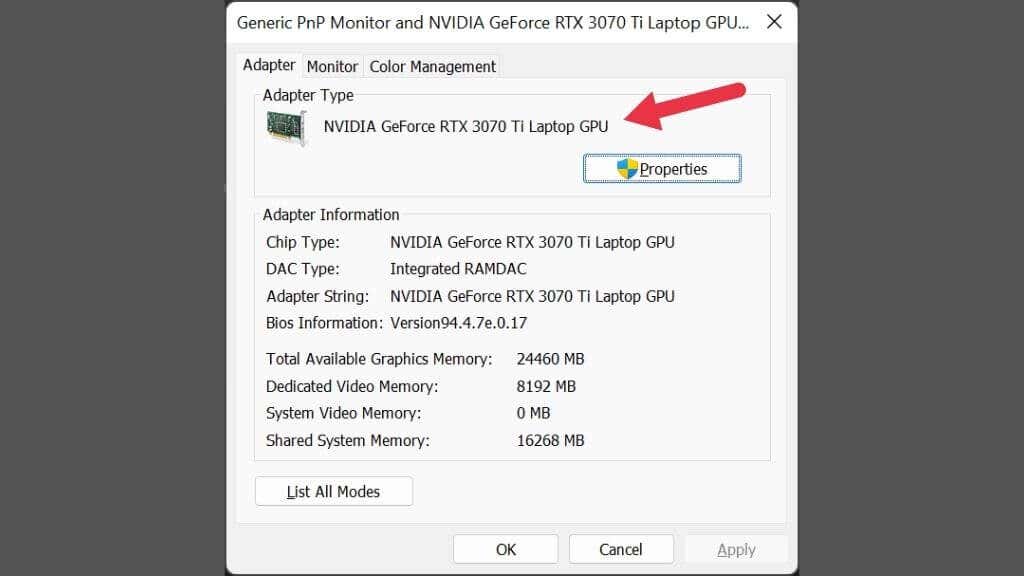
You can access basic details about your GPU in the operating system Advanced Display Settings:
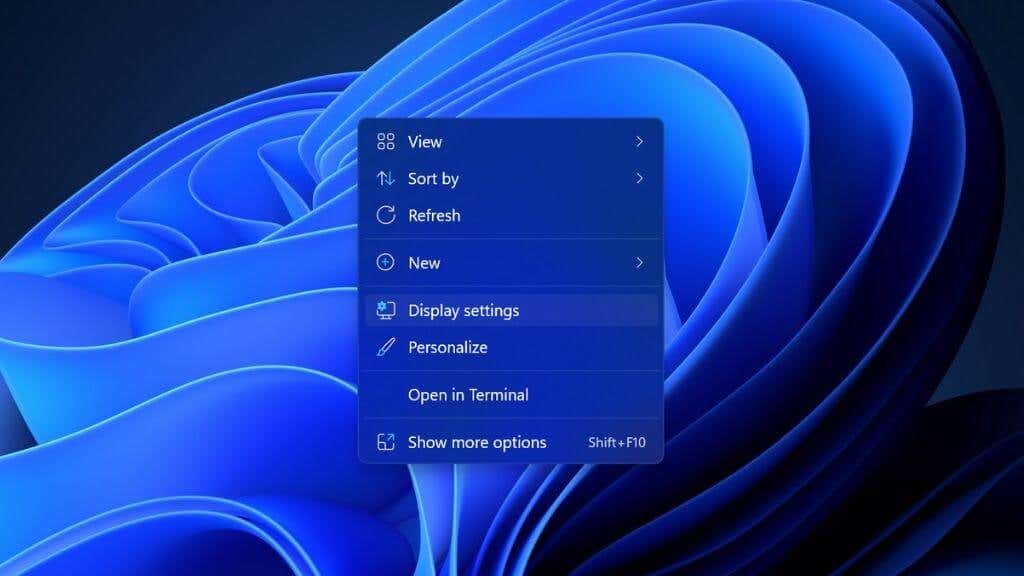
- Right-click on any open area of the desktop.
- Select Display Settings.
- Select Advanced display.
- Select Display adapter properties for Display X, where X is the number of the display connected to that GPU.
If you have more than one display connected and they aren’t both using the same GPU, you can change the current display option by using this dropdown menu at the top-right of the window.
Check Device Manager
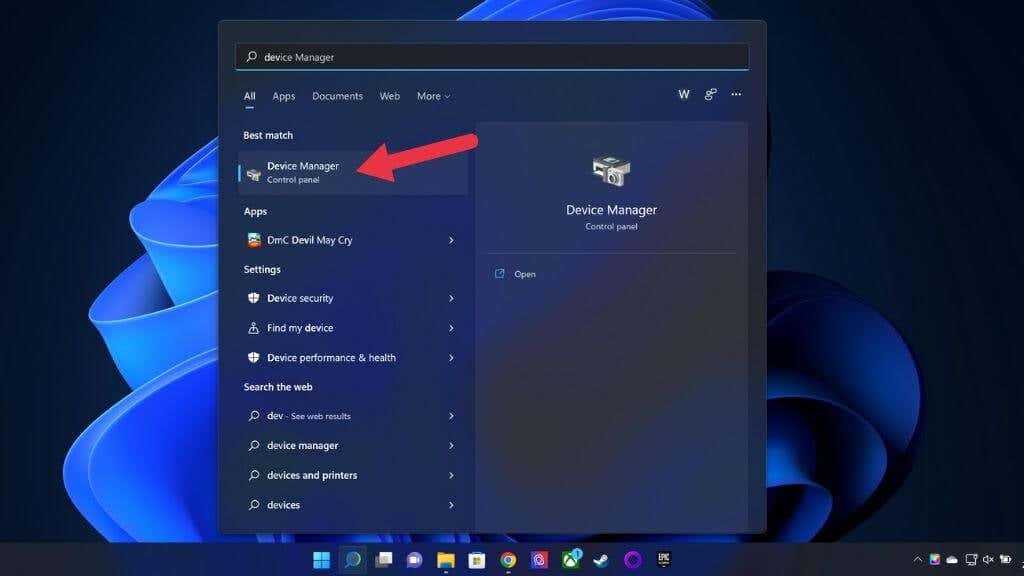
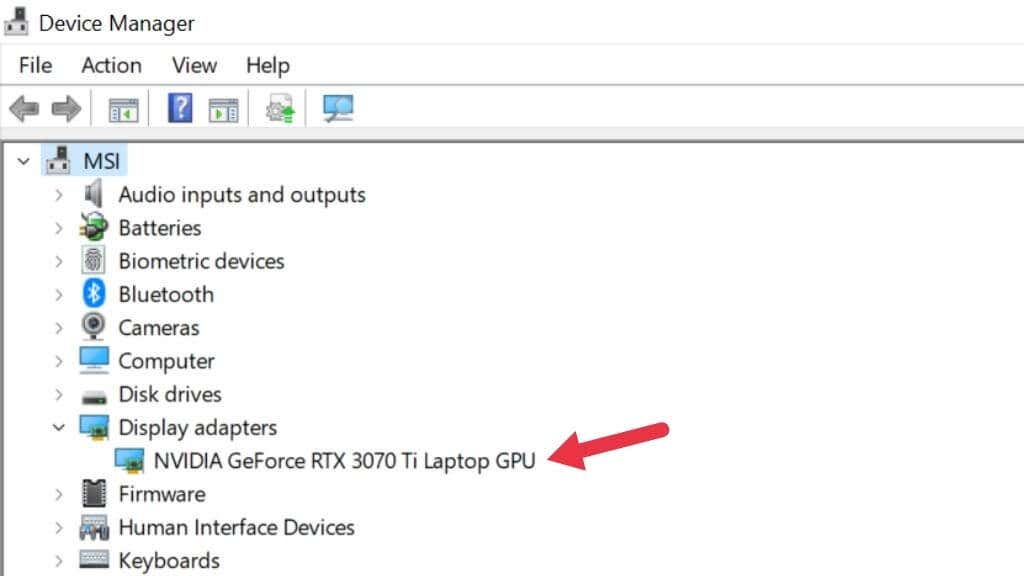
Device Manager is also a fast way to see what GPU you have installed. To open Device Manager in Microsoft Windows 11:
- Select the Start Button on the Taskbar to open the Start Menu.
- Type Device Manager in the search bar.
- Select Device Manager from the results.
- If the entire list of devices is collapsed, expand it by selecting the right-facing arrow.
- Expand the Display Adapters section.
Here you can see the graphics card information currently installed on your computer. You will only see the proper name of your GPU if its drivers are installed. Both Windows 10 and 11 have extensive driver libraries, so this usually isn’t an issue.
If you have a laptop with hybrid graphics (e.g., Nvidia Optimus), you’ll see two GPUs listed. One is your integrated graphics card, and the other is your discrete video card. The discrete GPU is the more powerful one, so that’s the most relevant to system requirements.
If you have a laptop with hybrid graphics but only see one GPU listed, your system most likely has a “MUX” switch. This switch can disable one or the other GPU. The setting can be changed from within the UEFI (or BIOS) menu or using the manufacturer’s utility. It always requires a reboot to take effect.
Use Task Manager
The Windows 11 Task Manager gives you an overview and control of the applications and processes currently running on your PC. Its performance monitoring segment also lists what GPU or GPUs your computer has.
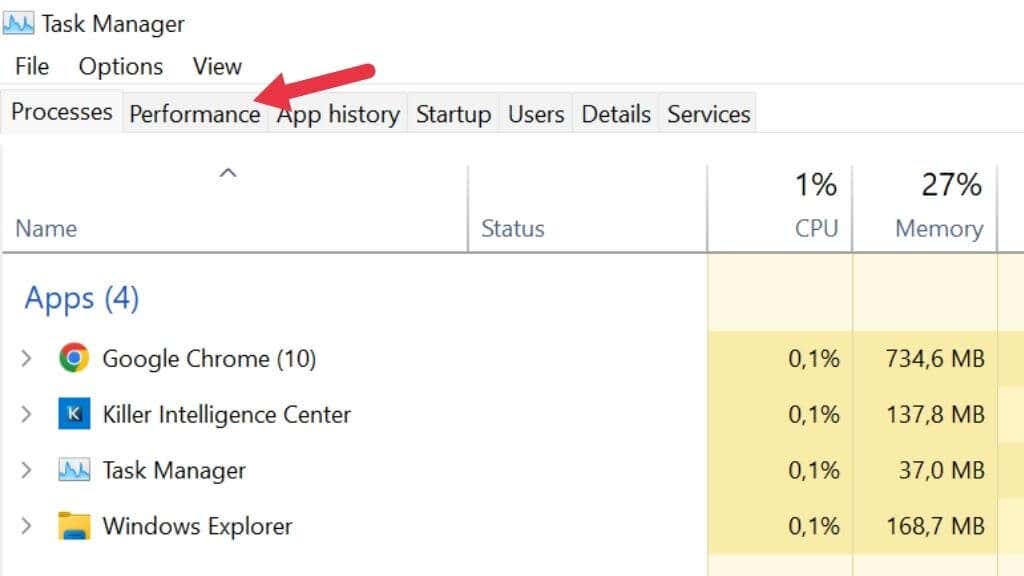
- Open Task Manager by pressing Windows + X or CTRL + SHIFT + ESC.
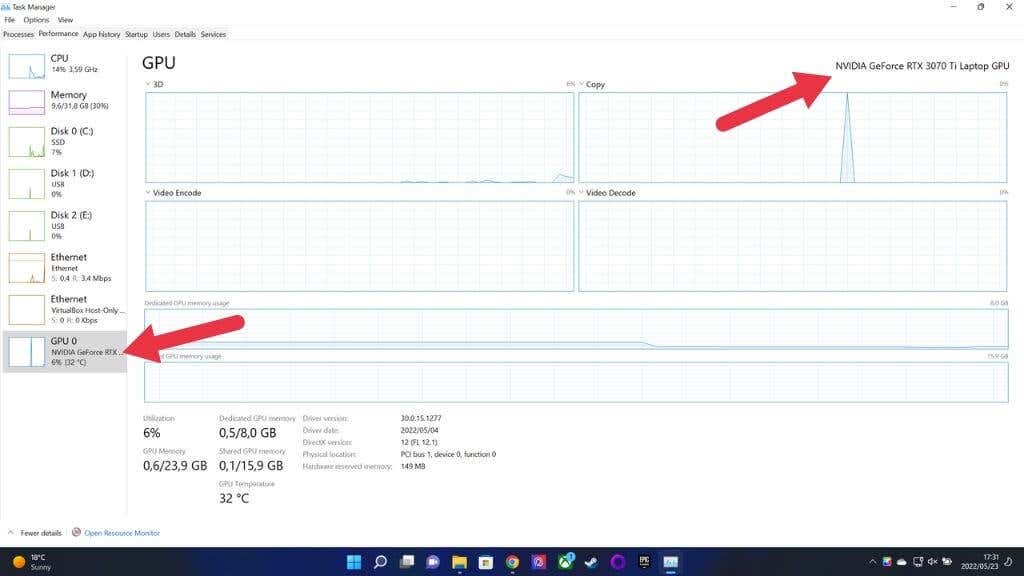
- Switch to the Performance tab.
- Select GPU on the left sidebar.
If you have a computer with multiple GPUs, you’ll see more than one GPU listed. You can check the name of the GPU you’ve selected in the top right-hand corner of the Window, as seen above.
Check System Information
Windows 11 has a dedicated System Information app that will show you what GPU you currently have and just about anything you’d like to know about your system. It’s not the most beginner-friendly app, but you should find what you need, even if you know only a little about interpreting computer specifications.
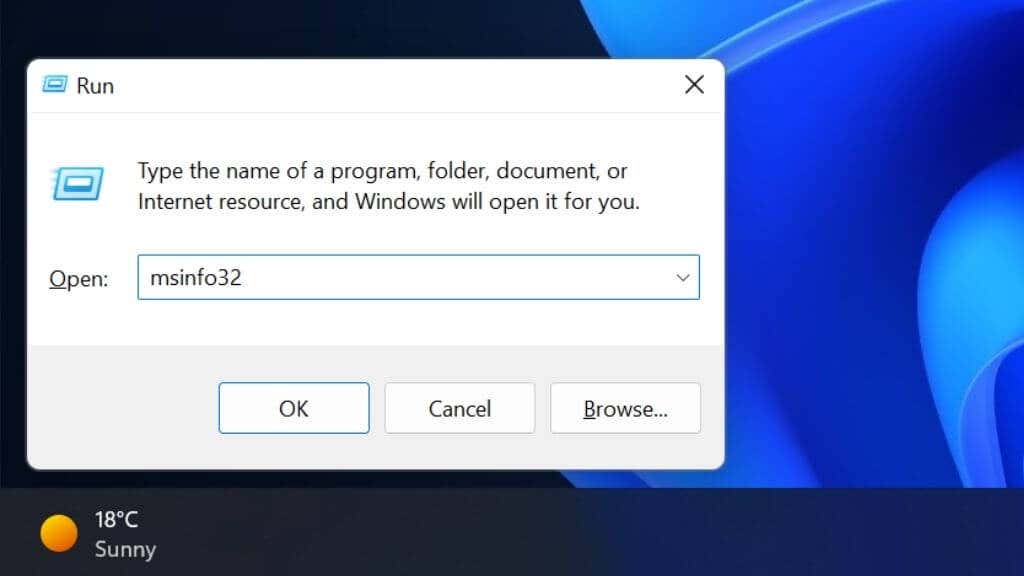
- Press Windows + R to open the Run window.
- Type msinfo32 into the text field and press Enter. System Information will open.
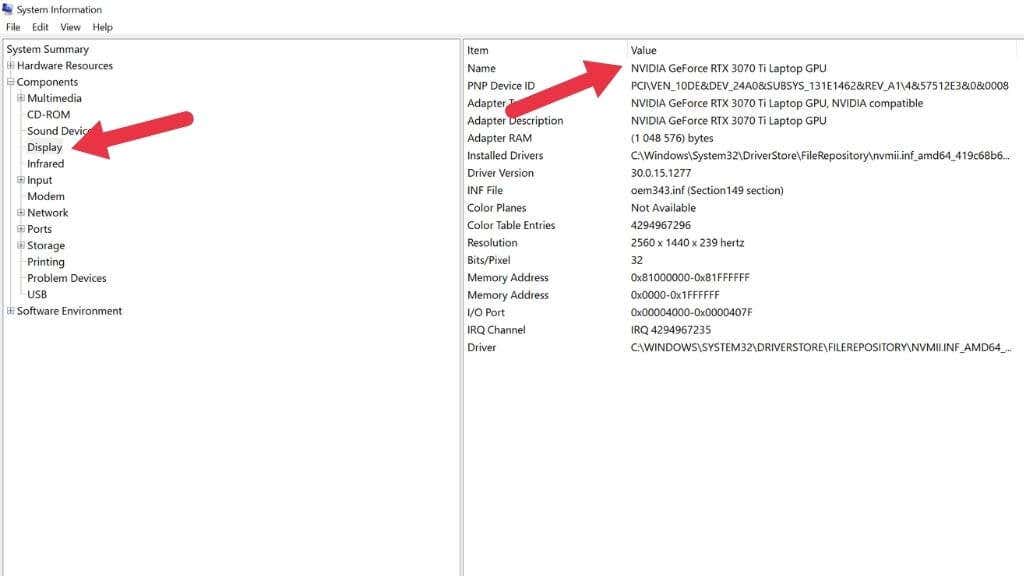
- In the left hand pane, select System Summary > Components > Display.
In the right hand pane under Name, you’ll see the GPU listed.
Use the DirectX Diagnostic Tool
DirectX is a crucial API in Windows 11 (and previous versions) that allow multimedia apps such as video games to work with any compliant hardware. As part of the DirectX suite, there’s an application known as the DirectX Diagnostic Tool (AKA DXDIAG), which will reveal your GPU details to you:
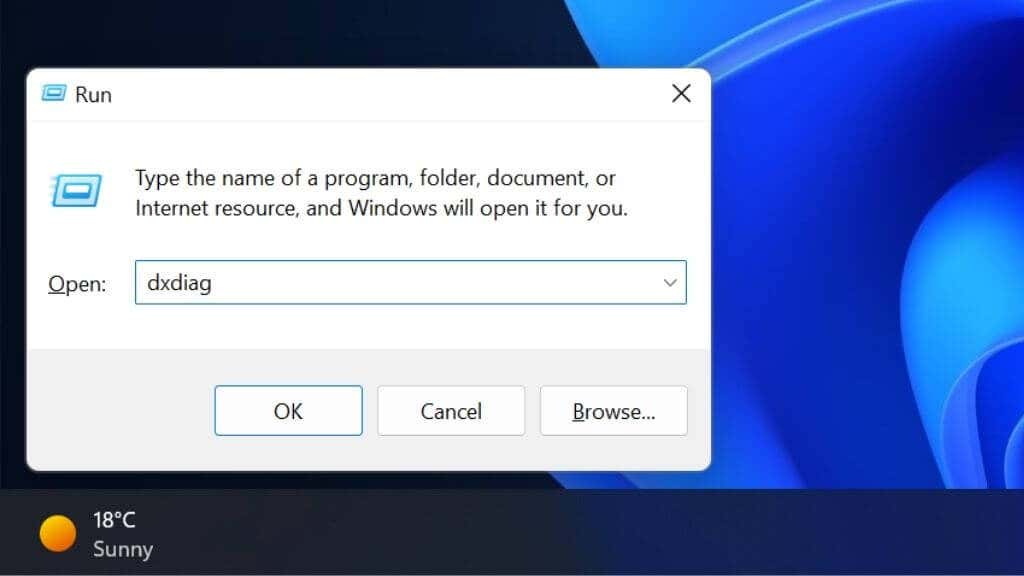
- Press Windows + R to open the Run dialog box.
- Type dxdiag into the text field and press Enter.
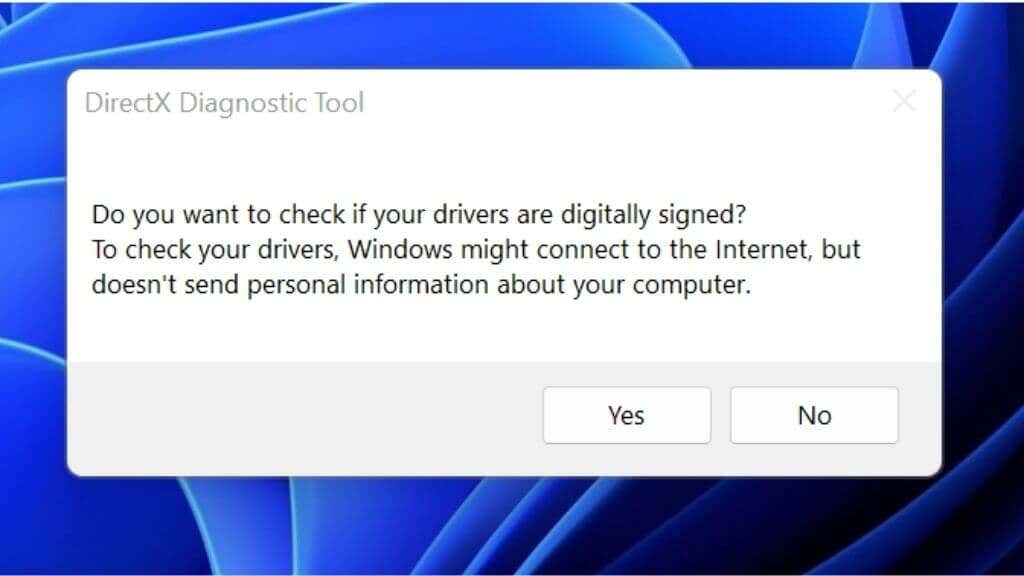
- If you are asked about checking if your drivers are signed, click Yes to proceed.
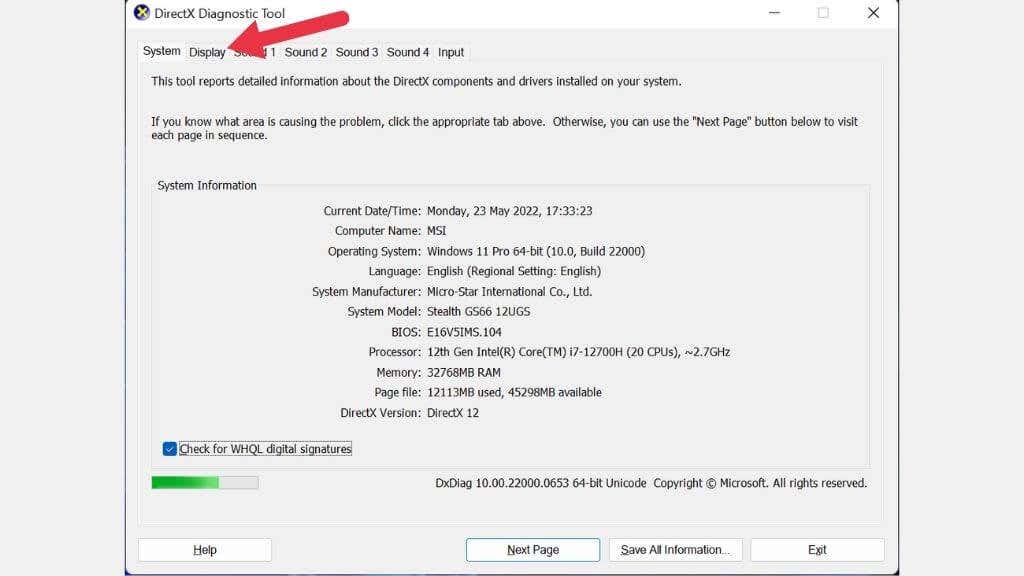
- Select the Display tab.
- Under Device, you’ll see your GPU’s name and other details.
Use GPU-Z
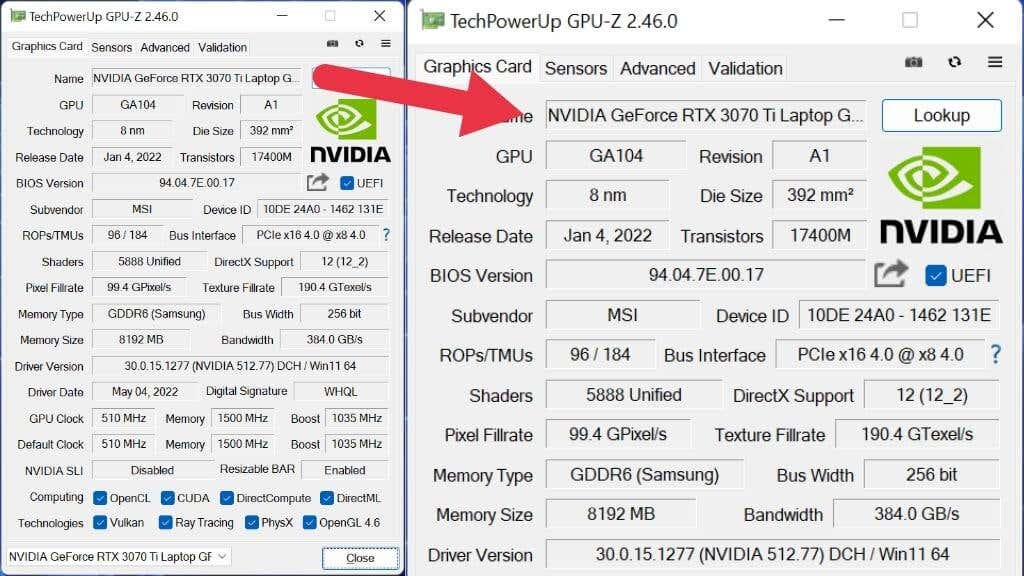
GPUZ (not related to the CPU-Z CPU utility) is a great little portable application by TechPowerUp that will show you intimate details about your GPU.
- Download GPU-Z.
- Run the downloaded file.
- Choose whether to install it or run it in standalone mode. The app will open.
With GPU-Z open, you might be overwhelmed by the sheer number of entries squeezed into this tiny app. These are the most important graphics card details:
- The name shows you the chip type.
- Subvendor offers you the name of the board partner (if any).
- DirectX Support offers you which version of DirectX the GPU can work with.
You can also check the boost clock of your GPU, various bandwidth levels, the brand of the GPU memory (e.g., Samsung), and much more.
Use Speccy
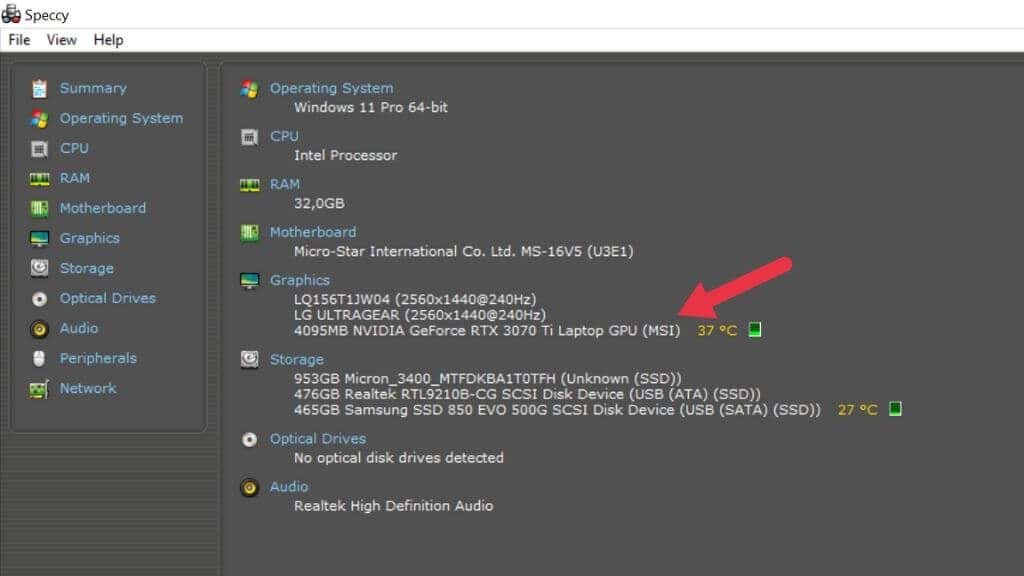
Speccy is a little app made by the same folks responsible for CCleaner. The free version provides you with your computer’s specs and nothing else, but that’s what we want!
- Download and install Speccy.
- Open the application.
- In the summary, look under Graphics.
Here, you’ll see every GPU in the computer and detailed display information. As with GPU-Z, you can see the sub-vendor and other information such as the VRAM size.
I Can See (My GPU) Now
There are many ways to check what GPU your Windows 11 computer has installed. So by now, there’s no way you haven’t determined which GPU you have. All you have to do is use that information to figure out what you need to do next, but that’s as far as we can take you in this article!
