- in windows 11 by Admin
How to Fix “Dump File Creation Failed” Error in Windows
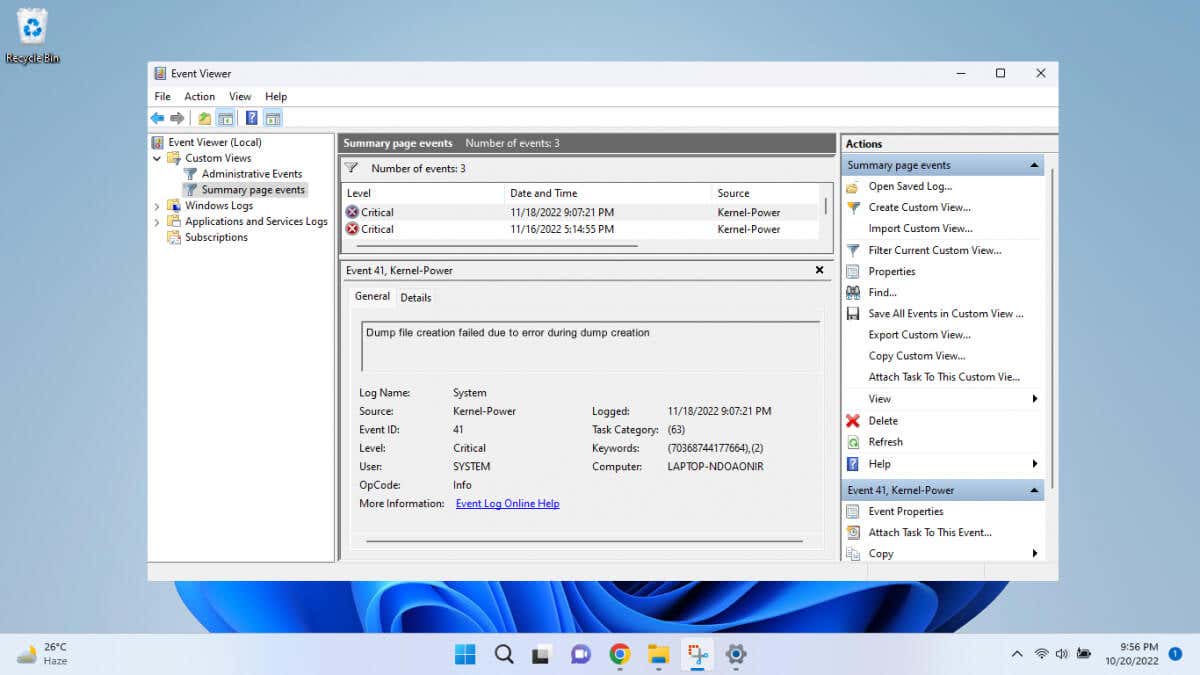
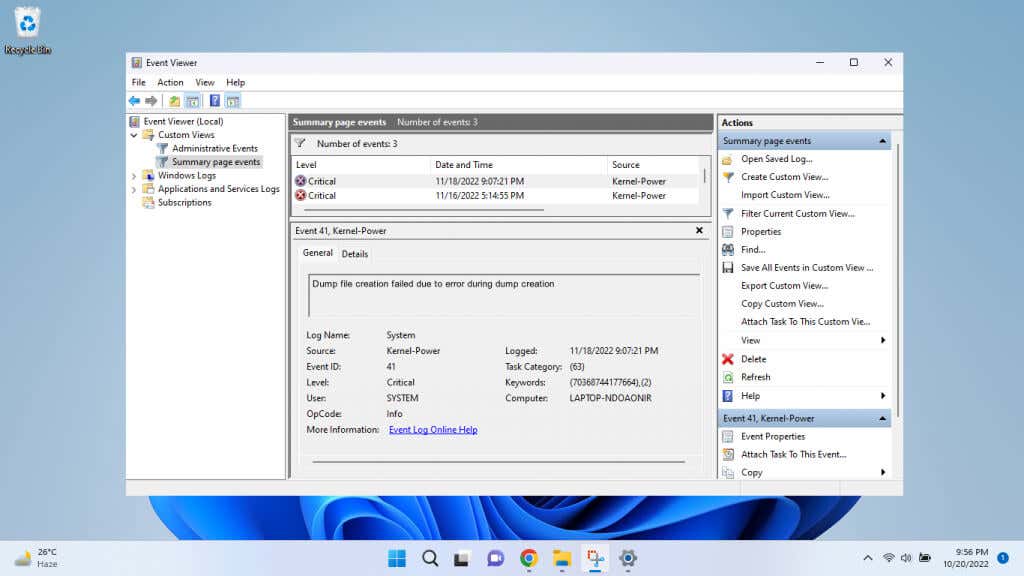
Whenever Windows crashes, it “dumps” all log data into an appropriately named dump file. But what are you supposed to do when even the dump file creation fails? Let’s find out.
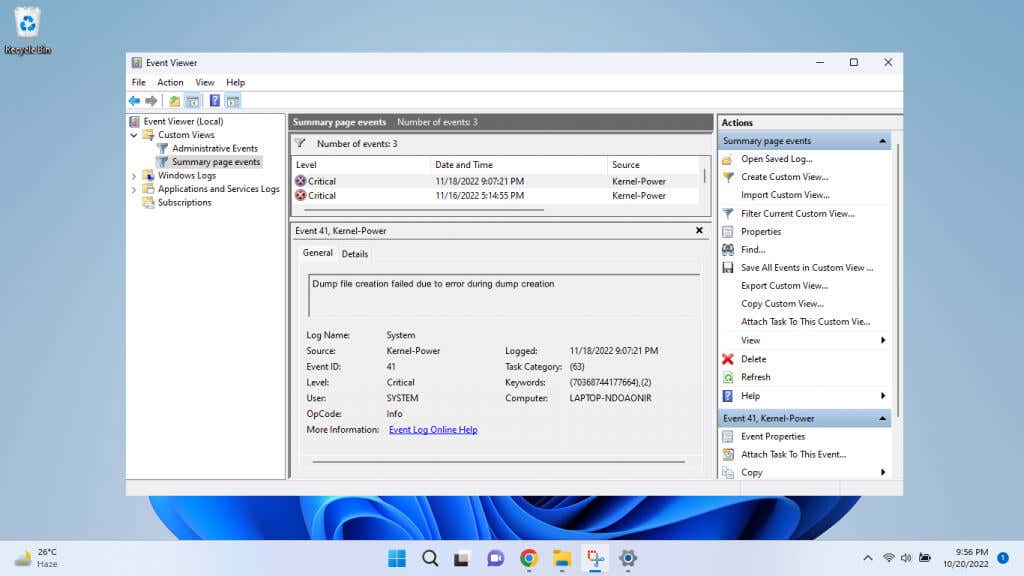
You don’t always need the dump file data to diagnose your Windows issues. The Event Viewer’s entry is usually enough to pinpoint the problematic process – the dump file is just to get a detailed report of what the process was doing.
What Is the Purpose of the Windows Dump File?
The problem with diagnosing a blue screen of death (BSOD) is how suddenly things go wrong. Unless you can take an accurate snapshot of the exact state of the operating system at the moment of the crash, you’ll be left shooting in the dark.
And that’s exactly what the dump file does. It is a snapshot of the memory (or a memory dump) at the time of the OS crash, containing a complete or partial log of every process running on it.
For all of its utility, the dump file isn’t a user-friendly source of information. Therefore, it will not be useful unless you are an experienced system administrator or Windows technician.
What Can Cause the “Dump File Creation Failed” Error in Windows?
The dump file is designed to be created even in the case of a catastrophic system crash. As a result, there aren’t many things that can interfere with that process.
- Corrupted System Files: The most probable cause of the “dump file creation failed” error is system file corruption. And we are not talking about a virus or two infecting your system, but rather a widespread data corruption that has reached the essential system files of your computer.
- Malfunctioning BIOS: While rare, an unstable or outdated BIOS version can also interfere with dump file creation. It can be hard to determine when the BIOS is the culprit, so keeping your computer’s firmware updated is recommended to remove this potential factor from consideration.
- Cleanup Apps: Third-party cleanup apps boasting of improving Windows performance are popular with many users. Unfortunately, some of these apps get a bit overzealous with their cleanup and can also wipe out log files and dump data. While you can no longer regain the lost dump files, removing such apps can prevent the issue in the future.
- Hardware Faults: There is always the possibility that an underlying hardware issue is causing issues. RAM problems, a failing hard drive – many malfunctioning components can prevent a dump file from being written to the disk.
Fix 1: Uninstall Cleanup Applications
The easiest fix to the “dump file creation failed” error is to uninstall any third-party cleaning apps that might be deleting your PC’s log files.
Removing any app on Windows is a simple case of running its uninstaller. If you cannot locate it (or don’t remember its name), you can always check the installed Apps from Settings.
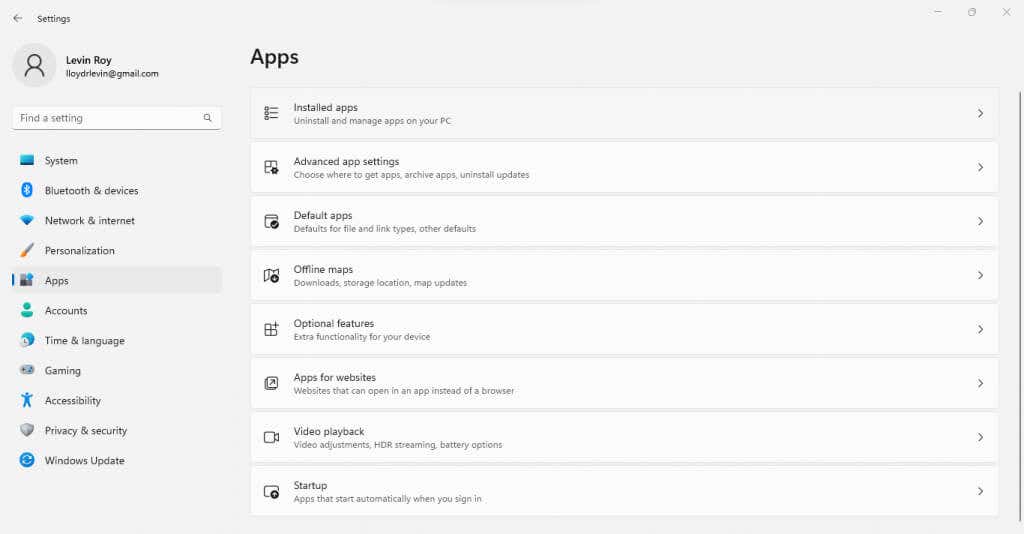
- Open Settings to view and uninstall applications on Windows 11 or Windows 10. You can find its gear icon in the Start menu.
- Switch to the Apps tab on the left and select Installed apps.
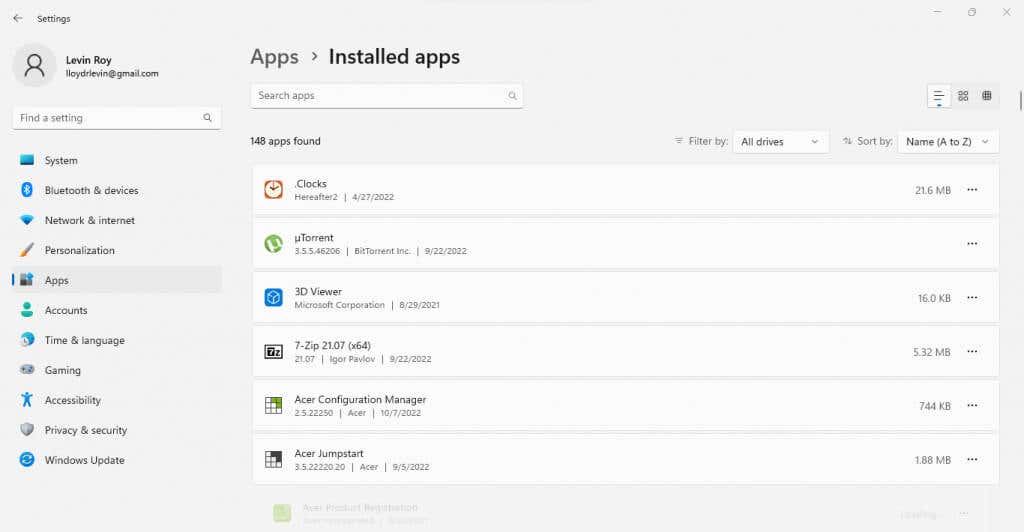
- As you might expect, this lists all installed applications on your computer. They are arranged alphabetically by default, so you can scroll down to the entries starting with C and check if any cleaning app exists. You can also search for a specific app if you remember a part of its name.
- Once you find an app you think is the likely culprit, uninstall it by clicking on the three dots next to it and selecting Uninstall from the drop-down menu. We found nothing like that on our computer, so we are going to demonstrate by uninstalling a random app we don’t need.
- The dedicated uninstaller for the app will remove the application. Follow along with the instructions, and the app will be uninstalled from your PC, hopefully solving your issue as well.
Fix 2: Repair System Files With DISM and SFC
If a cleaning app wasn’t the root of your problem, you should start suspecting corrupted system files. And the good news is that you can fix this issue with two command prompt utilities.
The System File Checker (SFC) is a handy command that verifies the integrity of Windows files by comparing them against a system image, replacing any corrupted data with fresh copies. This means you can rescue a corrupted OS without having to reinstall Windows.
Sometimes, the backup system image gets corrupted, which is where DISM comes in. The Deployment Image Servicing and Management (DISM) utility downloads an uncorrupted copy of the system image from Microsoft’s servers, using it to restore your local backup.
When SFC and DISM are used in tandem, there are very few Windows errors that you cannot fix. Including the “dump file creation failed” error.
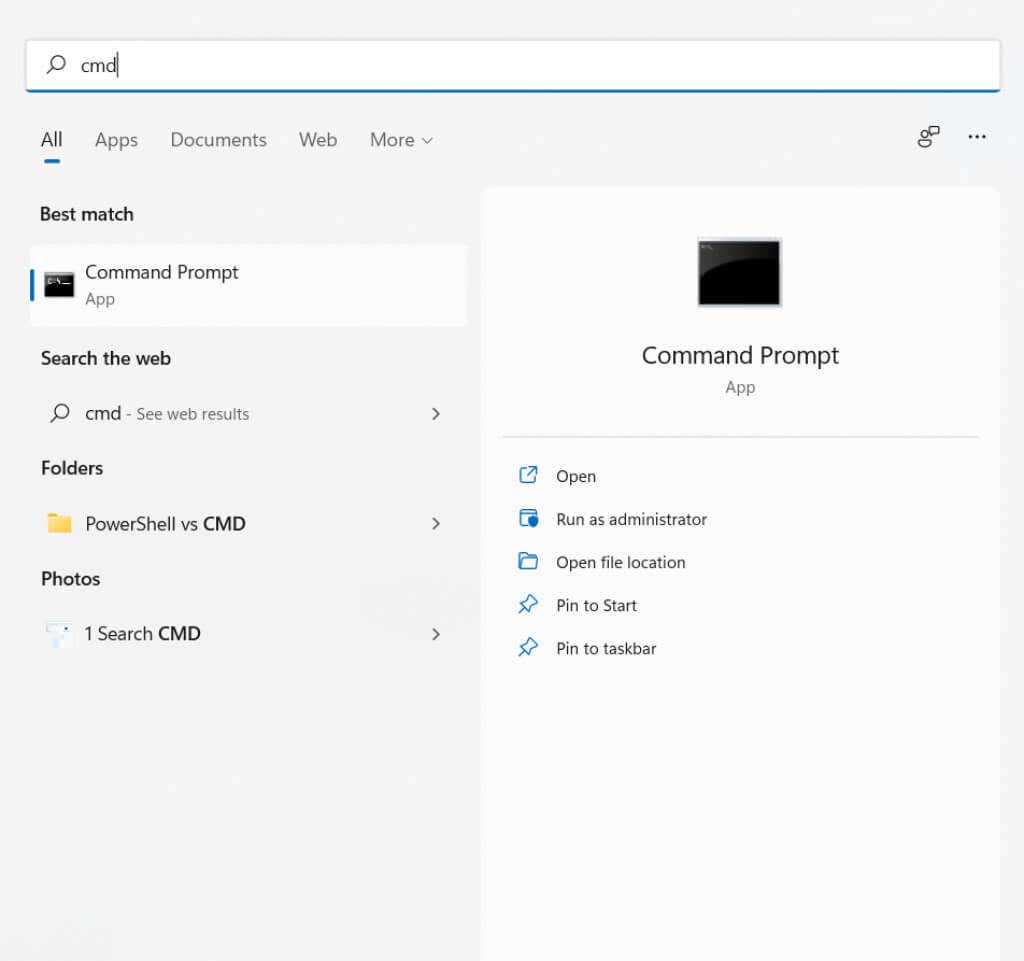
- To repair your PC’s system files using CMD utilities, open the Command Prompt and Run as Administrator. You can find the app by searching with “cmd” in the Start Menu in Windows 11.
- We will begin with a DISM scan to ensure that the system image is not compromised. Enter the following command:
Dism /Online /Cleanup-Image /RestoreHealth
- This triggers a full scan of the local image, using a downloaded image from Microsoft as a base. DISM will automatically fix any deviations found during this scan, restoring the system image to a pristine condition.
- Now we can run an SFC scan without worrying about issues with the system image itself. Just enter sfc /scannow to repair your OS of any data corruption.
- SFC will verify every system file, replacing any missing entries or corrupted data. By the time the scan has finished, your Windows installation will be repaired to a fully functional state.
Fix 3: Update BIOS
If repairing your OS and removing all cleanup apps didn’t fix your issue, the BIOS is the next stop. Updating the BIOS isn’t too difficult these days, thanks to installation packages compiled by motherboard manufacturers that flash the chip automatically.
Updating your BIOS is always risky, as losing power during the process can brick your computer completely. So only try this out with a guaranteed power backup and an understanding of the risks involved.
There will be no exact steps for this section, as the process of flashing the BIOS can vary from motherboard to motherboard. Some systems will have a method of updating the BIOS from within Windows, while others require preparing a USB stick with the necessary files. You can find more information about BIOS updates in our dedicated article.
Fix 4: Check the RAM for Errors
After ruling out all possible software issues, the only thing left is to check the hardware. This can mean the RAM or the HDD.
Checking the RAM for errors is easy. There are multiple methods for testing the memory in Windows, from the built-in memory diagnostic tool to third-party utilities like MemTest86.
Some of these testers work by checking the memory without the OS entirely booting into Windows, while others test the RAM with Windows still running. Both methods should be used to comprehensively verify memory health.
- For this guide, we will demonstrate RAM testing using PassMark’s MemTest86, the popular memory-checking tool. You can download the free version of the software from the official website.
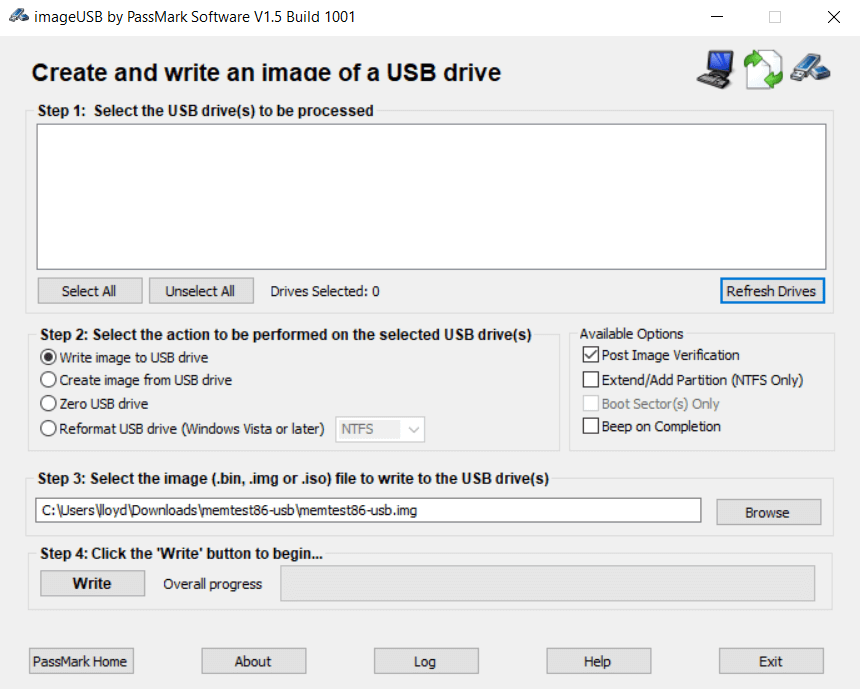
- MemTest86 is a preboot memory tester, so it needs to be run from a USB drive. The application setup will help you format and prepare a bootable flash drive for this test.
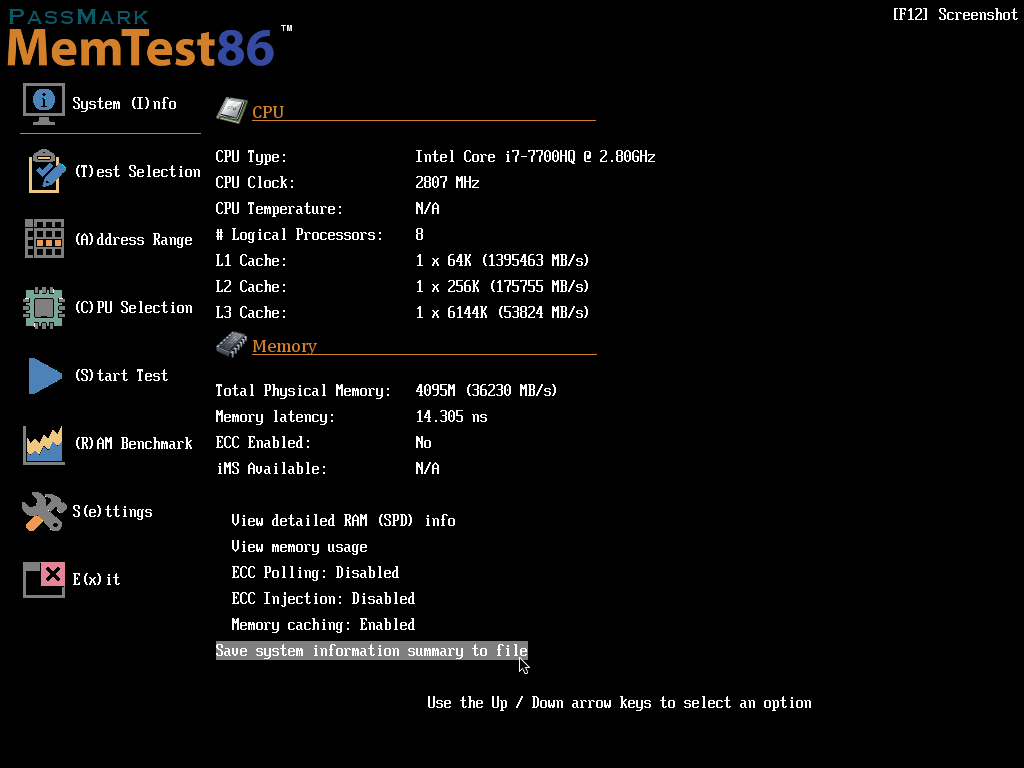
- Plug the prepared USB into your computer and reboot it. If your boot options are set correctly, you will boot from the flash drive, opening the memory testing tool. Configure the options to your liking (not that it is needed) and start testing your RAM.
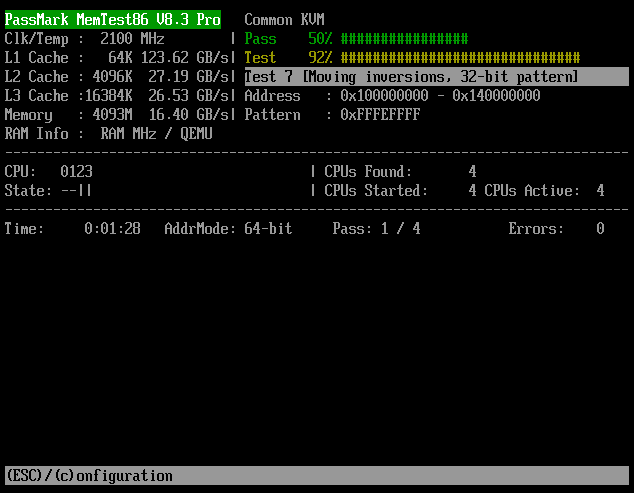
- The UI is pretty barebones, but clearly communicates the progress as MemTest86 scans your memory sticks for issues. As it runs multiple tests, it can take a while to complete.
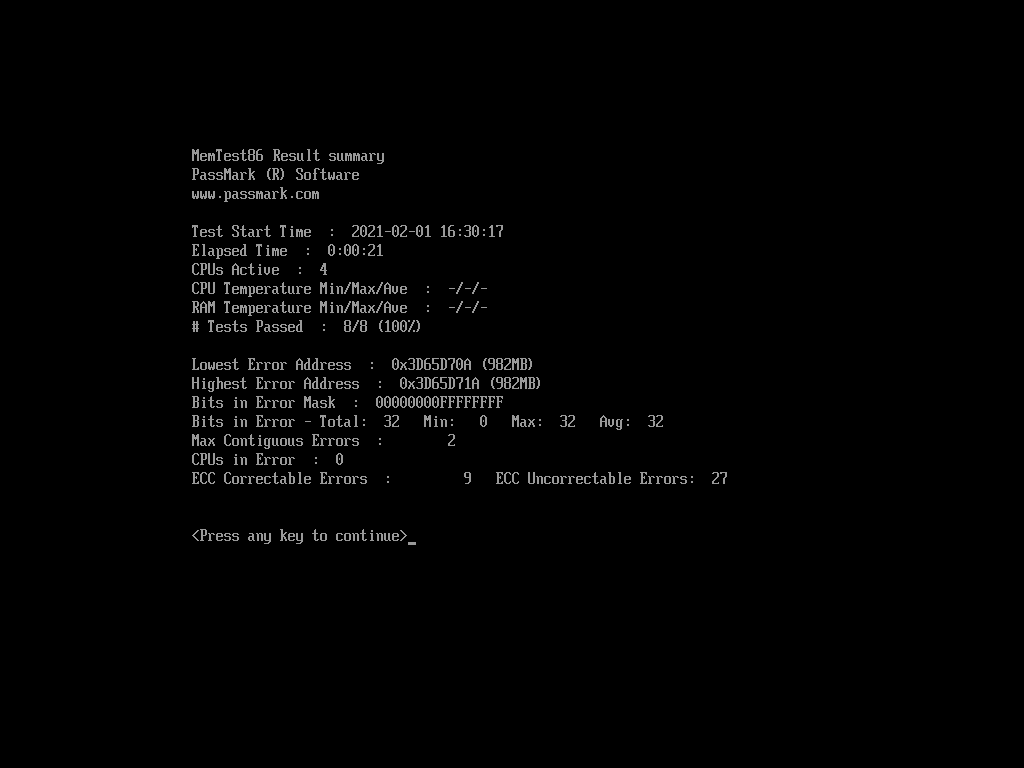
- When all the tests are complete, you will be presented with a summary of the results. Don’t worry about writing it all down – you can save a detailed report in the next step.
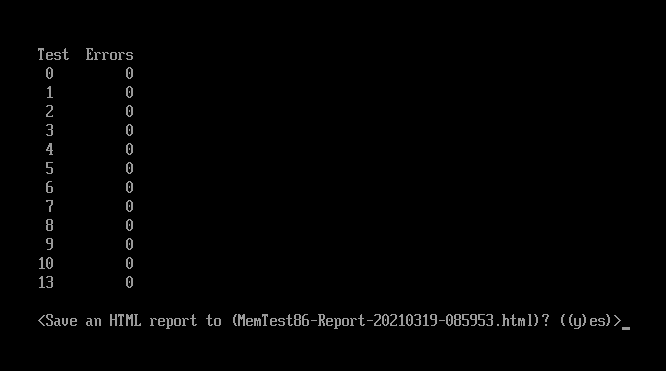
- MemTest86 can generate an HTML report containing its findings in a more user-friendly format. Hit y to confirm.
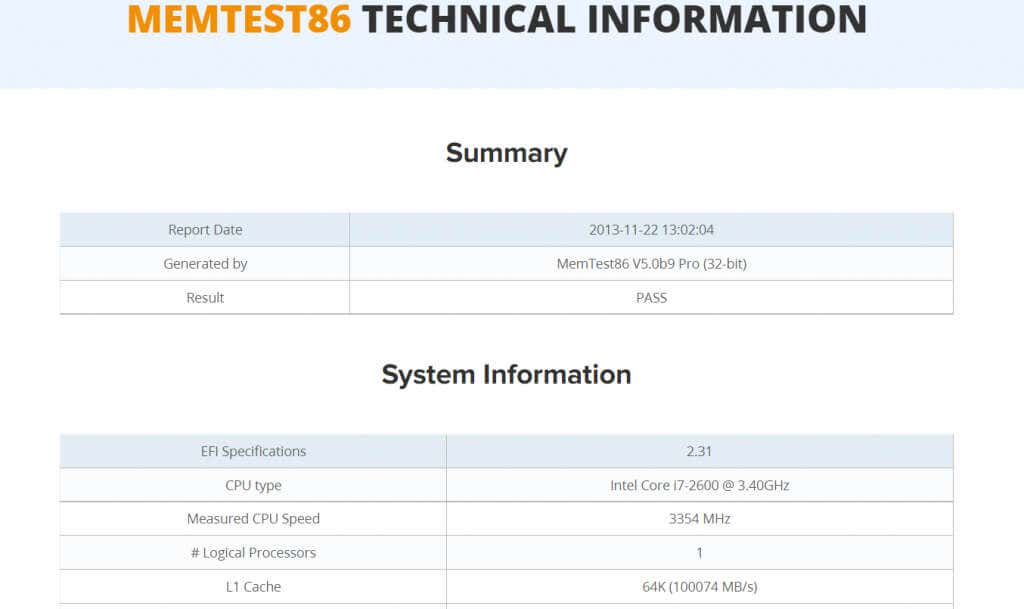
- After this, your PC will boot up normally. You will find the compiled HTML report on the USB drive you prepared, with a general pass/fail verdict and a detailed breakdown of the RAM’s performance.
Fix 5: Scan the Hard Disk for Issues
The hard disk is a more common point of failure than the RAM, especially if you are still using old-school Hard Disk Drives (HDD) with spinning platters and magnetic coatings. And a malfunctioning storage can often fail at recording the dump file.
In a relatively modern hard disk, it is possible to get an accurate look at its health simply by looking at its S.M.A.R.T. status. For older disks, we have to use other methods.
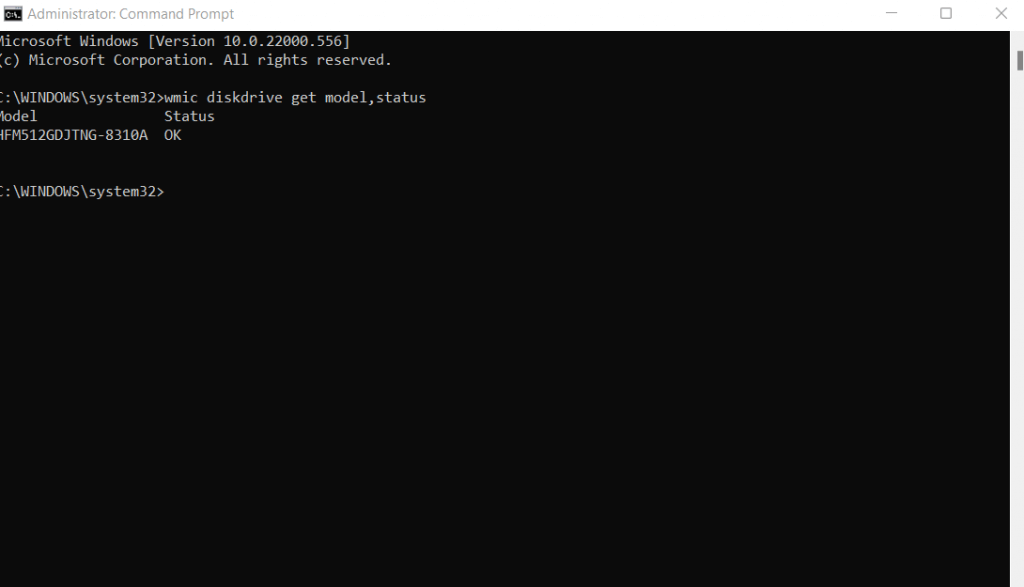
- You can get a basic read of the S.M.A.R.T. status by just using the command prompt. This will only work if your HDD supports the technology. Still, open the Command Prompt to try it out.
- Type the following command and press Enter: wmic diskdrive get model,status
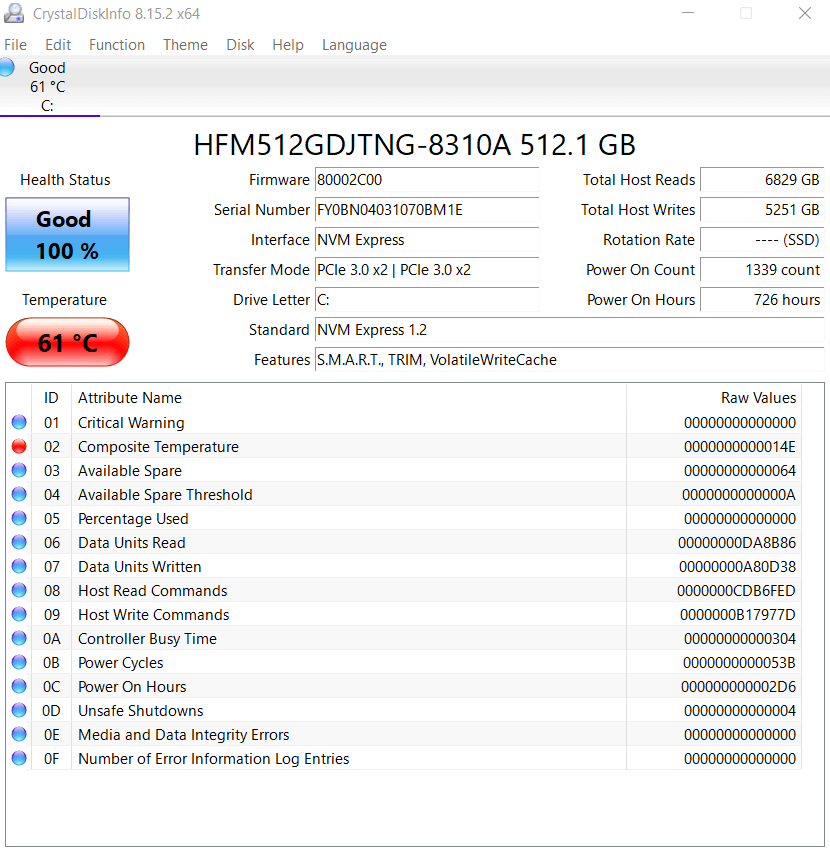
- The results are…underwhelming. All you will get is an OK, or a Pred Fail if the drive is about to die. You will need to use a third-party tool to get a more detailed report of its health.
- CrystalDisk Info is a good free option. Just download and run the app to get a complete analysis of your hard drive’s condition.
What Is the Best Way to Fix the “Dump File Creation Failed” Error in Windows?
As the most common reason for seeing a “dump file creation failed” message is corrupted system files, repairing your OS with DISM and SFC should be the first thing you try. These commands can restore your Windows installation without losing any data.
Overactive disk cleaning programs are another potential factor, so it is a good idea to comb through your installed apps and remove any such software.
And while you can update your BIOS easily, there is no troubleshooting your hard drive or RAM through software alone. All you can do is check their health and ensure everything is working correctly.
