Your headphones are not getting recognized by Windows 10? Or your headphones are not working in Windows 10? The problem lies with the incorrect sound configuration, damaged cable, headphone jack might be damaged, Bluetooth connectivity issues, etc. These are just a few issues that can cause the headphone not working issue, but the cause can vary as different users have different system configurations and setups.
How to Fix Headphones Not Working in Windows 10
Here is how you can fix the headphone jack to send audio to your external speaker system:
Method 1: Restart your Computer
Although this doesn’t seem like a fix but has helped many people. Just plug in your headphones in your PC then reboot your PC. Once the system restarts check if your headphone starts working or not.
Method 2: Set Your Headphone as Default Device
1. Press Windows Key + I to open Settings then select System.
2. From the left-hand tab, click on Sound.
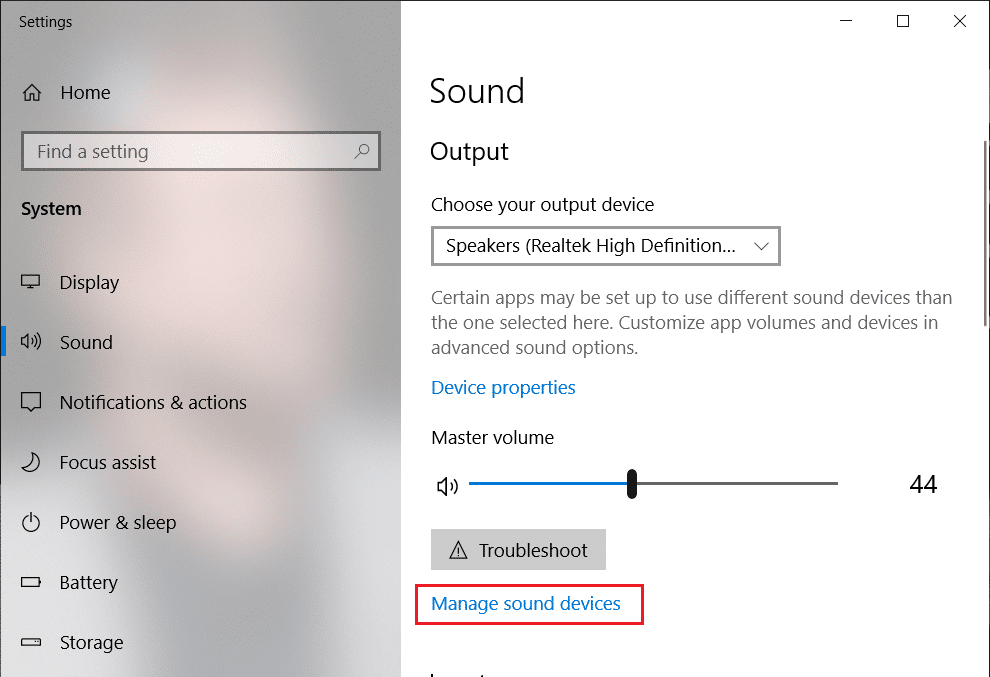
3. Now under Output click on “Manage sound devices“.
4. Under Output devices, click on Speakers (which are currently Disabled) then click on the Enable button.

5. Now go back to the Sound Settings and from the “Choose your output device” drop-down select your headphones from the list.
If this doesn’t work then you can always use the traditional way to set your Headphones as the default device:
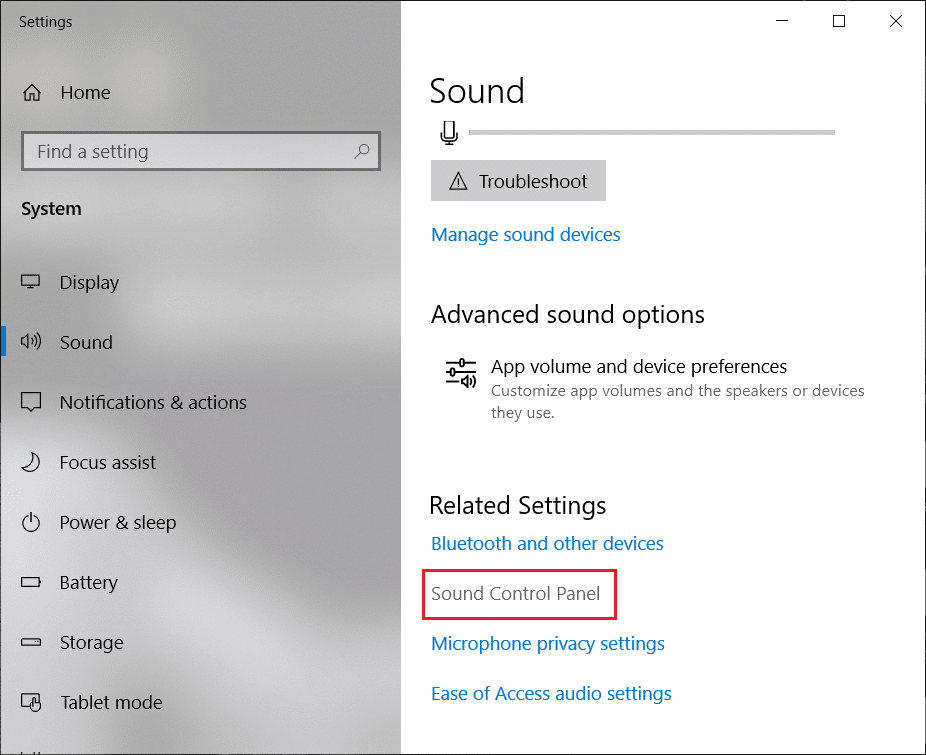
1. Right-click on your Volume icon and select “Open Sound Settings”. Under Related Settings click on the Sound Control Panel.
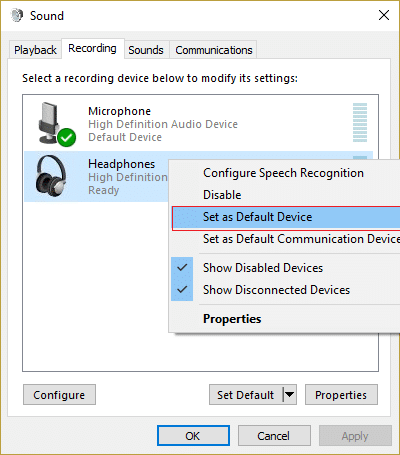
2. Make sure you are on the Playback tab. Right-click in an empty area and select “Show Disabled device“.
3. Now right-click on your Headphones and select “Set as Default Device“.
This should definitely help you resolve the headphone problem. If not then continue with the next method.
Method 3: Let Windows Automatically Update Your Audio/Sound Drivers
1. Right-click on your Volume icon and select “Open Sound Settings”.
![]()
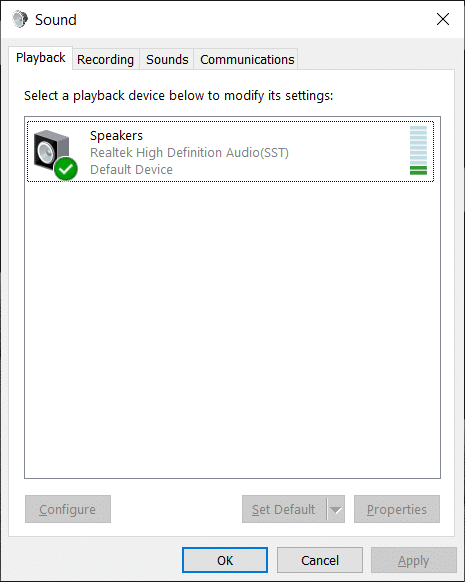
2. Now, under Related Settings click on the Sound Control Panel. Make sure you are on the Playback tab.
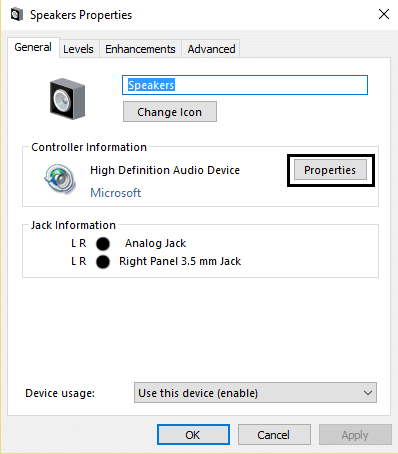
3. Then select your Speakers/Headphones and click on the Properties button.
4. Under the Controller Information click on the Properties button.
5. Click on the Change Settings button (Needs Administrators permission).
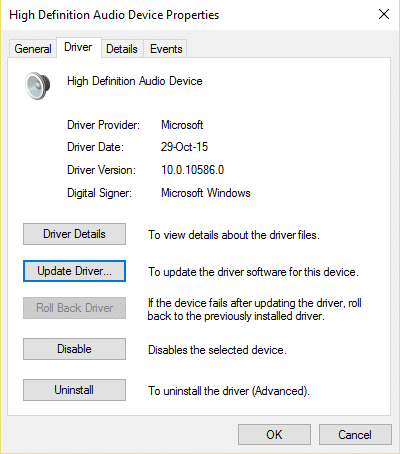
6. Switch to the Driver tab and click on the Update Driver button.
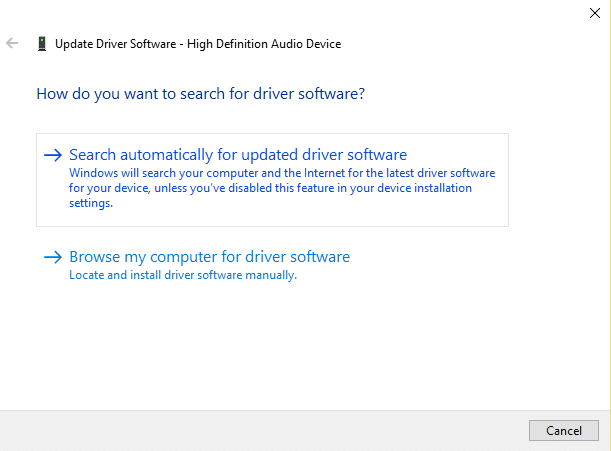
7. Select “Search automatically for updated driver software“.
8. Done! The sound drivers will automatically update and now you can check if you are able to fix headphone jack not working in Windows 10 issue.
Method 4: Change Default Sound Format
1. Right-click on your Volume icon and select “Open Sound Settings”.
2. Now under Related Settings, click on the Sound Control Panel.
3. Make sure you are on the Playback tab. Then double click on the Speakers/Headphones (default).
Note: The Headphones will also appear as Speakers.
4. Switch to the Advanced tab. From the “Default Format” drop-down try changing to a different format and click Test each time you change it to a new format.
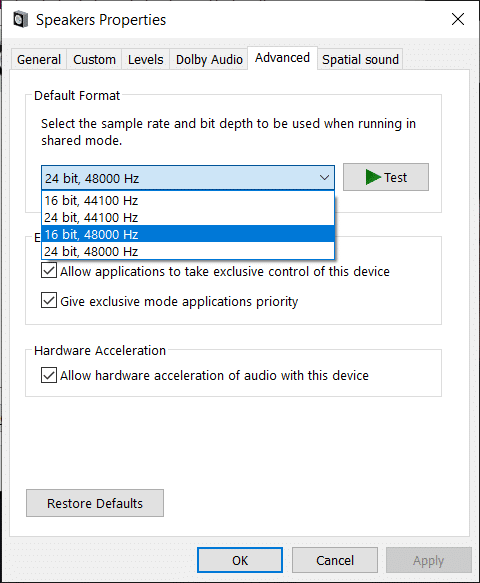
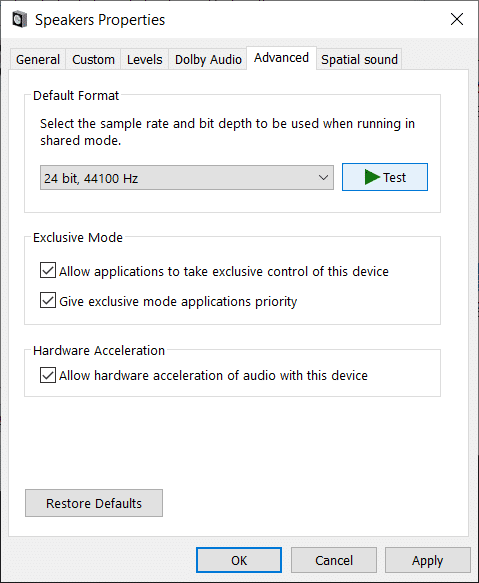
5. Once you start hearing audio in your headphones, click Apply followed by OK.
Method 5: Manually Update Your Sound/Audio Drivers
1. Right-click on “This PC” or “My Computer” and select Properties.
2. In Properties windows in the left plane select “Device Manager.”
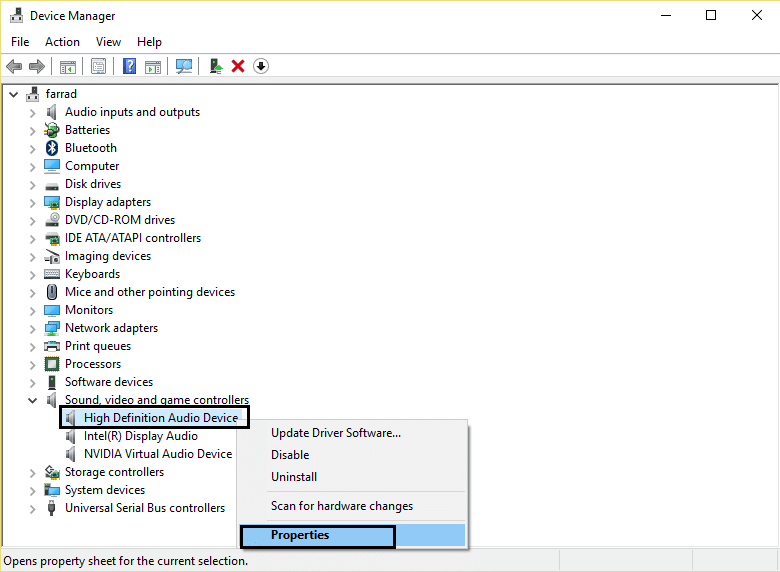
3. Expand Sound, Video, and Game controllers, then right-click on High Definition Audio Device and select Properties.
4. Switch to the Driver tab in the High Definition Audio Device Properties window and click on the Update Driver button.
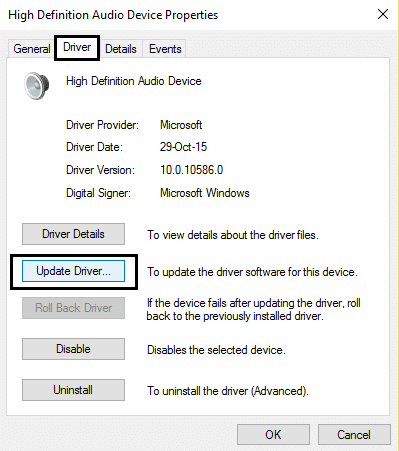
This should update the High Definition Audio Device Drivers. Just restart your PC and see if you’re able to resolve headphones not detected in Windows 10 issue.
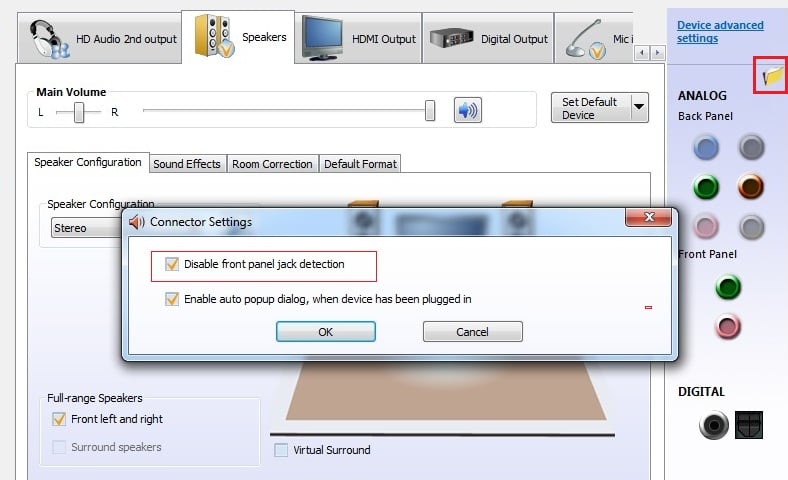
Method 6: Disable Front Panel Jack Detection
If you have installed the Realtek software, open the Realtek HD Audio Manager, and check the “Disable front panel jack detection” option under Connector Settings in the right-side panel. The headphones and other audio devices should work without any problem.
Method 7: Run Audio Troubleshooter
1. Press Windows Key + I to open Settings then click on the Update & Security icon.
2. From the left-hand menu make sure to select Troubleshoot.
3. Now under the “Get up and running” section, click on “Playing Audio“.
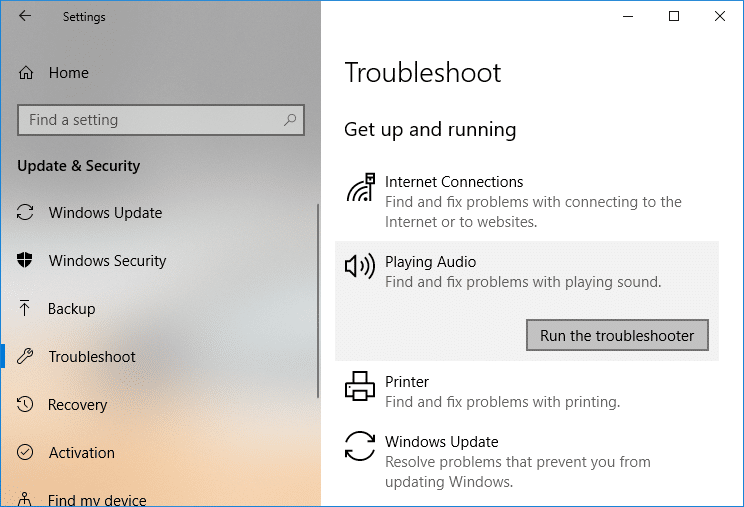
4. Next, click on Run the troubleshooter and follow on-screen instructions to fix the headphones not working issue.
Method 8: Disable Audio Enhancements
1. Right-click on the Volume or Speaker icon in Taskbar and select Sound.
2. Next, switch to the Playback tab then right-click on Speakers and select Properties.
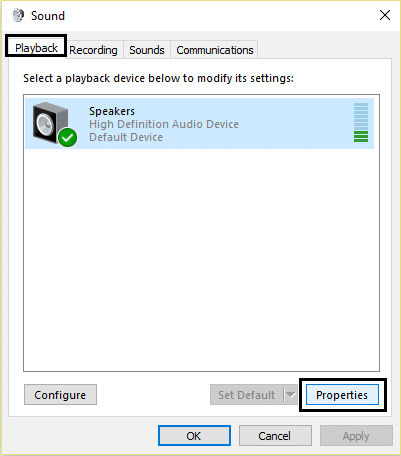
3. Switch to the Enhancements tab and tick mark the option ‘Disable all enhancements.’
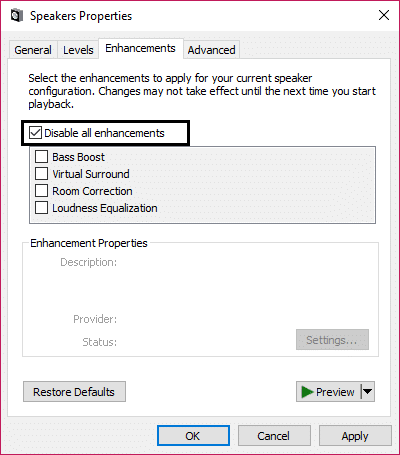
4. Click Apply followed by OK and then restart your PC to save changes.
You may also like:
That’s it, you have successfully fix headphones not working on Windows 10, but if you still have any queries regarding this article please feel free to ask them in the comment section.