After the revelations of the Facebook–Cambridge Analytica data scandal, users have been paying extra attention to what information they share on the social networking platform. Many have even deleted their accounts and left the platform to prevent their private information from being stolen and used for political advertising again. However, leaving Facebook also implies that you won’t be able to use the social network to stay in touch with friends and family, follow your favourite pages or run your own page and benefit from all the networking options. A workaround to keeping your Facebook data from being misused is to exercise control over what data is made public by Facebook.
The platform grants users almost complete control over their privacy and account security. Account-holders can handpick the details that are displayed when someone arrives on their profile, who or who cannot view pictures and videos posted by them (by default, Facebook makes all your posts public), restrict the exploitation of their internet browsing history for targeted ads, deny access to third-party applications, etc. All the privacy settings can be configured from either the mobile application or the Facebook website. Also, the privacy options available to Facebook users keep constantly changing, so the names/labels may be different from what is mentioned in this article. Without further ado, let’s start on how to make the Facebook page or account private.

How to Make Facebook Page or Account Private?
On Mobile Application
1. Launch Facebook’s mobile application and log into the account/page you wish to make private. If you do not have the application, visit Facebook – Apps on Google Play or Facebook on the App Store to download and install it on your Android or iOS device respectively.
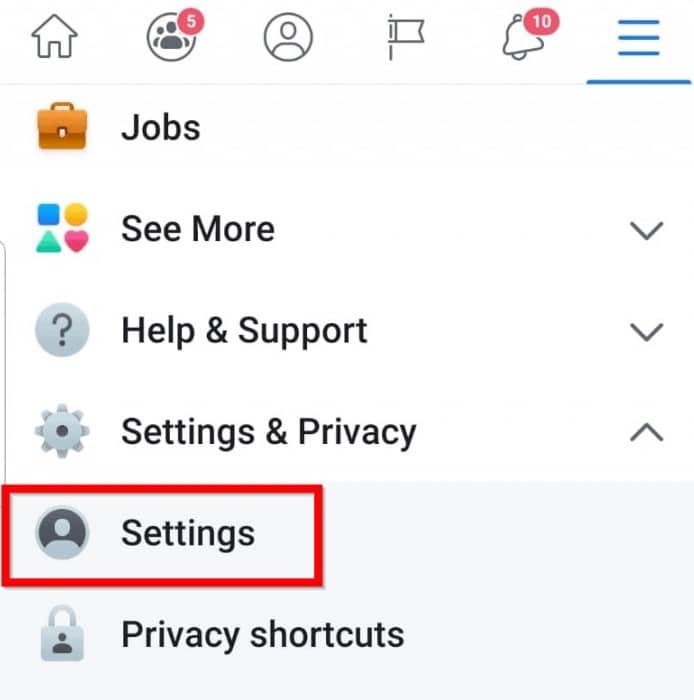
2. Click on the three horizontal bars present at the top right corner of the Facebook application screen.
3. Expand Settings and Privacy by tapping on the downward-facing arrow and tap on Settings to open the same.
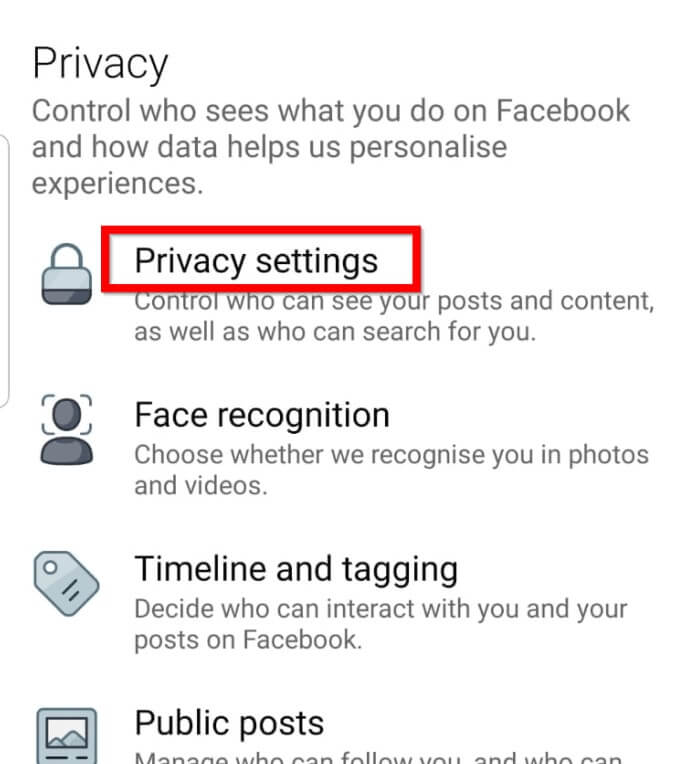
4. Open Privacy Settings.
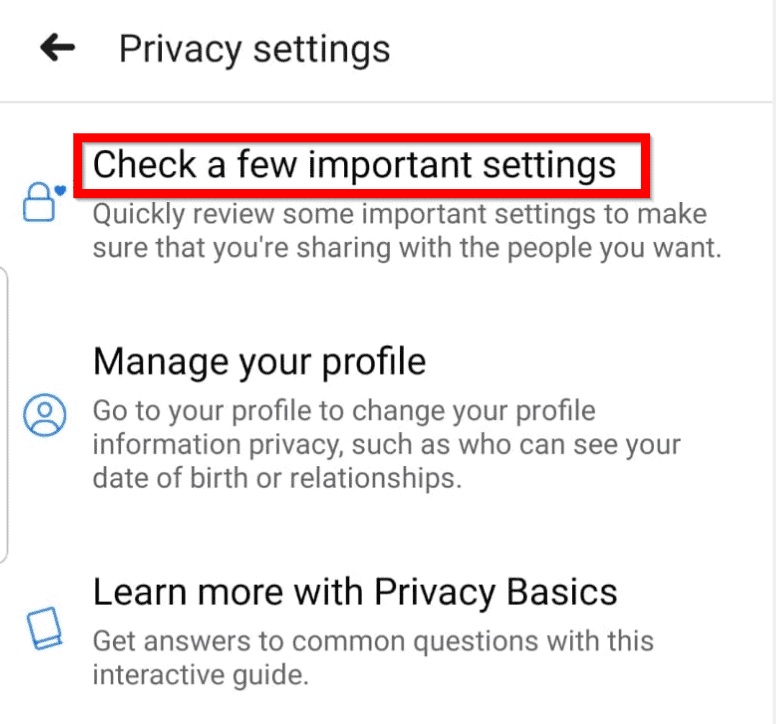
5. Under privacy settings, tap on Check a few important settings to access the Privacy checkup page.
6. Aforementioned, Facebook lets you change the security settings for a number of things, from who can see your posts and friends list to how people find you.
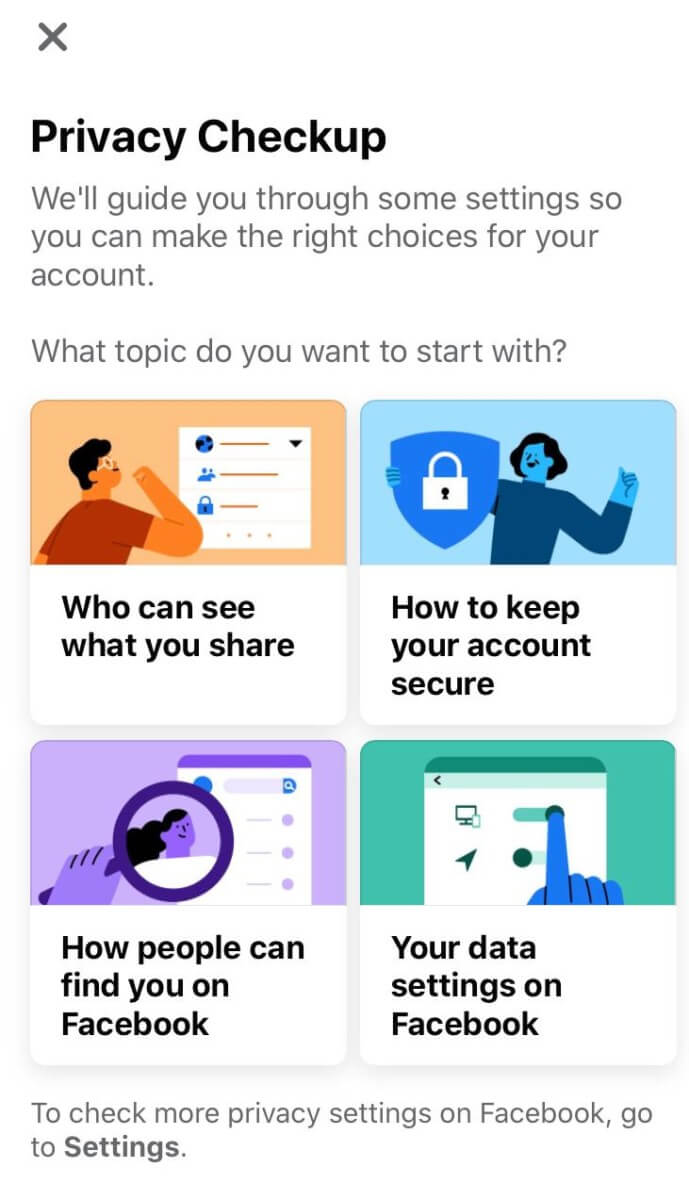
We will walk you through each setting and you can make your own choice on which security option to choose.
As the name suggests, you can choose what others can see on your profile, who can view your posts, etc. Click on the ‘Who can see what you share’ card and then on Continue to modify these settings. Starting off with your personal profile information, i.e, contact number and mail address.
Users can log in to their Facebook accounts using either their email address or phone number; both of these are also required for password recovery purposes and thus linked with everyone’s account. Unless you run a business or would love for your friends/followers and random strangers to directly contact you on your phone, change the privacy setting for your phone number to Only me. Similarly, depending on who you would like to see your mail address, and potentially contact you via email, set the appropriate privacy setting. Never keep any personal information public as it may lead to a lot of problems. Click on Next to continue.
On the next screen, you can choose who can view your future posts and modify the visibility of the things you have previously posted. The four different privacy settings available for future posts are Your Friends, Friends except for specified friends, Specific Friends, and Only Me. Again, choose the option you desire. If you do not wish to set the same privacy setting for all your future posts, modify a post’s visibility before recklessly clicking on the Post button. The past posts setting can be used to change the privacy of all the cringy things you posted in your teenage emo years so they are only visible to your friends and not to friends of friends or the public.
The final setting in the ‘Who can see what you share’ section is the blocking list. Here you can have a look at all individuals that are blocked from interacting with you & your posts and also add someone new to the blocking list. To block someone, simply tap on ‘Add to blocked list’ and search for their profile. Once you are happy with all the privacy settings, tap on Review Another Topic.
Also Read: Fix Facebook Messenger Waiting for Network Error
How people can find you on Facebook?
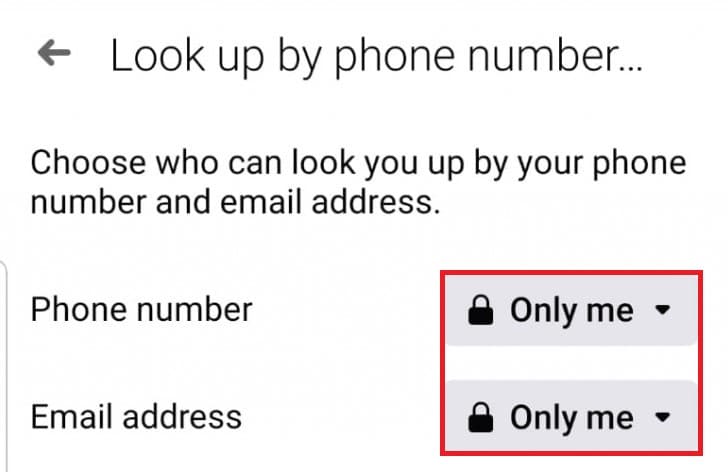
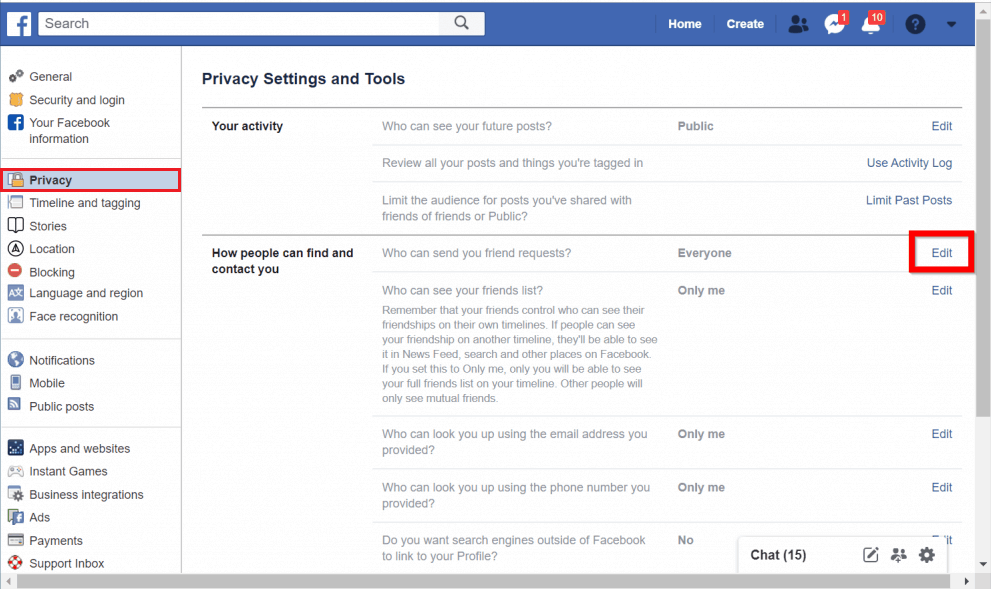
This section includes settings for who can send you friend requests, who can search for your profile using your phone number or email address, and if search engines outside Facebook are allowed to link to your profile. All of these are pretty explanatory. You can either allow everyone on Facebook or only friends of friends to send you a friend request. Simply click on the downward-facing arrow next to Everyone and choose the setting you want. Click on Next to move on. On the Lookup by phone number screen, set the privacy setting for your phone and email address to Only me to avoid any security issues.

The option to change if search engines like Google can display/link to your Facebook profile is not available on Facebook’s mobile application and only present on its website. If you are a brand looking to attract more consumers and followers, set this setting to yes and if you do not want search engines to display your profile, select no. Click on Review another topic to exit.
Your Data Settings on Facebook
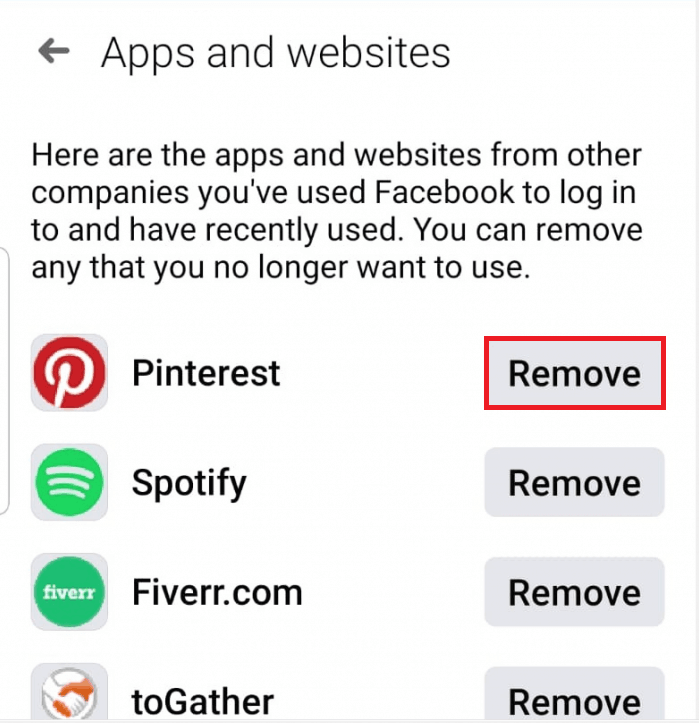
This section lists all the third-party applications and websites that can access your Facebook account. Every app/website you log into using Facebook gets access to your account. Simply click on Remove to restrict a service from accessing your Facebook details.
That’s about all the privacy settings you can change from the mobile application, whereas Facebook’s web client allows users to further privatize their page/account with a few additional settings. Let’s see how to make the Facebook page or account private using Facebook web client.
Make Facebook Account Private Using Facebook Web App
1. Click on the little downward-facing arrow at the top-right corner and from the drop-down menu, click on Settings (or Settings & Privacy and then Settings).
2. Switch to Privacy Settings from the left menu.
3. The various privacy settings found on the mobile application can be found here too. To change a setting, click on the Edit button to its right and select the desired option from the drop-down menu.
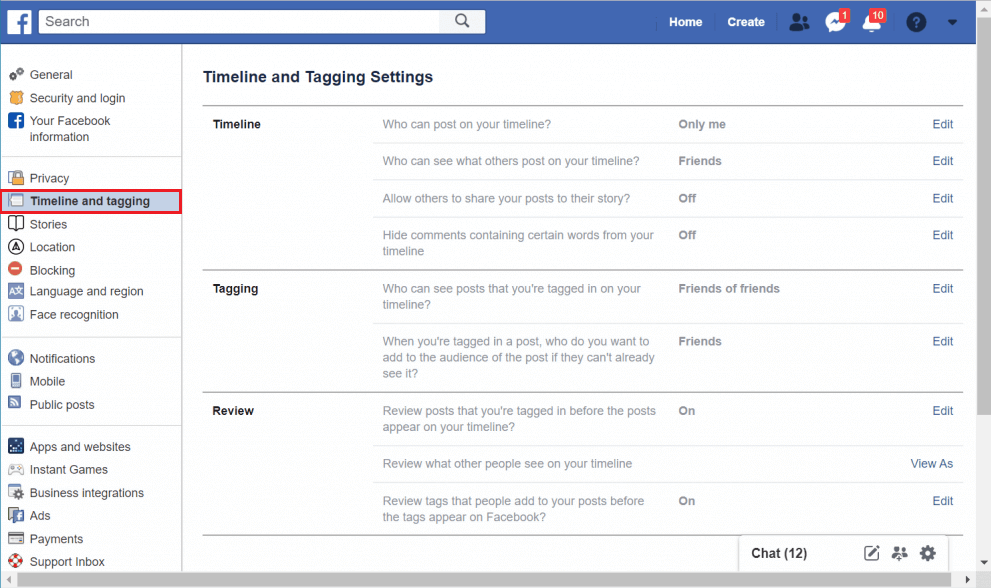
4. All of us have at least one weird friend or family member that keeps tagging us in their pictures. To prevent others from tagging you or posting on your timeline, move to the Timeline and Tagging page, and modify the individual settings to your liking or as shown below.
5. To restrict third-party applications from accessing your account, click on Apps present in the left navigation menu. Click on any app to view what data it has access to and modify the same.
6. As you might be aware, Facebook also uses your personal data and your browsing history around the internet to send you targeted ads. If you would like to stop seeing these creepy ads, go to the ads setting page and set the answer to all the questions as No.
To make your account/page even more private, go to your profile page (Timeline) and click on the Edit Details button. In the following pop-up, toggle off the switch next to every piece of information (current city, relationship status, education, etc.) you would like to keep private. To make a certain photo album private, click on the three horizontal dots next to the album title and select Edit album. Click on the shaded Friends option and select the audience.
Recommended:
While Facebook does allow its users to control all aspects of their account’s privacy and security, users must refrain from sharing any personal information that can lead to identity theft or any other serious issues. Similarly, oversharing on any social network can be troublesome. If you need any help understanding a privacy setting or what would be the appropriate setting to set, contact us in the comments below.