How to Prevent Hard Disk from going to Sleep in Windows 10
How to Prevent Hard Disk from going to Sleep in Windows 10: It is possible that after the recent Windows 10 update, you may notice that your hard disk turns off after a specific period of inactivity. This is done in order to save battery which in turns improves the battery life of your PC. This setting is configured using “Turn off hard disk after” setting in Power Options which lets users set a specified time (of inactivity) after which the hard disk will power down. This setting doesn’t affect SSD and once the system is brought back from the sleep state, it will take some time for the hard disk to turn ON before you will be able to access it.
But you don’t want your external hard disk or USB to go into sleep state then don’t worry as you can configure each drive or USB to either go into sleep or not after a specified time when your PC is idle. Anyway, without wasting any time let’s see How to Prevent Hard Disk from going to Sleep in Windows 10 with the help of the below-listed tutorial.
How to Prevent Hard Disk from going to Sleep in Windows 10
Make sure to create a restore point just in case something goes wrong.
Method 1: Prevent Hard Disk from going to Sleep in Power Options
1.Right-click on Power icon on the taskbar then select Power Options.
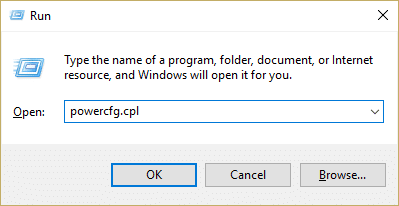
Note: To directly open the advanced power settings, simply press Windows Key + R then type “control.exe powercfg.cpl,,3” (without quotes) and hit Enter.
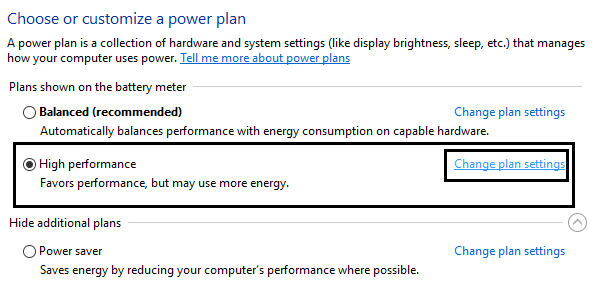
2.Next to your currently selected power plan click on “Change plan settings” link.
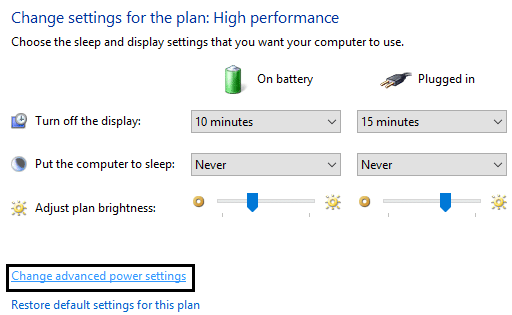
3.On the next screen, click on “Change advanced power settings” link at the bottom.
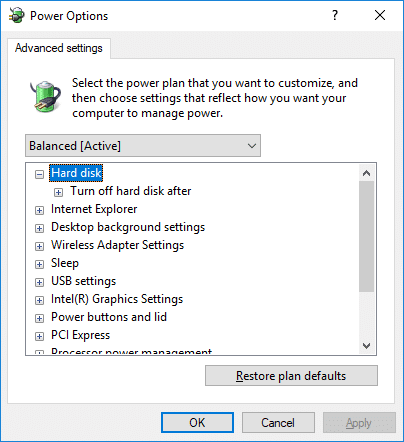
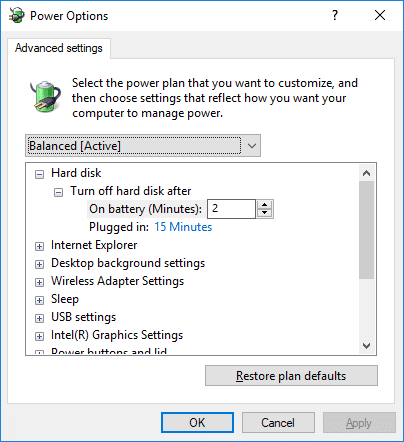
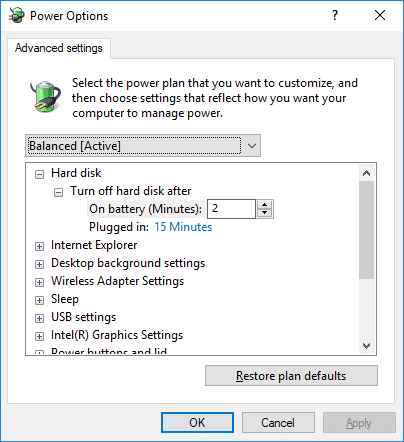
4.Expand Hard disk and similarly expand “Turn off hard disk after” then change the settings for “On battery” and “Plugged in” to specify after how many minutes (of idle time) you want the hard disk to turn off.
Note: The default is 20 minutes and it is not recommended to set a low amount of minutes. You can also set the above settings to Never if you don’t want to turn off hard disk after PC inactivity.
5.Click Apply followed by OK.
6.Reboot your PC to save changes
Method 2: Prevent Hard Disk from going to Sleep in Windows 10 using Command Prompt
1.Press Windows Key + X then select Command Prompt (Admin).
2.Type the following command into cmd and hit Enter:
On Battery: powercfg /SETDCVALUEINDEX SCHEME_CURRENT 0012ee47-9041-4b5d-9b77-535fba8b1442 6738e2c4-e8a5-4a42-b16a-e040e769756e seconds
Plugged in: powercfg /SETACVALUEINDEX SCHEME_CURRENT 0012ee47-9041-4b5d-9b77-535fba8b1442 6738e2c4-e8a5-4a42-b16a-e040e769756e seconds
Note: Replace seconds with how many seconds you want to turn off hard disk after PC inactivity.
3.Also, using 0 (zero) will be the same as “Never” and the default value is 1200 seconds (20 minutes).
Note: It is not recommended to set the time below 20 minutes as doing so will cause more wear and tear on HDDs.
4.Close cmd and restart your PC.
Recommended:
That’s it you have successfully learned How to Prevent Hard Disk from going to Sleep in Windows 10 but if you still have any queries regarding this tutorial then feel free to ask them in the comment’s section.
