How to Remove Instagram Filter from Photo
Every month, one billion individuals use the well-known social networking platform, known as Instagram. Each day, the app gains thousands of new users. And every second, a new story or post is added. Because it allows users to interact and share life events, Instagram is very popular among individuals of all ages, from young children to senior citizens. Are you already an Instagram user who uploads photos on Instagram and uses Instagram’s Inbuilt filters and editing tools? If you are, and now, wondering how to remove Instagram filter from photo and how to edit Instagram photos after posting, you are at the right place! So, we are bringing you a helpful guide that will resolve all your queries, like which is the best Instagram editing app and how can you unedit someone else’s photo on Instagram. Let’s dive right in!
How to Remove Instagram Filter from Photo
You will get to know how to remove Instagram filter from photo and unedit someone else’s photo further in this article. Keep reading to learn more about it in detail.
How Can You Edit Your Instagram Photos?
Most people share photos with their friends, family, and followers on Instagram and want to enhance their photos using Instagram’s Editing tools. Instagram provides you with powerful editing tools, you just have to use them properly. Here is a guide on how can you edit your Instagram photos in a few simple steps.
Note: For both Android and iOS Instagram users.
1. Launch the Instagram application on your Android or iOS smartphone.
2. Then, tap on the plus icon from the top right of the screen.
3. Select one or multiple high-quality photos from your Gallery.
4. Tap on the Next arrow icon from the top right corner of your screen.
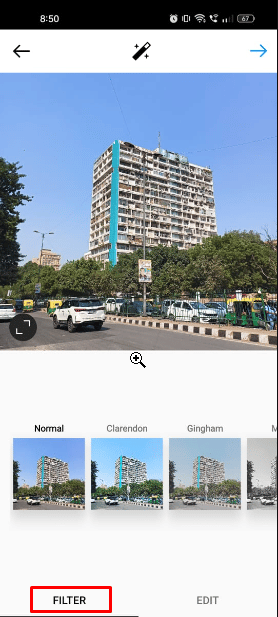
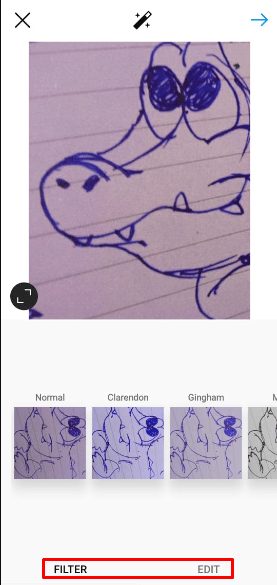
5. Now, tap on the FILTER tab from the bottom bar. You can choose from a wide range of filters and each filter will alter the image’s sharpness, contrast, lighting, and color in various ways. You can adjust the intensity of applied filters to create an eye-pleasing image.
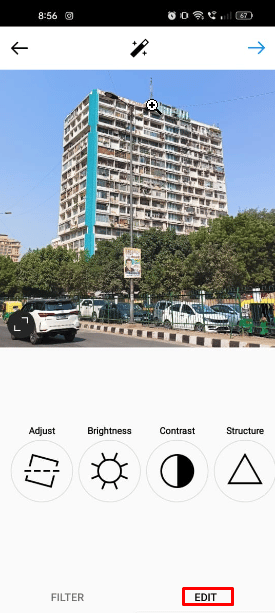
6. Then, tap on the EDIT tab to access Instagram’s basic editing features. You can change the alignment, brightness, contrast, structure, warmth, saturation, highlights, shadows, and sharpness of your image using these editing tools.
Your photo is edited now, you can choose to upload that photo or save it to your Gallery for later use.
Also Read: How to Reverse Image Search on Instagram
What is the Best Instagram Editing App?
If you want to upload top-notch images on your Instagram feeds, you should start using Instagram image editing apps and software which makes your feed more aesthetically beautiful and improves your social media presence. But there are a lot of editing apps available on the App Store and Play Store. So, which is the best Instagram editing app? The answer to this question depends on what you want your photos to look like.
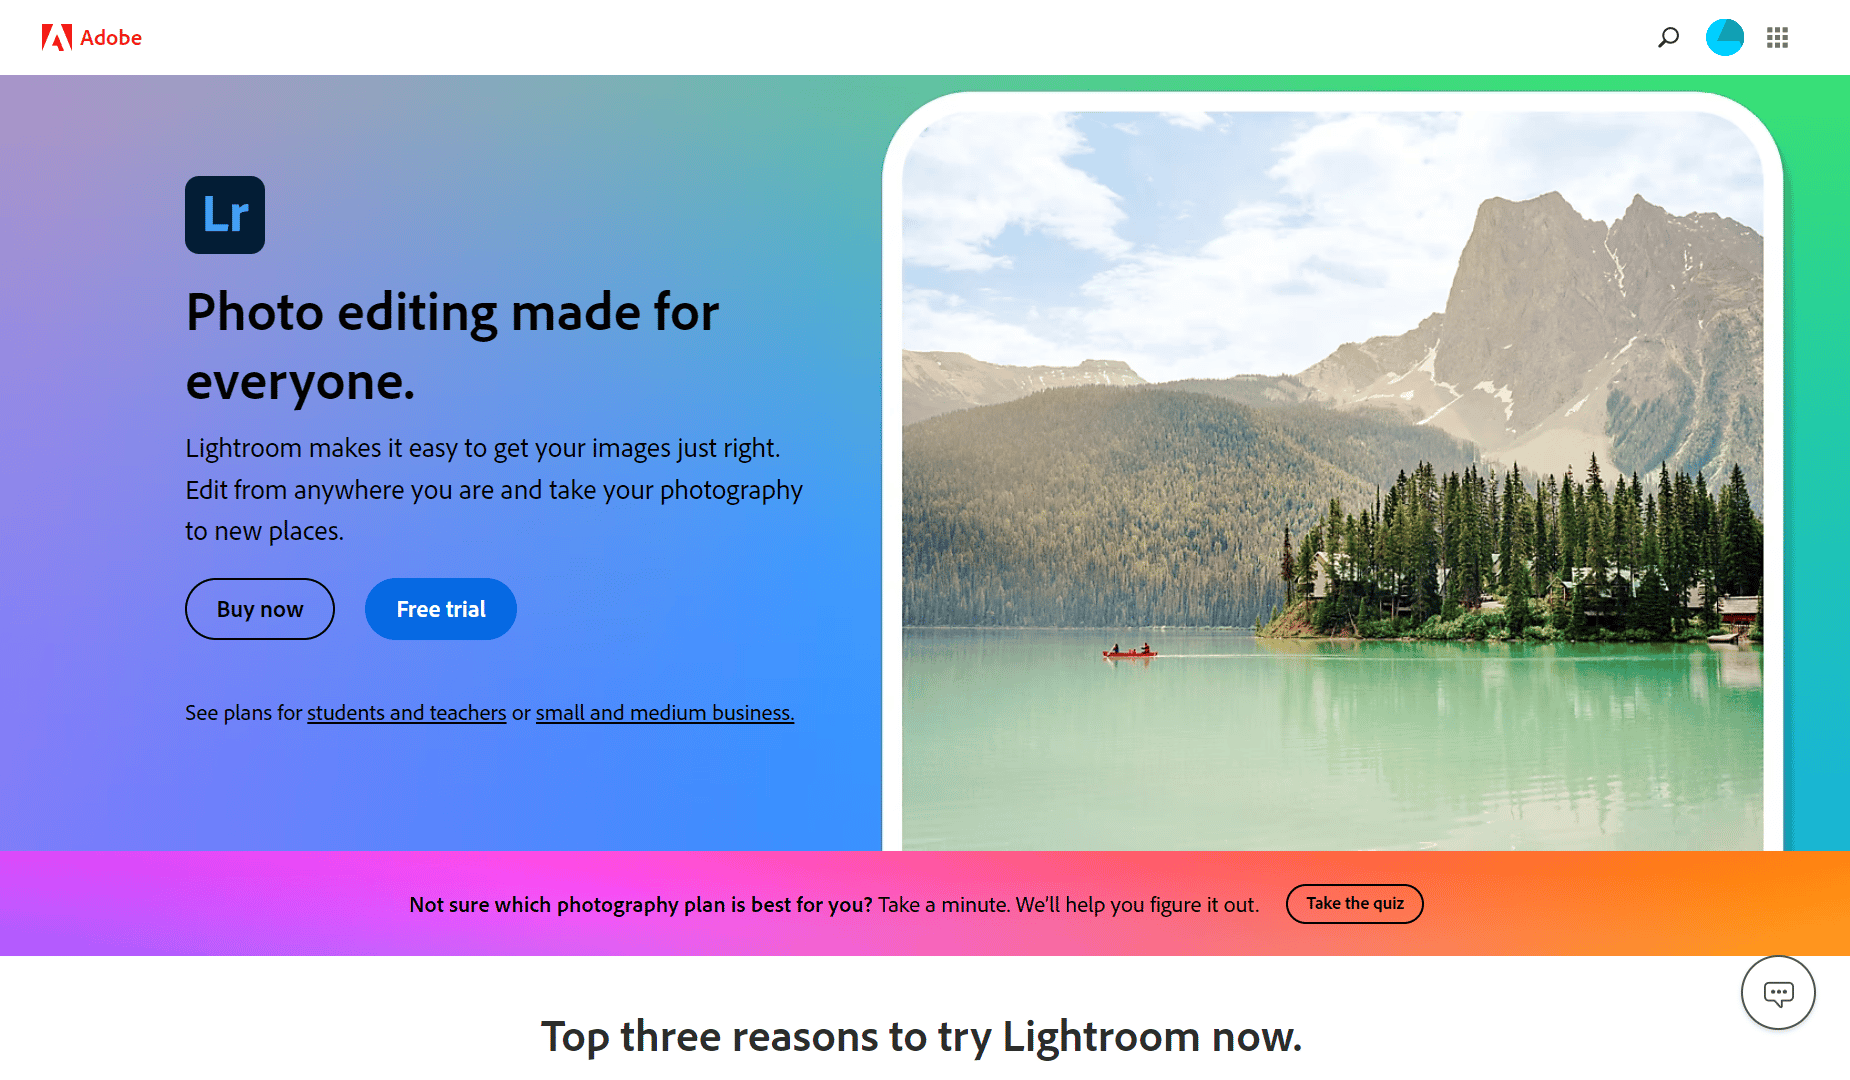
Some of the reasonable options are Adobe Lightroom Photo Editor, VSCO, Afterlight, and Google Snapseed. All of these apps have inbuilt tools present that can enhance your photos with a single tap. And these editing apps are filled with lots of free and paid features, so you can choose any of these to edit your Instagram photos.
How Do You Edit Instagram Photos in Photoshop?
You can use these simple tricks to make your photos look more eye-pleasing on Instagram. Here is how you can edit Instagram photos in Photoshop in a few simple steps.
Note: Adobe Photoshop Express app is used for the steps mentioned below for demonstration purposes.
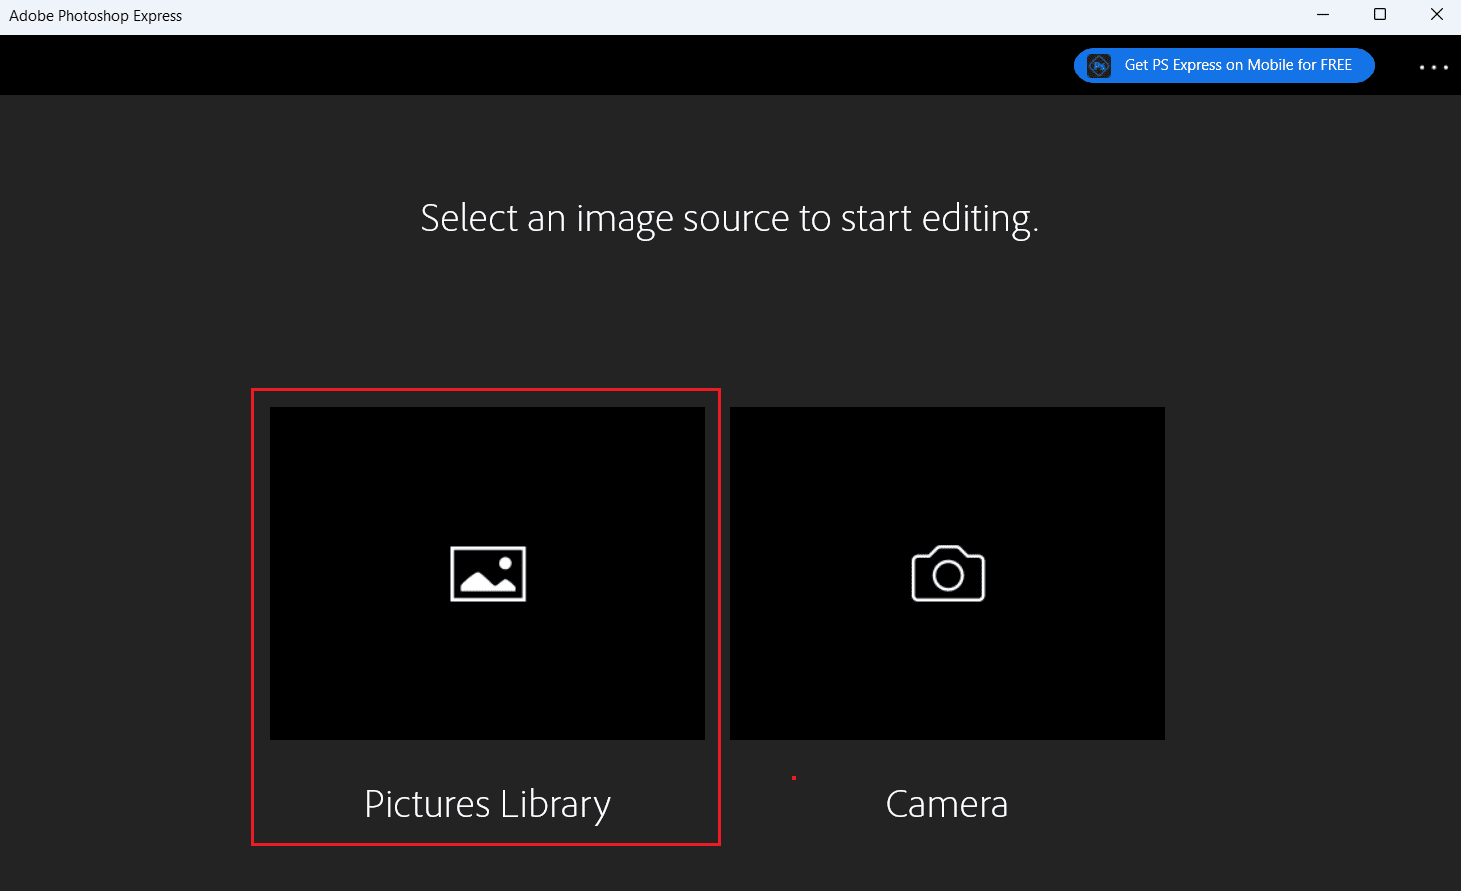
1. Launch the Adobe Photoshop Express app on your desktop.
2. Click on Pictures Library.
3. Select the desired photo you want to upload on Instagram.
Note 1: Choose the optimum aspect ratio. The best ratio for photos on Instagram is 4:5.
Note 2: Make sure you have chosen the highest resolution for your photo. The recommended resolution is between 566 and 1350 pixels.
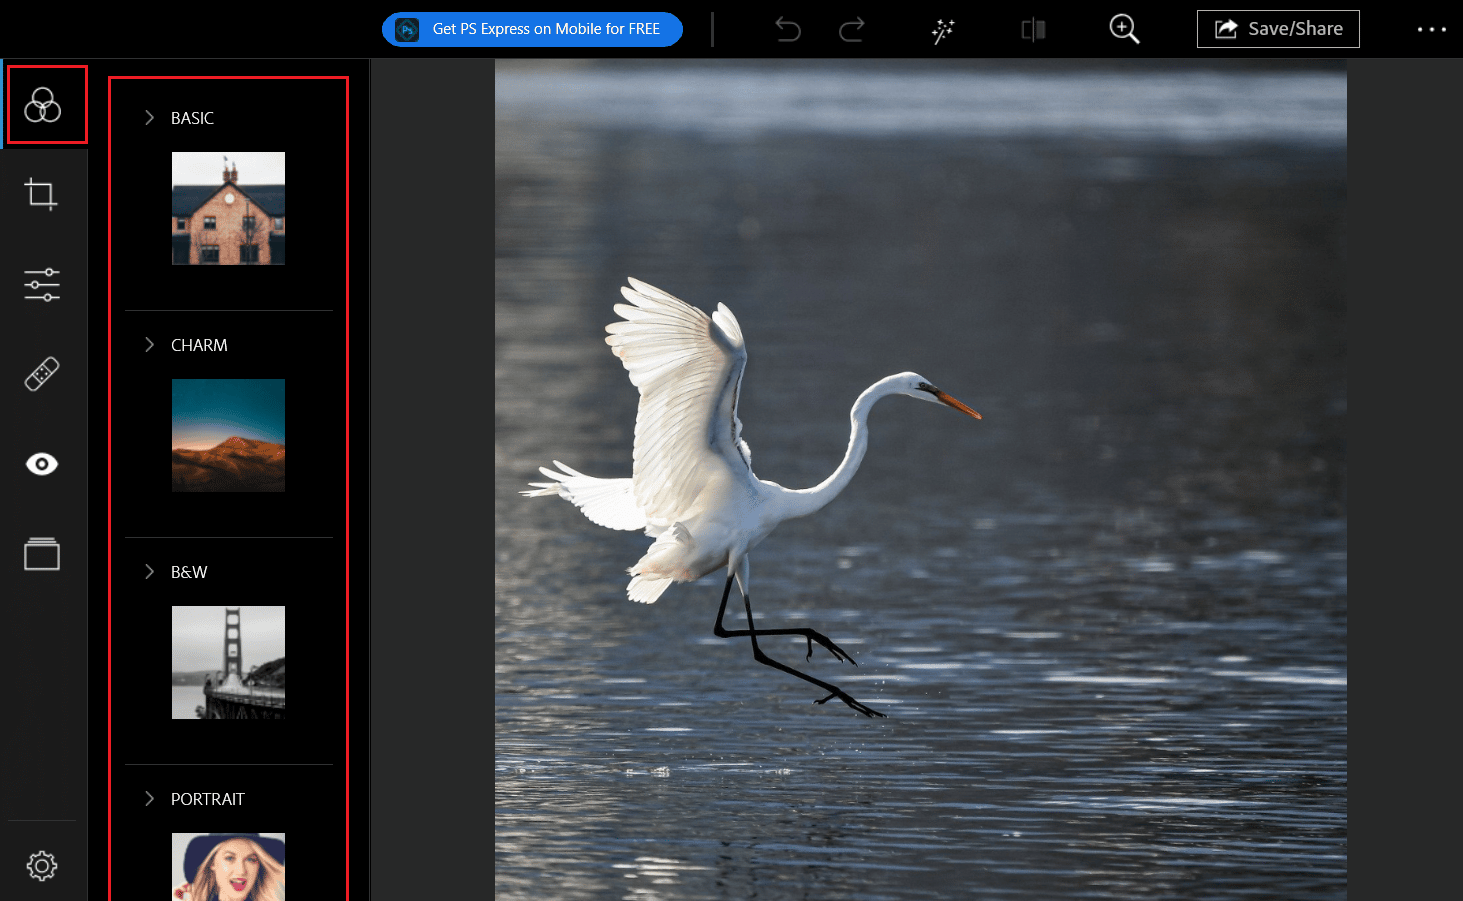
4. Now, click on the Looks tab from the left pane and select the desired looks you want to apply to your photo.
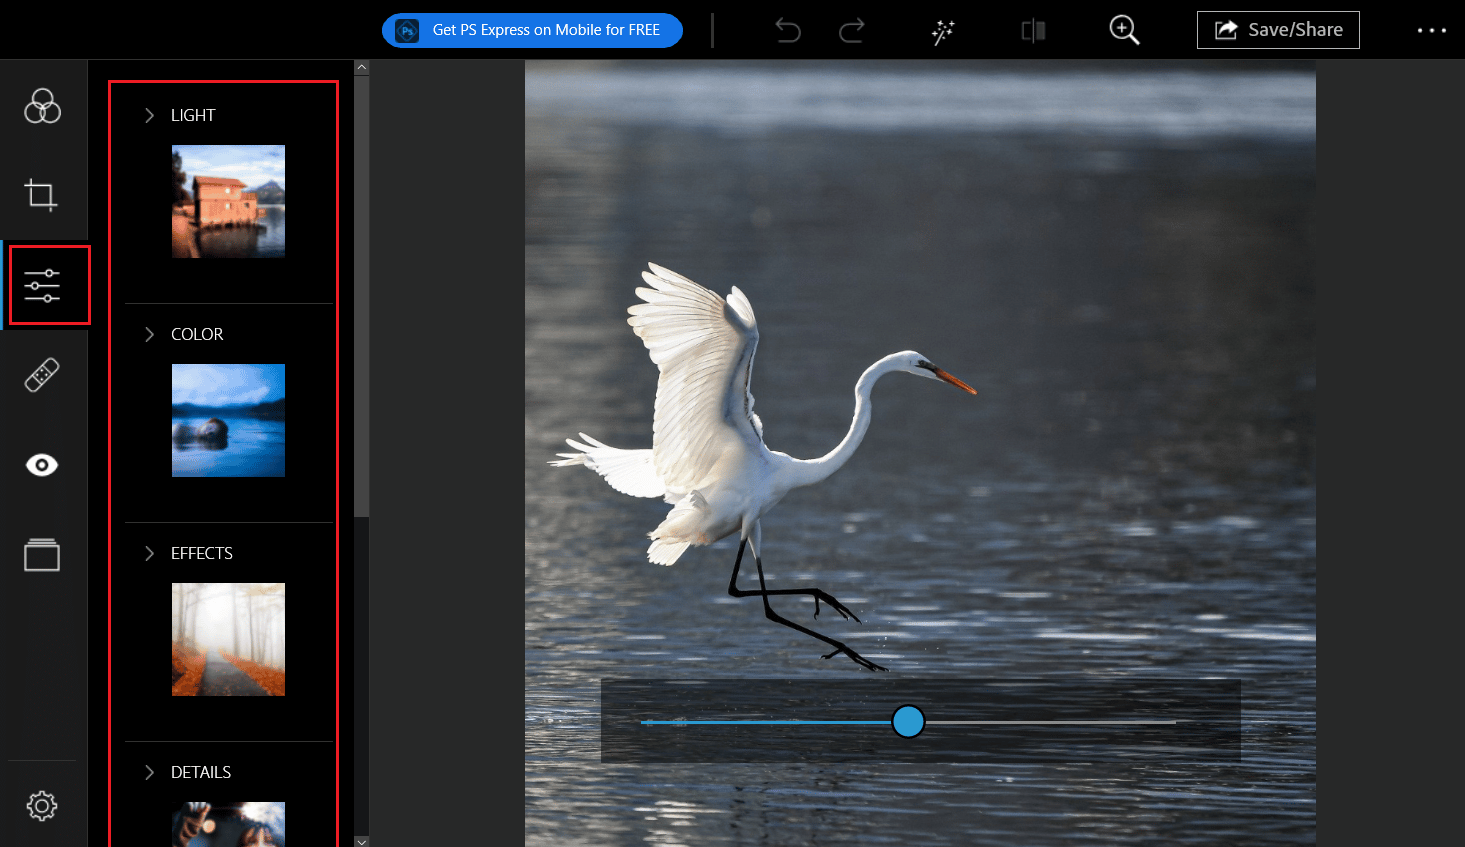
5. Then, switch to the Corrections tab to edit the aspects like LIGHT, COLOR, EFFECTS, DETAILS, etc.
6. Explore the other editing tabs too if you want to improve your photo in a more detailed way.
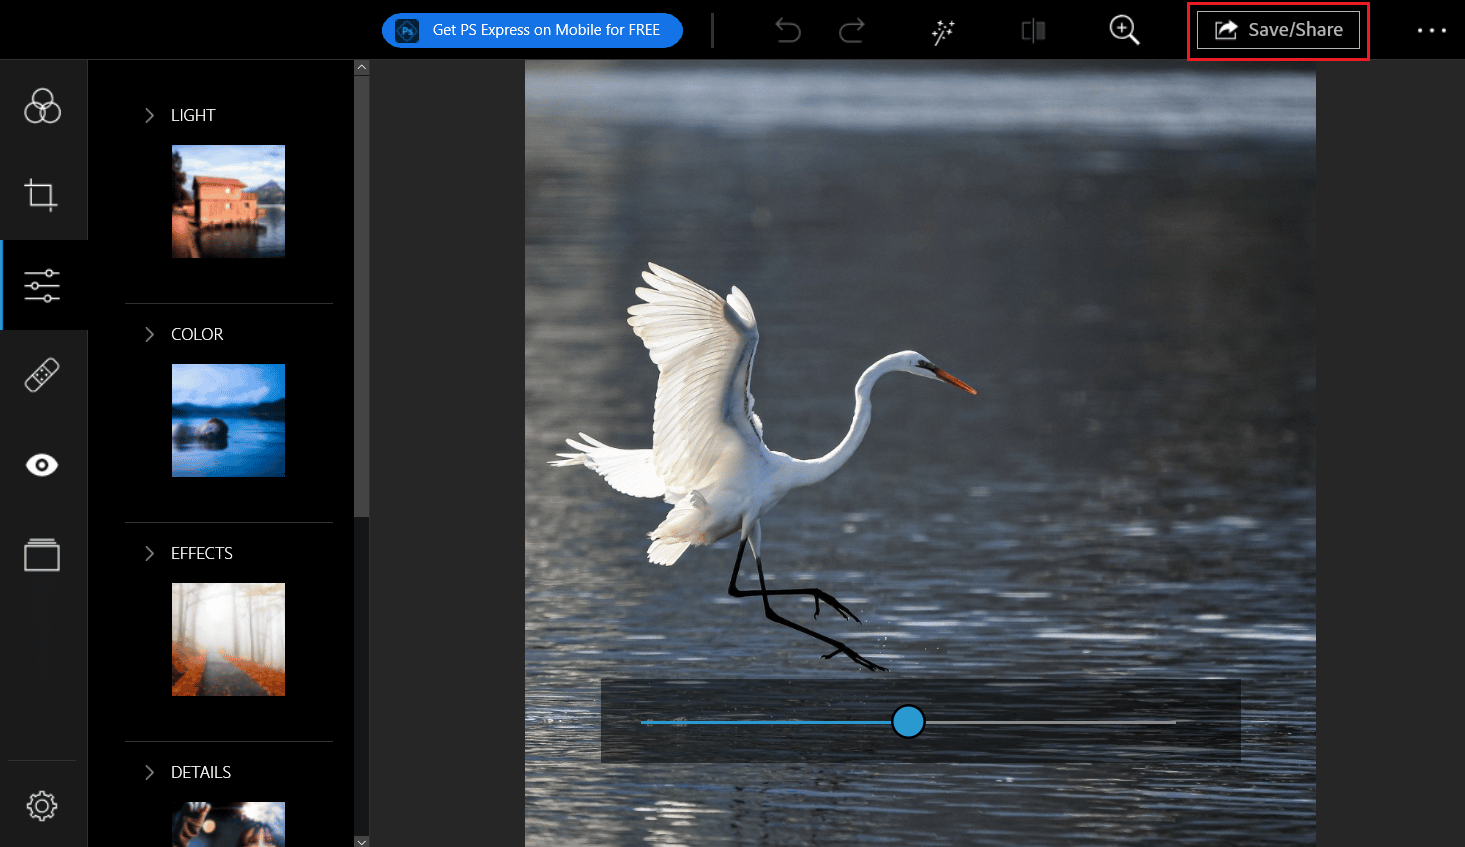
7. Finally, click on Save/Share to export the edited image and upload it on Instagram.
Also Read: 28 Best Free Photo Editing Software for PC
Is It Possible to Remove Instagram Filters?
Yes, it is possible to remove Instagram filters. You just have to swipe left and right to apply different filters or to remove any applied filter.
How to Remove Instagram Filter from Photo?
Instagram allows you to add filters to photos or collections of photographs before sharing them. But if you don’t like a filter and want to remove that filter from your IG camera, here is a guide you should follow step-by-step.
1. Launch the Instagram app on your phone.
2. Swipe left from your Instagram feed to open up the Instagram Camera screen.
Note: You can also tap on the plus icon from the top right corner to get t this IG camera screen.
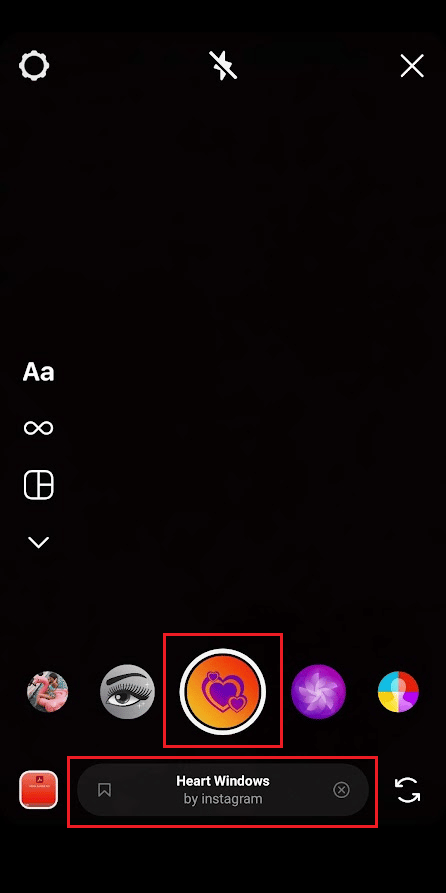
3. Tap on the desired filter > filter name from the bottom.
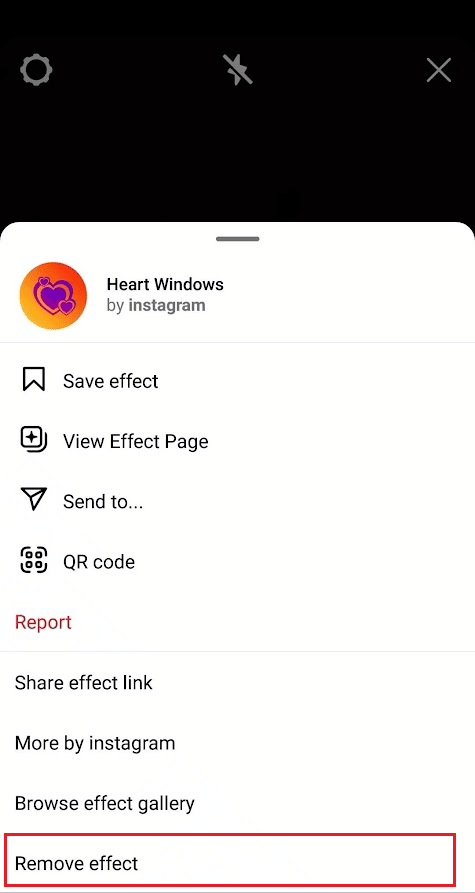
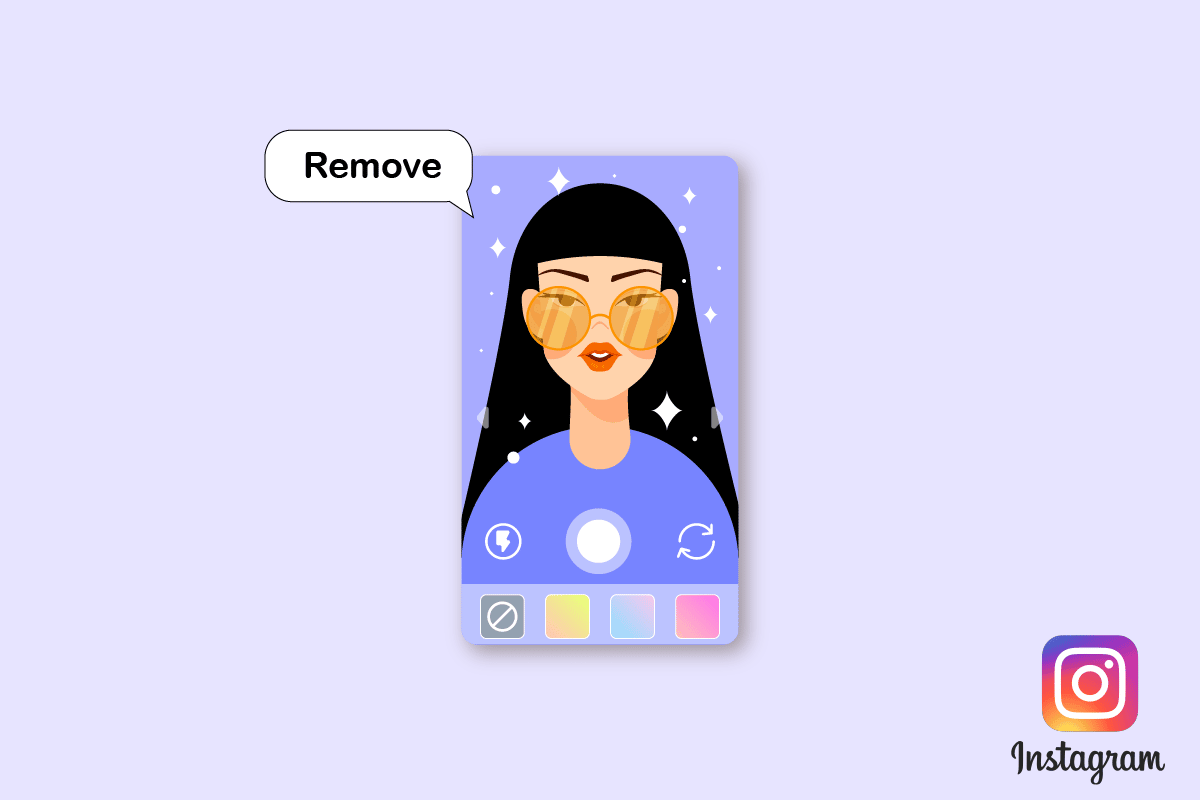
4. Swipe down in the menu options and tap on Remove effect.
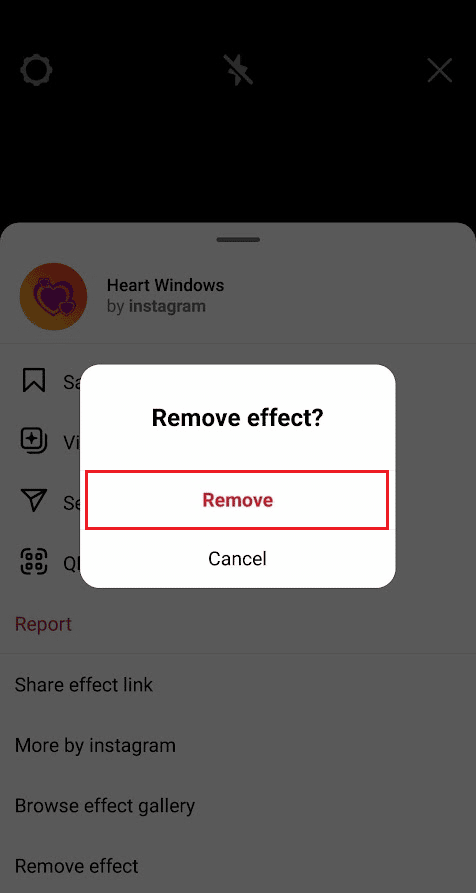
5. Tap on Remove from the popup window to successfully remove the filter from the IG camera.
Also Read: How to Remove the Red Filter on TikTok
How Do You Replace a Photo You Posted on Instagram?
If you have uploaded the wrong photo or you want to make some changes to an uploaded photo, there is no direct way to make changes to an uploaded photo on Instagram. You have to delete that post and replace it with the edited photo. And here is a guide on how can you replace a photo that you have already posted on Instagram.
1. Launch the Instagram application on your smartphone.
2. Navigate to the desired photo from your IG profile you want to replace.
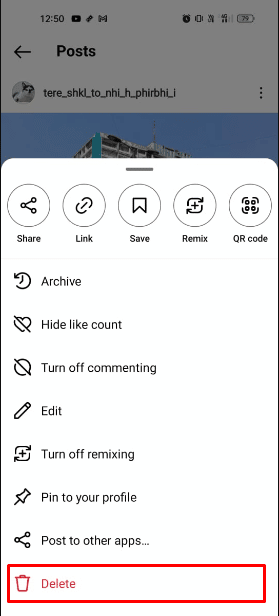
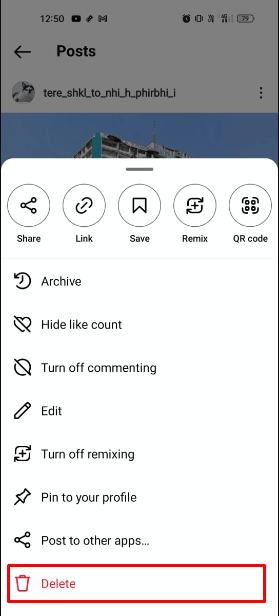
3. Tap on the three-dotted icon from the top right corner of that post.
4. Swipe down and tap on Delete.
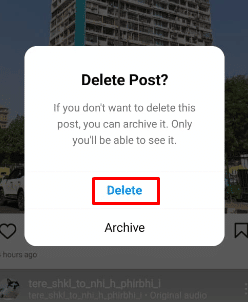
5. Tap on the Delete option to finally delete that post from your Instagram profile.
6. Once the photo is deleted successfully from your profile, edit that photo to make the necessary changes.
7. After the desired changes are made, open the Instagram app and tap on the plus icon from the top right corner.
8. Select that edited photo from your gallery.
9. Then, tap on the Next arrow icon from the top right corner of your screen.
10. Now, apply the desired filter and edit the photos using the FILTER and EDIT tabs.
Note: You can choose from a wide range of filters and edit your image using these Editing tools.
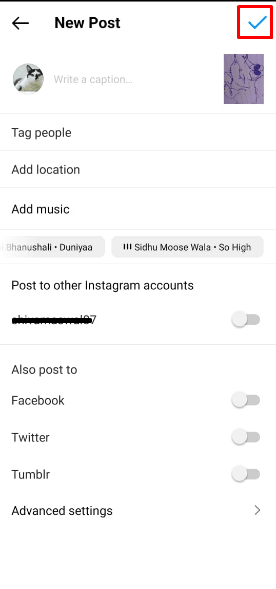
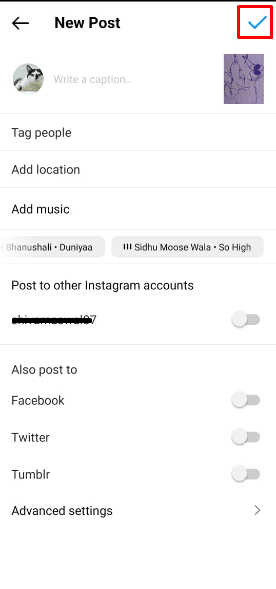
11. Tap on the tick mark icon to finally upload that photo.
This is how you can replace a photo posted on Instagram in a few easy steps.
Also Read: How to Put Snapchat filters on Pictures from Camera Roll
Can You Edit Instagram Photos After Posting?
Yes, you can edit Instagram photos after posting. Instagram allows you to edit your caption, add location, tag people, and even delete some photos. IG also allows you to delete the photos if you have uploaded multiple photos together, even after you have uploaded that photo on your Instagram feed.
How Do You Remove a Filter on Instagram After Posting?
There is no direct way or feature provided by Instagram to remove filter on Instagram after posting. But you can first delete that photo and re-upload the same photo without a filter. And here is a simple guide on how to remove a filter on Instagram after posting.
1. Open the Instagram app and navigate to the desired photo from which you want to remove the filter.
2. Tap on the three-dotted icon > Delete.
3. Then, tap on the plus icon from the top right corner.
4. Now, select the unedited photo without any filter on Instagram.
5. Tap on the Next arrow icon.
6. Edit your image using Instagram’s Editing tools.
7. After editing is done, tap on the tick mark icon to finally upload that photo without any filter.
Read this article from the start to learn what is the best Instagram editing app to edit your IG photos.
How Do You Remove a SC Filter from a Picture?
Snapchat has a vast range of filters and lenses which you can use to click beautiful pictures. But if you want to remove a Snapchat filter from a picture that you have already taken, here is a guide explaining how you can do that in a step-by-step manner.
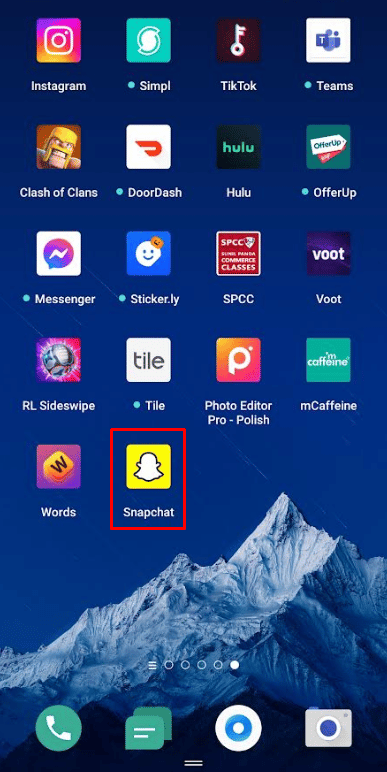
1. Open the Snapchat app on your device.
Note: Make sure you are logged into your account.
2. Tap on the gallery icon present next to the capture button to access your saved photos.
3. Select the desired photo from which you want to remove your remove filter in Snapchat.
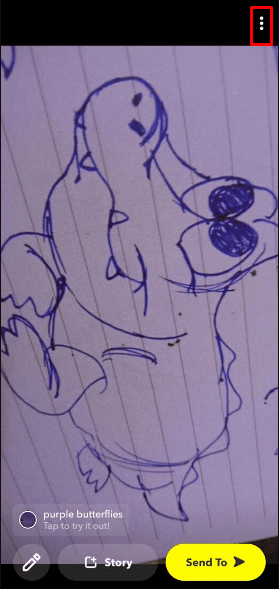
4. Tap on the three-dotted icon from the top right corner of your screen.
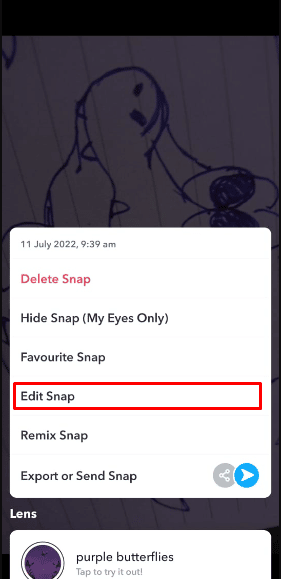
5. Then, tap on the Edit Snap option.
6. To apply the new Snapchat filter, swipe left and right.
Note: Also, there are so many several editing tools that will allow you to instantly restore a photo to its original state.
Also Read: How to Get the No Beard Filter on TikTok
How Do You Unedit Someone Else’s Photo?
Here is a guide on how can you unedit someone else’s photo in a few easy steps.
1. Upload the desired photo which you want to unedit or remove filters on the Adobe Photoshop Elements on your desktop.
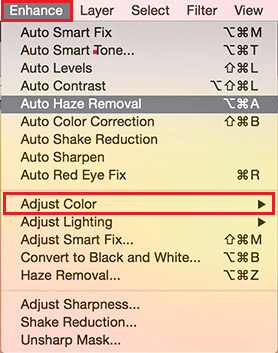
2. Now, click on Enhance > Adjust Color.
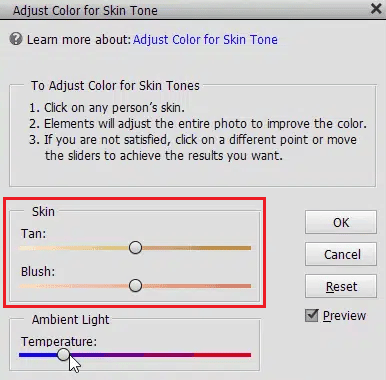
3A. Then, adjust the color to the Skin Tone and then click on OK to apply the modifications.
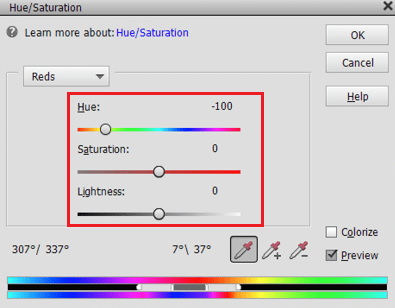
3B. If you have not achieved the desired result, return to Enhance > Adjust Color > Adjust Hue/Saturation and give the photo a more natural appearance by lowering the saturation levels.
This is how you can unedit someone else’s photo.
Can You Remove Filters from Other People’s Instagram Videos?
No, you can’t remove filters from other people’s Instagram videos. But you can remove filters from Instagram photos using Adobe Photoshop Elements or any other photo editing software.
Recommended:
We hope that you learned about how to remove Instagram filter from photo and unedit someone else’s photo. Feel free to reach out to us with your queries and suggestions via the comments section below. Also, let us know what you want to learn about next.
