How to Remove Watermarks From Word Documents
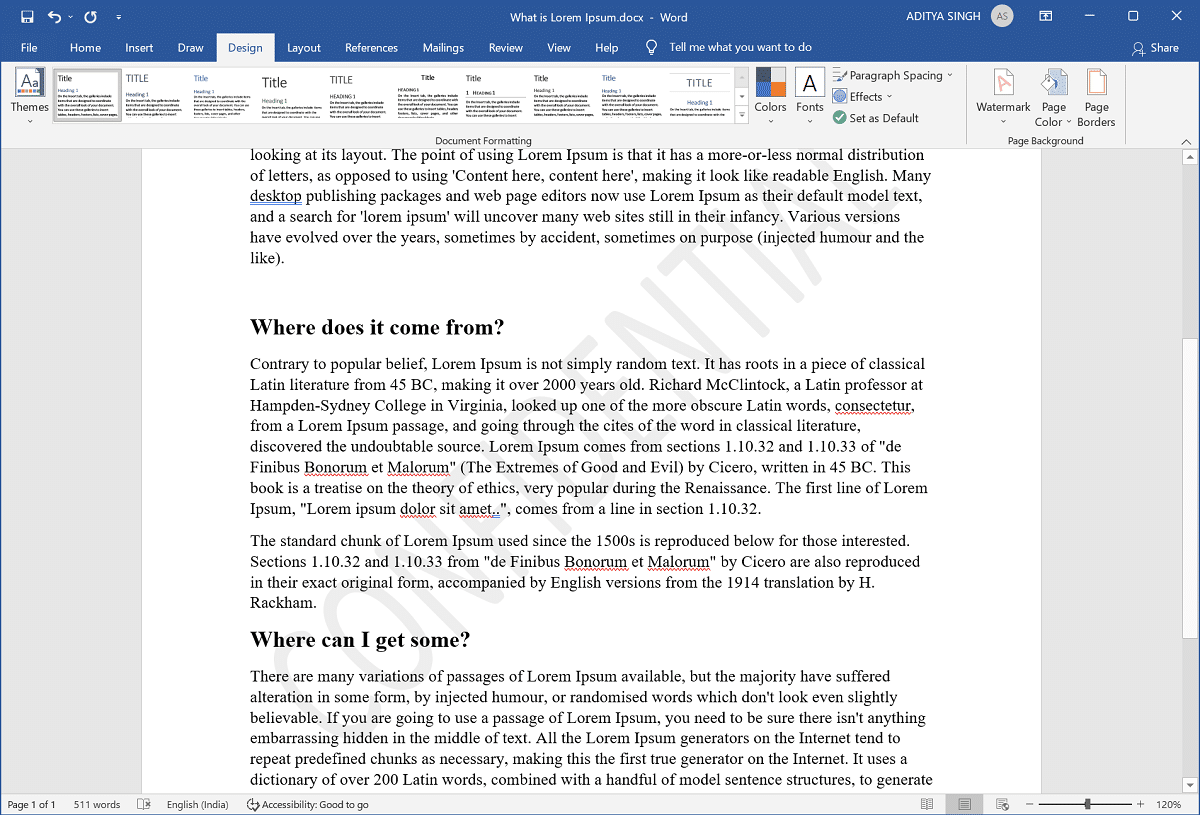
A watermark is a word or image that is placed over a substantial portion of a page or a document. It is generally put over in a light grey hue so that both the content and the watermark can be seen and read. On the backdrop, you must have noticed corporate logo, company name, or phrases like Confidential or Draft. Watermarks are used to safeguard copyright of items such as cash, or government/private papers that you do not want others to claim as their own. Watermarks in Microsoft Word assist users to make certain aspects of the document obvious to the readers. Hence, it is used to deter counterfeiting. Occasionally, you may need to remove a watermark in Microsoft Word and it may refuse to budge. If you’ve been having trouble with this, then continue reading to learn how to remove watermarks from Word documents.
How to Remove Watermarks from Microsoft Word Documents
Managing several word documents frequently will undoubtedly, necessitate dealing with watermark removal occasionally. Though it is not as common or useful as inserting them, here are some typical scenarios where eliminating watermarks in MS Word could be useful:
- To make a change in the status of the document.
- To delete a label from the document, such as a company name.
- To share documents for them to be open to the public.
Regardless of the reason, understanding how to remove watermarks in Microsoft Word is an important skill to have. By doing so, you can prevent making little errors that could lead to major problems in the future.
Note: The methods have been tested by our team on Microsoft Word 2016.
Method 1: Use Watermark Option
This is one of the simplest methods to remove watermarks in Word docs.
1. Open the Desired Document in Microsoft Word.
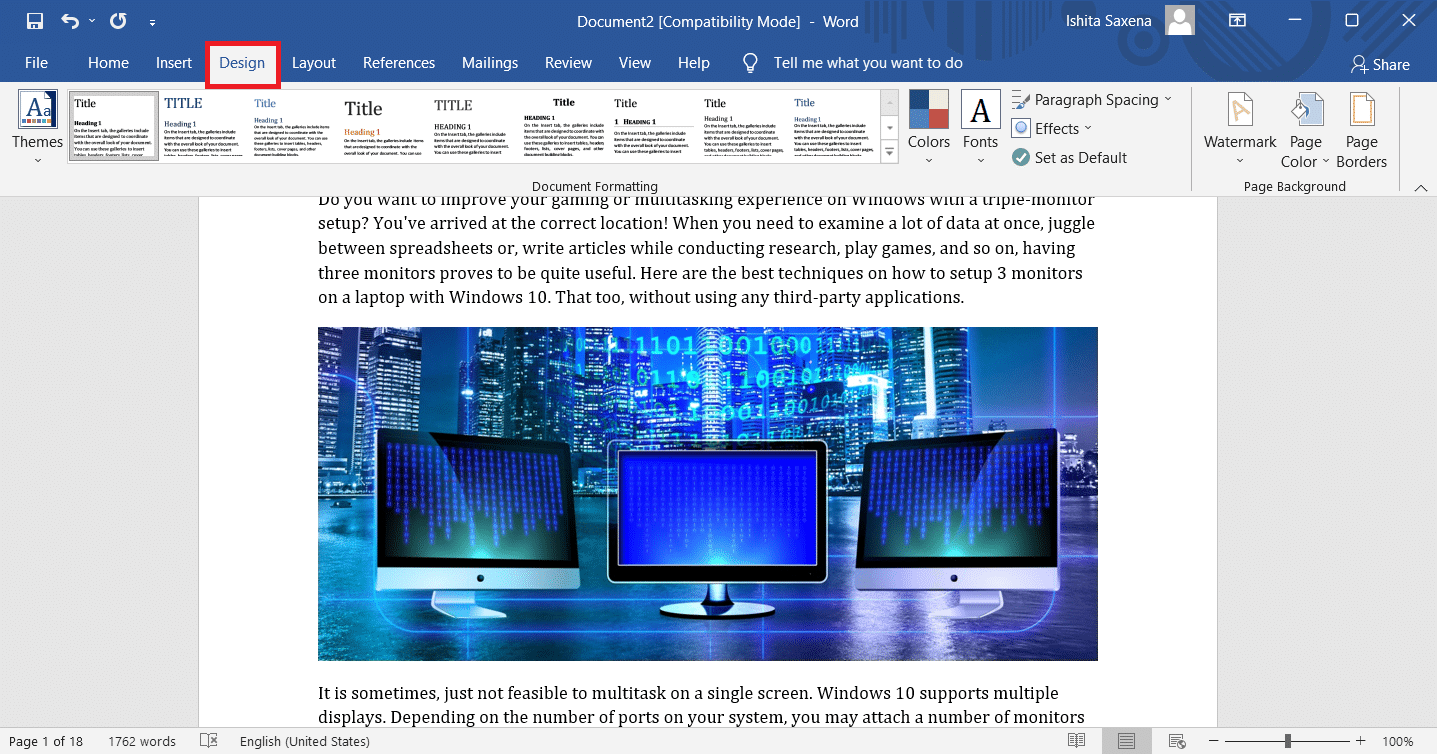
2. Here, click on the Design tab.
Note: Select the Page Layout option for Microsoft Word 2007 and Microsoft Word 2010.
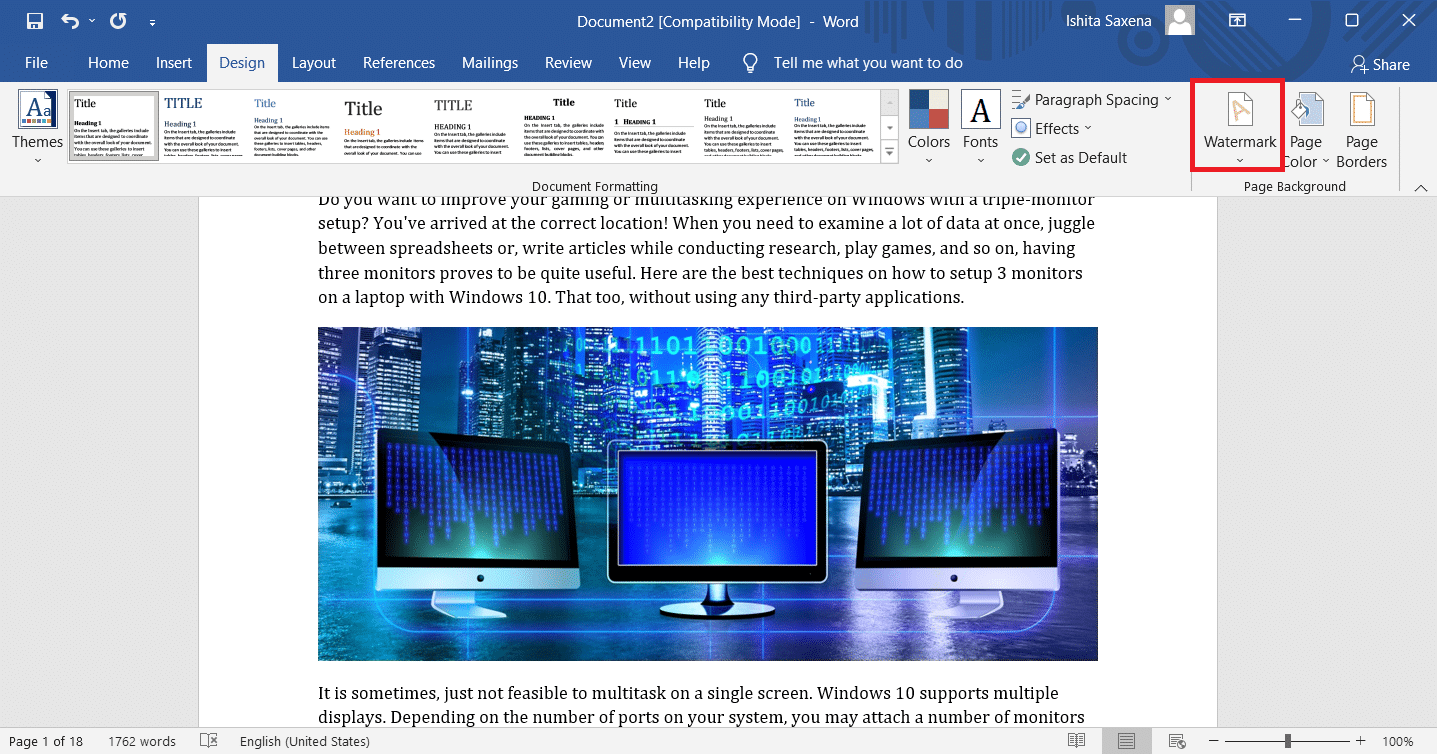
3. Click on Watermark from the Page Background tab.
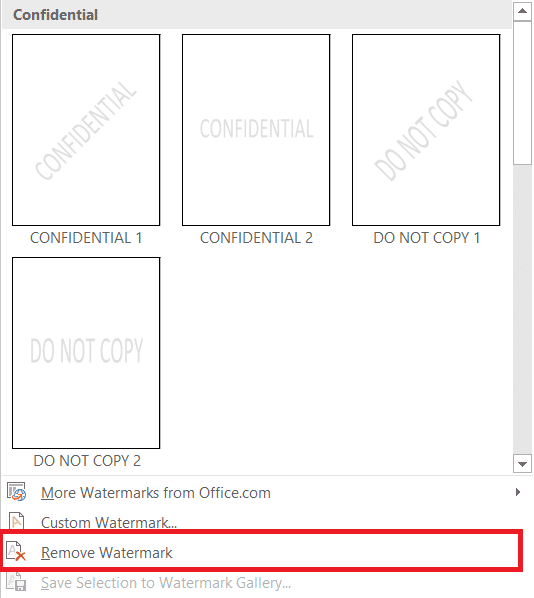
4. Now, select the Remove Watermark option, shown highlighted.
Also Read: How to Open a Pages File on Windows 10
If the Watermark is not affected by the above method, then here is how to remove watermark in Microsoft Word by using the header and footer option.
1. Open the Relevant file in Microsoft Word.
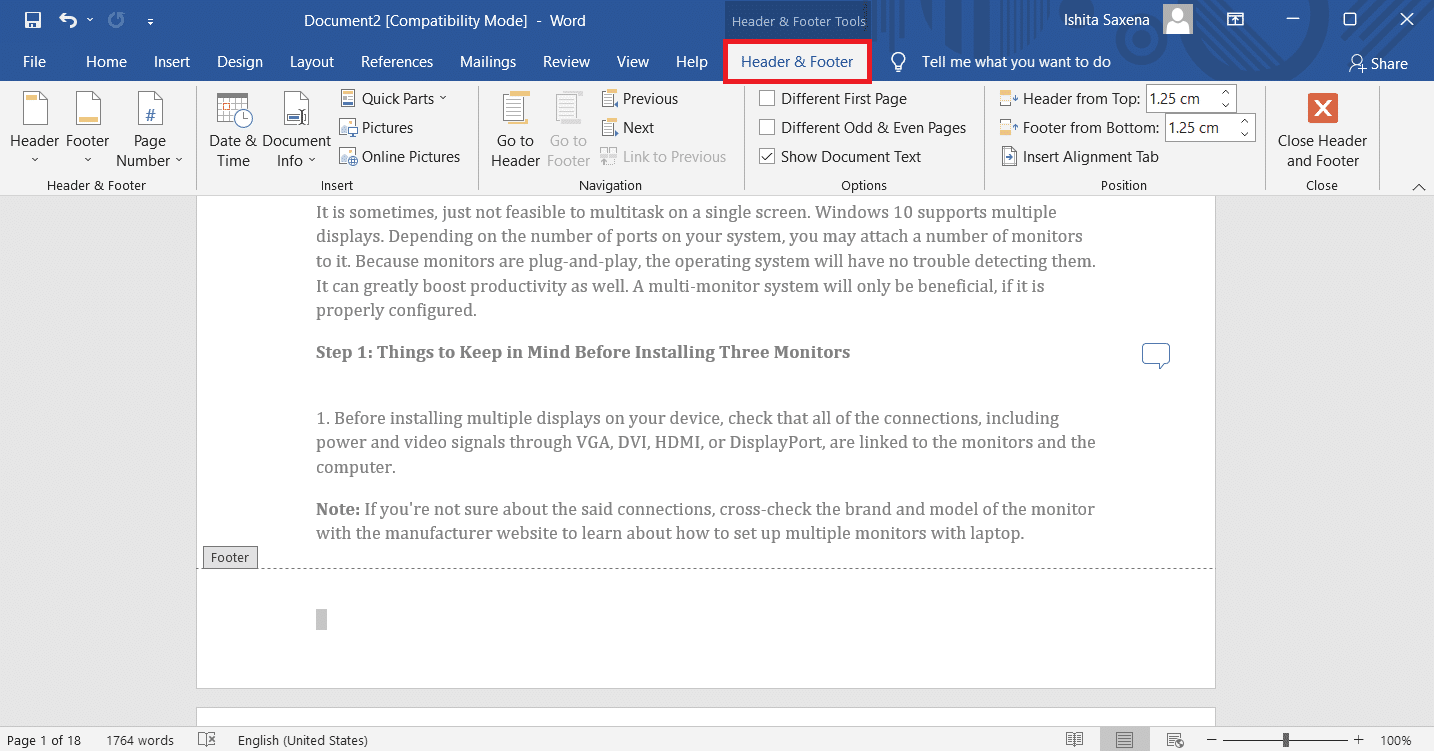
2. Double-click on the Bottom margin to open Header & Footer menu.
Note: You can also double-click on the Top margin of the page to open it.
3. Move the mouse cursor over the watermark until it transforms to a Four-way arrow and, then click on it.
4. Finally, press the Delete key on the keyboard. The watermark should no longer be visible in the document.
Also Read: Fix Microsoft Office Not Opening on Windows 10
Method 3: Use XML, Notepad & Find Box
A markup language that is comparable to HTML is XML (eXtensible Markup Language). More importantly, saving a Word document as XML transforms it into plain text, through which you can delete the watermark text. Here’s how to remove watermarks from Word documents:
1. Open the Required File in MS Word.
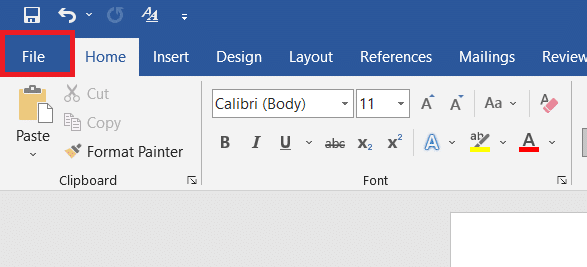
2. Click on the File tab.
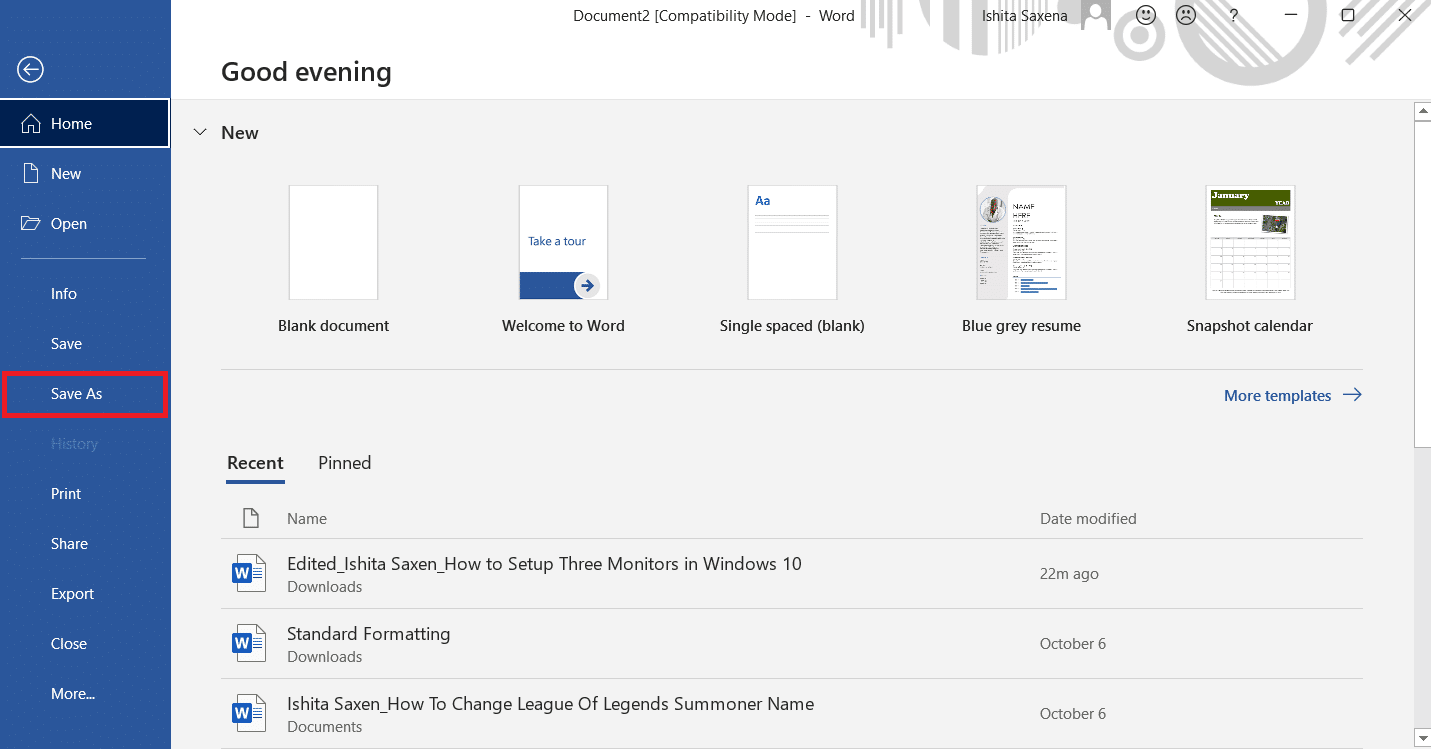
3. Now, click on Save As option, as shown.
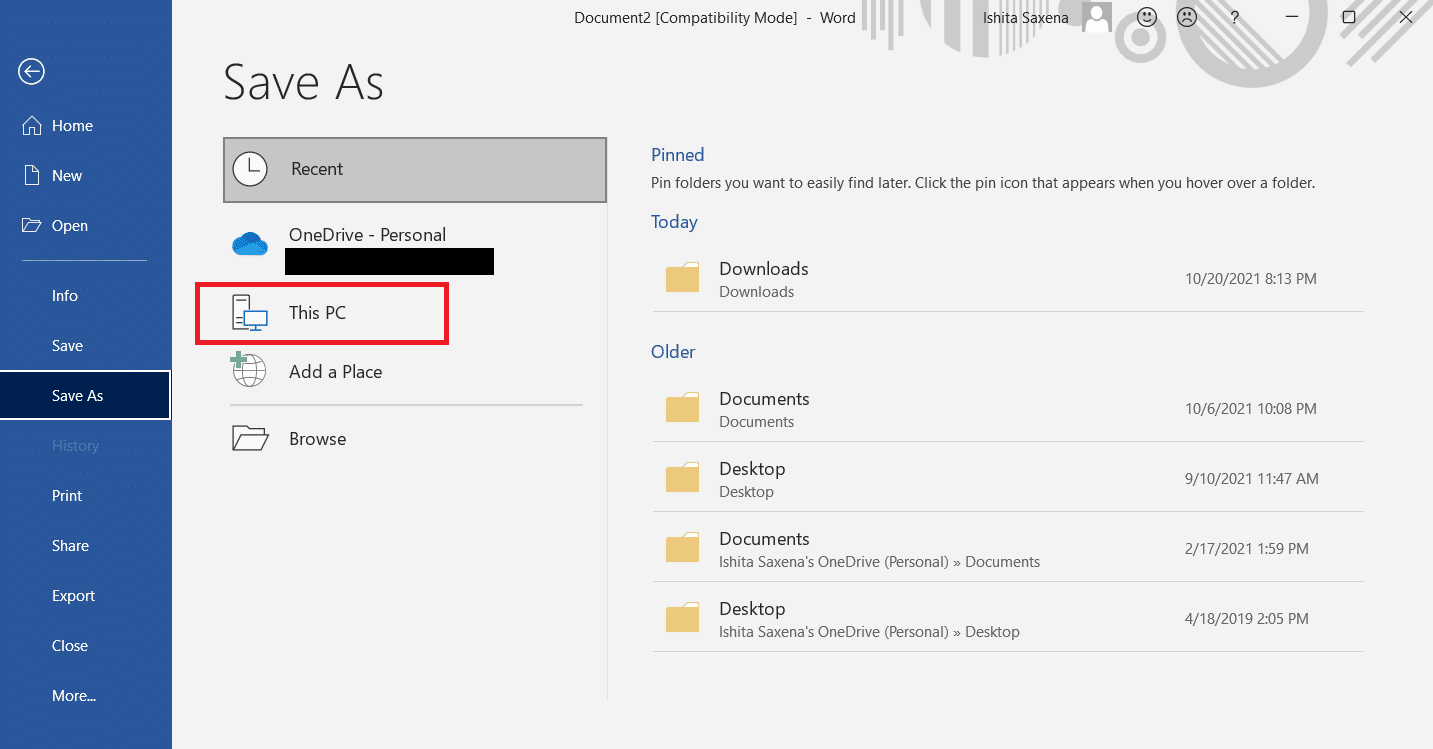
4. Select a suitable place such as This PC and click on a Folder in the right pane to save the file there.
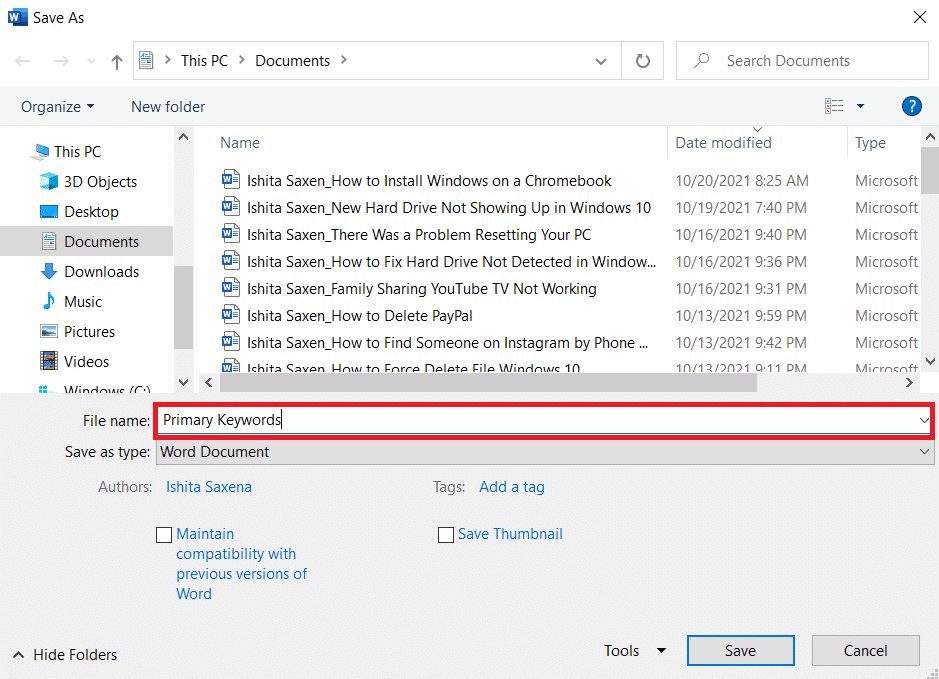
5. Type the File name renaming it with an appropriate name, as depicted.
6. Now, click on Save as type and select Word XML Document from the drop-down menu that appears.
7. Click on Save button to save this XML file.
8. Go to the Folder you chose in Step 4.
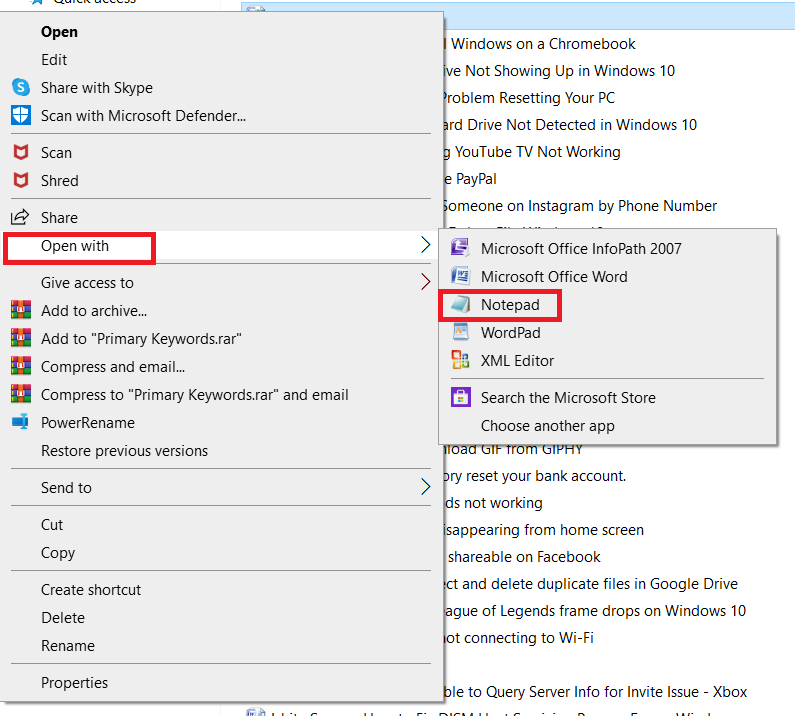
9. Right-click on the XML File. Select Open With > Notepad, as illustrated below.
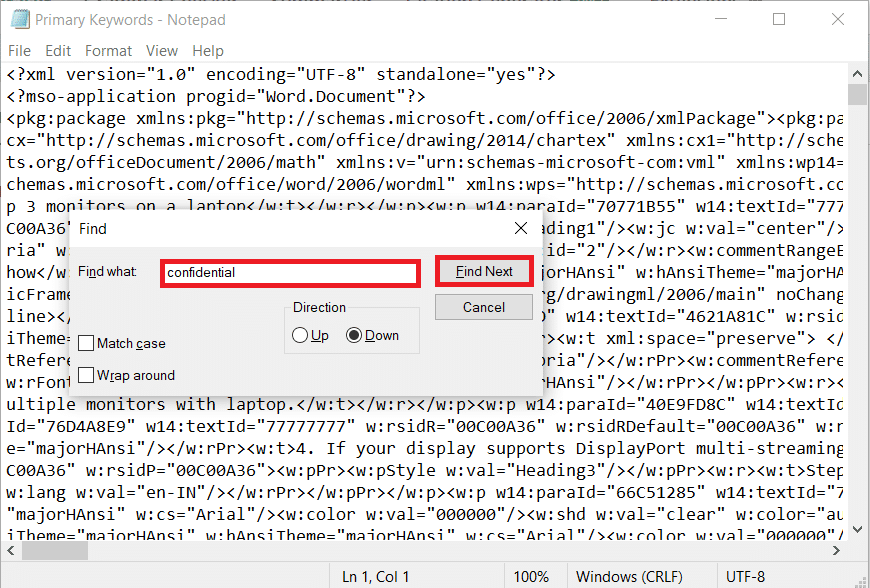
10. Press the CTRL + F keys simultaneously on the keyboard to open Find box.
11. In Find what field, type the watermark phrase (e.g. confidential) and click on Find Next.
12. Remove the word/words from the sentences they appear in, without removing the quotation marks. This is how to remove watermarks from Word docs using XML file & Notepad.
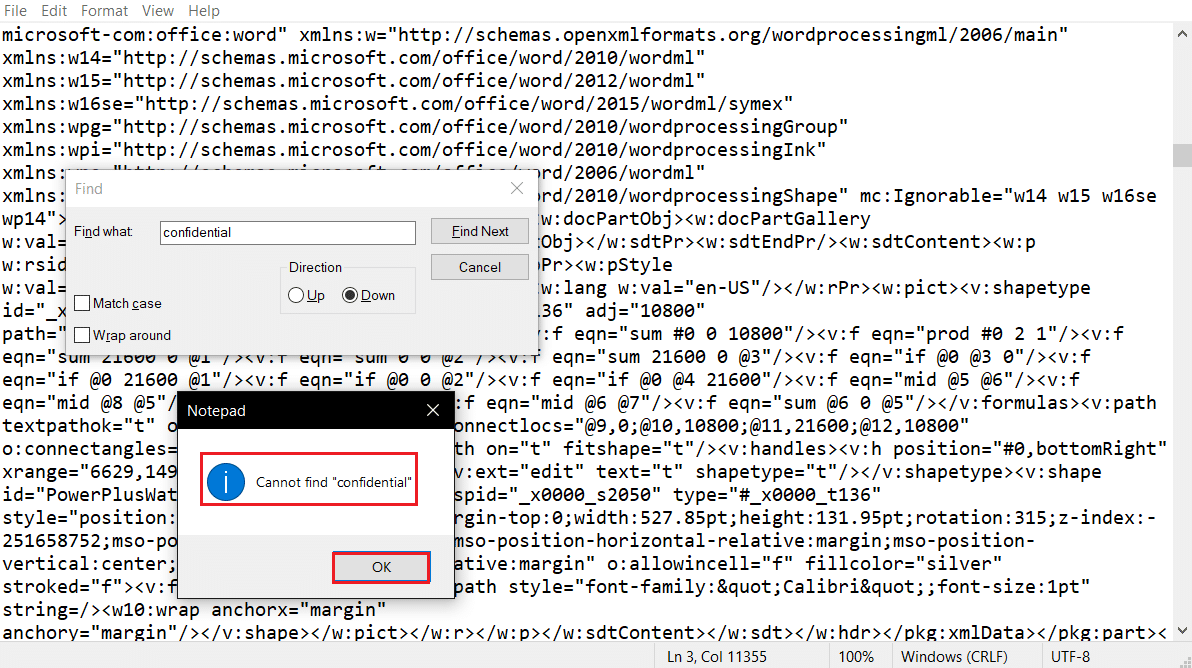
13. Repeat the search & deletion process until all the watermark words/phrases have been removed. The said message should appear.
14. Now, press the Ctrl + S keys together to save the file.
15. Navigate to the Folder where you had saved this file.
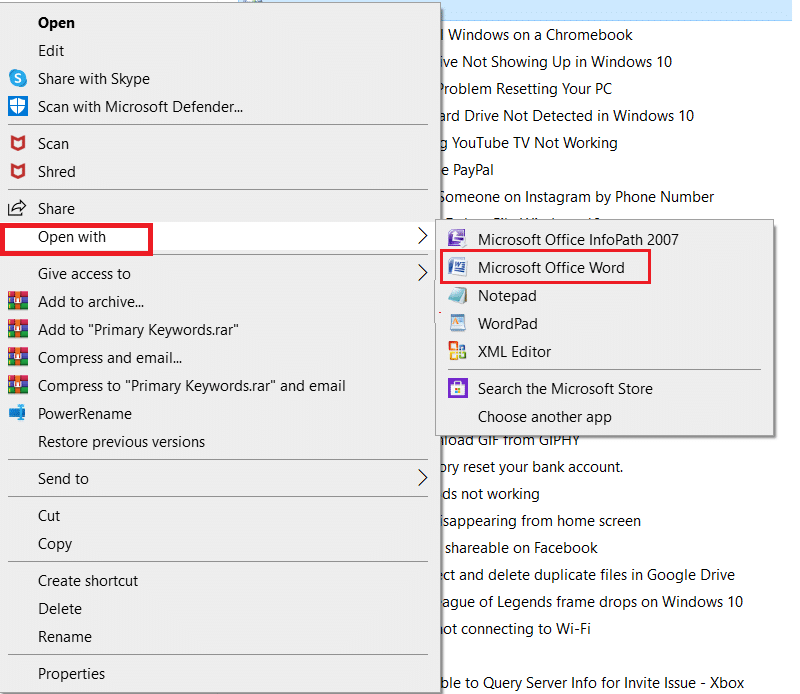
16. Right-click on the XML File. Select Open With > Microsoft Office Word, as depicted below.
Note: If MS Word option is not visible, then click on Choose another app > MS Office Word.
17. Go to File > Save As window as earlier.
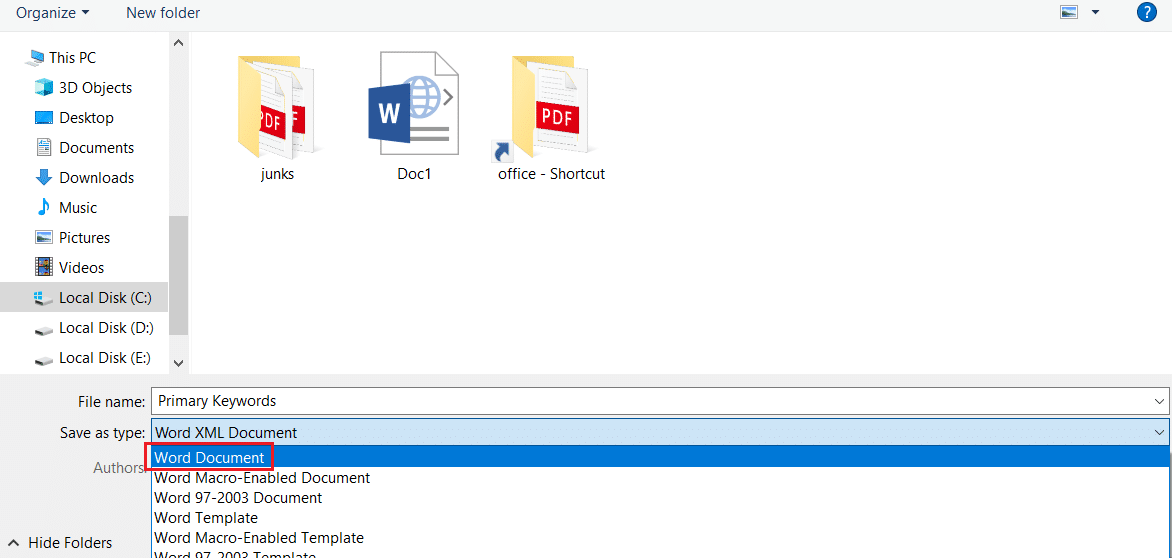
18. Here, rename the file, as needed and change Save as type: to Word Document, as depicted.
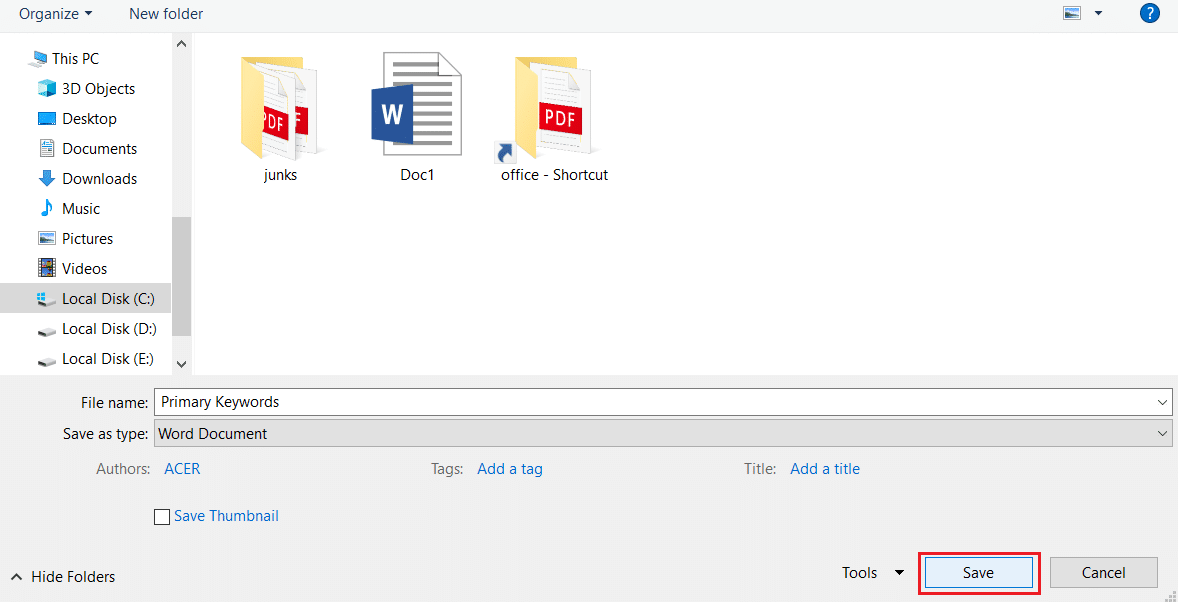
19. Now, click on the Save option to save it as a Word document, without any watermark.
Recommended:
We hope that this guide was helpful and you learnt how to remove watermarks from Microsoft Word documents. Let us know which method worked for you best. If you have any queries or suggestions then, feel free to drop them in the comments section below.
