How to Rollback Driver Updates on Windows 11
A driver is a piece of software that aids in the communication of hardware with the operating system & software programs. In the Device Manager, you will see a list of different drivers for all installed and connected devices. Windows Update searches for and installs driver updates on your computer automatically. You can also update the driver manually. However, the updated version may not always work as planned and may cause instability. Or, it could simply be inferior compared to the previous edition. Whatever the case may be, you can always uninstall driver updates and revert to a previous version, whenever needed. Read below to learn how to update and rollback driver updates on Windows 11.
How to Rollback Driver Updates on Windows 11
Sometimes, there may be unstable updates that can cause system errors in your PC. Follow the given steps for driver rollback in Windows 11:
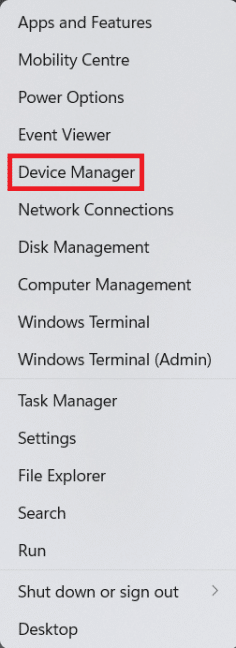
1. Press Windows + X keys together to open the Quick Link Menu.
2. Select Device Manager from the given list. as shown.
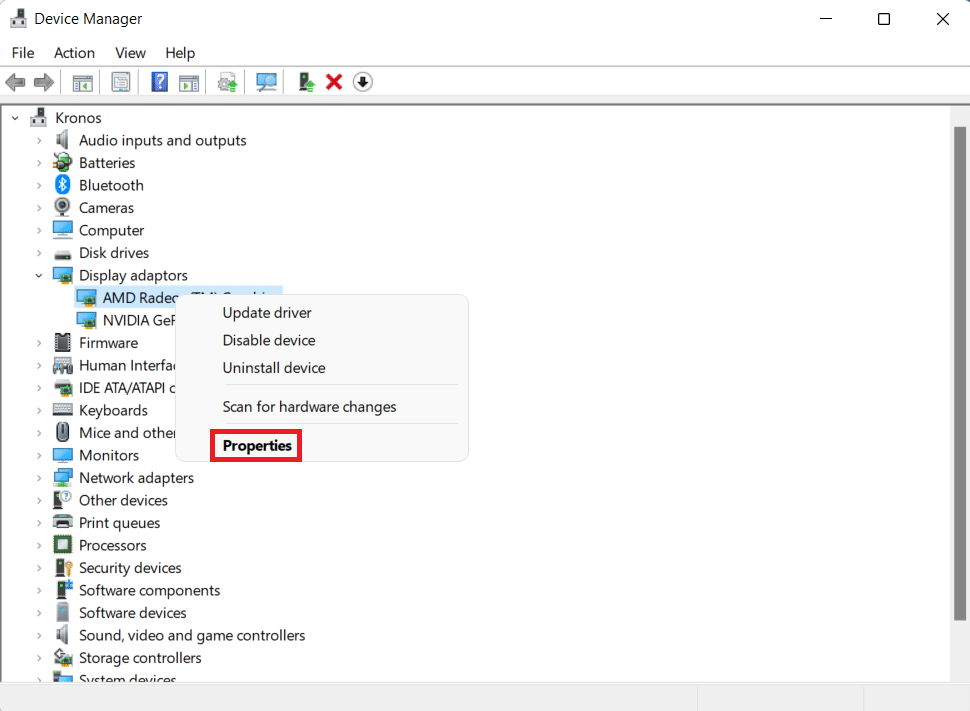
3. Here, double click on the Device category (e.g. Display adapters).
Note: You can choose the device category whose driver has been updated and for which you wish to perform driver rollback.
4. Then, right-click on the Device driver (e.g. AMD Radeon(TM) Graphics).
5. Click on Properties from the context menu, as depicted below.
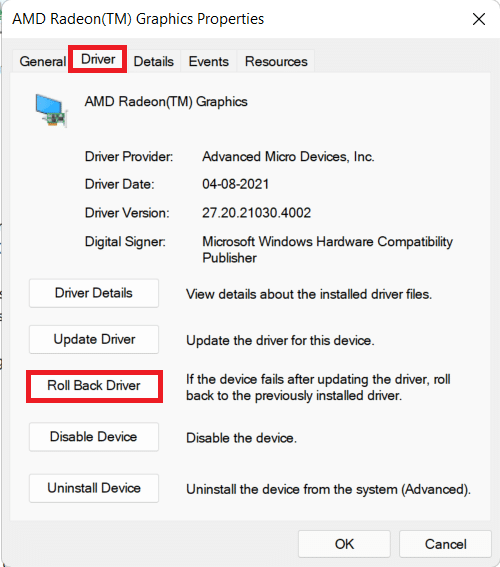
6. Switch to the Driver tab.
7. Then, select Roll Back Driver.
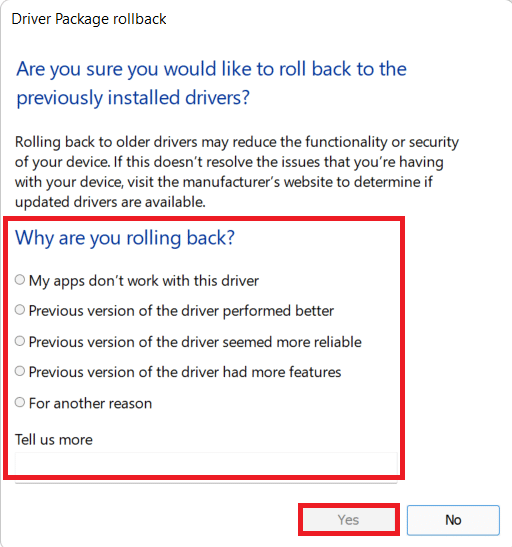
8. Select the reason from Why are you rolling back? section and click on Yes.
9. Finally, restart your PC after the process is finished.
This is how to rollback driver updates in Windows 11.
Also Read: How to Debloat Windows 11
How to Update Device Drivers
Follow the steps listed below to install the latest drivers:
1. Launch Device Manager as earlier.
2. Double-click on the Device category (e.g. Mice and other pointing devices) for which you want to update the drivers.
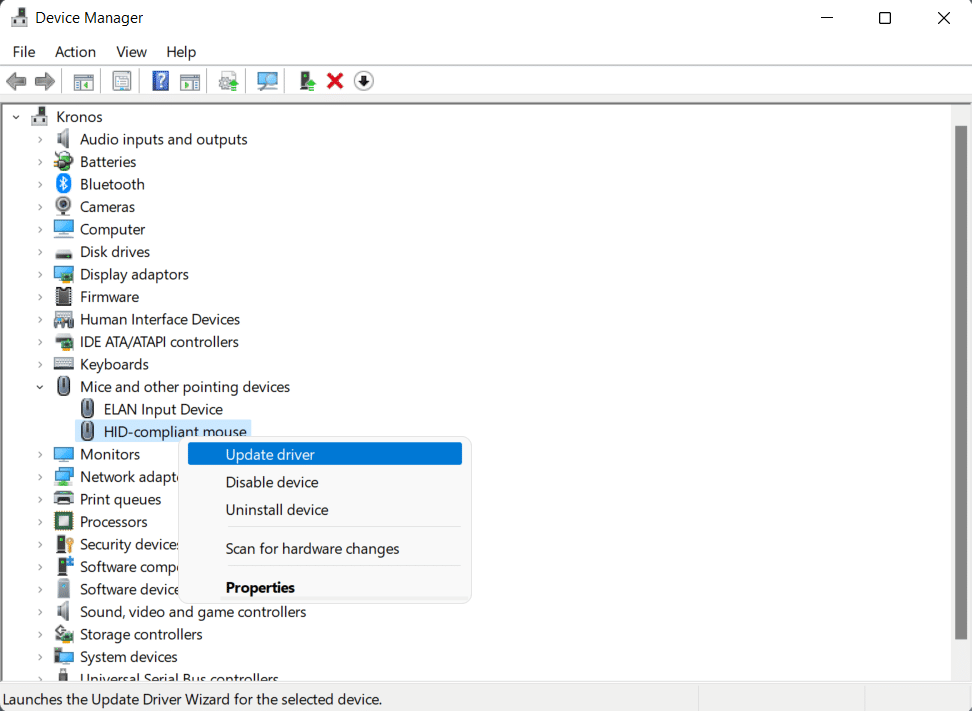
3. Then, right-click on the Device driver (e.g. HID-compliant mouse).
4. Click on Update driver option shown highlighted.
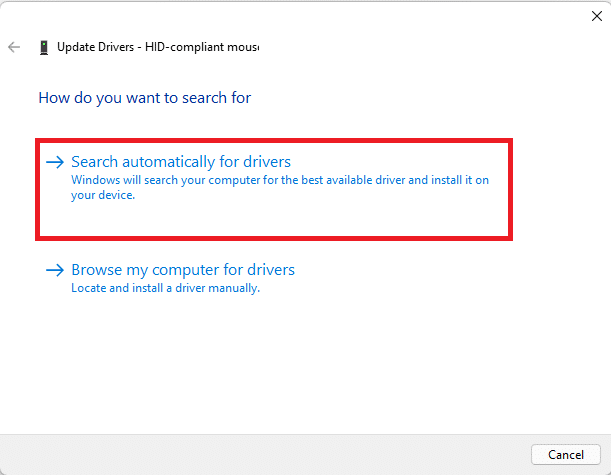
5A. Then, click on Search automatically for drivers, as depicted below.
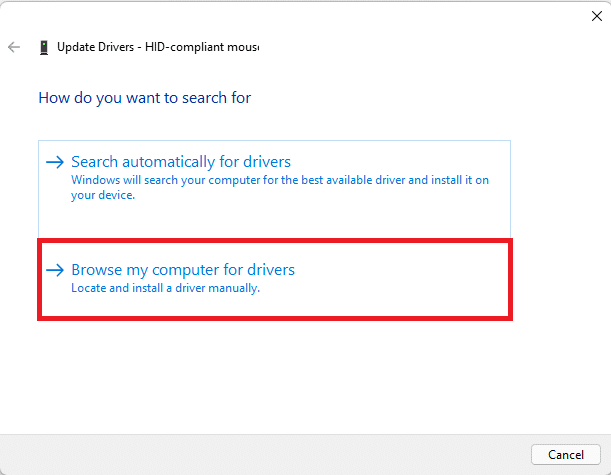
5B. Alternatively, click on Browse my computer for drivers if you already have the latest drivers downloaded on your PC. Locate & select drivers to be installed.
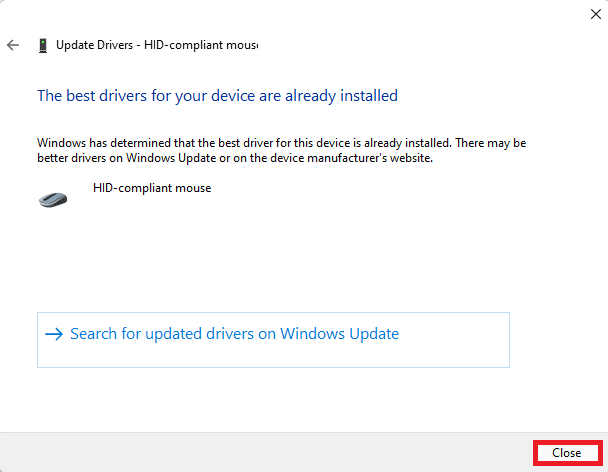
6. Click on Close if The best drivers for your device are already installed message is displayed, as shown.
7. Restart your Windows 11 PC after the wizard is done installing the drivers.
Also Read: How to Download and Install Windows 11 Updates
How to Turn Off Automatic Driver Updates
You have learned how to rollback driver updates on Windows 11, you can choose to opt-out of updates altogether. You can easily turn off automatic driver updates as follows:
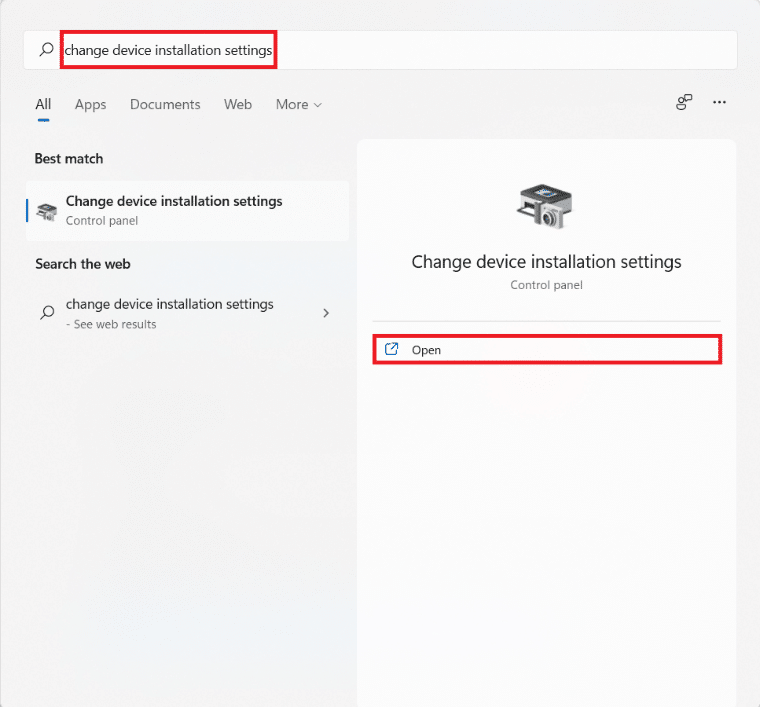
1. Click on the Search icon and type change device installation settings.
2. Then, click on Open to launch it.
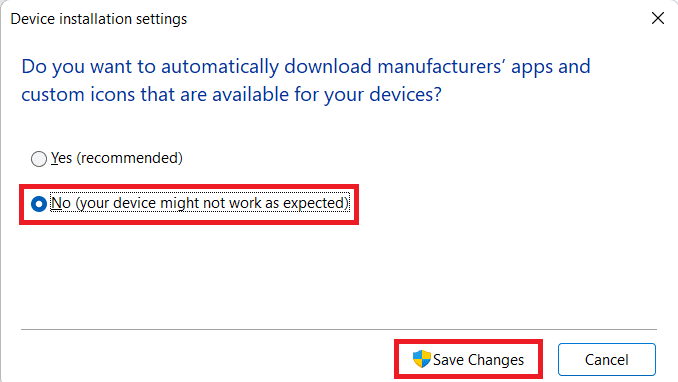
3. Choose No as a response to Do you want to automatically download manufacturers’ apps and custom icons that are available for your devices? question.
4. Finally, click on Save Changes in the Device installation settings window.
Recommended:
This is how to update or rollback driver updates on Windows 11. Additionally, you can turn off automatic update feature. Do drop your suggestions and queries in the comment section down below.
