- in windows 11 by Admin
How to Start Windows 11 in Safe Mode

Booting into Safe Mode can help you pinpoint the source of a problem on your Windows computer. If a problematic PC component works smoothly in Safe Mode, that implies that bad device drivers, bug-ridden third-party apps, incorrect system configurations, malware, or network-related issues are the root cause of the problem.
Windows has three different Safe Mode options. This tutorial will show you how to start your Windows 11 PC in Safe Mode and how its options differ.
1. Enter Safe Mode from the Windows Recovery Environment
Windows Recovery is the best route to start Windows 11 in Safe Mode if your PC isn’t booting up or doesn’t boot past a black/blank screen.
- Hold the power button until your PC shuts down completely.
- Wait for about 10 seconds and press the power button to turn your PC back on.
- Press the power button when your PC’s screen lights up or when the manufacturer’s logo appears on the screen. Keep holding the power button until your PC shuts down.
- Wait for about 5-10 seconds and press the power button to turn on your PC.
- Repeat step #3 and step #4, and your PC should load the Windows Recovery Environment (winRE) on the third try.
- Select Troubleshoot in the recovery environment.
- Select Advanced options.
- Select Startup Settings.
- Select Restart to load the Startup Settings options.
- Press the corresponding number next to the Safe Mode option you want to boot.
- Press 4 or F4 on your keyboard to boot into regular Safe Mode. This Safe Mode option strips all third-party apps and programs. A “Safe Mode” inscription will appear in the four corners of your PC’s screen. Windows will only load basic drivers and few options in the Settings menu. Consequently, you won’t be able to use the internet or make certain changes to your PC settings.
- Press 5 or F5 to “Enable Safe Mode with Networking.” This option will load your PC’s network drivers, giving you access to the internet while in Safe Mode. You should only select this option if the problem you’re troubleshooting is network-related or requires access to the internet.
- Press 6 or F6 to enable “Safe Mode with Command Prompt.” Unlike the other two options, this option loads a Command Prompt terminal on the screen. Use this option for advanced troubleshooting where you might need to run CMD commands.

If you can’t enter the Windows Recovery Environment and your computer continues to boot into a blank screen, consider starting Windows 11 from a bootable USB drive. You can create a bootable USB drive on another Windows 11 PC using Microsoft’s media creation tool or by downloading Windows 11 disk image (ISO). Read our tutorial on creating a Windows bootable USB recovery drive to learn more.
2. Enter Safe Mode From Windows Settings
Like older Windows versions, you can also enter Safe Mode in Windows 11 from the Settings app.
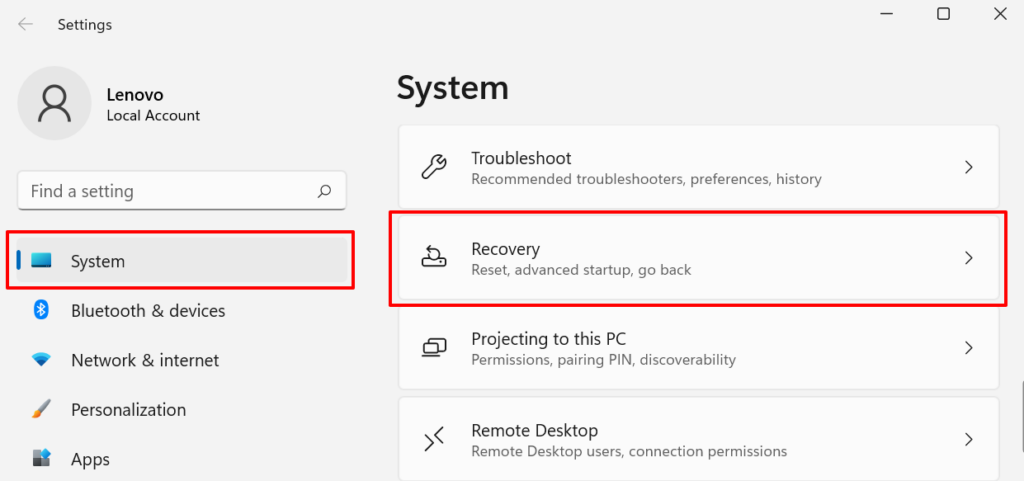
- Open the Settings app (press Windows key + I), select System in the sidebar, and select Recovery.
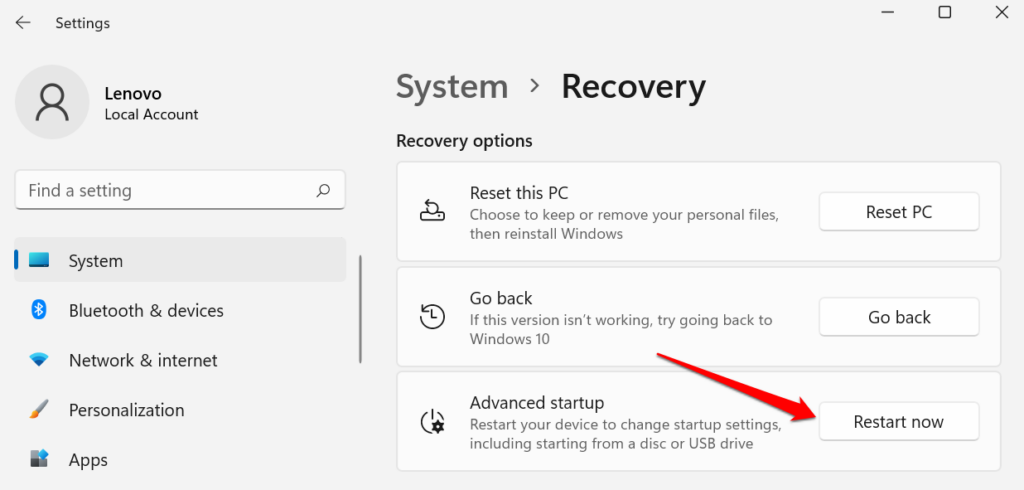
- Scroll to the “Recovery options” section and select Restart now next to “Advanced startup.”
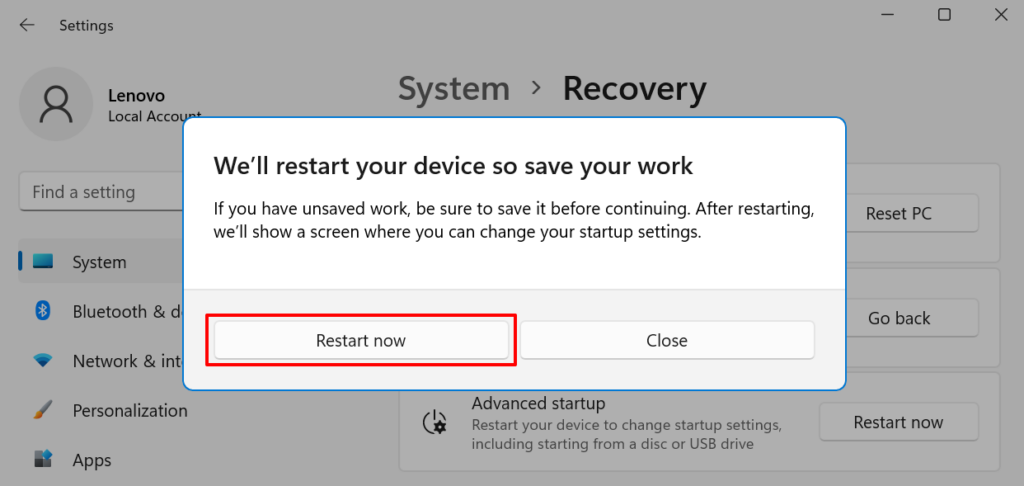
- Select Restart now on the confirmation prompt to continue.
That’ll boot your PC into the recovery environment. Go to Troubleshoot > Advanced options > Startup Settings > Restart and press either 4, 5, or 6 on your keyboard to enable your preferred Safe Mode option.
3. Start Windows 11 in Safe Mode From the Start Menu
Using the Start Menu is probably the easiest way to boot Windows 11 into Safe Mode. By holding the Shift key while restarting your PC, Windows will boot into the advanced startup menu, where you can enter Safe Mode.
- Press the Windows key and select the power icon.
- Press and hold the Shift key on your keyboard and select Restart.
That’ll load the advanced startup page. Then, as described in the method above, go to Troubleshoot > Advanced options > Startup Settings > Restart and select your preferred Safe Mode type.
4. Start Windows 11 in Safe Mode Using MSCONFIG
MSCONFIG stands for Microsoft System Configuration. It is a built-in Windows tool that lets you access system settings you may not find in the Settings app or Control Panel.
- Press the Windows key on the keyboard or select the Search icon in the taskbar.
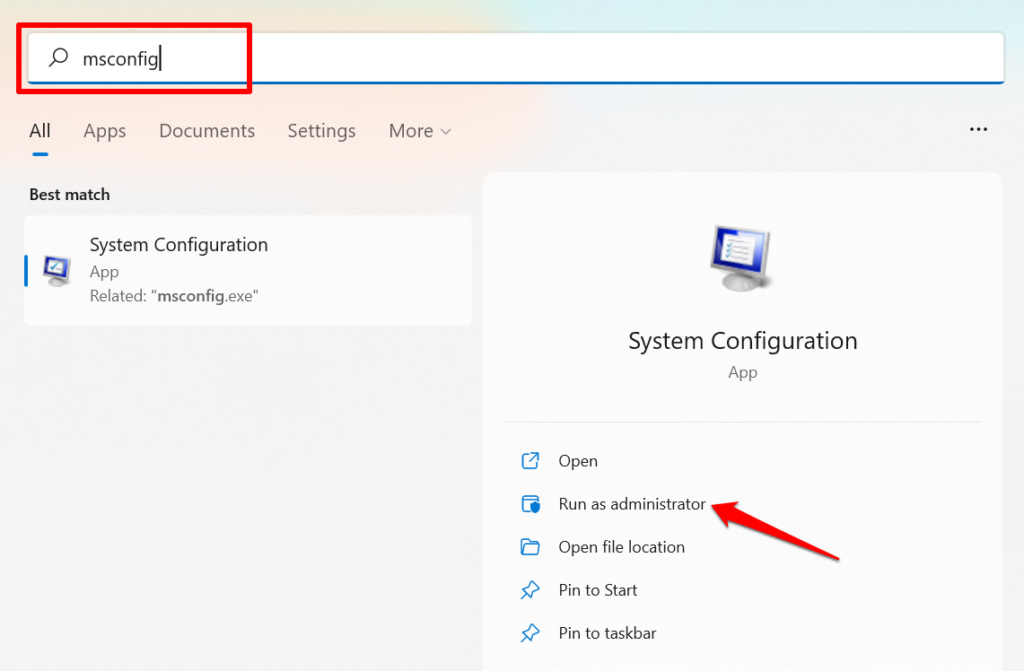
- Type msconfig (aka System Configuration) in the search box and select Run as administrator in the result pane.
- Head to the Boot tab and check Safe boot in the “Boot options” section.
- Select your preferred Safe Mode option: Minimal, Alternate shell, Active Directory repair, or Network.
- The “Minimal” option will load basic drivers and settings in Safe Mode. However, you won’t be able to access the internet, use third-party apps, and modify certain system configurations.
- “Alternate shell” will boot only the Command Prompt terminal in Safe Mode.
- “Active Directory repair” is commonly used by network administrators in corporate environments to repair or restore an Active Directory database.
- The “Network” option will load the network drivers in Safe Mode.
- Select Apply and then select OK to proceed.
- Select Restart on the prompt to boot into Safe Mode. Otherwise, select Exit without restart to reboot your PC later, especially if you have unsaved documents in other apps.
Note: Your PC will always boot into Safe Mode each time you restart your PC.
The following steps will disable Safe Mode and boot your PC normally:
Return to the “System Configuration” window (Click Start, type msconfig), uncheck Safe boot, select OK, and reboot your PC to disable.
5. Enable Safe Mode From Command Prompt
Another way to boot Windows 11 into Safe Mode is via Command Prompt.
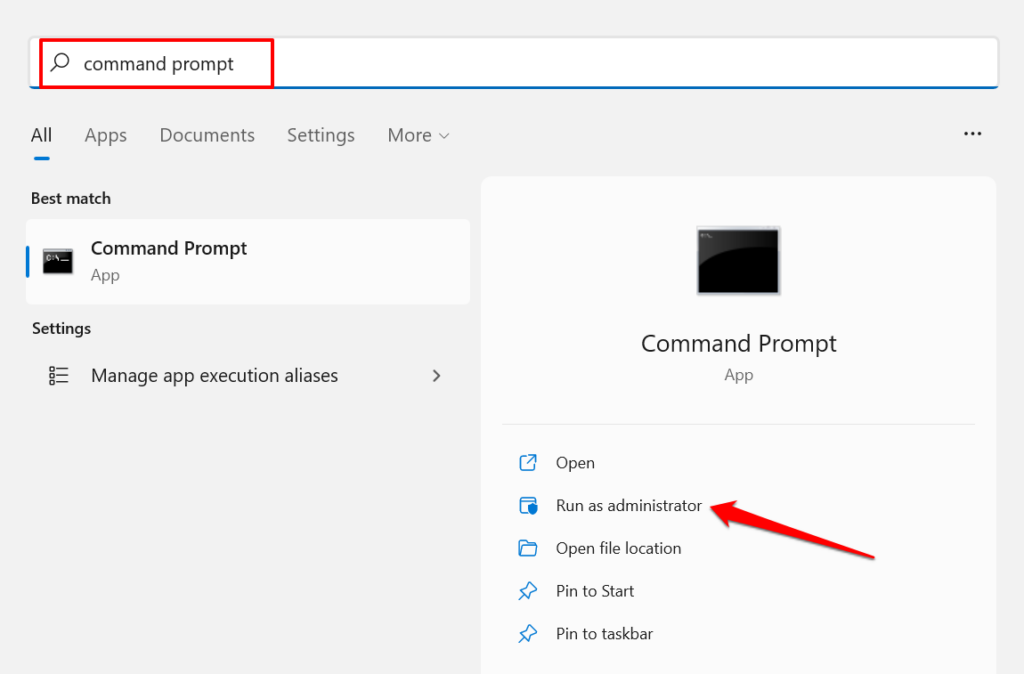
- Press the Windows key, type command prompt in the search bar, and select Run as administrator.
- Type or paste shutdown.exe /r /o in the console Command Prompt terminal and press Enter.
- You’ll get a notification that Windows will shut down in less than a minute. Select Close and wait for your PC to boot into the Windows Recovery page.
- On the startup page, head to Troubleshoot > Advanced options > Startup Settings > Restart and press the corresponding key next to your preferred Safe Mode option.
6. Enter Safe Mode from the Sign-in Screen
It’s also possible to enter Safe Mode without having to sign in to Windows. Select the power icon in the bottom-left corner of the sign-in screen, press and hold the Shift key, and select Restart.
Your PC will load the Windows Recovery Environment. As mentioned in the sections above, go to Troubleshoot > Advanced options > Startup Settings > Restart and select the Safe Mode option.
There’s More to Safe Mode
In addition to diagnosing performance and boot-related issues, entering Safe Mode can help diagnose malware infections and other system errors.


