How to Update DirectX in Windows 10
DirectX is a Windows component that helps software, mainly game programs, to work directly with the audio and video hardware on Microsoft platforms. This collection of application programming interfaces (APIs) uses built-in hardware multimedia accelerator features more productively. This guide will help you with installing the latest version to update DirectX on Windows 10 to DirectX 11 or 12 update.
How to Update DirectX in Windows 10
DirectX comes pre-installed on Windows but it needs to be regularly updated in order to enhance the gaming performance. Microsoft has made the latest releases such as Direct X 12 update to resolve issues with the current version of and thus, improve game efficiency. As the installation of DirectX depends upon the version of the operating system on your Windows PC, for different versions of OS, there is a different DirectX variant that you can install.
Note: If you have a macOS running on your laptop or computer, then DirectX will not be available for you. DirectX is only available for Microsoft Windows OS versions.
The process to update Windows 10 DirextX version are explained in a step-wise manner in the forthcoming section.
Step I: Check Current DirectX Version
The first thing to do to update DirectX Windows 10 is to check the current version of DirectX on your system. It is possible that your PC does not support DirectX 12 update as systems that use older GPUs are not compatible with the latest version. Therefore, you can follow the steps given below to know the current generation beforehand as follows:
Note: The same steps can be followed by Windows 7 or Windows 8 users as well.
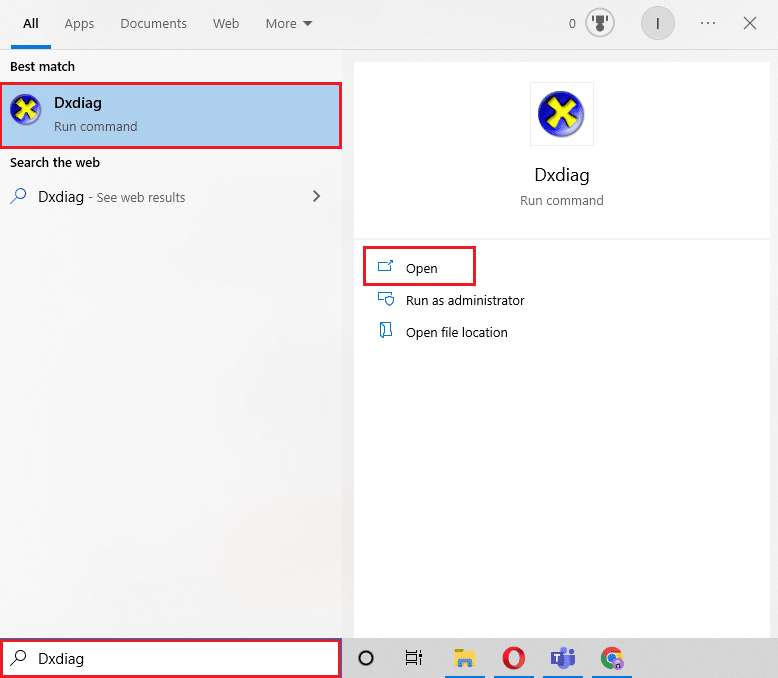
1. Open Windows search bar on your PC by pressing Windows key, type Dxdiag in it, and click on Open as shown.
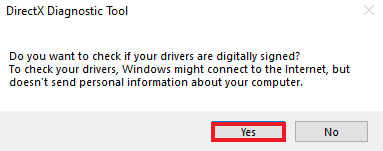
2. Next, click on Yes in DirectX Diagnostic Tool prompt.
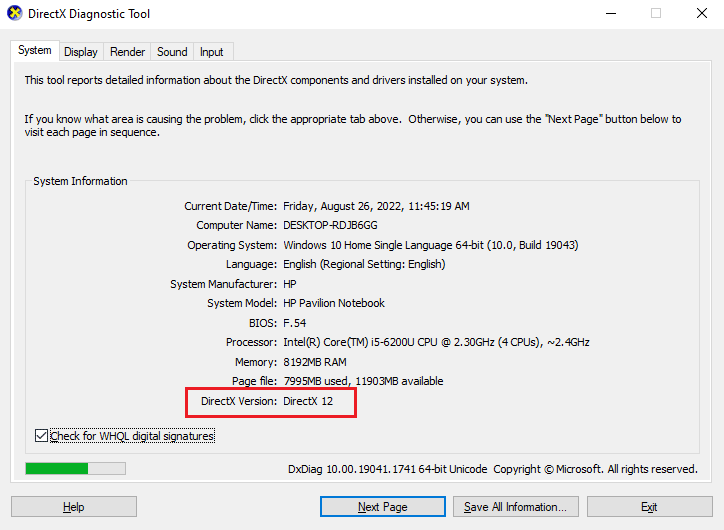
3. In the DirectX Diagnostic Tool window, you can find the DirectX Version that is currently running on your system as shown highlighted.
Also Read: How to Check PowerShell Version in Windows 10
Step II: Check Hardware and System Requirements
Now that you are aware of the current DirectX version, it is time to check the hardware and system requirements. As the latest version available for DirectX is DirectX 12, it is supported by:
- all NVIDIA graphic cards that are built on Pascal, Maxwell, Kepler, Ampere, Turning, and
- any GPU whose name starts with 600, 700, 900, or 2000.
Also, the 77xx series supports DirectX 11 update as well as 12.
Step III: Check Compatibility with Windows OS Version
The next method to follow is to check if the Windows version you are currently running is compatible with the DirectX version that you are trying to update. For Windows 7, 8, or 10, DirectX 12 works fine but if you are facing incompatibility issues while running a game on your laptop or PC with Windows 7 then try the DirectX 11 update instead of DirectX 12.
The list of DirectX versions that are available for the Windows operating system is given below:
- DirectX 11 version is supported by Windows 7, Windows 8, Windows 10, and Windows Server 2008 R2.
- DirectX 11.1 is compatible with Windows 7 (SP1), Windows 8, Windows 10, Windows RT, and Windows Server 2012.
- DirectX 11.2 is supported by Windows 8.1, Windows RT 8.1, Windows 10, and Windows Server 2012 R2.
- DirectX 11.3 & 11.4 can only be run on Windows 10.
- DirectX 12 comes pre-installed in Windows 10.
Also Read: What are Valorant Laptop Requirements?
Step IV: Install Newest DirectX Version via Windows Update
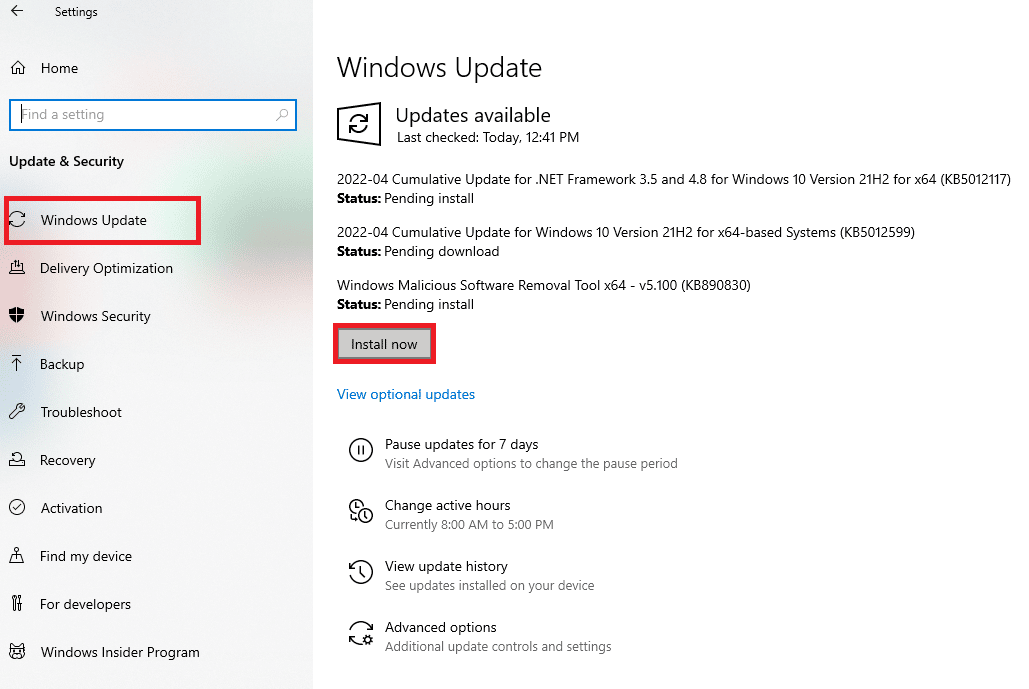
A simple way for DirectX latest version download is to simply update Windows on your PC. Forcing Windows to update your operating system will help you to automatically install DirectX 12 or any other latest version as compatible with your system. Follow our guide on How to Download and Install Windows 10 Latest Update to do the same.
Step V: Update Manually via DirectX Website
Apart from updating Windows, you can update DirectX Windows 10 manually on your system too. The following steps can be performed on any version of the Windows operating system to install the latest update of DirectX.
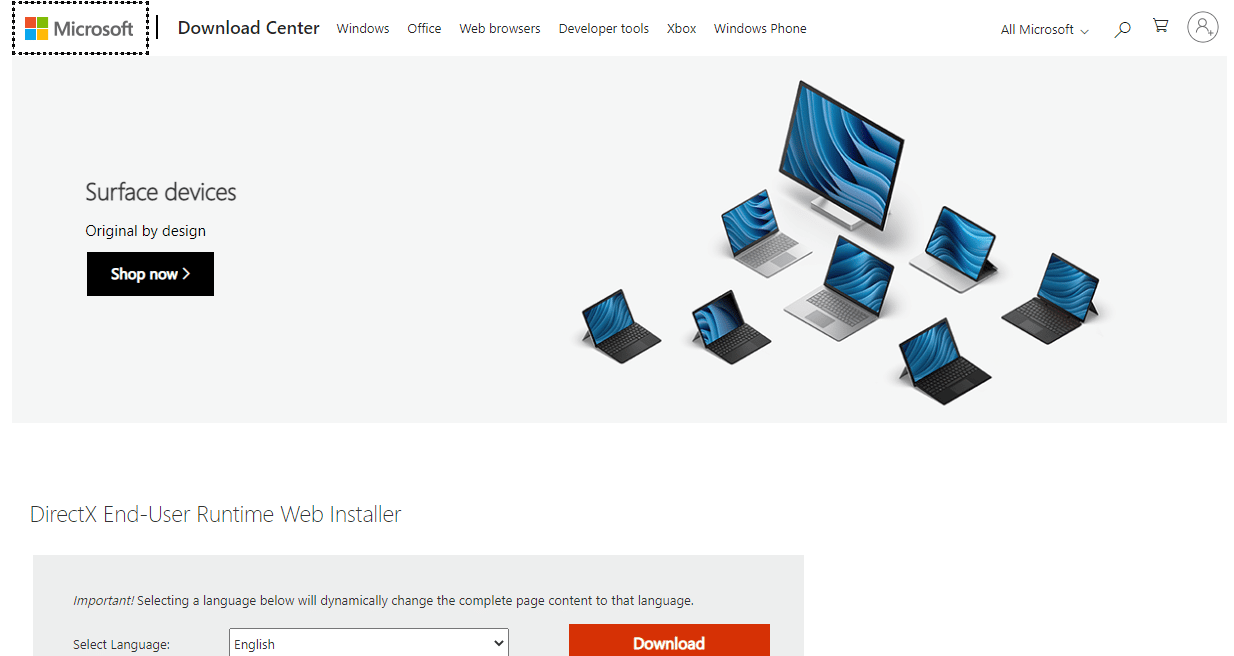
1. Launch any web browser on your PC and open the DirectX download page.
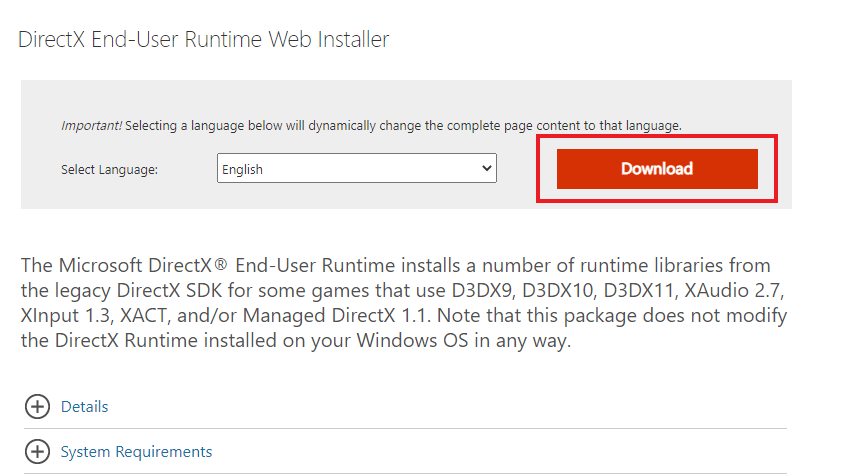
2. Once you have selected the language, click on Download.
3. Now, click on the downloaded file.
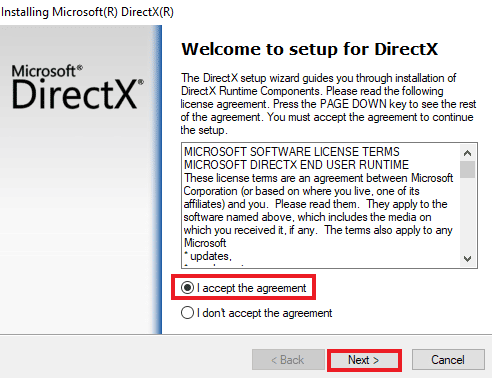
4. Select I accept the agreement and click on Next in the Installing Microsoft(R) DirectX(R) window.
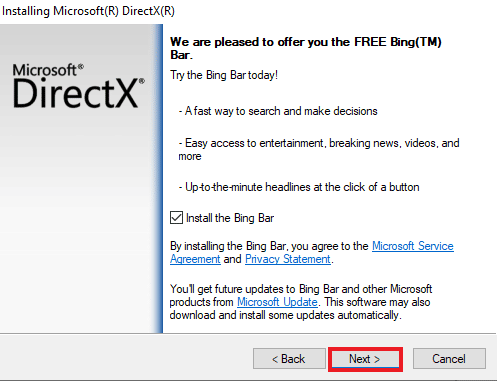
5. Now, click on Next again.
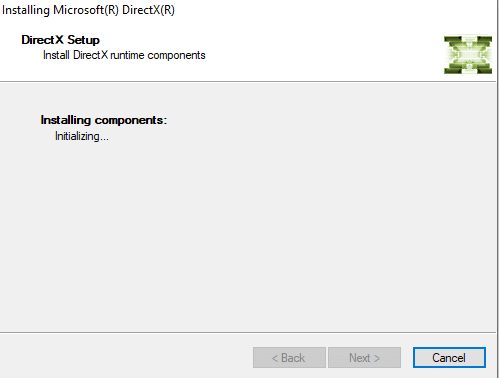
6. The DirectX Setup will start to install as shown.
7. Follow the on-screen instructions to complete the installation and restart your PC.
You have now DirectX latest version download & installation process. Enjoy gaming!
Also Read: How to Rollback Driver Updates on Windows 11
Pro Tip: Roll Back DirectX
Another method that can help you to resolve DirectX issues on your PC is to roll back the current version rather than update it. You can try the step-by-step instructions below to follow the same on your system:
Note: The Value data mentioned in the steps is exclusive to newer versions of Windows, including Windows XP, Windows Vista, and Windows 7.
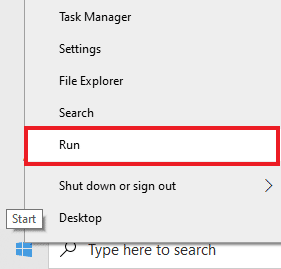
1. Open the Run dialog box with a right-click on the Start icon and select Run.
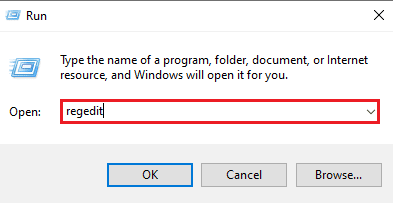
2. Now, type regedit and press enter on your keyboard to open Registry Editor.
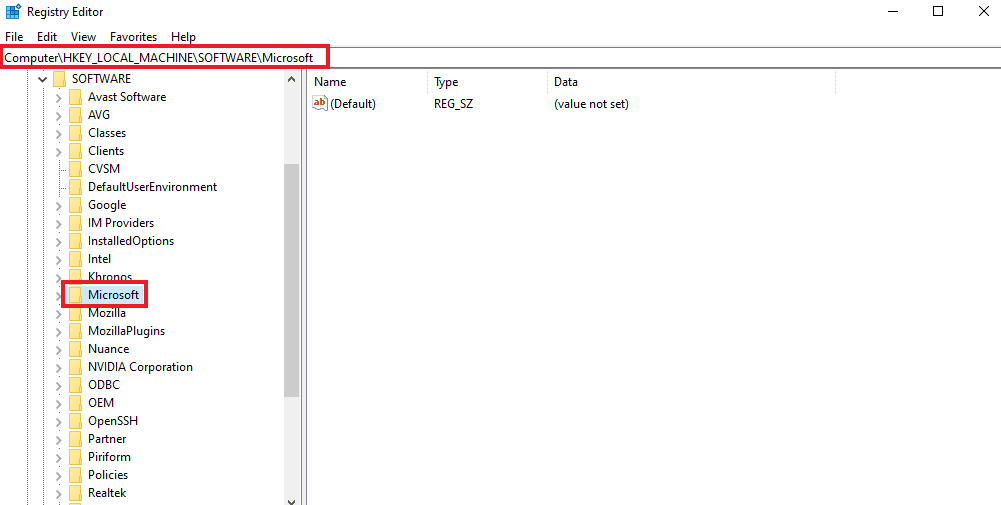
3. Next, navigate to HKEY_LOCAL_MACHINESOFTWAREMicrosoft as shown.
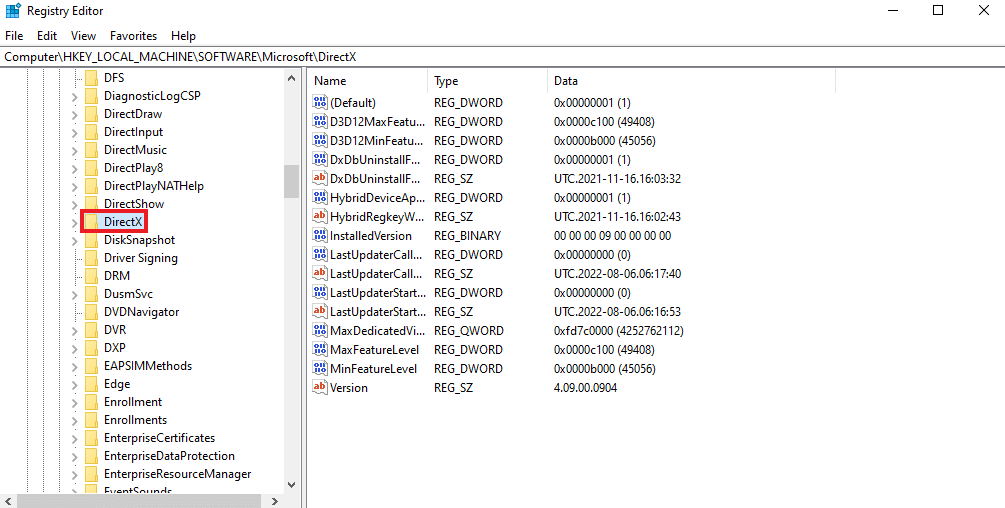
4. Now, locate and click on the DirectX folder.
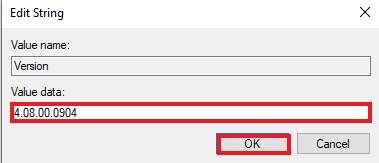
5. Click on Version, replace Value data from 4.09.00.0904 to 4.08.00.0904, and click OK.
6. Now, close the Registry Editor & exit.
Frequently Asked Questions (FAQs)
Q1. How can I update from DirectX 10 to 12?
Ans. To update your DirectX version, follow the methods mentioned above. However, do make sure to check the requirements that are needed to update the DirectX version from 10 to the latest version download first.
Q2. Which is better, DirectX 11 or 12?
Ans. The major difference between DirectX 11 and 12 is that DirectX 12 is lower-level, which means it provides fine-grained control of how the game interacts with the CPU and GPU of your system. In short, DirectX 12 is better and provides more flexibility & power to the users.
Q3. Is DirectX 12 great for gaming?
Ans. One of the many advantages of DirectX 12 is improved CPU performance. From CPU utilization and other performance upgrades, DirectX 12 is indeed great for gaming.
Q4. Can DirectX 11 be installed on Windows 10?
Ans. There is no stand-alone package that can be used to download DirectX 11 update to Windows 10. The latest version of DirectX comes pre-installed along with Windows 10.
Q5. How can I check if my PC supports DirectX current version?
Ans. You can refer to Step I, Step II & Step III given above to know more about the current DirectX version on your PC and if your PC supports that particular update of DirectX.
Recommended:
We hope that our guide on how to update DirectX or latest version download Windows 10 has been helpful. If you have any more queries or suggestions, leave a comment down below.
