Network Adapter missing in Windows 10? 11 Working Ways to Fix it!
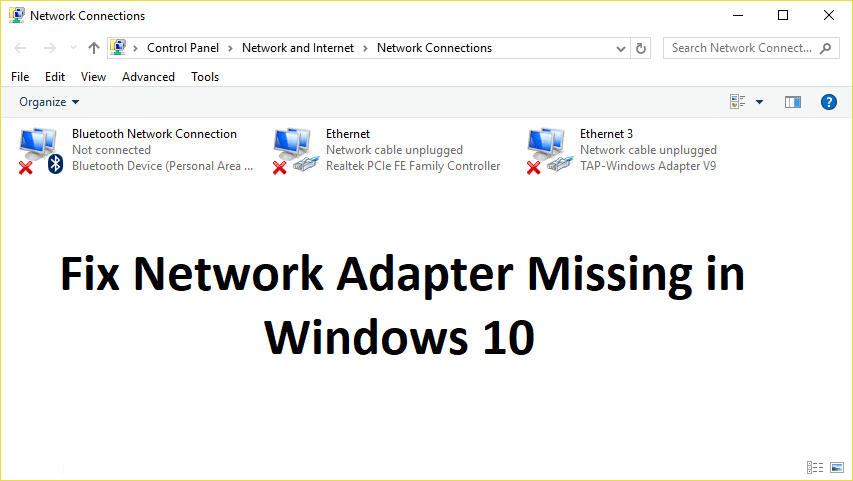
If you don’t see Wireless Adapter under Network Connections neither there is a Network adapter tab under device manager then it seems like your Network Adapter is missing or not detected on your Windows 10 which is a serious issue because you won’t be able to access the Internet until the issue is resolved. In short, when you click on the Wireless icon on the system tray there won’t be any device listed in order to connect to the Internet and if you open Device Manager then you won’t see the Network Adapter tab.
These are the reasons behind the Network Adapter missing issue:
- Network adapter missing in Device manager
- No Network Adapters showing in Device Manager
- Network Adapter Not Detected
- Network Adapter Not Found Windows 10
- No Network Adapter In Device Manager
The main cause of this issue seems to be outdated, incompatible or corrupted Network Adapter drivers. If you have recently upgraded from previous versions of Windows then it’s possible that the old drivers will not work with the new Windows and hence the issue. So without wasting any time let’s see how to actually Fix Network Adapter Missing in Windows 10 issue with the below-listed troubleshooting steps.
Note: Just make sure to uninstall any VPN software on your PC before continuing.
Fix Network Adapter Missing in Windows 10
Make sure to create a restore point just in case something goes wrong.
Method 1: Reboot your Computer
Most of us know about this very basic trick. Rebooting your computer can sometimes fix any software conflict by giving it a fresh start. So if you are someone who would rather put their computer on sleep, restarting your computer is a good idea.
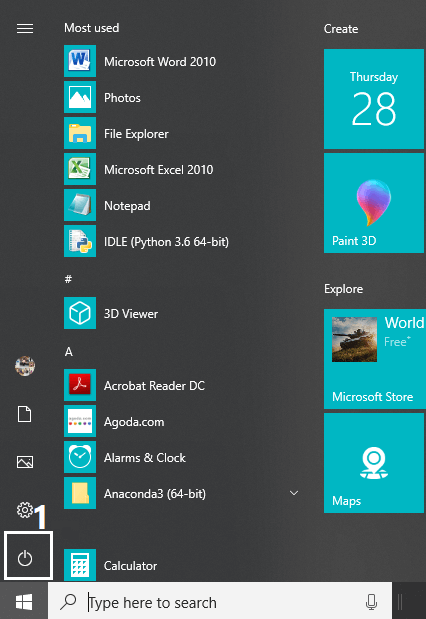
1. Click on the Start menu and then click on the Power button available at the bottom left corner.
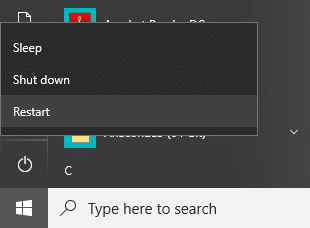
2. Next, click on the Restart option and your computer will restart itself.
After the computer restarts, check if your problem is resolved or not.
Method 2: Flush DNS and Reset Winsock Components
1. Open elevated Command Prompt.
2. Now type the following command and press Enter after each one:
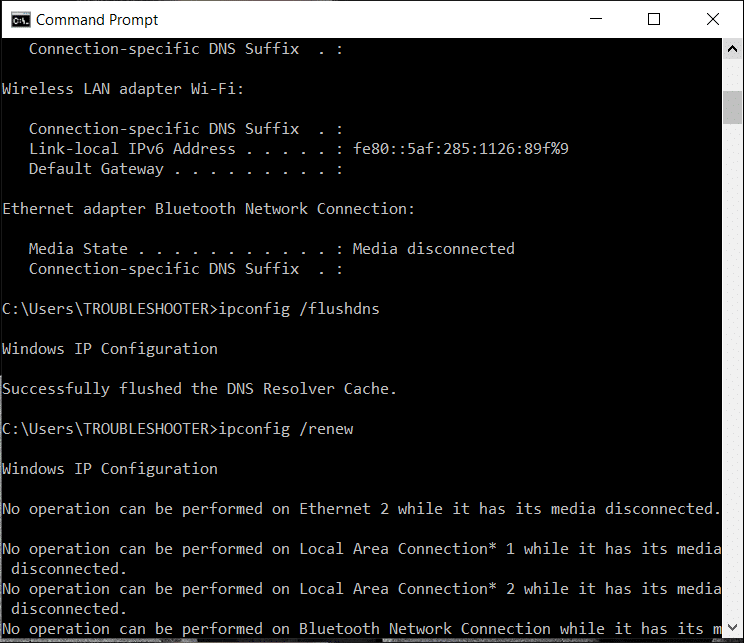
ipconfig /release
ipconfig /flushdns
ipconfig /renew
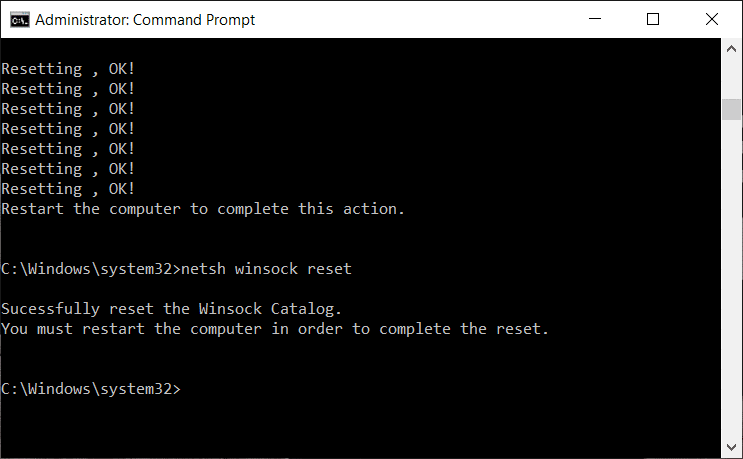
3. Again open Command Prompt and type the following command one by one and hit enter after each one:
ipconfig /flushdns
nbtstat –r
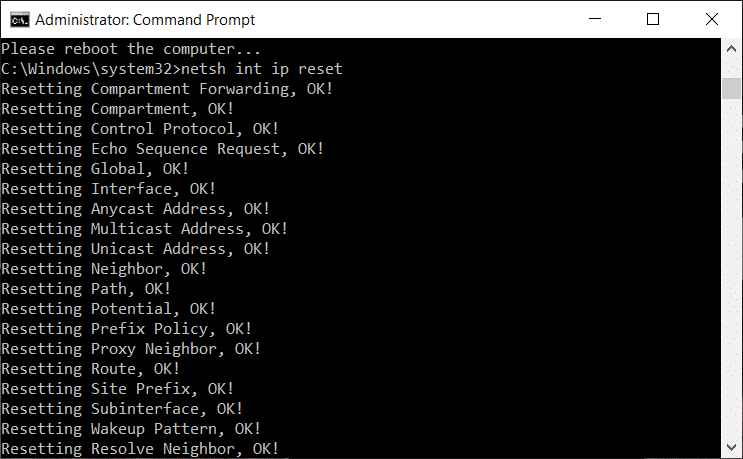
netsh int ip reset
netsh winsock reset
4. Reboot to apply changes. Flushing DNS seems to Fix Network Adapter Driver Issues on Windows 10.
Method 3: Run WWAN AutoConfig Service
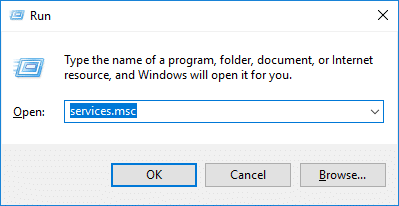
1. Press Windows Key + R then type services.msc and hit Enter.
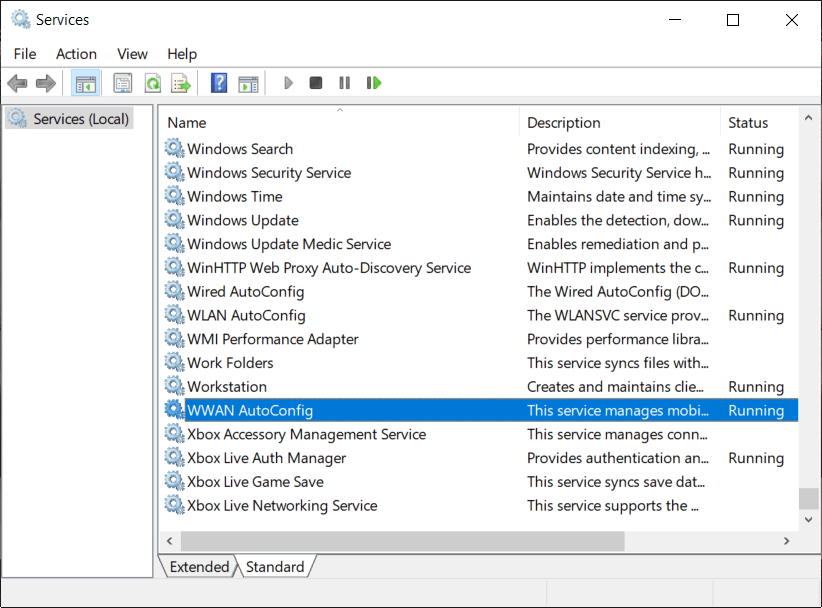
2. Find WWAN AutoConfig Service in the list (press W to reach to the end of the list quickly).
3. Double-click on WWAN AutoConfig Service.
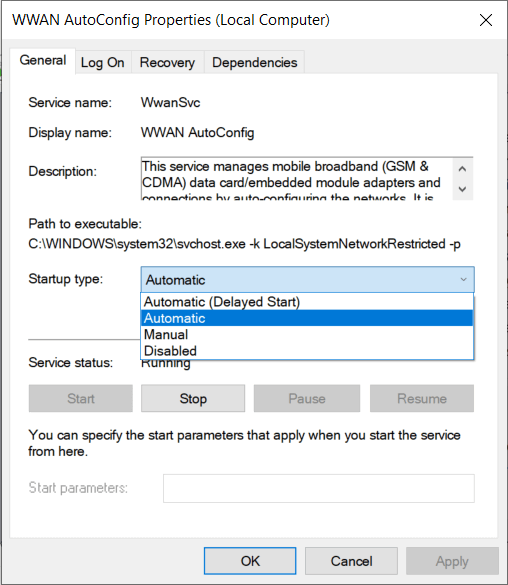
4. If the service is already running then click on Stop, then from the Startup type drop-down select Automatic.
5. Click Apply followed by OK.
6. Right-click on the WWAN AutoConfig Service and select Start.
Method 4: Update Network Adapter Drivers
1. Press Windows key + R and type “devmgmt.msc” in Run dialogue box to open device manager.
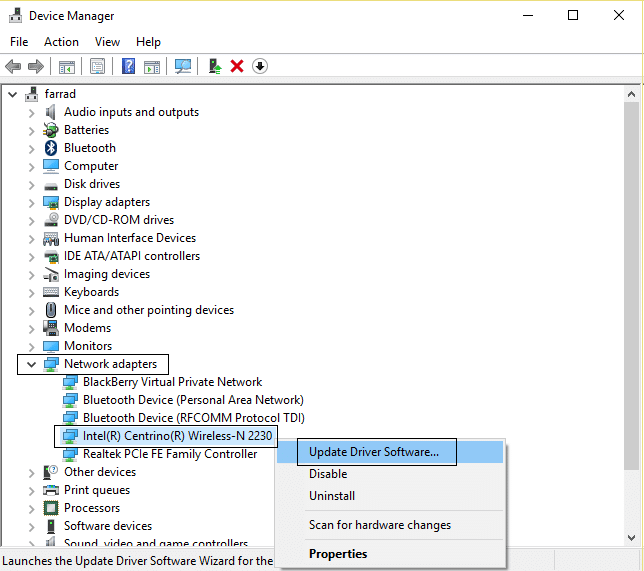
2. Expand Network adapters, then right-click on your Wi-Fi controller (for example Broadcom or Intel) and select Update Driver Software.
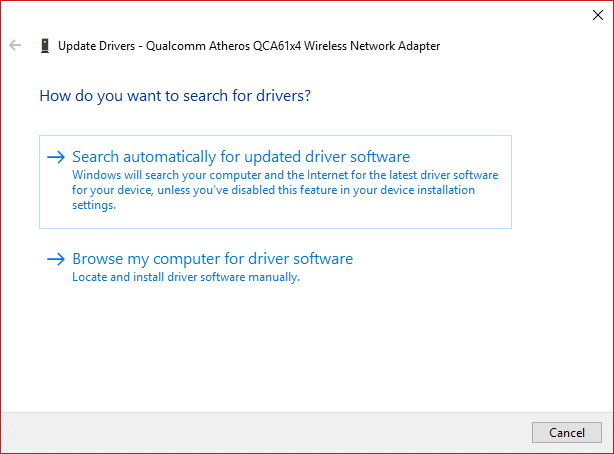
3. Now select “Search for automatically for updated driver software“.
4. Now Windows will automatically search for the Network driver update and if new update is found, it will automatically download and install it.
5. Once finished, close everything and reboot your PC.
6. If you’re still facing the Network Adapter Missing in Windows 10 issue, then again right-click on your WiFi controller and select Update driver in Device Manager.
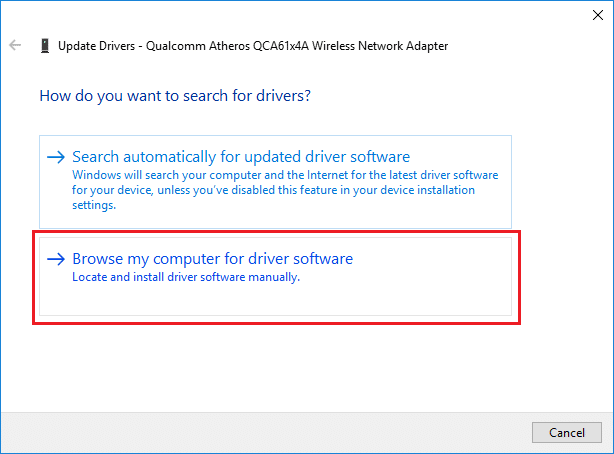
7. Now, in the Update Driver Software Windows, select “Browse my computer for driver software.“
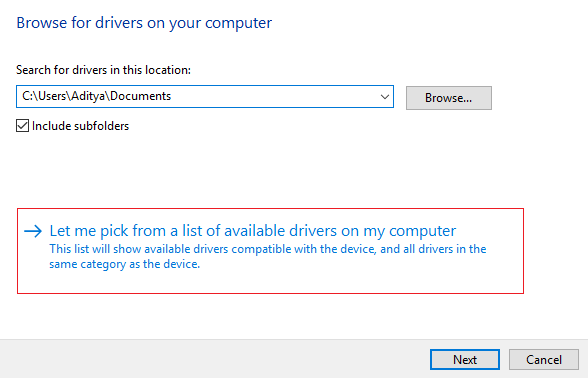
8. Now select “Let me pick from a list of available drivers on my computer.“
9. Try to update drivers from the listed versions (make sure to checkmark compatible hardware).
10. If the above didn’t work then go to the manufacturer’s website to update drivers.
11. Download and install the latest driver from the manufacturer’s website then restart your PC.
Method 5: Uninstall Network Adapter Drivers
1. Press Windows Key + R then type “devmgmt.msc” and hit Enter to open Device Manager.
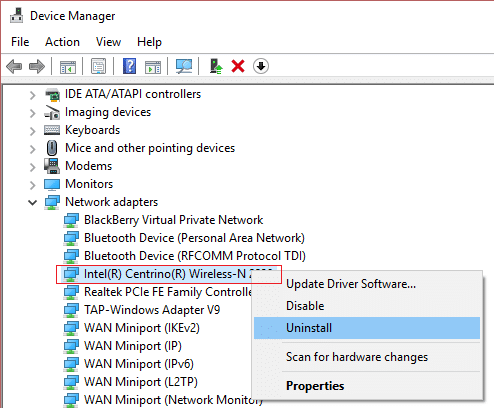
2. Expand Network Adapters and find your network adapter name.
3. Make sure you note down the adapter name just in case something goes wrong.
4. Right-click on your network adapter and uninstall it.
5. It will ask for confirmation select Yes.
6. Restart your PC and Windows will automatically install the network adapter drivers again.
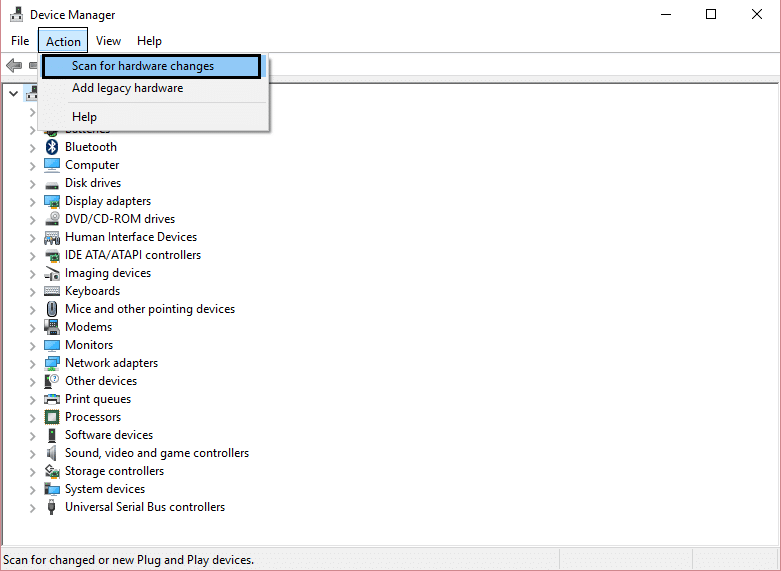
7. If the drivers are not installed automatically then again open the Device Manager.
8. From the Device Manager menu, click on Action then click on “Scan for hardware changes“.
Method 6: Make sure Windows is up to date
1. Press Windows Key + I to open Settings then click on Update & Security.
2. From the left-hand side, menu click on Windows Update.
3. Now click on the “Check for updates” button to check for any available updates.
4. If any updates are pending then click on Download & Install updates.
5. Once the updates are downloaded, install them and your Windows will become up-to-date.
6. After the updates are installed reboot your PC to save changes.
Method 7: Run Network Adapter Troubleshooter
1. Press Windows Key + I to open Settings then click on Update & Security.
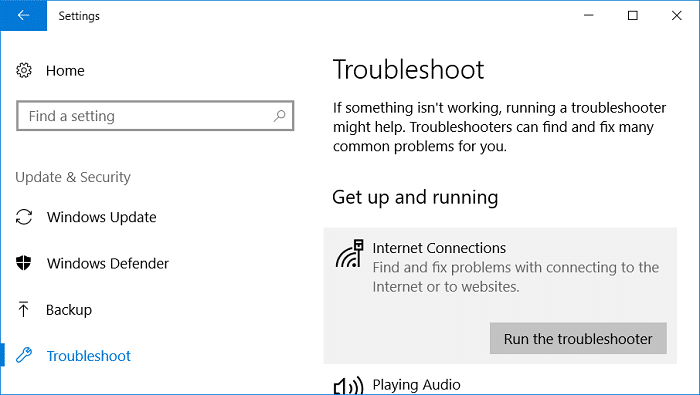
2. From the left-hand menu select Troubleshoot.
3. Under Troubleshoot click on Internet Connections and then click Run the troubleshooter.
4. Follow further on-screen instructions to run the troubleshooter.
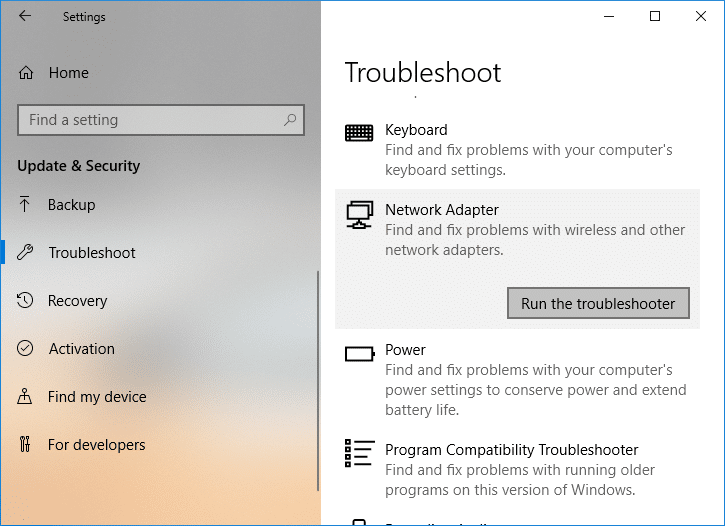
5. If the above didn’t fix the issue then from the Troubleshoot window, click on Network Adapter and then click on Run the troubleshooter.
5. Reboot your PC to save changes and see if you’re able to fix the Network Adapter Missing issue.
Method 8: Install Intel PROSet/Wireless Software
Sometimes the problem is caused due to outdated Intel PROSet Software, hence updating it seems to fix Network Adapter Missing in Windows 10 issue. Therefore, go here and download the latest version of PROSet/Wireless Software and install it. This is a third party software which manages your WiFi connection instead of Windows and if PROset/Wireless Software is outdated is can cause drivers issue in Wireless Network Adapter. Hence, read How to Update Network Adapter Drivers on Windows 10.
Method 9: Reset Network Connection
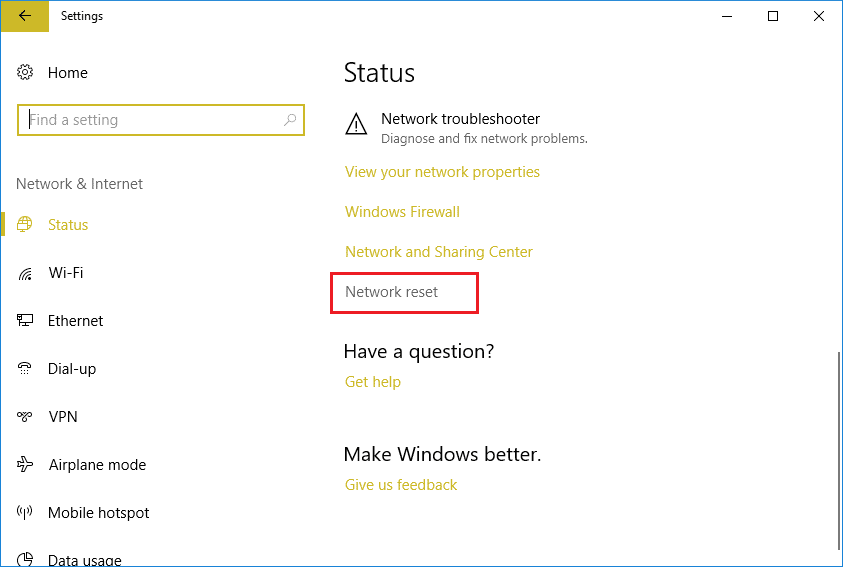
1. Press Windows Key + I to open Settings then click on Network & Internet.
2. From the left-hand menu select Status.
3. Now scroll down and click on Network reset at the bottom.
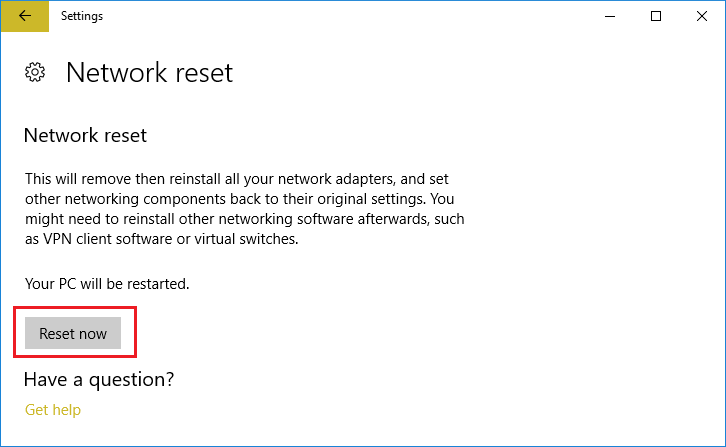
4. Again click on “Reset now” under Network reset section.
5. This will successfully reset your network adapter and once it is complete the system will be restarted.
Method 10: Perform a System Restore
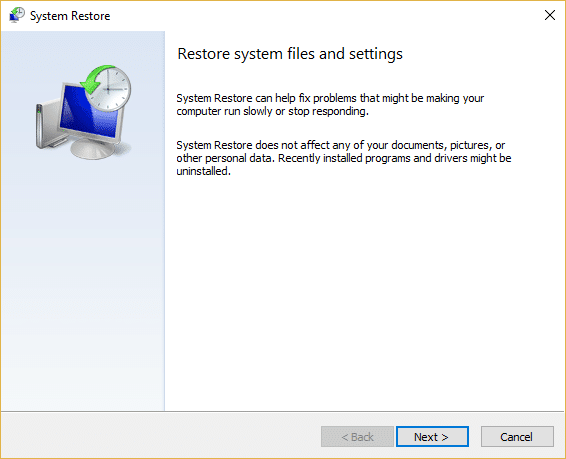
System Restore always works in resolving the error, therefore System Restore can definitely help you in fixing this error. So without wasting any time run system restore in order to resolve Network Adapter Missing issue.
Method 11: Using elevated Command Prompt
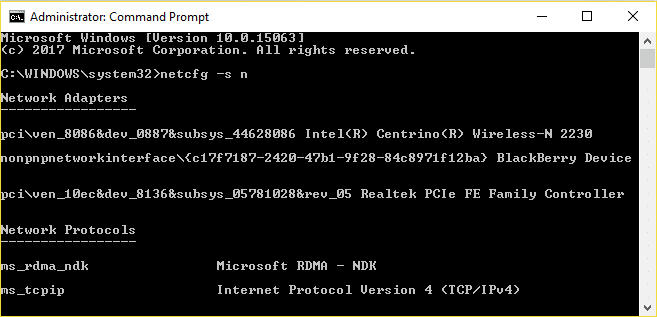
1. Press Windows Key + X then select Command Prompt (Admin).
2. Type the following command into cmd and hit Enter:
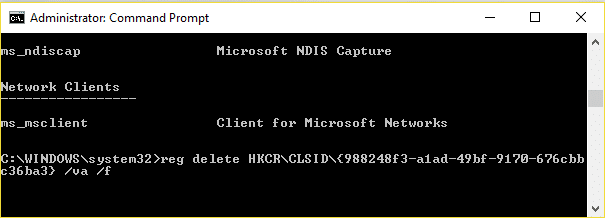
netcfg –s n
3. This will display a list of networking protocols and in that list find DNI_DNE.
4. If DNI_DNE is listed then type the following command into cmd:
reg delete HKCRCLSID{988248f3-a1ad-49bf-9170-676cbbc36ba3} /va /f
netcfg -v -u dni_dne
5. If you don’t see DNI_DNE listed then only run the command netcfg -v -u dni_dne.
6. Now if you receive the error 0x80004002 after trying to run the above command then you need to delete the above key manually.
7. Press Windows Key + R then type regedit and hit Enter.
8. Navigate to the following Registry Key:
HKEY_CLASSES_ROOTCLSID{988248f3-a1ad-49bf-9170-676cbbc36ba3}
9. Delete this key and then again type netcfg -v -u dni_dne command in cmd.
10. Reboot your PC to save changes.
Recommended for you:
That’s it you have successfully Fix Network Adapter Missing in Windows 10 but if you still have any questions regarding this post then feel free to ask them in the comment’s section.
