[SOLVED] keyboard has stopped working on Windows 10

Fix keyboard has stopped working on Windows 10: You are here because your Keyboard seems to suddenly stopped working and you have tried everything you know to fix the issue. But don’t worry here at troubleshooter we will list all the advanced as well as simple techniques to fix your Keyboard. This seems to be the most frustrating thing that happens in Windows 10 because if you can’t type then your PC is just a sitting rock. Without wasting any more time let’s see how to fix keyboard issues in Windows 10.
Fix keyboard has stopped working on Windows 10
Before trying any of the below-listed methods you should try to run System Restore. It’s also recommended to try the method listed in this guide How to fix This Device Cannot Start Code 10 Error.
Method 1: Try Windows Key + Space Shortcut
Before going all gaga over this problem you might consider trying this simple fix, which is pressing Windows Key and Space bar simultaneously which seems to work in almost all the cases.
Also, check that you didn’t accidentally locked your keyboard using some shortcut key, which is typically accessed by pressing Fn key.
Method 2: Make sure to Turn off Filter Keys
1.Press Windows Key + X then select Control Panel.
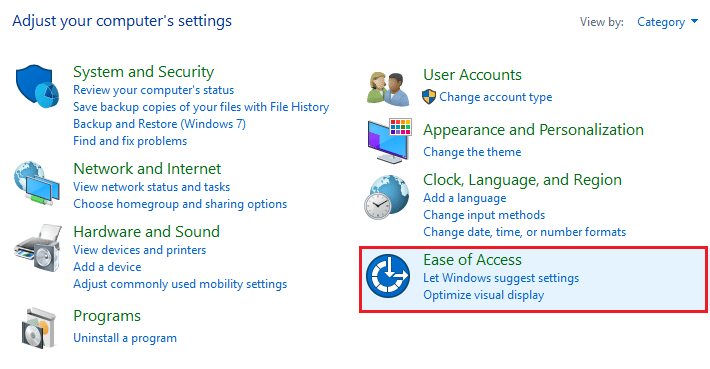
2.Next, click on Ease of Access and then click “Change how your keyboard works.“
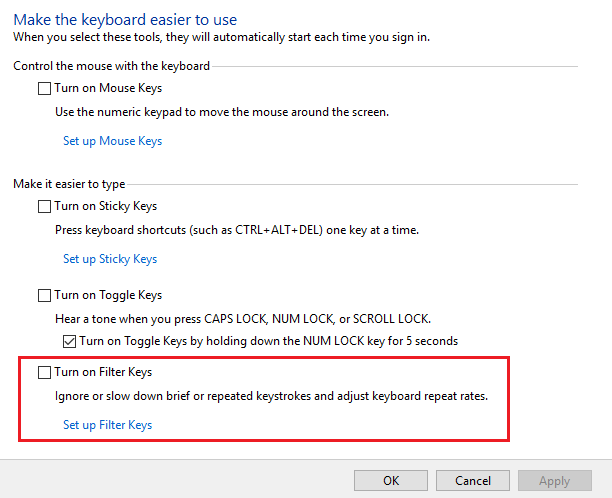
3.Make sure that Turn on Filter Keys option is not checked.
4.If its checked then uncheck it and click Apply followed by OK.
Method 3: Update your Keyboard drivers
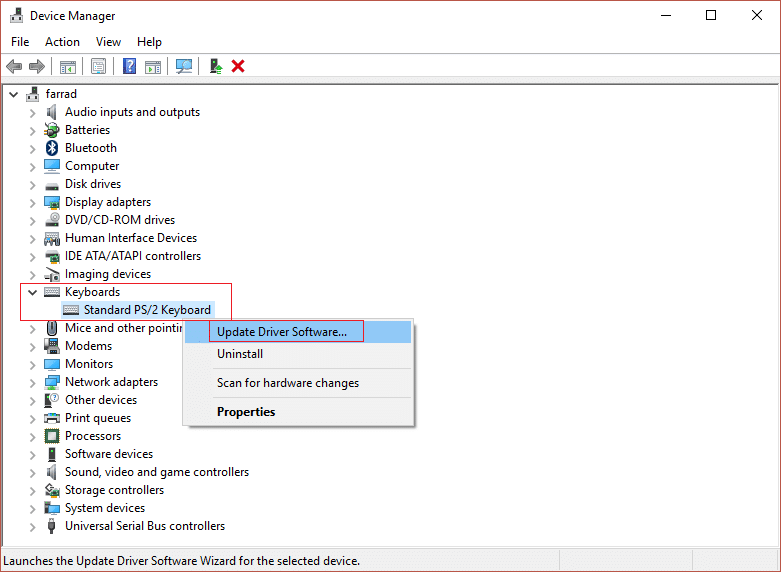
1.Press Windows Key + R then type “devmgmt.msc” and hit enter to open Device Manager.
2.Next, expand the Keyboard and right click on Standard PS/2 Keyboard then select “Update Driver Software.“
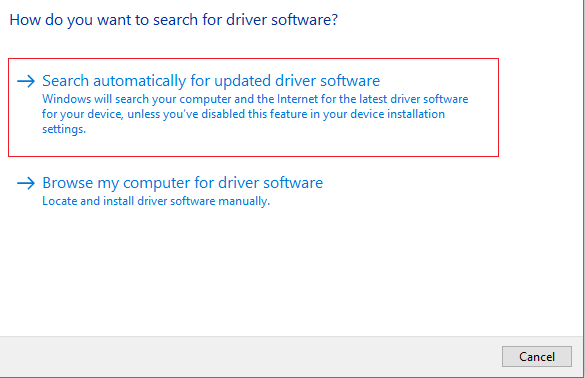
3.Now first select the option “Search automatically for updated driver software” and complete the driver update process.
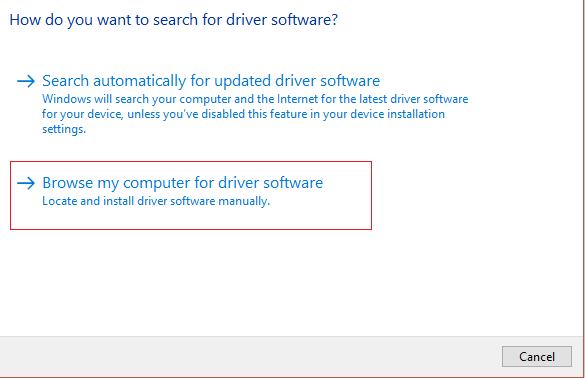
4.If above doesn’t fix your problem then select the second option “Browse my computer for driver software.“
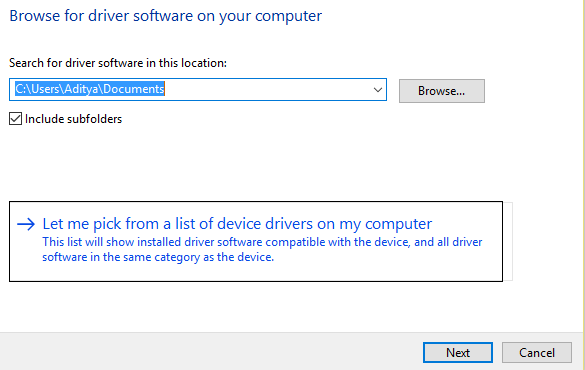
5.Click “Let me pick from a list of device drivers on my computer.”
6.Select the appropriate driver from the list and click Next.
7.Once the process is finished close the device manager and reboot your PC.
Method 4: Disable Fast Startup
1.Press Windows Key + X then select Control Panel.
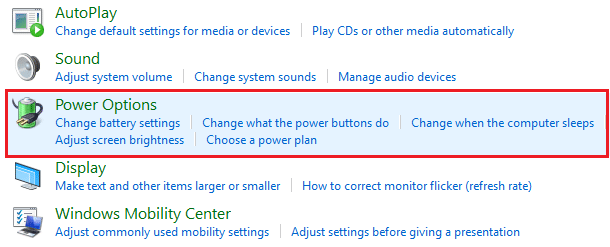
2.Click on Hadware and Sound then click on Power Options.
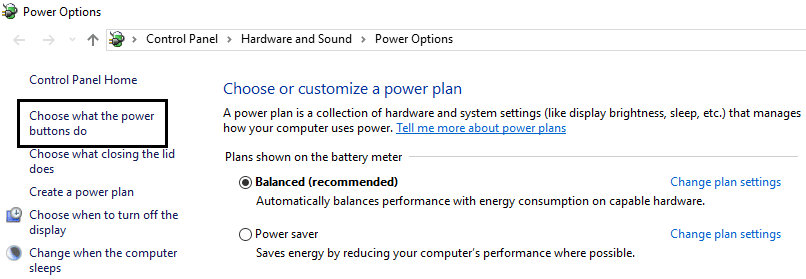
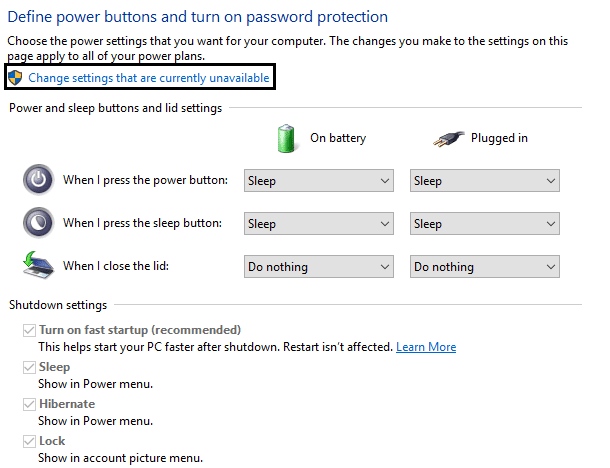
3.Then from the left window pane select “Choose what the power buttons do.“
4.Now click on “Change settings that are currently unavailable.“
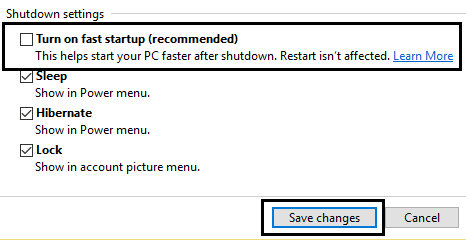
5.Uncheck “Turn on fast startup” and click on Save changes.
Method 5: Uncheck Allow the computer to turn off this device to save power
1.Press Windows Key + R then type “devmgmt.msc” and hit enter to open Device Manager.
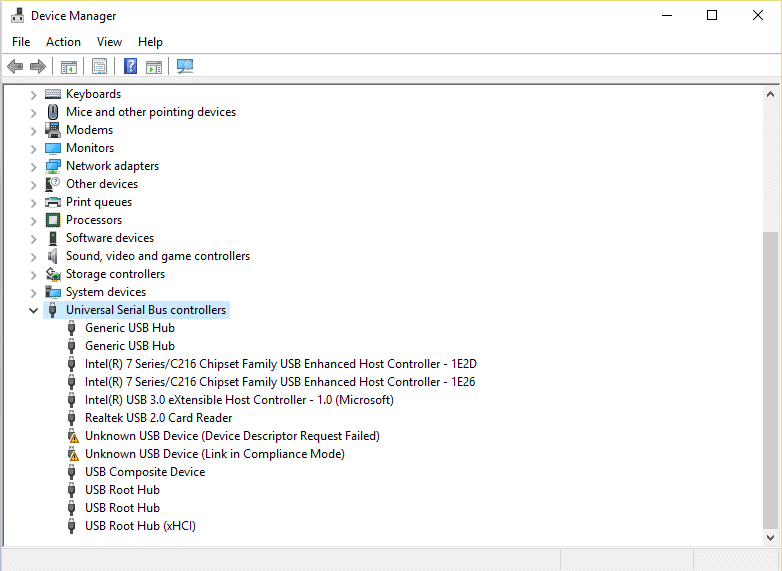
2.Expand Universal Serial Bus controllers and right-click on USB Root Hub then select Properties. (If there are more than one USB Root Hub then do the same for each one)
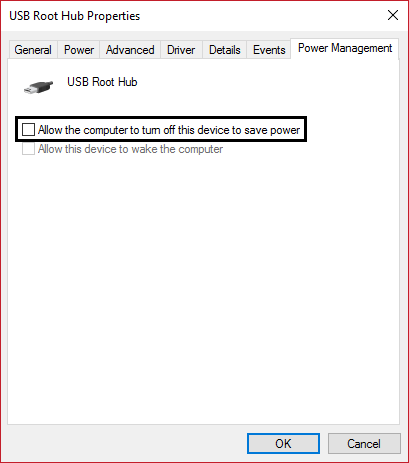
3.Next, select Power management tab in USB Root Hub Properties.
4.Uncheck “Allow the computer to turn off this device to save power.“
5.Click Apply followed by OK and reboot your PC.
Method 6: Make sure Bluetooth Keyboard Drivers are installed
1.Press Windows Key + R then type “control printers” and hit enter.
2.Right-click on your Keyboard/Mouse and click Properties.
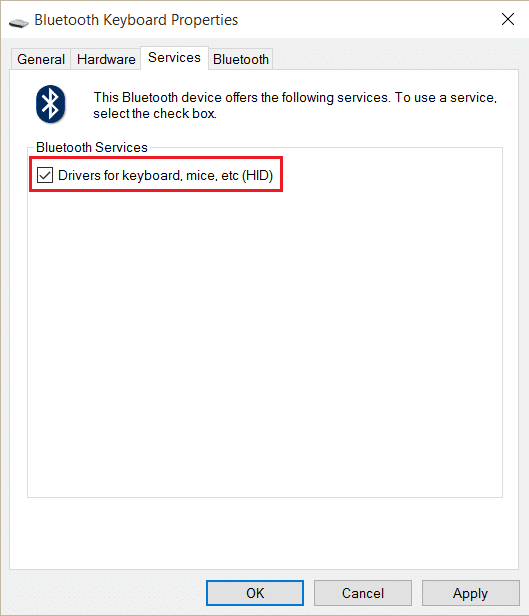
3.Next, select Services window and check “Drivers for keyboard, mice, etc (HID).“
4.Click Apply then OK and restart your PC to save changes.
That’s it, you have read the end of this post [Solved] keyboard has stopped working on Windows 10 but if you still have any questions regarding this post feel free to ask them in the comment’s section.

