Windows Boot Manager is a software utility in your system, often termed as BOOTMGR. It helps you to load a single Operating System from a list of multiple Operating Systems on the hard drive. Also, it allows the user to boot CD/DVD drives, USB, or floppy drives without any Basic Input / Output System. Moreover, it helps to set the boot environment and you would not be able to boot your Windows if the windows boot manager goes missing or corrupt. So, if you want to know more about how to enable or disable Windows Boot Manager on Windows 10, then you are at the right place. So, continue reading!
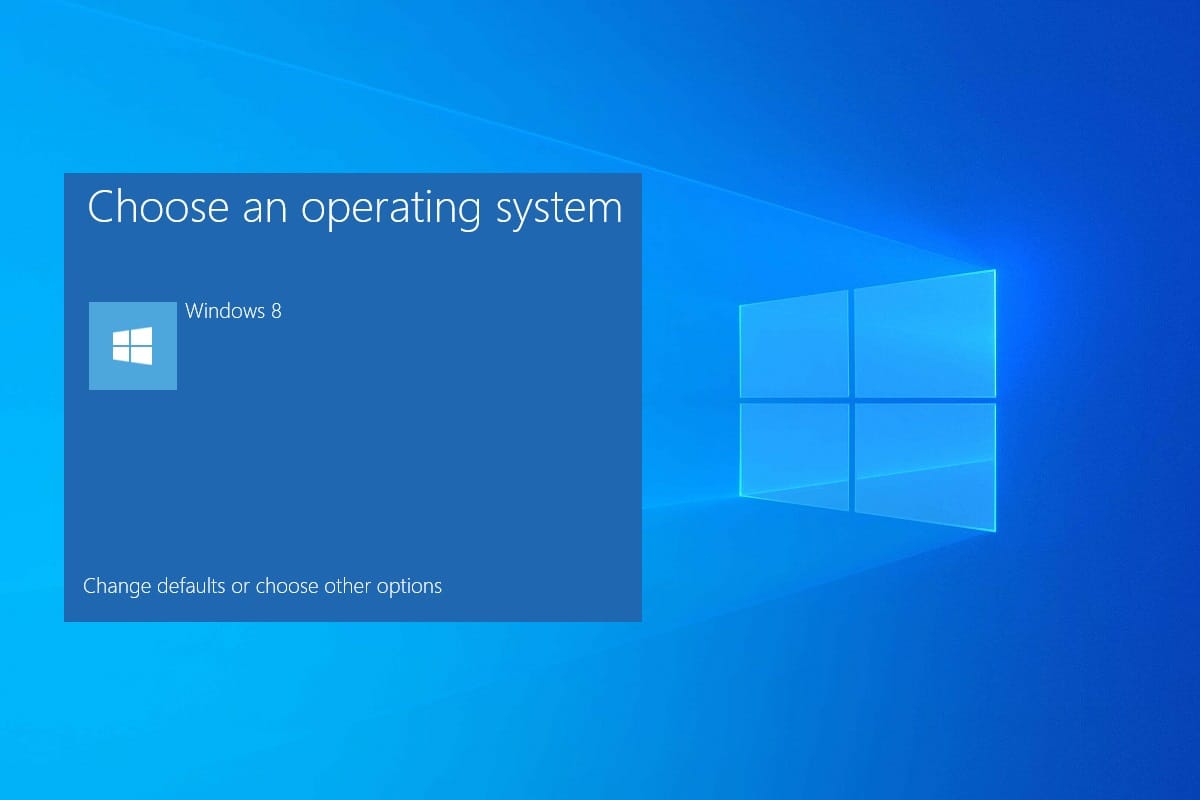
What is Boot Manager on Windows 10?
Volume Boot Code is a part of the Volume Boot Record. Windows Boot Manager is software loaded from this code which helps you to boot Windows 7/8/10 or Windows Vista Operating System.
- All the configuration data that the BOOTMGR requires is located in Boot Configuration Data (BCD).
- The Windows Boot Manager file in the root directory is in read-only and hidden format. The file is marked as Active in Disk Management.
- In most systems, you can locate the file in the partition named System Reserved without requiring a hard drive letter.
- However, the file may be located in the primary hard drive, usually C drive.
Note: The Windows boot process begins only after the successful execution of the system loader file, winload.exe. Hence, it is important to locate the boot manager correctly.
How to Enable Windows Boot Manager on Windows 10
You can enable Windows Boot Manager when you have multiple operating systems and you wish to select and launch any one of these.
Method 1: Using Command Prompt (CMD)
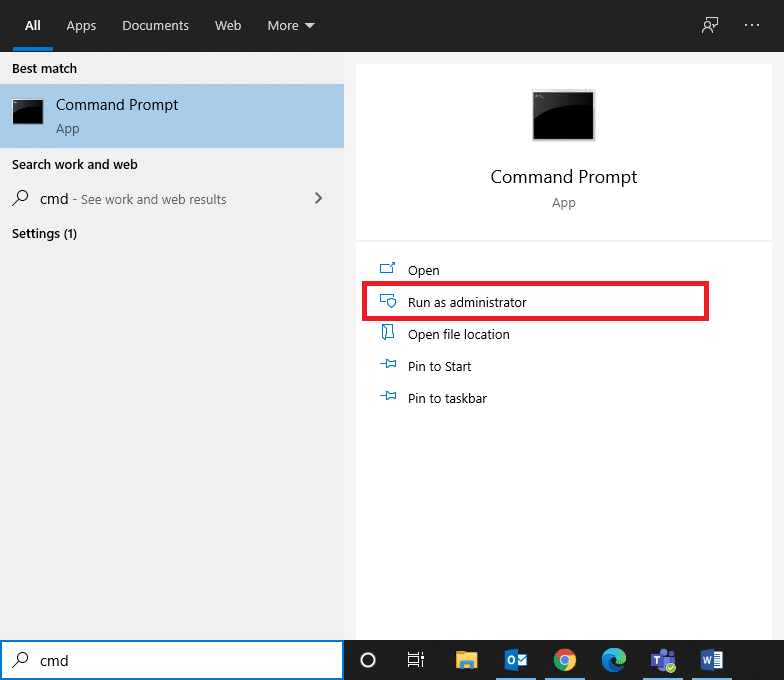
1. Launch Command Prompt by going to the search menu and typing cmd and then, clicking on Run as administrator, as shown.
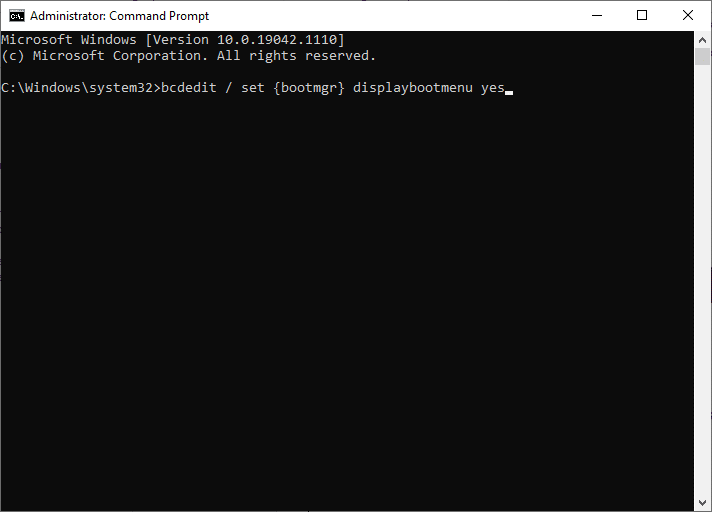
2. Type the following commands one-by-one, and hit Enter after each:
bcdedit / set {bootmgr} displaybootmenu yes
bcdedit / set {bootmgr} timeout 60
Note: You can mention any timeout value as 30,60 etc specified in seconds.
Method 2: Using System Properties
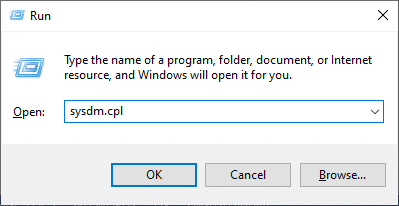
1. To open the Run dialog box, press Windows +R keys together.
2. Type sysdm.cpl, and click OK, as depicted. This will open System Properties window.
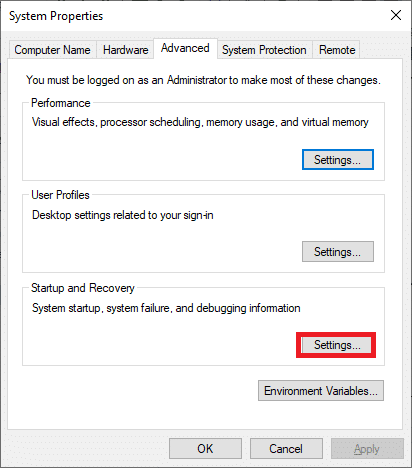
3. Switch to the Advanced tab and click on Settings… under Startup and Recovery.
4. Now, check the box Time to display list of operating systems: and set value in seconds.
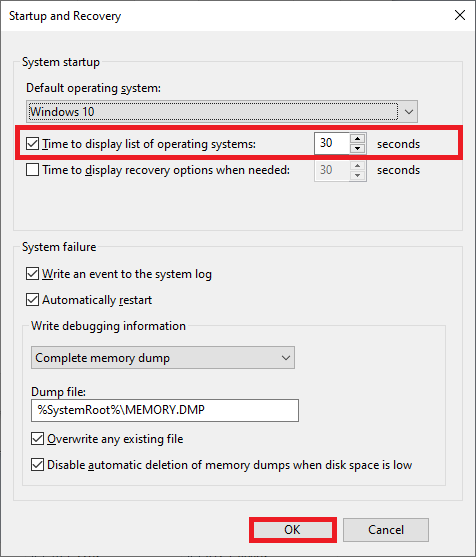
5. Finally, click on OK.
Also read: Fix Windows 10 Won’t Boot From USB
How to Disable Windows Boot Manager on Windows 10
Since enabling Windows Boot Manager can slow down the booting process, if there is only one Operating system in your device then you can disable it to speed up the boot process. A list of methods to disable Windows Boot Manager is explained below.
Method 1: Using Command Prompt
1. Launch Command Prompt with administrative permissions, as instructed in Method 1, step 1 under How to Enable Windows Boot Manager on Windows 10 section.
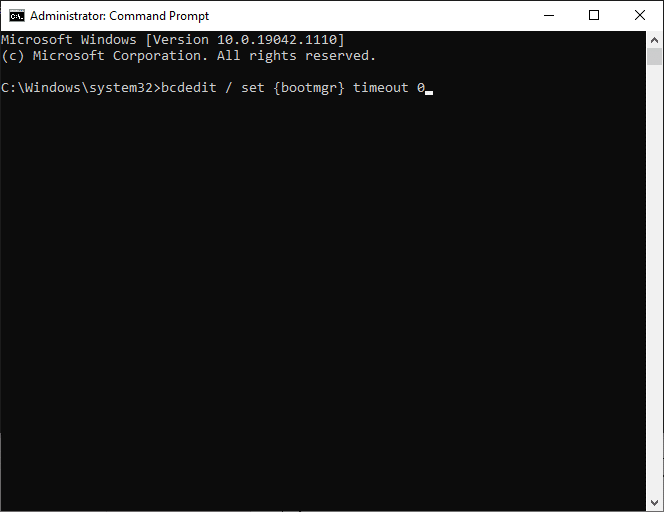
2. Type the following command and press Enter key:
bcdedit / set {bootmgr} timeout 0
Note: You can also use bcdedit / set {bootmgr} displaybootmenu no command to disable Windows Boot Manager.
Method 2: Using System Properties
1. Launch Run > System Properties, as explained earlier.
2. Under the Advanced tab, click on Settings… under Startup and Recovery, as shown.
3. Now, uncheck the box Time to display a list of operating systems: or set the value to 0 seconds.
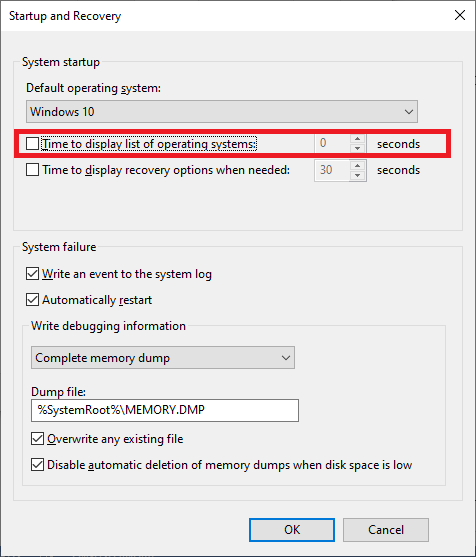
4. Finally, click on OK.
Also read: How to Boot to Safe Mode in Windows 10
How to Use System Configuration Tools to Reduce Response Time
Since you cannot completely remove Windows Boot Manager from your system, you can reduce the time the computer allows you to answer which Operating System you wish to boot. In simple words, you can skip the Windows Boot Manager on Windows 10 by using System Configuration Tool, as follows:
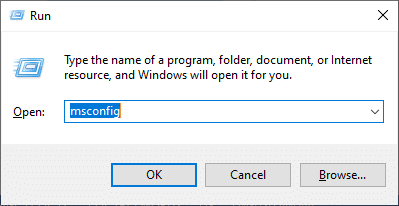
1. Launch Run Dialog Box, type msconfig and hit Enter.
2. Switch to the Boot tab in the System Configuration window that appears.
3. Now, choose the Operating System you want to use and change the Timeout value to the least possible value, as highlighted.
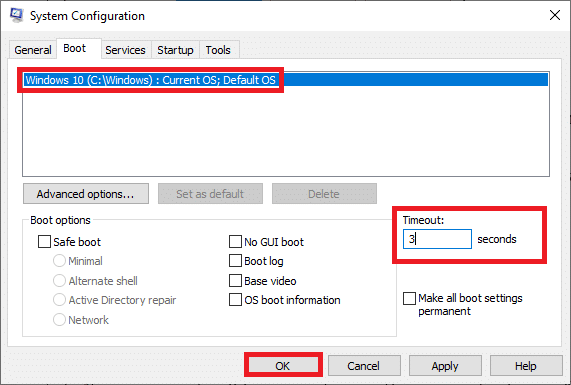
4. Set the value to 3 and click on Apply and then, OK to save the changes.
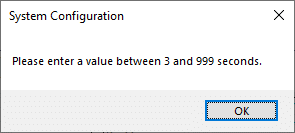
Note: If you enter a value less than 3, you will receive a prompt, as depicted below.
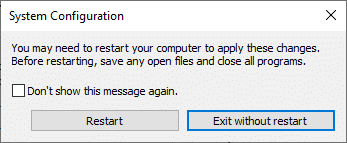
5. A prompt will be displayed stating: You may need to restart your computer to apply these changes. Before restarting, save any open files and close all programs.
6. Do as instructed and confirm your choice by clicking on Restart or Exit without restart.
Recommended
We hope that this guide was helpful and you were able to learn about Windows Boot Manager & how to enable or disable it on Windows 10. If you have any queries/suggestions regarding this article, then feel free to drop them in the comments section.