So the question is, how can you recover your data from a dead hard drive (internal) or SSD if the Windows operating system becomes so messy that it becomes impossible to boot the system. In that case, you can always reinstall from scratch, but you have to reinstall the programs that were previously there and have to reconfigure every other application. There can be a hardware failure, or any software issue or malware may suddenly seize your system, which will damage your installed programs and harm your important documents and files stored on your system.
The best strategy here is to backup your entire Windows 10 system. If you are a Windows 10 user, there are various approaches for creating a backup for your files and documents. Basically, Windows copy all these files & folders to an external storage device or store them in your cloud account by directly uploading the files, or you can even use any third-party backup solutions. In this article, you will know how to create a system image-based backup for your Windows 10 PC.
Create Full Backup of your Windows 10 (System Image)
Make sure to create a restore point just in case something goes wrong.
This is the most common way of creating a backup of your files & folders in Windows 10. Also, for creating a full backup of your system, you don’t need any 3rd party application. You can use default Windows utility to make a backup of your Windows 10 PC.
1. Plug in your external hard drive. Make sure it has sufficient space to hold all your internal hard drive data. It is recommended to use at least a 4TB HDD for this purpose.
2. Also, make sure your external drive is accessible by your Windows.
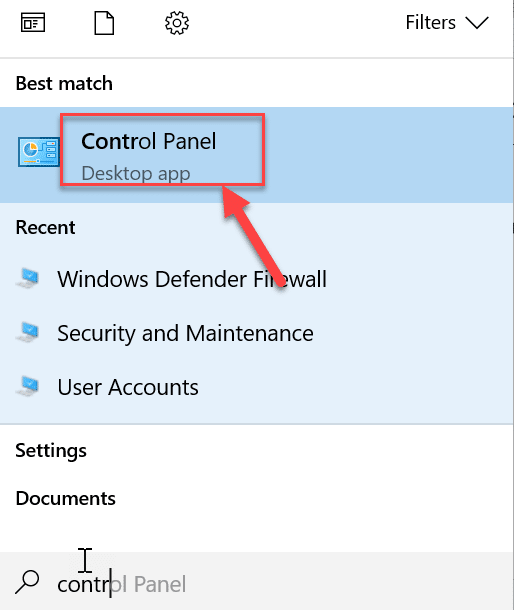
3. Press Windows Key + S to bring up Windows search, type “Control” and click on “Control Panel” from the search result.
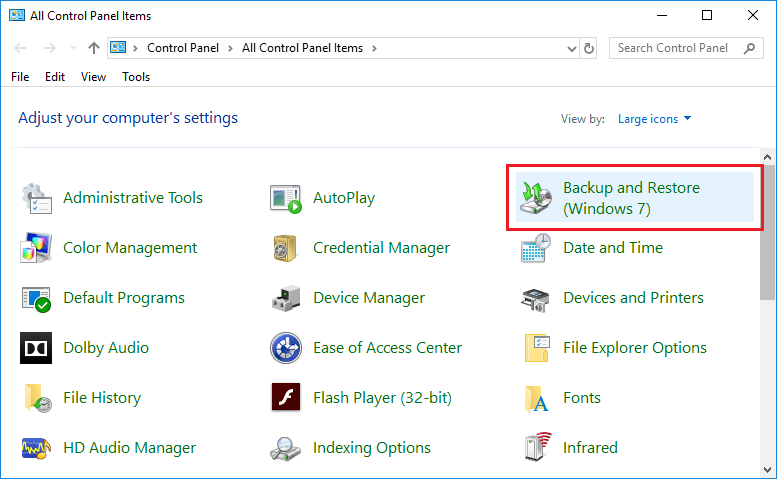
4. Now click on Backup and Restore (Windows 7). Do not worry about the term ‘Windows 7’ associated with it.
Note: Make sure Large icons is selected under “View by:” drop-down.
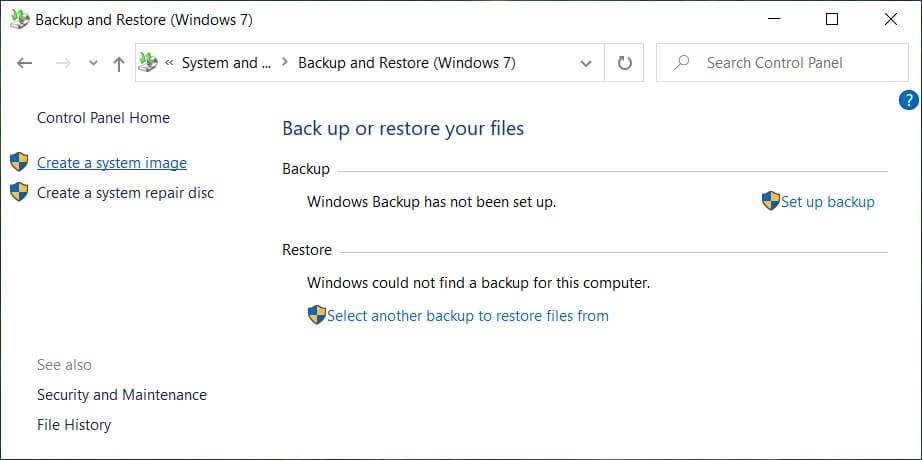
5. Once inside Backup and Restore click on Create a system image from the left window pane.
6. Wait for a few minutes as the Backup wizard will scan your system for external drives.
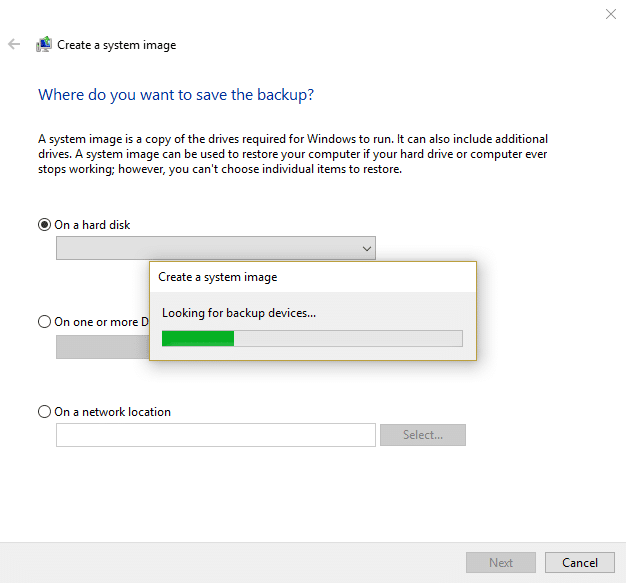
7. Now on the next window, make sure to select the appropriate option (DVD or an external hard disk) to store & backup your data then click Next.
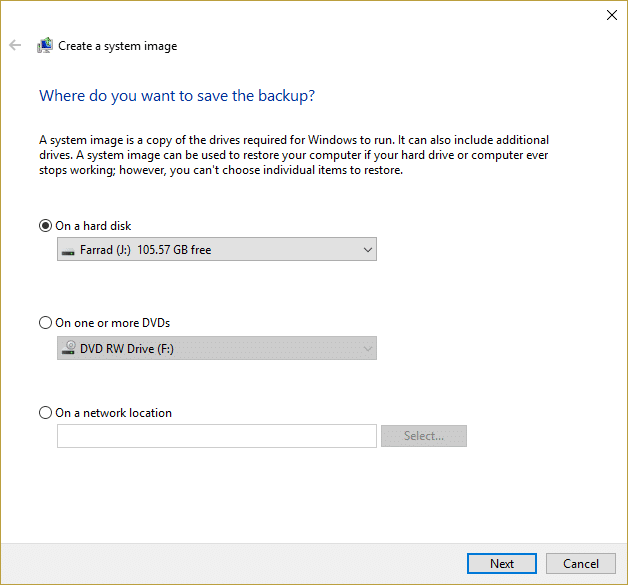
8. Alternatively, you can also prefer the option to create a full backup on DVDs (by selecting the radio button saying “On one or more DVDs”) or “On a network location”.
9. Now by default Windows installation drive (C:) will be automatically selected but you can choose to include other drives to be under this backup but keep in mind it will add to the final image’s size.
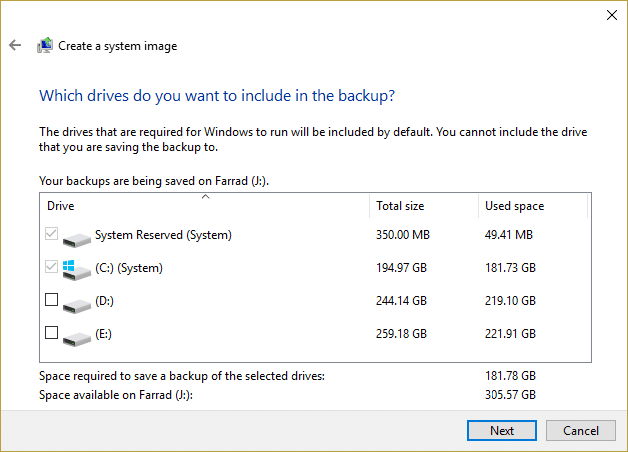
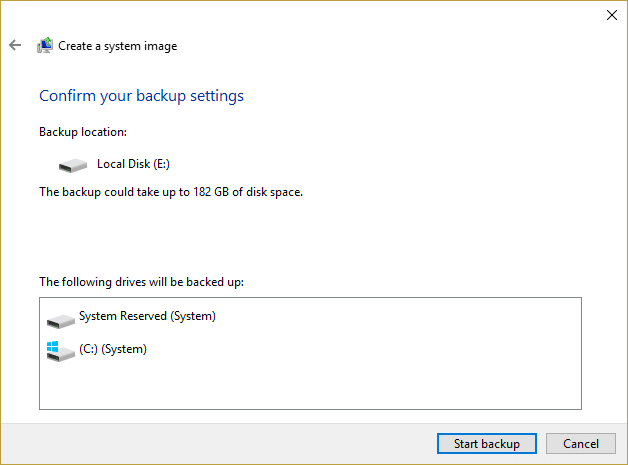
10. Click Next, and you will see the final image size of this backup. Check if the configuration of this backup is alright and then click on Start Backup button.
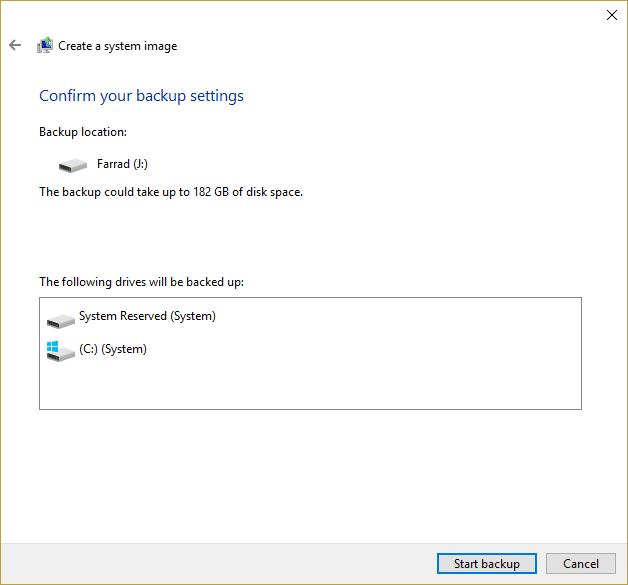
11. You will see a progress bar as the tool creates the system image.
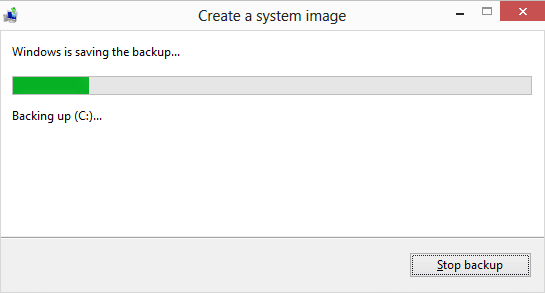
This backup process may take hours to backup all your data. So, you can continue to use your PC or leave it overnight. But your system may get slow down if you do any resource-intensive work in parallel to this backup process. Hence, it is recommended to start this backup process at the end of your workday.
Once the backup process gets completed, the process will prompt you to create a System Repair disc. If your computer has an optical drive, create the disc. Now you have completed all the steps to Create a Full Backup of your Windows 10, but you still need to learn how to restore your PC from this system image? Well, don’t worry, follow the below steps, and in no time you will have your system restored.
Restore the PC from a System Image
To get into the recovery environment for restoring the image you have build, steps you need to follow are:
1. Press Windows Key + I to open Settings then click on “Update & Security” icon.
![]()
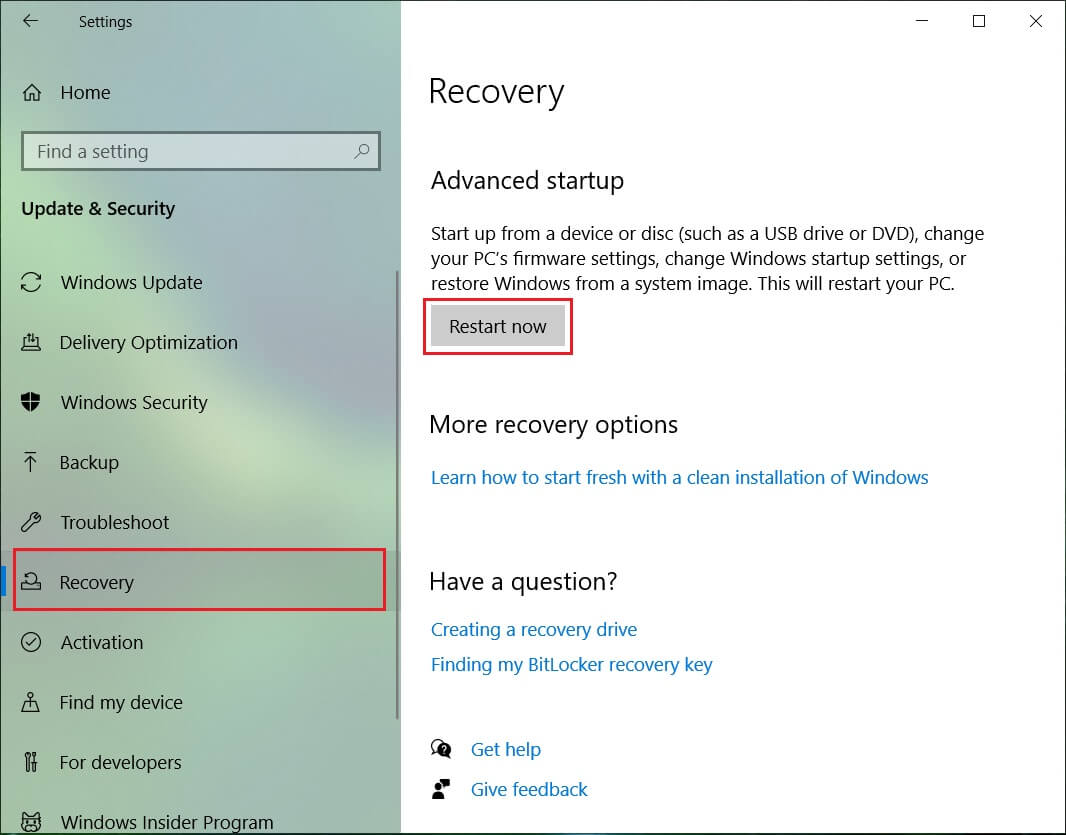
2. Now, from the left-hand side menu, make sure to select Recovery.
3. Next, under Advanced startup section, click on “Restart now” button.
4. If you can’t access your system then boot from Windows disc to restore your PC using this System Image.
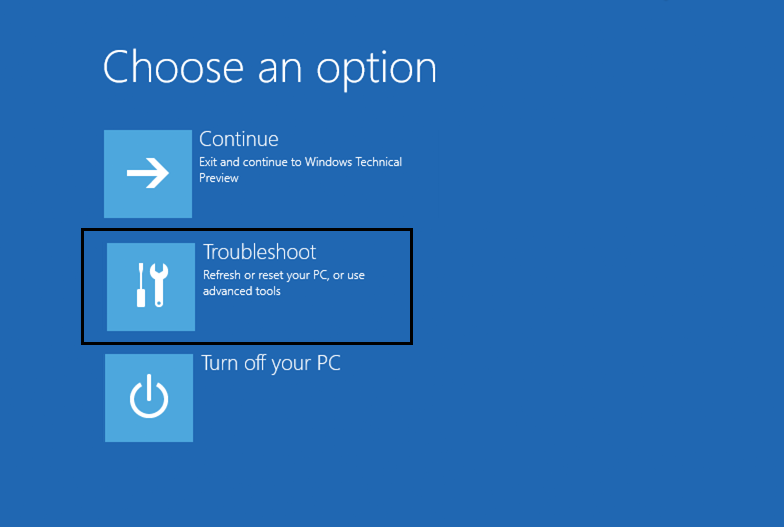
5. Now, from Choose an option screen, click on Troubleshoot.
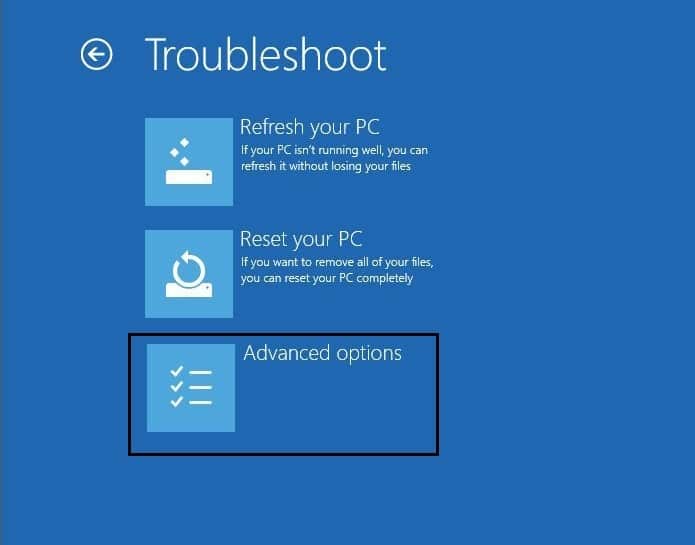
6. Click Advanced options on Troubleshoot screen.
7. Select System Image Recovery from the list of options.
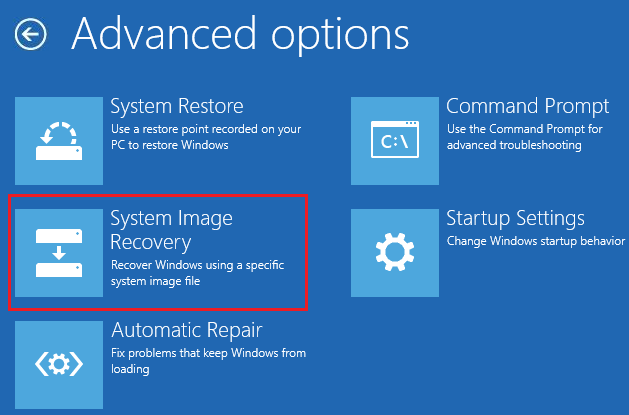
8. Select your user account and type in your Microsoft account password to continue.
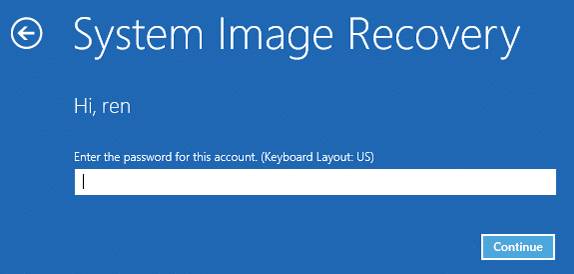
9. Your system will reboot and prepare for recovery mode.
10. This will open System Image Recovery Console, select cancel if you are present with a pop up saying Windows cannot find a system image on this computer.
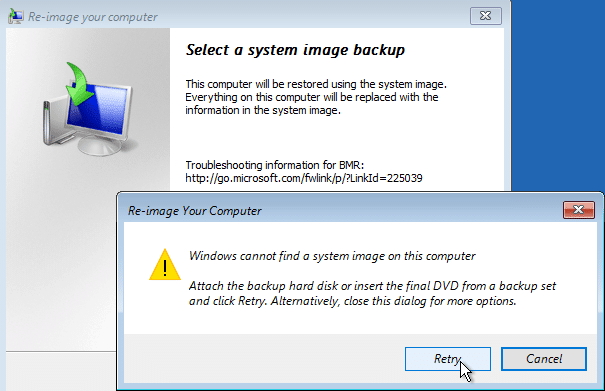
11. Now checkmark Select a system image backup and click Next.
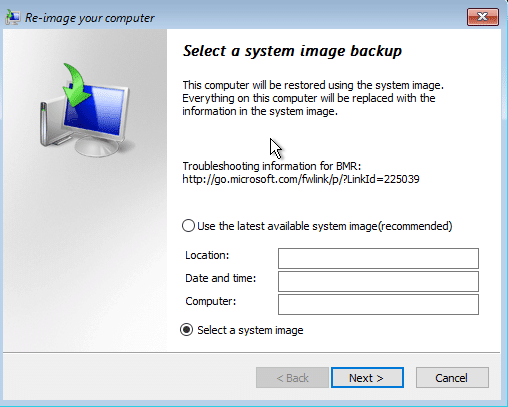
12. Insert your DVD or external Hard disk which contains the system image, and the tool will automatically detect your system image then click Next.
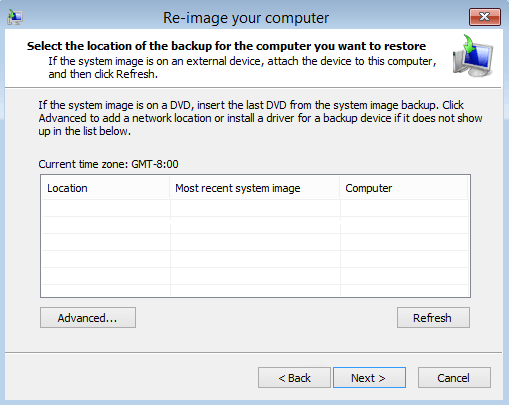
13. Now click Finish then click Yes to continue and wait for the system to recover your PC using this System image.

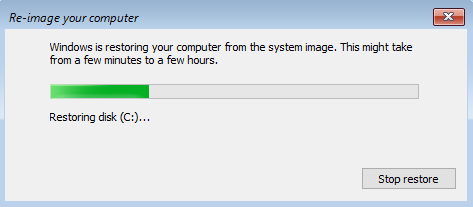
14.Wait while the restoration takes place.
Recommended:
I hope this article was helpful, and you can now easily Create Full Backup of your Windows 10 (System Image), but if you still have any questions regarding this tutorial then feel free to ask them in the comment’s section.

