How to Delete Email Addresses from Gmail Autofill on Android

Gmail uses its algorithm to mark emails as spam and important. You can schedule your emails or send them directly and attach your documents, images, audio files, video files, or any other file. Similarly, Gmail can help you write your email through its capability to autocomplete text and can help you in replying to emails.
While sending an email, Gmail will automatically suggest a bunch of related email addresses based on your contacts and previous emails. But do you find the email autofill feature annoying, or you don’t like it? This article will guide you on how to delete email addresses from Gmail autofill on Android and remove email suggestions from Gmail app. It will also help you know how to remove an email account from Google and delete a Gmail address from your iPhone.
How to Delete Email Addresses from Gmail Autofill on Android
Gmail, a free email service provided by Google, has more than a billion users all around the world. Probably, every smartphone user has set Gmail as their default email service and uses it almost daily. You can easily organize all your emails on Gmail by using the Gmail mobile app on Android or iOS or your browser. Now, keep reading to learn how to delete email addresses from Gmail autofill on Android.
Note: Since smartphones don’t have the same Settings options, they vary from manufacturer to manufacturer. Hence, ensure the correct settings before changing any. The below steps are performed on Realme Narzo 10.
How Do You Remove an Email Account from Google?
To remove an email account from Google, read our guide on How to Remove a Google Account from your Android Device and implement the same.
See Also:
How to Know If AirPods are Charging on Android
How to Delete Downloads on Android (GUIDE)
How to Open Android Phone Settings Menu
How to Move Apps to SD Card on Android
How to Turn Off OK Google on Android
How Do You Remove an Email Address from Autofill on Gmail?
To remove an email address from autofill on Gmail, follow these steps:
1. Visit the Google contact page in a browser.
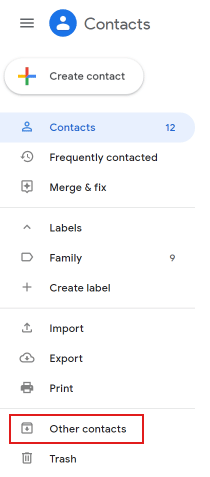
2. Click on Other contacts from the left pane.
3. Hover over the email address you want to delete and mark the checkbox.
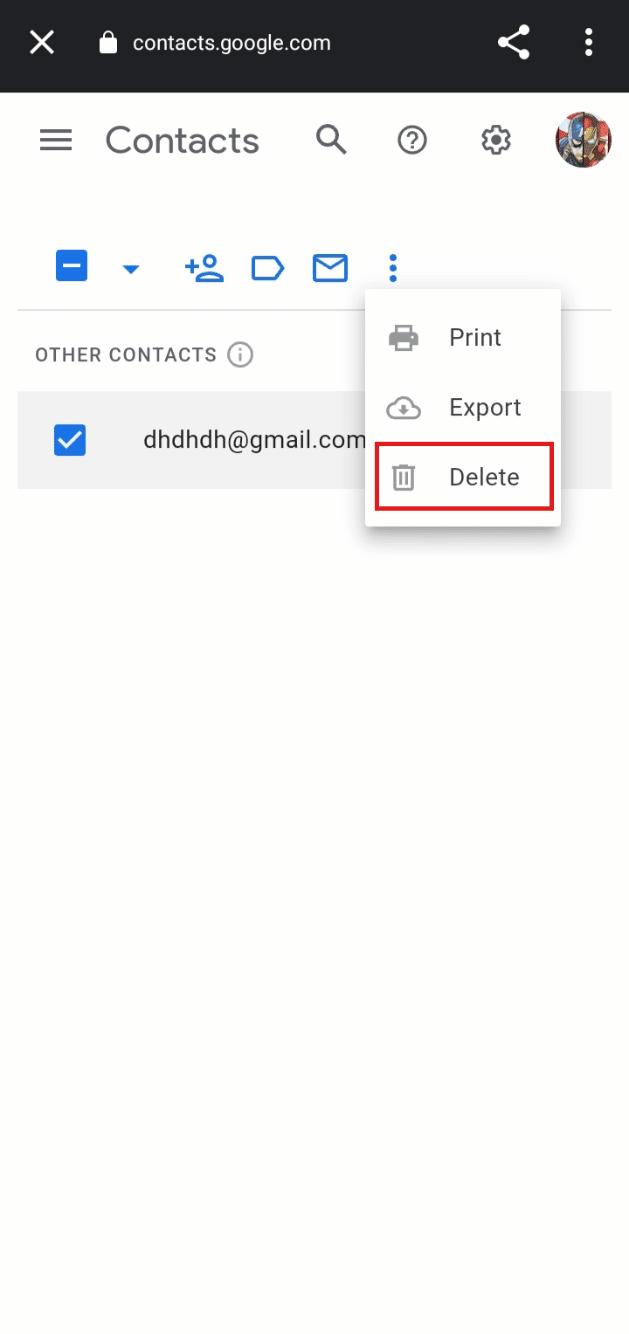
4. Click on the three-dotted icon from the top, as shown below.
5. Click on Delete.
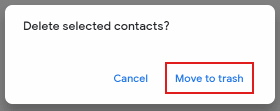
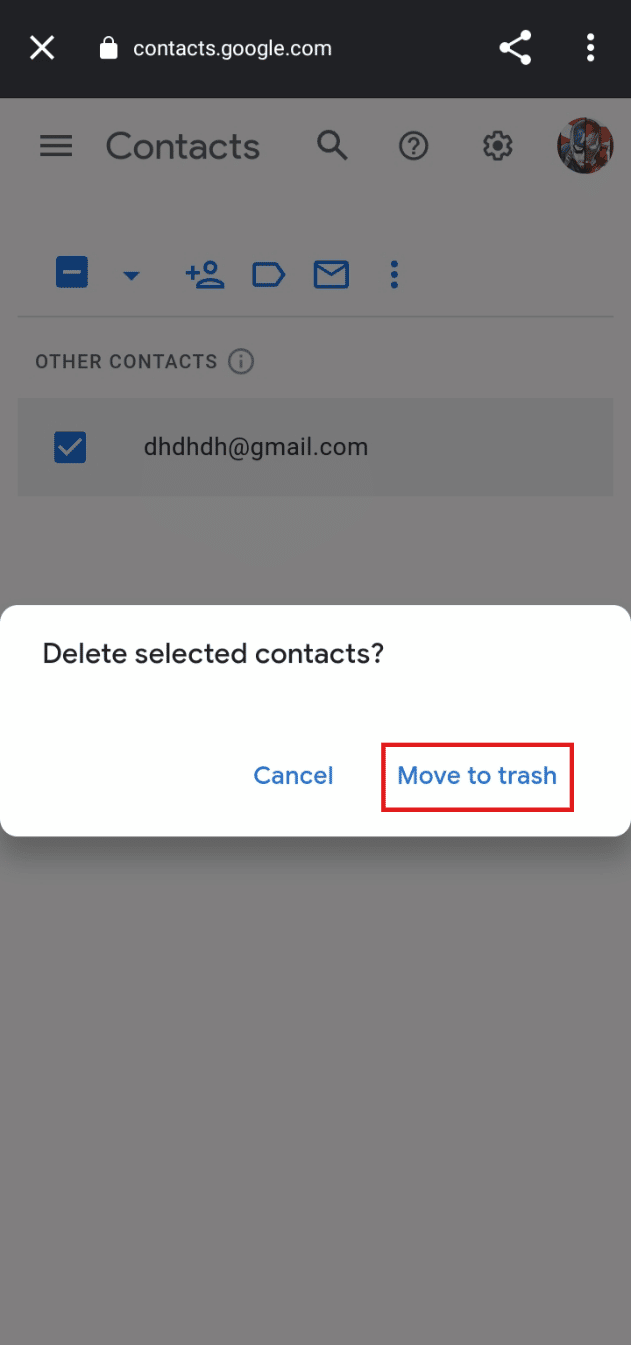
6. From the popup menu, click on Move to trash to confirm your deletion.
Also Read: What Happens If You Can’t Remember Gmail Password?
How Do You Remove Email Suggestions from Gmail App?
You can’t remove email suggestions from the Gmail app on your phone. You will have to do it through the browser by signing in to your Gmail account from the Google contact page. Follow the steps mentioned above to do it successfully on your desktop or laptop browser.
How to Delete Email Addresses from Gmail Autofill on Android?
To delete email addresses from Gmail autofill on Android, follow these steps on how to delete email addresses from Gmail autofill on Android:
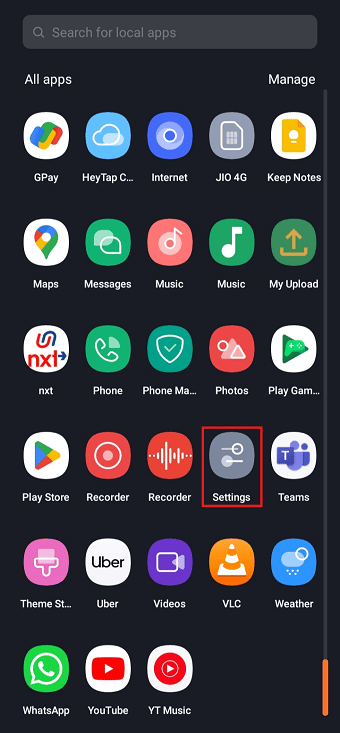
1. On your Android phone, open Settings.
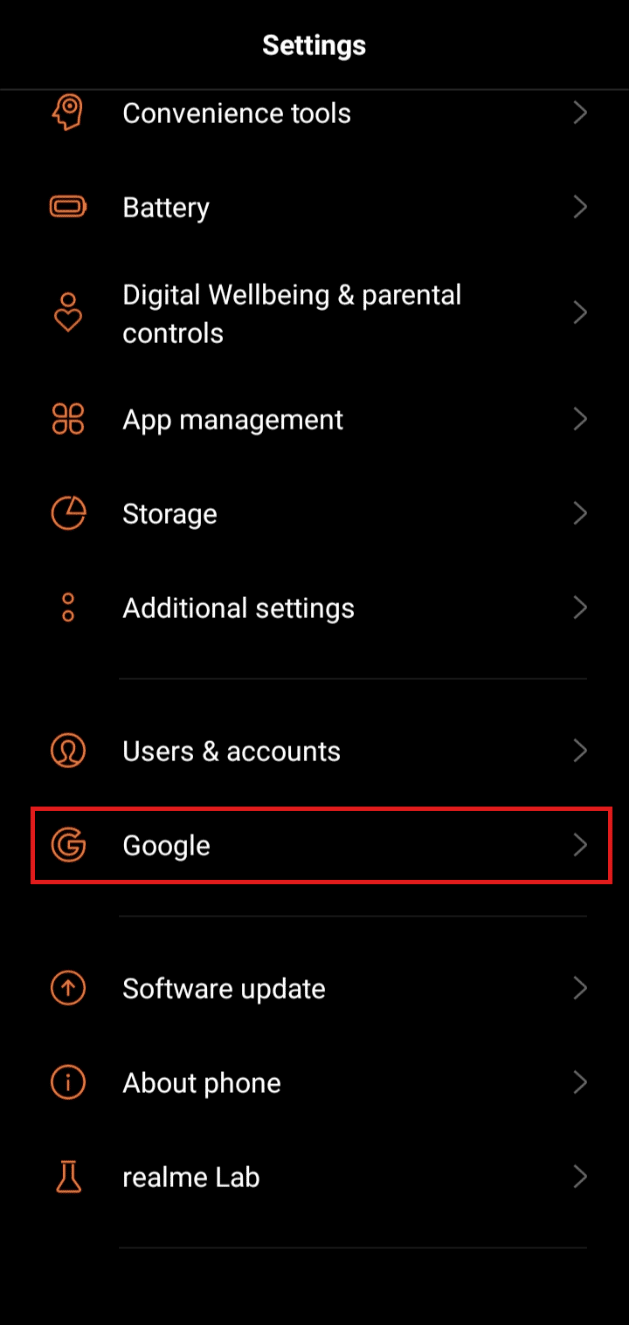
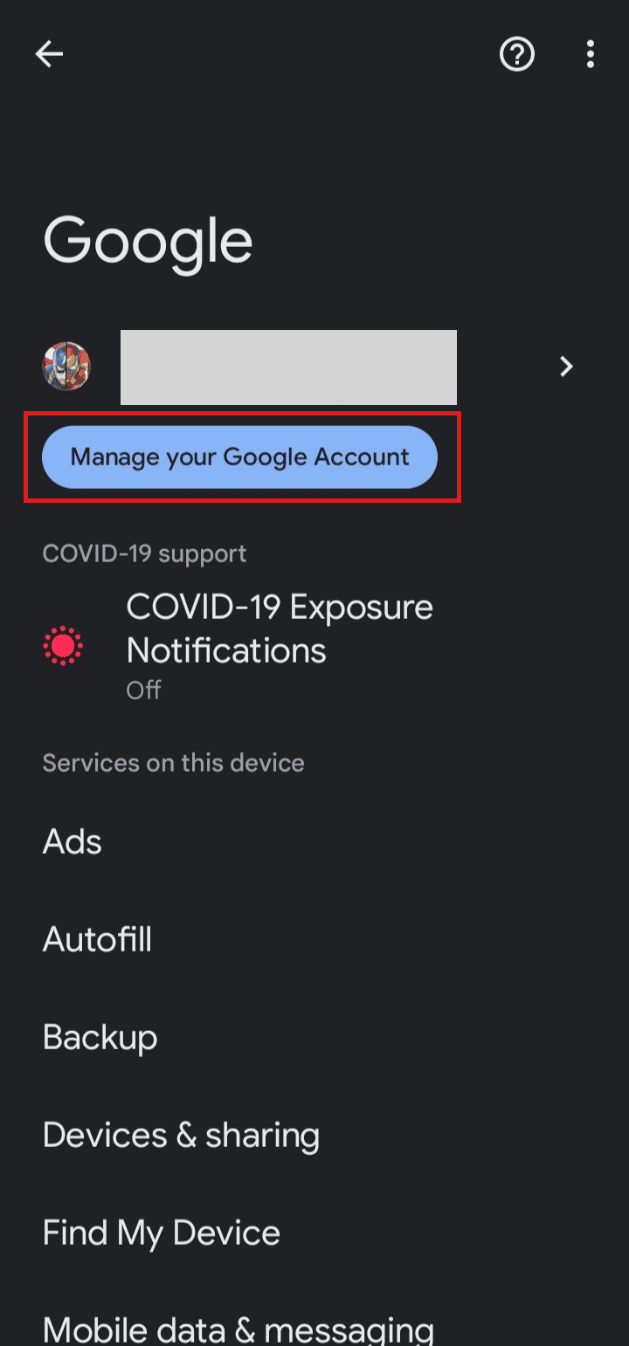
2. Scroll down and tap on Google.
3. Tap on Manage your Google Account.
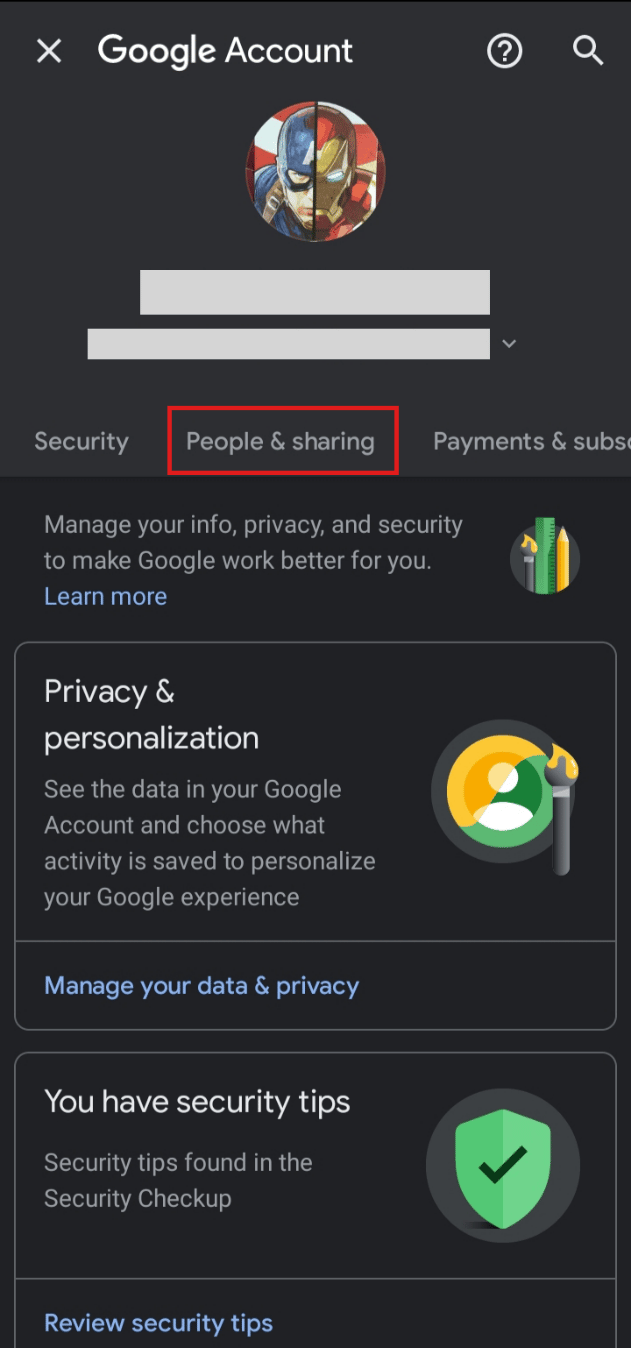
4. Tap on the People & sharing tab.
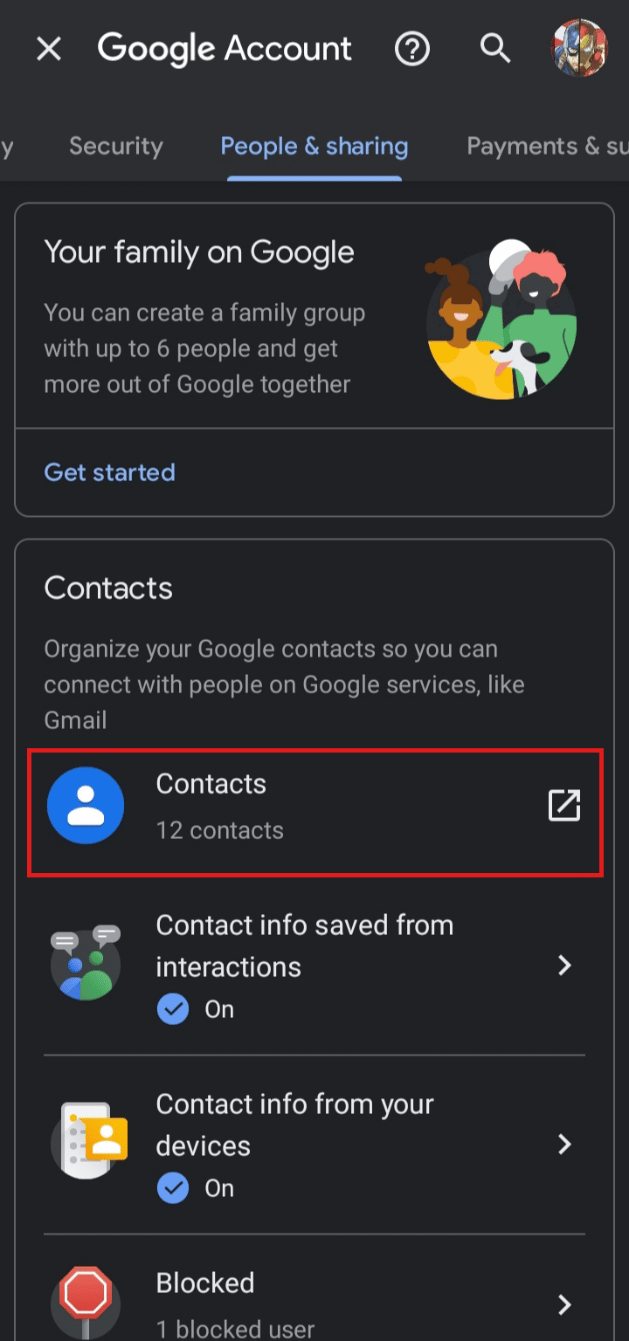
5. Tap on Contacts, as shown below.
6. Tap on the hamburger icon from the top-left of the screen.
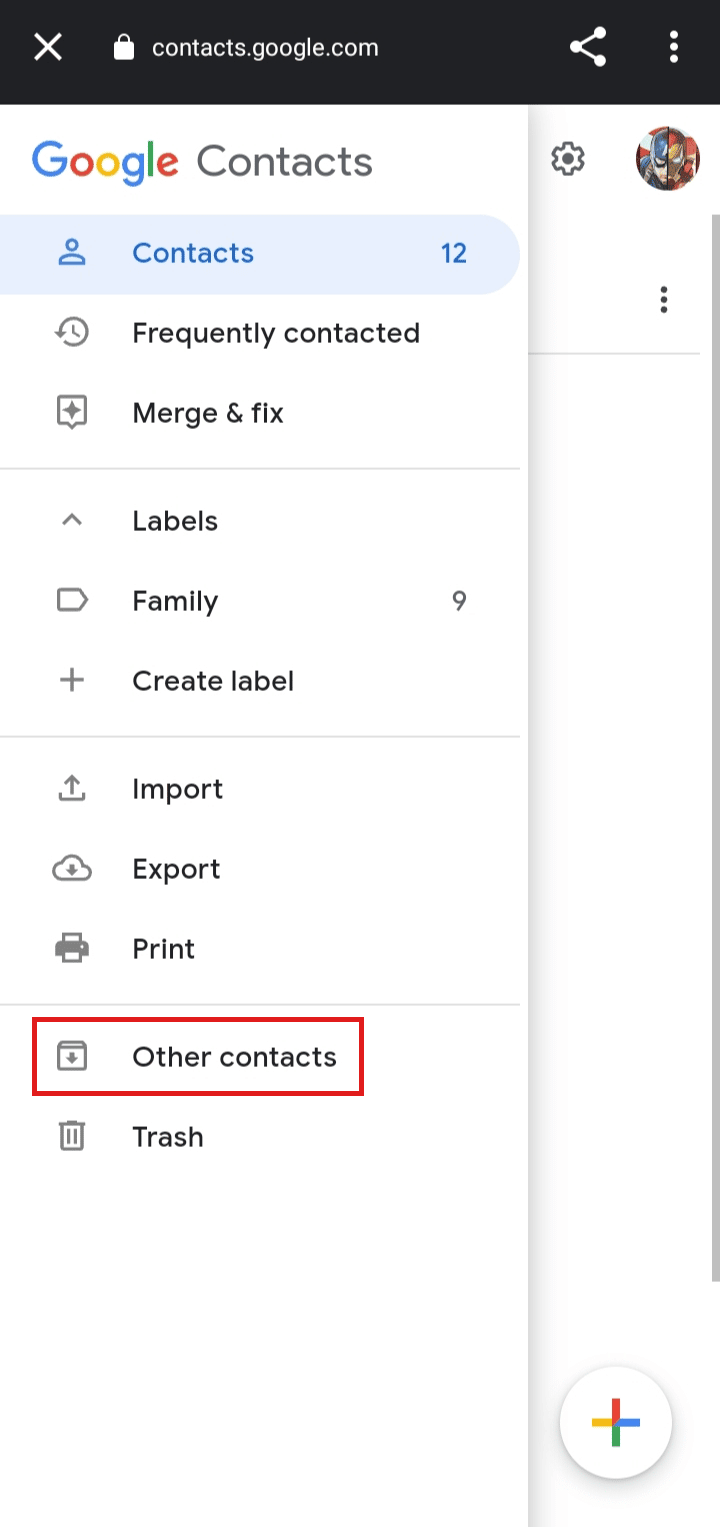
7. Tap on Other contacts.
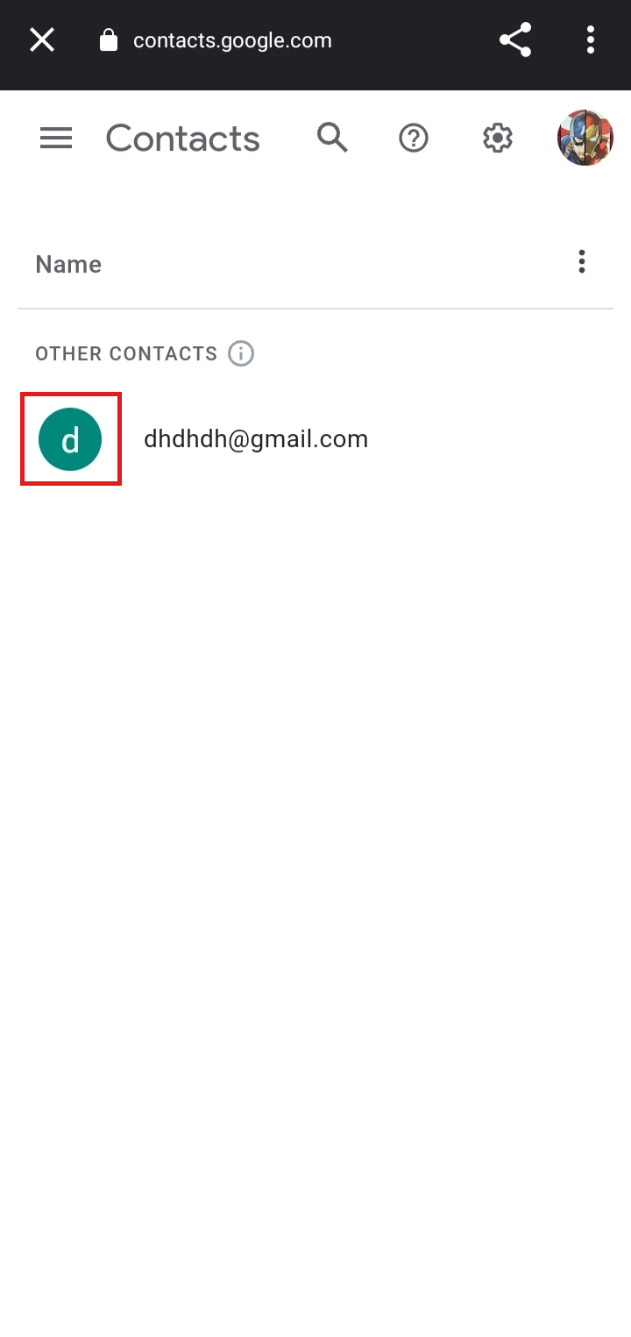
8. To select the email addresses for deletion, tap on the profile icon of that desired email.
9. Tap on the three-dotted icon from the top.
10. Tap on Delete.
11. Tap on Move to trash to confirm the deletion of email addresses.
This is the procedure on how to delete email addresses from Gmail autofill on Android.
Also Read: How to Automatically Delete Spam Emails In Gmail
How Do You Delete a Gmail Address from Your iPhone?
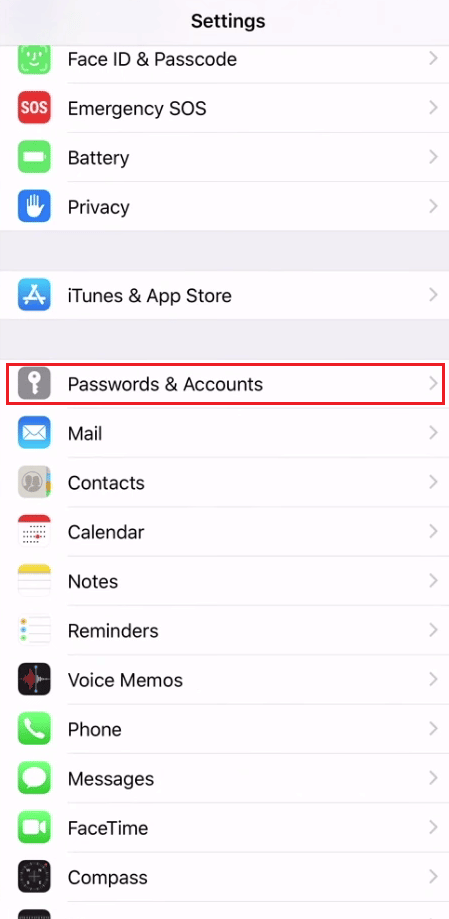
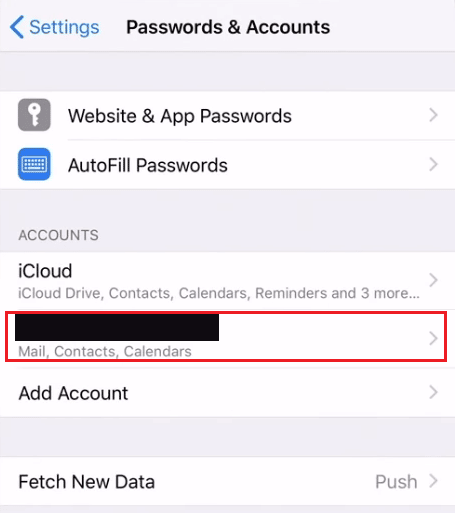
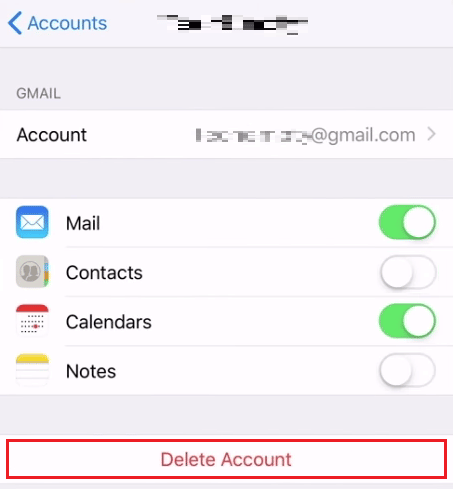
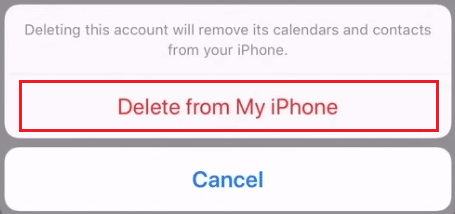
To delete a Gmail address from your iPhone, follow these steps:
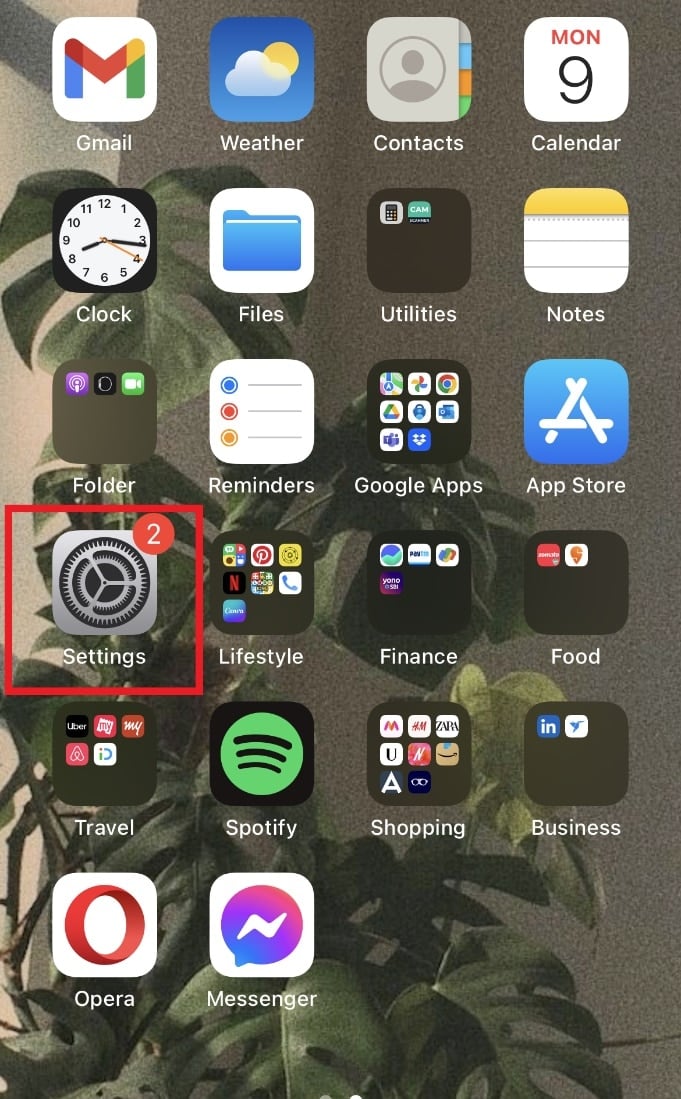
1. Open the Settings app on your iPhone.
2. Tap on Passwords & Accounts.
3. From the accounts list, tap on the desired Gmail account.
4. Tap on Delete Account.
5. Tap on Delete from My iPhone to confirm the deletion.
How Do You Remove an Incorrect Email Address in Autofill?
To remove an incorrect email address in autofill, follow these steps:
1. Launch the Chrome browser and click on the three-dotted icon from the top-right of the screen.
2. Then, click on Settings.
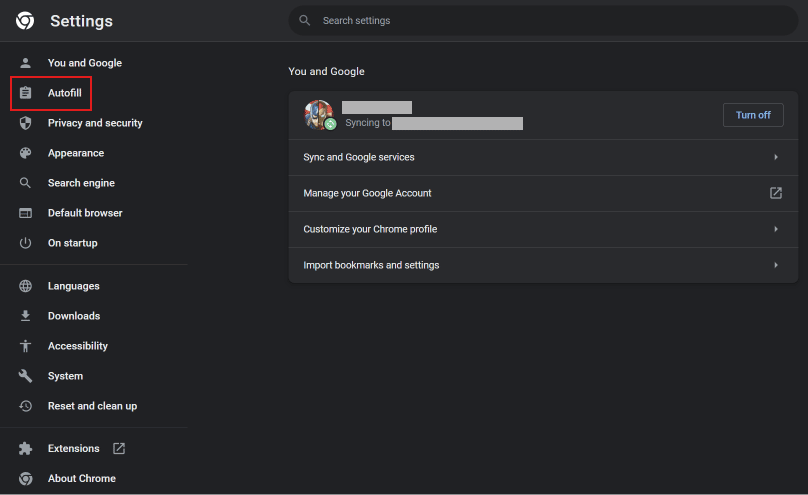
3. From the left pane, click on Autofill.
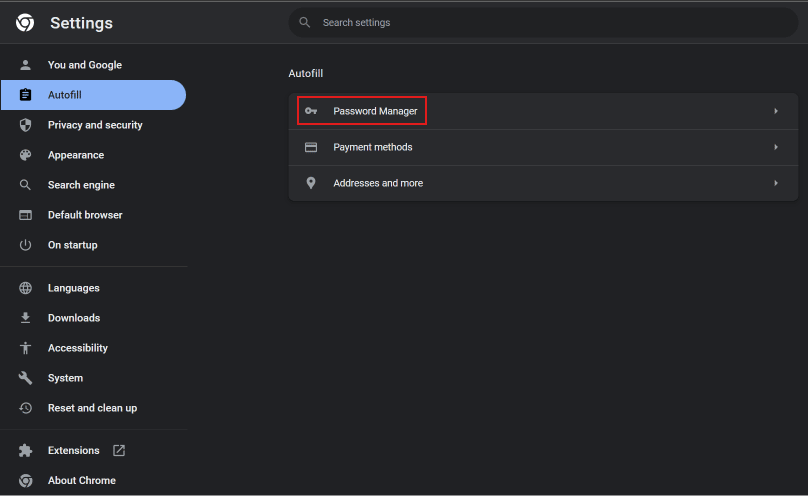
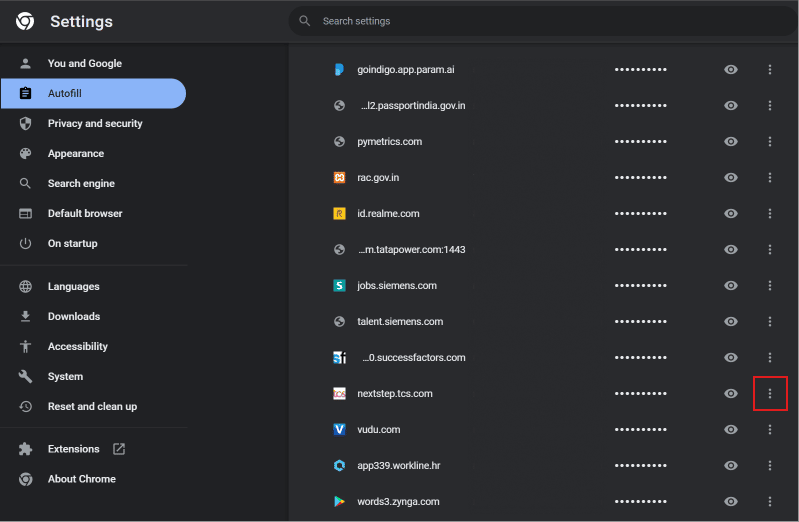
4. Click on Password Manager.
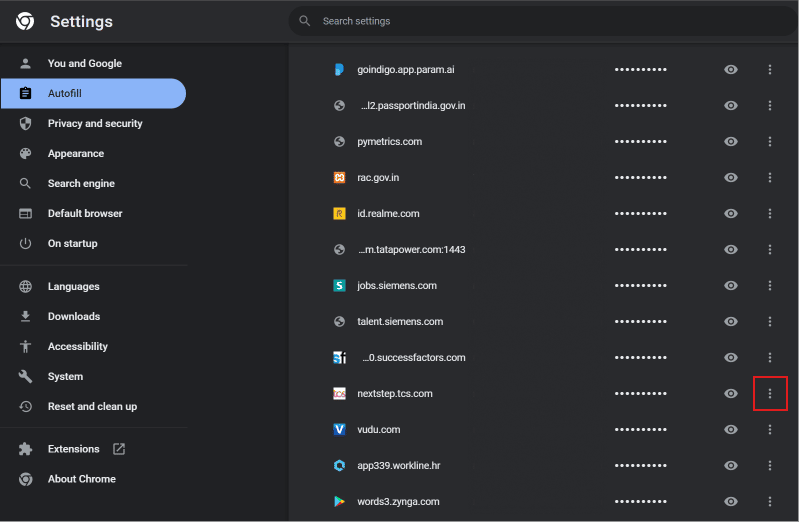
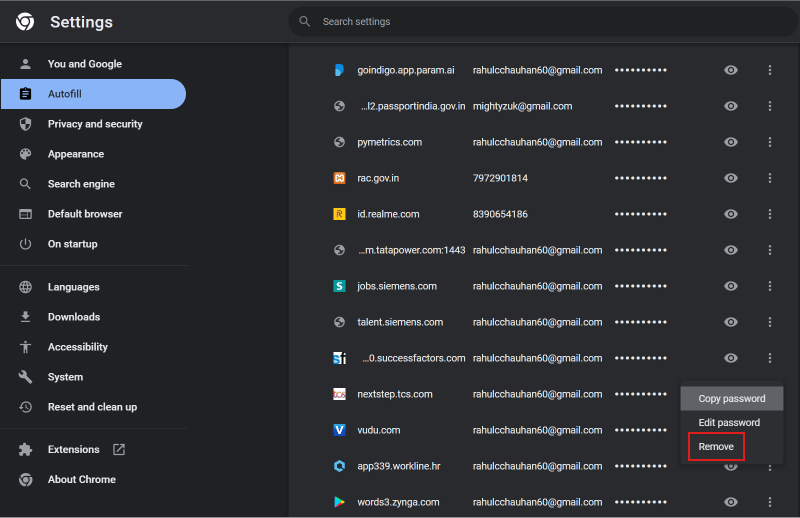
5. Locate the incorrect email address you want to remove and click on the three-dotted icon next to it.
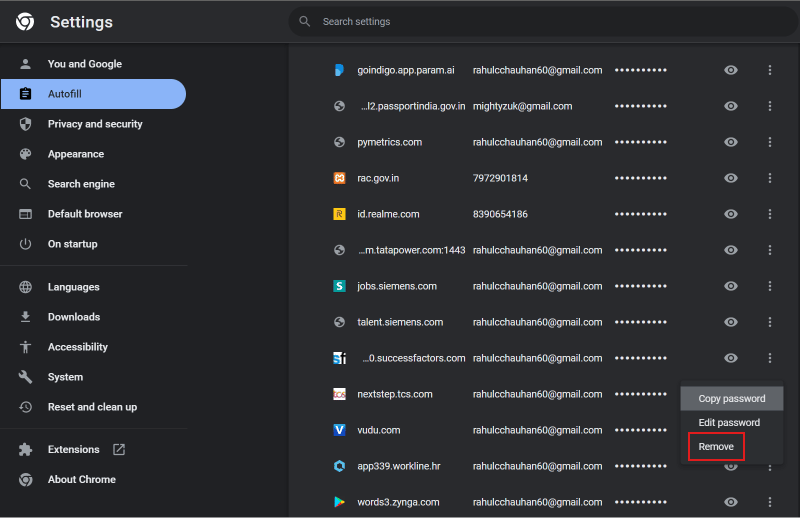
6. Click on Remove.
Also Read: How To View Saved WiFi Passwords on Windows, macOS, iOS & Android
How Do You Delete Unwanted Email Addresses?
You can delete unwanted email addresses from the autofill by following the above-mentioned steps.
How Do You Remove Old Address from Autofill?
To remove old address from autofill, follow these steps:
1. Open the Chrome browser and click on the three-dotted icon.
2. Click on Settings > Autofill > Password Manager.
3. Click on the three-dotted icon next to the incorrect email address.
4. Click on Remove.
How Do You Stop Old Email Addresses Appearing Automatically in the Field in the Mail App?
To stop old email addresses appearing automatically in the field in the mail app, follow these steps:
1. Open the Mail app on your iPhone.
2. Tap on the write mail icon.
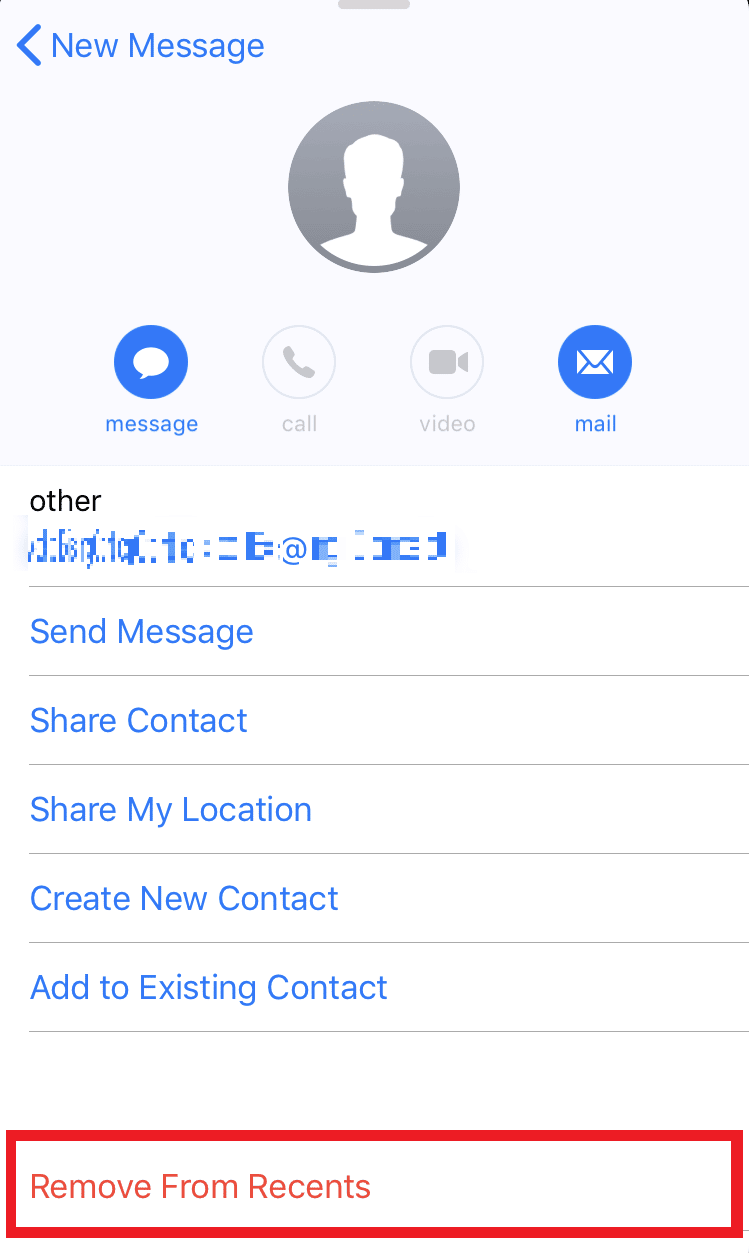
3. Start typing the email address. From the below email suggestions, tap on the info icon beside the email address you want to remove.
4. Tap on Remove From Recents to stop the email from appearing again.
Also Read: Fix Email Address Not Found in Gmail
How Can You Stop Mail from Automatically Adding Email Addresses to Contacts?
To stop mail from automatically adding email addresses to contacts, follow the below-mentioned steps:
1. Visit the Gmail page in a browser.
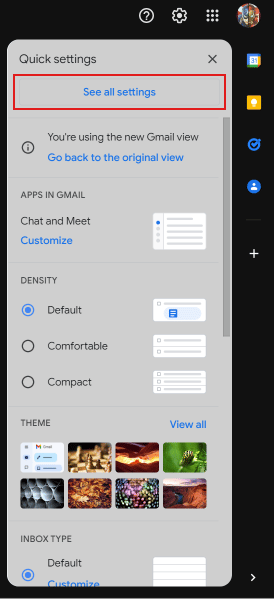
2. Click on the settings gear icon.
3. Click on See all settings.
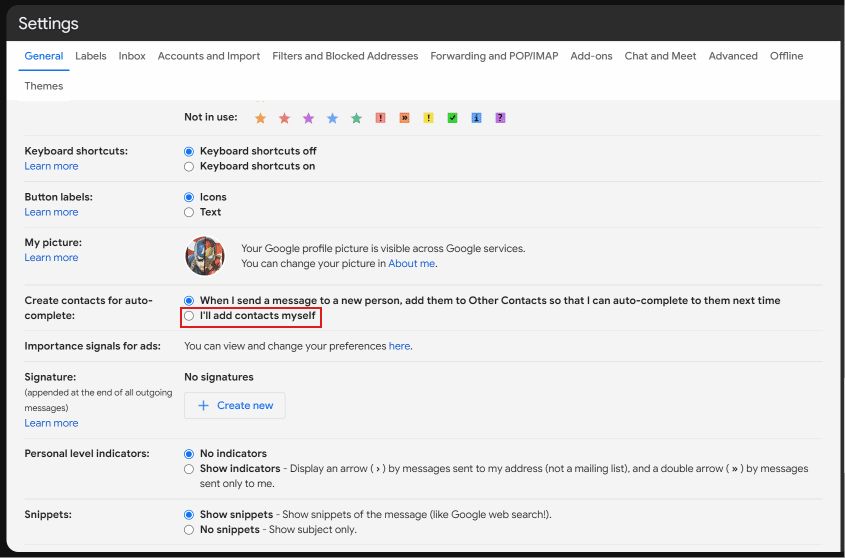
4. Scroll down and click on I’ll add contacts myself beside Create contacts for auto-complete: option.
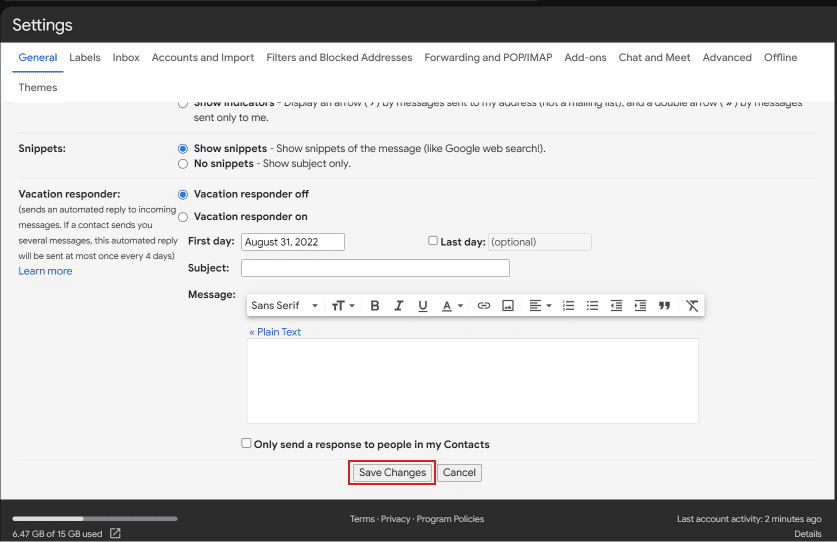
5. Click on Save Changes.
Recommended:
We hope that this article has helped you to know how to delete email addresses from Gmail autofill on Android. Feel free to reach out to us with your queries and suggestions via the comments section below. Also, let us know what topic you want to learn about in our next article.
