- in Windows 10 by Admin
How to Fix System Interrupts High CPU Usage in Windows 10

No matter how powerful CPUs get, there’s always going to be something that uses up all the resources. Perhaps the most frustrating issue to fix is high CPU usage because of system interrupts. Hint: it’s almost always caused by hardware or device drivers.
The following are the steps to troubleshooting this issue. We’ll go into greater detail below. They’re listed from the easiest to the most complicated:
- Restart the computer
- Update driver, check for windows updates
- Disable Fast Startup
- Disable Magic Packet
- Disable hardware devices one by one
- Check for hardware failures
- Update BIOS
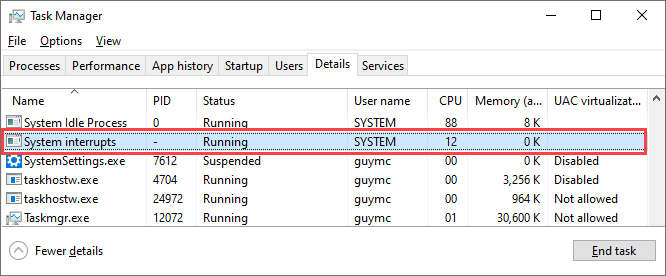
After each of these steps, use Task Manager to see if CPU usage for System Interrupts has dropped.
What Is a System Interrupt?
Believe it or not, computers can only do one thing at a time. They just do it really fast, so it seems like they’re multitasking.

The hardware in your computer has to ask to get their tasks done. Sometimes they have to interrupt other tasks. It’s like kids interrupting parents. Kids’ needs are essential too, but getting an adult’s attention can go well or be disruptive. The same goes for hardware system interrupts.
How Much CPU Should System Interrupts Use?
Maybe you’re looking at it and thinking 5% is too high. It can vary from computer to computer, but if it’s higher than 10%, there’s an issue. It’s time to do something.
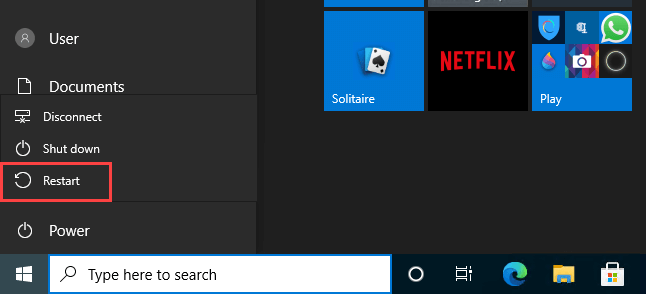
Restart the Computer
Have you tried turning it off and then on again? Yes, that old chestnut again. Why? Because it often works.
There are a billion things that go into starting Windows and sometimes things don’t go right. Try it again and it might go right. It’s the simplest, easiest, fastest thing to do, and it works more often than not.
Update the Drivers
Since the high CPU system interrupt issue is almost always hardware related, try updating the drivers. It’s a simple and easy approach that often works. Plus, it’s good to always keep drivers updated.
- Select the Start button.
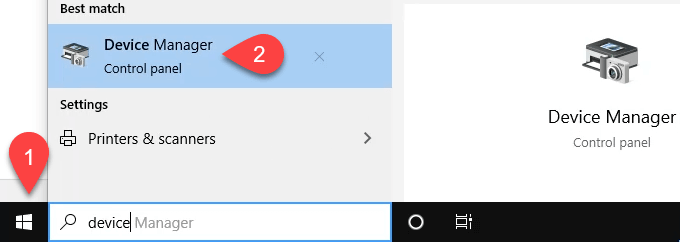
- Start typing device and select Device Manager.
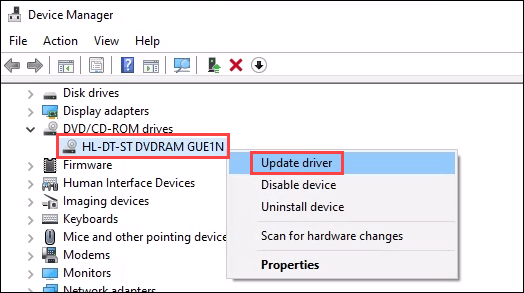
- Expand each element until you get down to specific devices. Right-click and select Update driver.
- Select Search automatically for updated driver software. You could choose to Browse my computer for driver software if you’ve already downloaded the driver and know where it is.
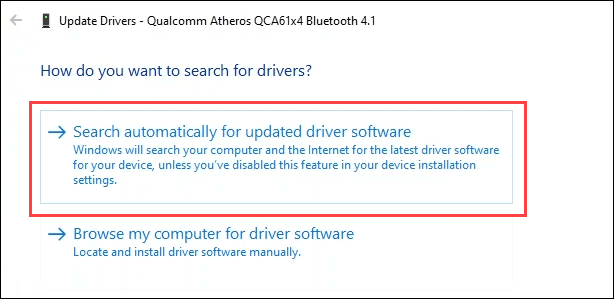
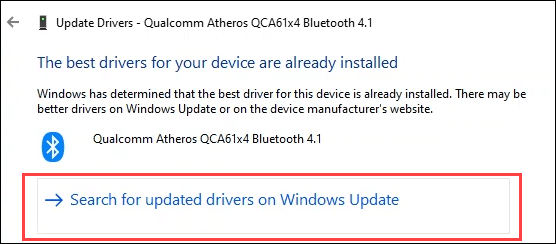
- If it finds a driver, install it. You can also try selecting Search for updated drivers on Windows Update.
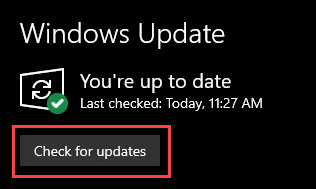
- In Windows Update, select Check for updates even if it says You’re up to date. It might surprise you.
Disable Fast Startup
Fast Startup’s job is to put your computer into a deep sleep that it seems like it’s off. So when you start it again, it’s more like waking it up. This deep sleep state can sometimes cause problems for hardware.
The reasons behind that are complex and beyond this article. To do this, you’ll need Administrator privileges on the computer.
- Select the Start button and start typing control.
- Select Control Panel.

- In the Control Panel, search for power.
- Select Change what the power buttons do.

- Select Change settings that are currently unavailable. If you see the blue and yellow shield, that means you need to have Administrator rights on this computer.

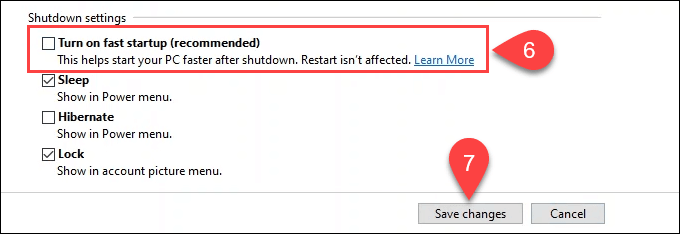
- Uncheck the Turn on fast startup box.
- Select the Save changes.
Disable Magic Packet
That can’t really be a thing, can it? Yes, Magic Packet is real. It allows for your computer to awaken from standby or sleeping mode when it receives the Magic Packet from the local network. You may have heard this called Wake On LAN (WOL).
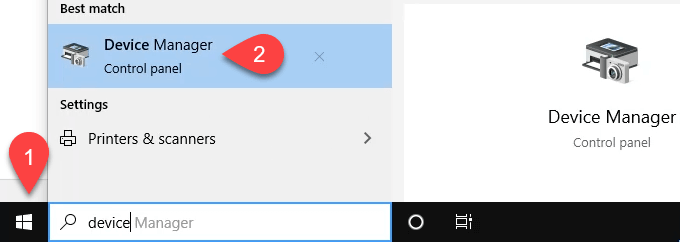
- Select the Start button and start typing device manager to find the utility.
- Select Device Manager.
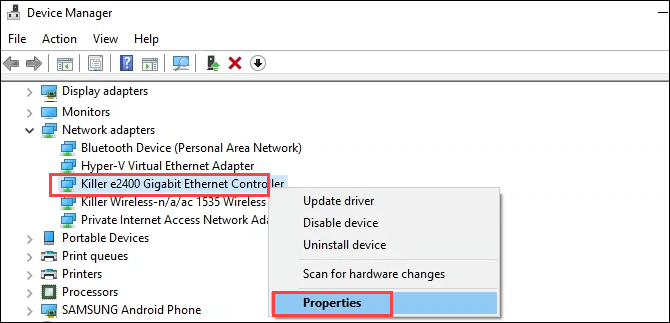
- Navigate to Network Adapters and right-click on your Ethernet adapter. Select Properties.
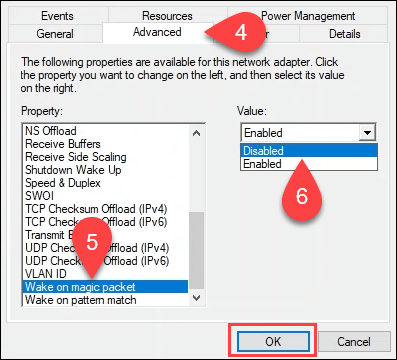
- Select the Advanced tab in the Properties window.
- In the Property pane, scroll down to Magic Packet and select it with a single click.
- In the Value: select box, change it to Disabled, and select the OK button to commit the change. It may take a few seconds.
Disable Hardware Devices One by One
Some hardware can’t be unplugged. Here’s how to disable them, one by one. When you find the one that drops the System Interrupt CPU usage, that’s the hardware to fix.
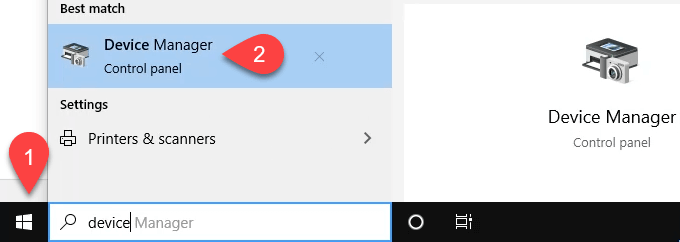
- Select the Start button and start typing device manager to find the utility.
- Select Device Manager.
- Navigate through the tree to find hardware that isn’t critical for the computer. If you’re not sure what’s critical or not, move on to the next method. Right-click on the hardware that’s not critical, and select Disable device.
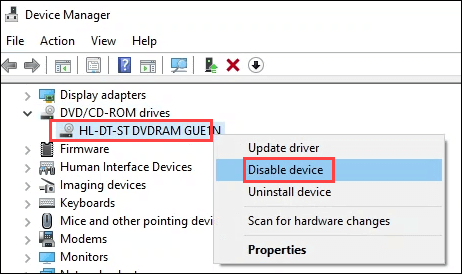
- It will warn you. If you’re confident it is safe to disable the device, select Yes.
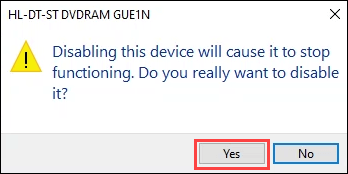
- Check System Interrupts CPU usage in Task Manager to see if it’s gone down. If not, find another piece of hardware in Device Manager and disable it. Do this one by one until you solve the problem or you run out of hardware to disable.
Remove External Hardware One by One
Chances are you already disabled external hardware in the previous method. But maybe you missed something.
- Have Task Manager open and focus on System Interrupts
- Unplug one device at a time from your computer and wait a few moments. See if the System Interrupts CPU usage drops. If not, move on to the next device.
- If you find the device this way, update its drivers and try it again. Also, check the hardware maker’s support page.
Check for Failing Hardware
It’s possible that a piece of hardware may be close to failure and intermittently causes the System Interrupts high CPU issue. Use our How to Diagnose, Check, and Test for Bad Memory as a guide to check your RAM.
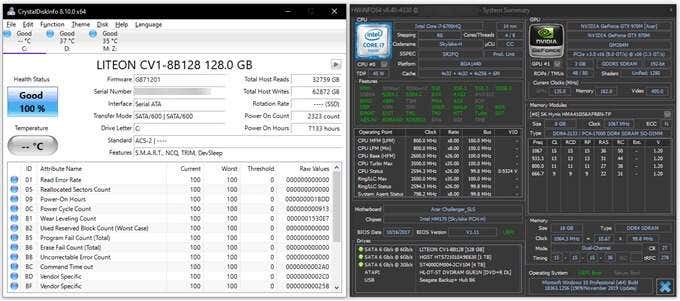
We also share 15 Windows Diagnostics Tools to Improve Your PC’s Health. Especially useful is HWiNFO and CrystalDiskInfo. Both are available as portable apps to run from a USB stick, so they don’t require a full installation.
Update BIOS
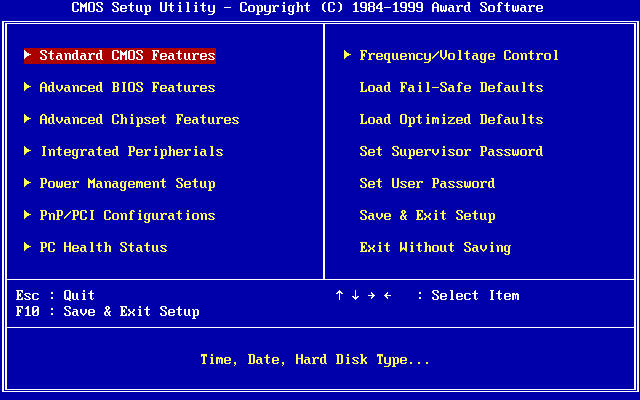
This is the last thing you should do. BIOS can go bad and make your computer useless, possibly requiring a new motherboard or replacing the computer. So first, check if a BIOS update is needed.
The article the link goes to also tells you how to do the update. If you’re not comfortable doing this, then take your computer to a respected computer shop. They can also check the hardware for you.
The System Interrupts CPU Usage is Still Too High
You have two choices. Take the computer to a certified, competent computer technician or upgrade the computer. Don’t feel bad, you’ve done your best. Remember, the average computer’s maximum life span is 5 years. Each year is like 14 years to your computer’s health. Be kind to it.