Duplicate files can cause a menace if you are a regular user of cloud storage services like Google Drive or One Drive. Google Drive lets you save, upload, access, or modify files from any device, viz your phone, tablet, or computer. It offers limited space and duplicate files can reduce the storage capacity further. Duplication of files occurs from time to time, especially when synchronization across numerous devices is involved. However, when you have a large number of files, locating these duplicates might be difficult and time-consuming. Today, we will discuss how to find and then, remove duplicate files in Google Drive.

How to Remove Duplicate Files from Google Drive Cloud Storage
You can opt for Google Drive cloud storage because it:
- Saves Space – Nowadays, files & apps consume the majority of device storage space due to their large size. Thus, to avoid low storage issue on your device, you can use cloud storage instead.
- Provides Easy Access – Once the file is uploaded on the cloud, then you can access it anywhere and/or anytime. You will only need an active internet connection.
- Assists in Quick Sharing – Google Drive Cloud Storage allows the users to share links of files with other people. In this way, you can share multiple files online, thereby making the process of collaboration easier. For example, a large number of photos and videos of a trip can be shared easily and quickly.
- Keeps the Data Safe – It keeps your important data safe and secure from malware or virus.
- Manages Files – Google Drive cloud storage helps to keep a track of the files and arranges them chronologically.
See Also:
How to Add and Remove People in Group Text on iPhone
How to Open Recent Files in Windows 10
How to Turn Off OK Google on Android
How to Track Someone on Google Maps Without Them Knowing
How to Change USB Settings on Android 6.0
But there are certain limitations of this cloud storage facility as well.
- Google Drive cloud storage allows you to store up to only 15 GB for free.
- For more cloud storage space, you have to pay & upgrade to Google One.
Thus, it becomes even more important to use Google Drive storage wisely and economically.
Why Google Drive Duplicate Files Problem Occurs?
This issue can arise because of various reasons, such as:
- When multiple people have access to the Drive, they might upload copies of the same document.
- Similarly, you might mistakenly upload multiple copies of the same file, then you will face the said issue.
How to Find Duplicate Files in Google Drive
There are various ways to find duplicate files as discussed in this section.
Method 1: Find Manually in Google Drive
Peruse through your drive by scrolling manually and removing the files that repeat themselves or have the same name.

Method 2: Use Google Drive Search Bar
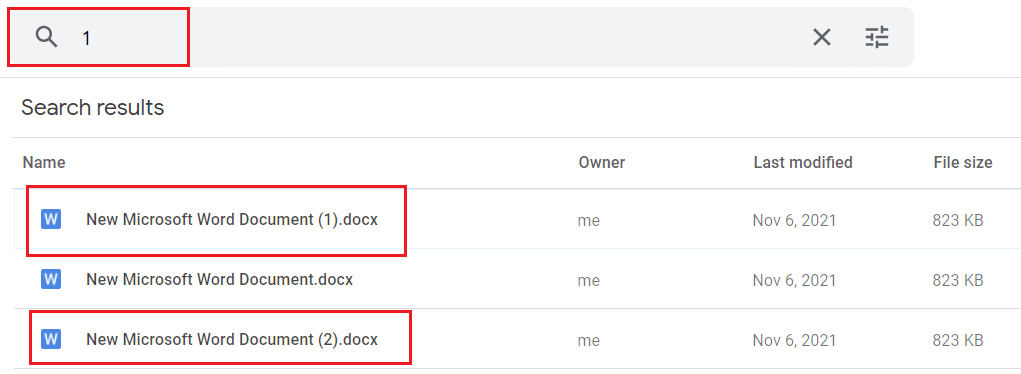
Google Drive automatically adds numbers in the name of duplicate files while uploading them. You can find duplicate files by searching for numbers in the search bar, as depicted below.
Method 3: Use Duplicate File Finder Add-in
Duplicate File Finder Add-in will help you to find duplicate files in Google Drive, as follows:
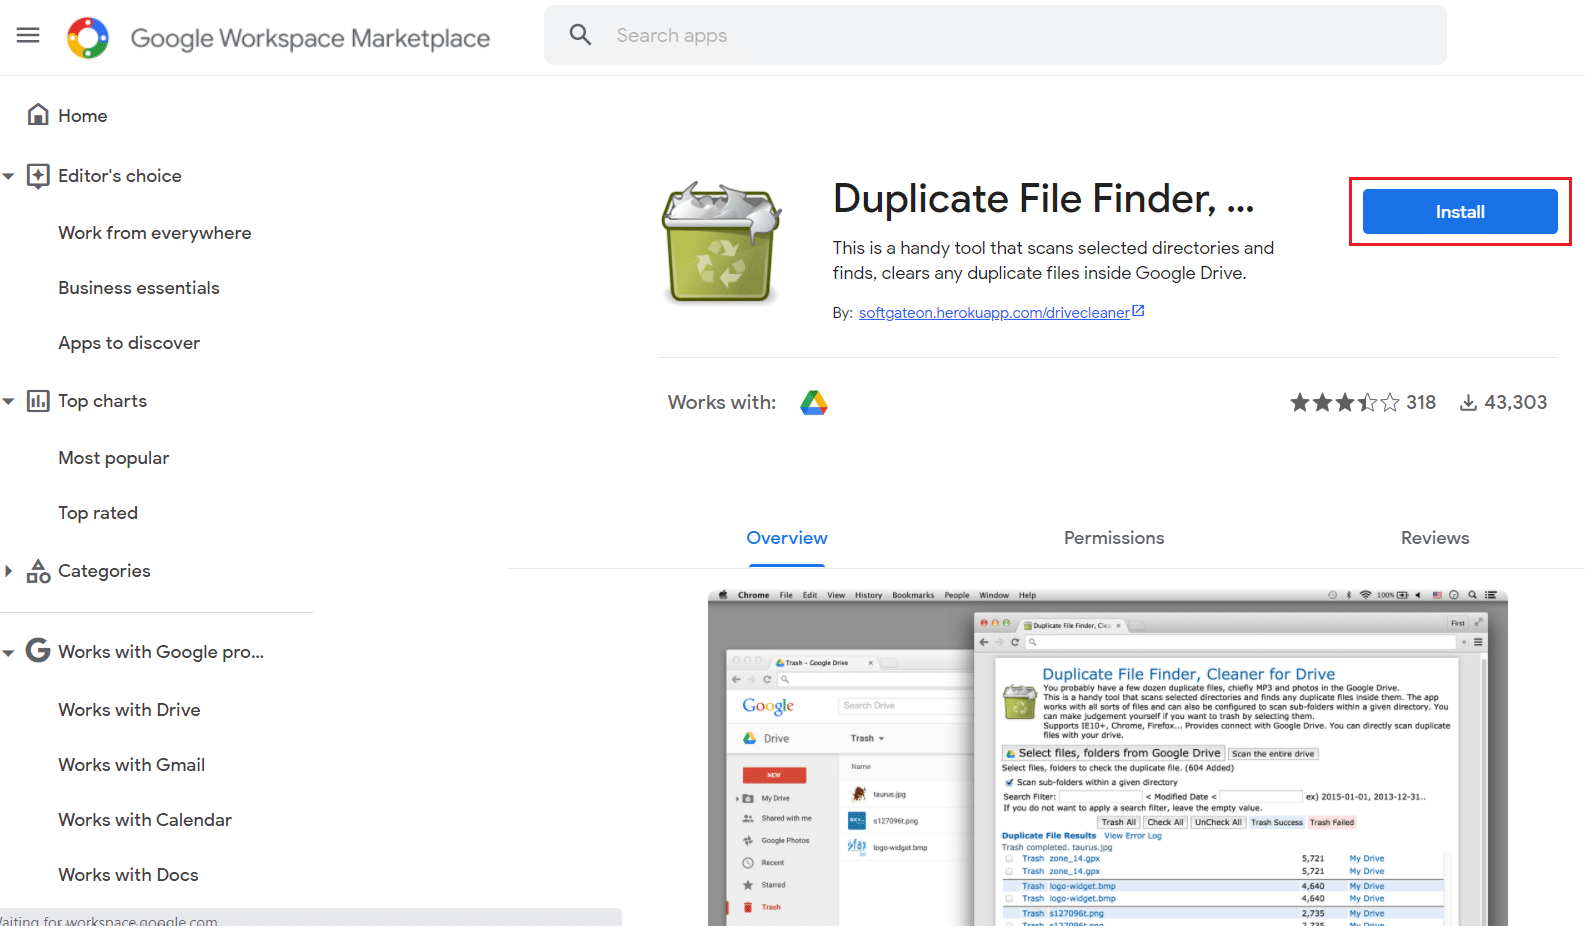
1. Install Duplicate File Finder from Chrome Workspace Marketplace, as shown.
2. Navigate to Google Drive. Click on the Google Apps icon, and then select Duplicate File Finder.
![]()
3. Here, click on Select files, folders from Google Drive > Login & Authorize, as illustrated below.
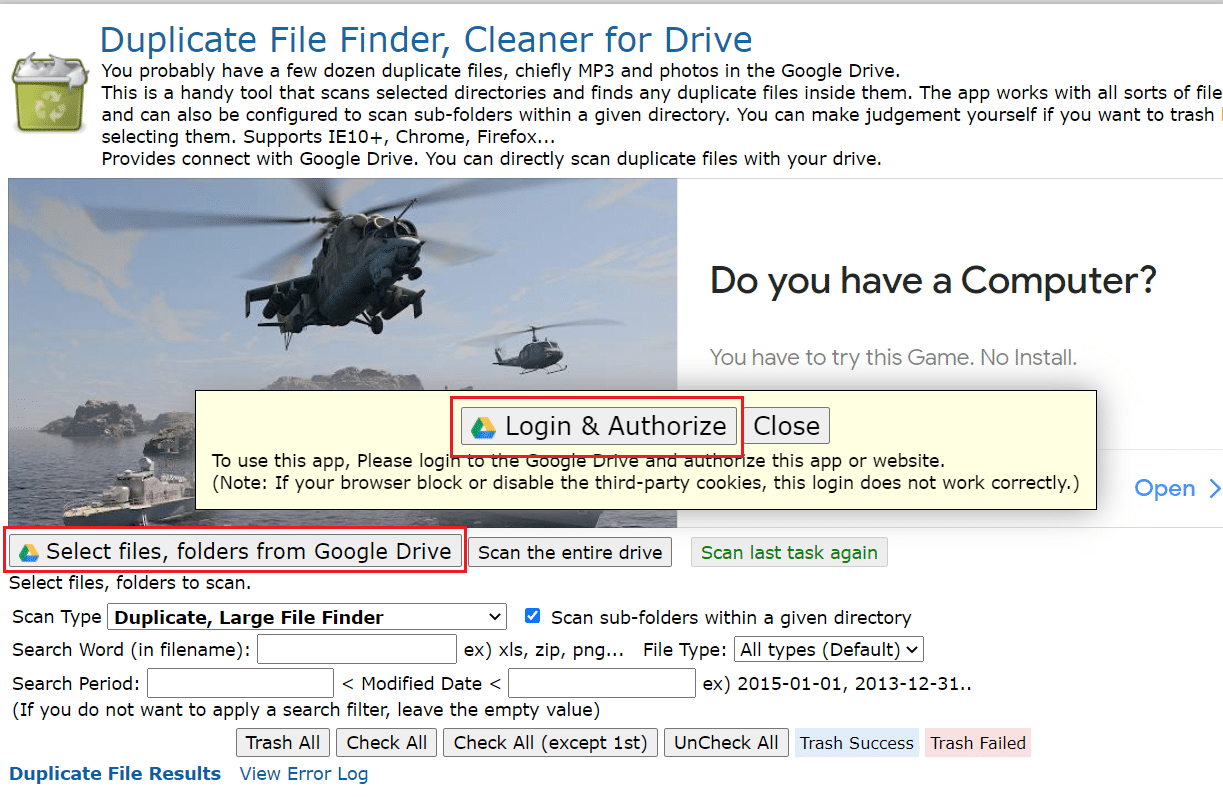
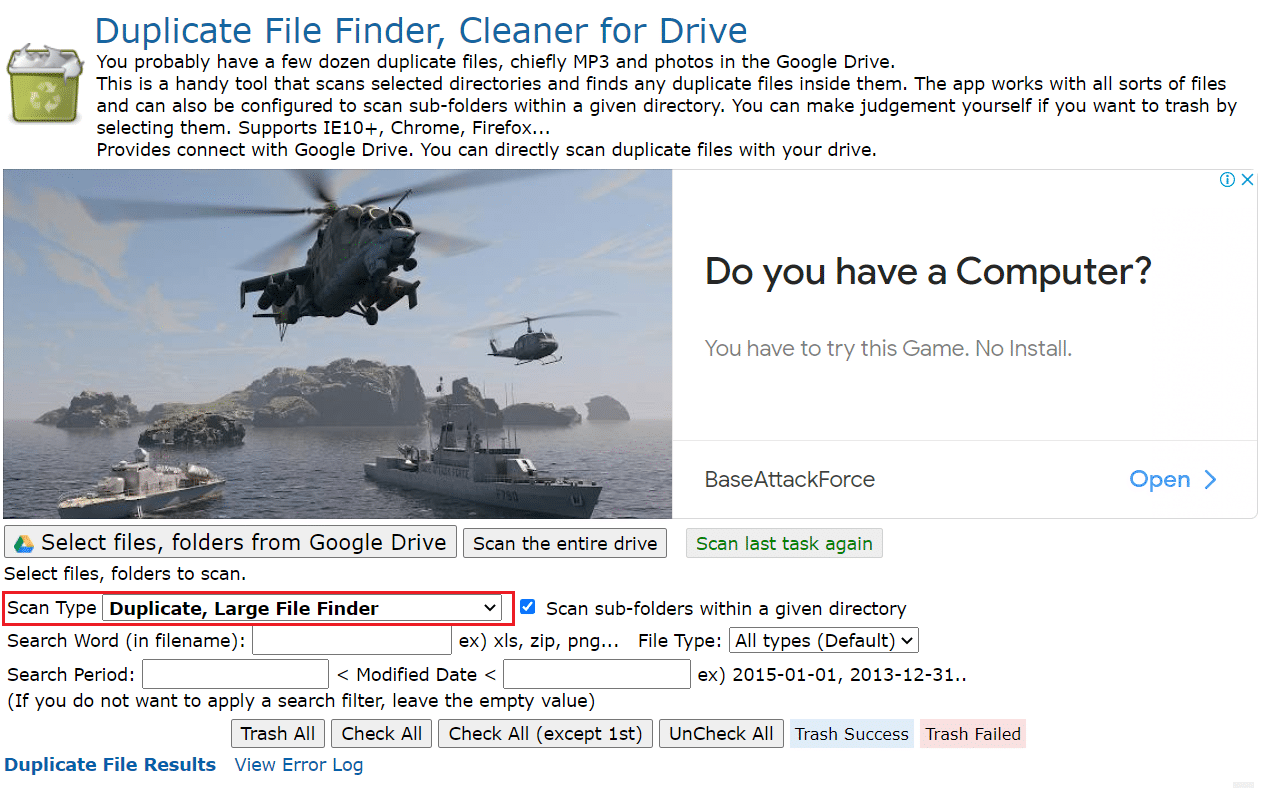
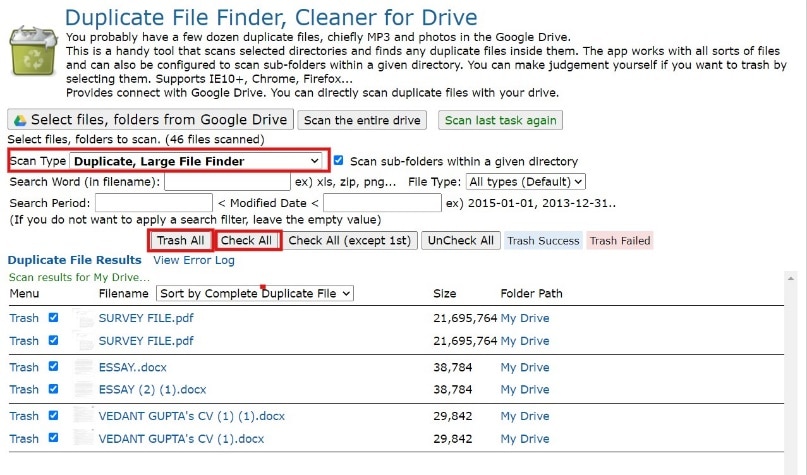
4. Login using account credentials and set the Scan Type to Duplicate, Large File Finder. All the duplicate files will be enlisted after the scan.
Also Read: How To Fix Google Drive Access Denied Error
How to Remove Duplicate Files in Google Drive
In this section, a list of methods is compiled to delete Google Drive duplicate files.
Method 1: Delete Manually from Google Drive
Here are the steps to remove duplicate files manually in Google Drive from your Web Browser.
Note: You can delete the files having numbers in brackets in their name. However, be cautious that you are deleting the copies and not the original ones.
1. Launch Google Drive in your Web Browser.
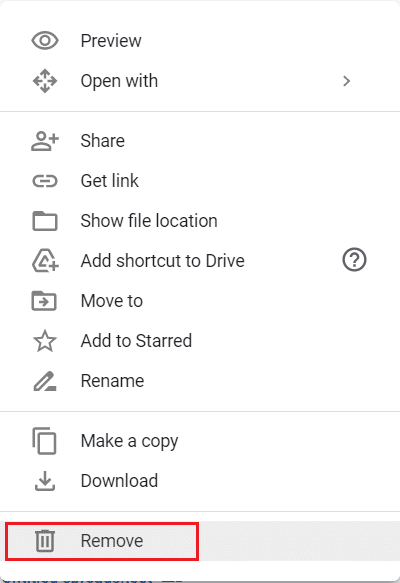
2A. Right-click on the duplicate file, then choose Remove, as shown.
2B. Alternatively, select the Duplicate File and then, click on the Trash icon to delete it.
![]()
2C. Or, Simply, select the Duplicate files and press the Delete key on the keyboard.
Note: The removed files will get collected in the Trash and will get deleted automatically after 30 days.
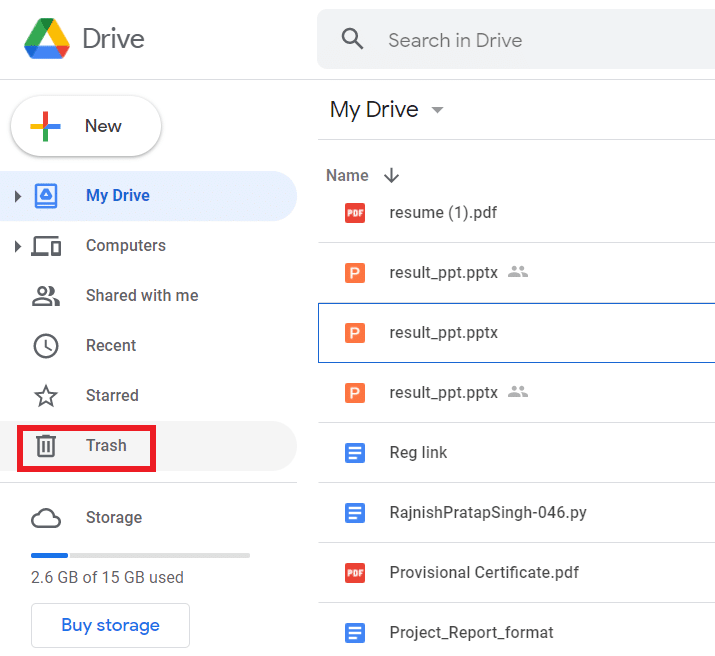
3. To remove duplicate files from Google Drive permanently, click on Trash in the left pane.
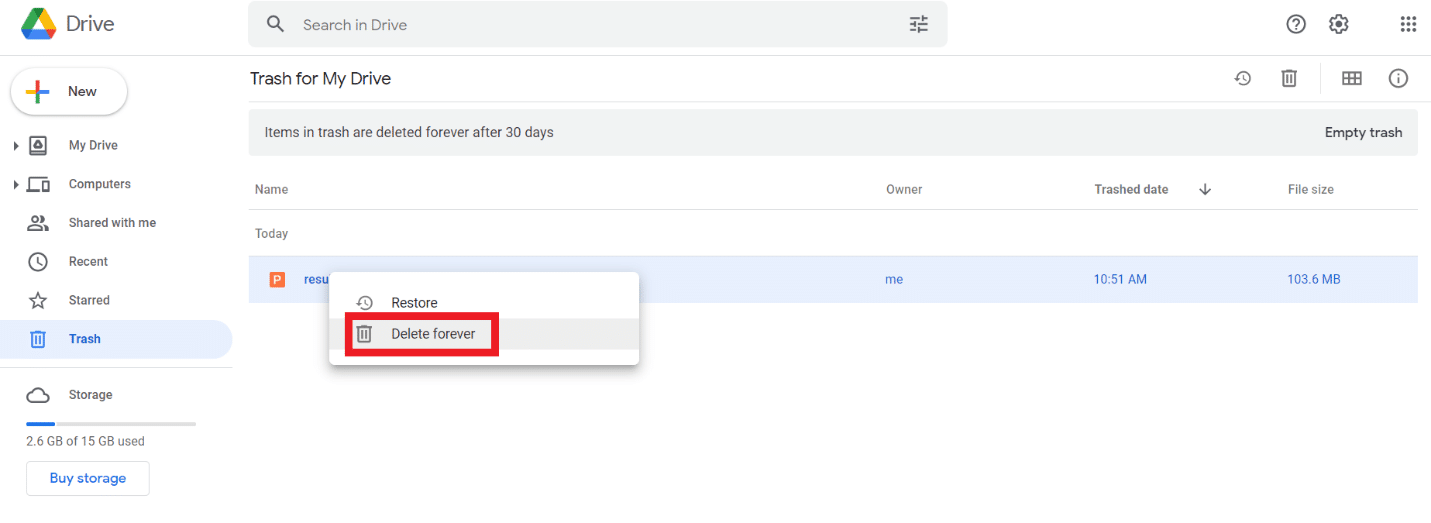
4. Here, right-click on the File and select the Delete forever option, as depicted.
Method 2: Use Google Drive Android App
1. Open the Google Drive app and tap on the Duplicate file.
2A. Then, tap on the Trash icon, as shown.
![]()
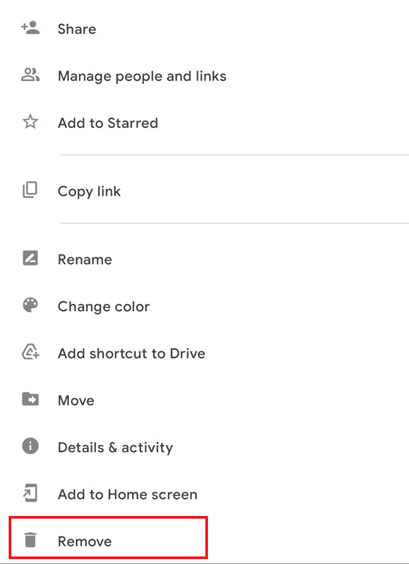
2B. Alternately, tap on the three-dotted icon at the top right corner of your screen. Then, tap on Remove, as shown highlighted.
Also Read: How to Move Files from One Google Drive to Another
Method 3: Use Files by Google Android App
If you are using your phone then you can delete duplicates using Files by Google app. The problem with this feature, however, is that it isn’t always reliable and effective since the app mainly focuses on internal storage and not cloud storage. Here is how to remove duplicate files in Google Drive automatically:
1. Launch Files by Google on your Android phone.
2. Here, tap on Clean from the bottom of the screen.
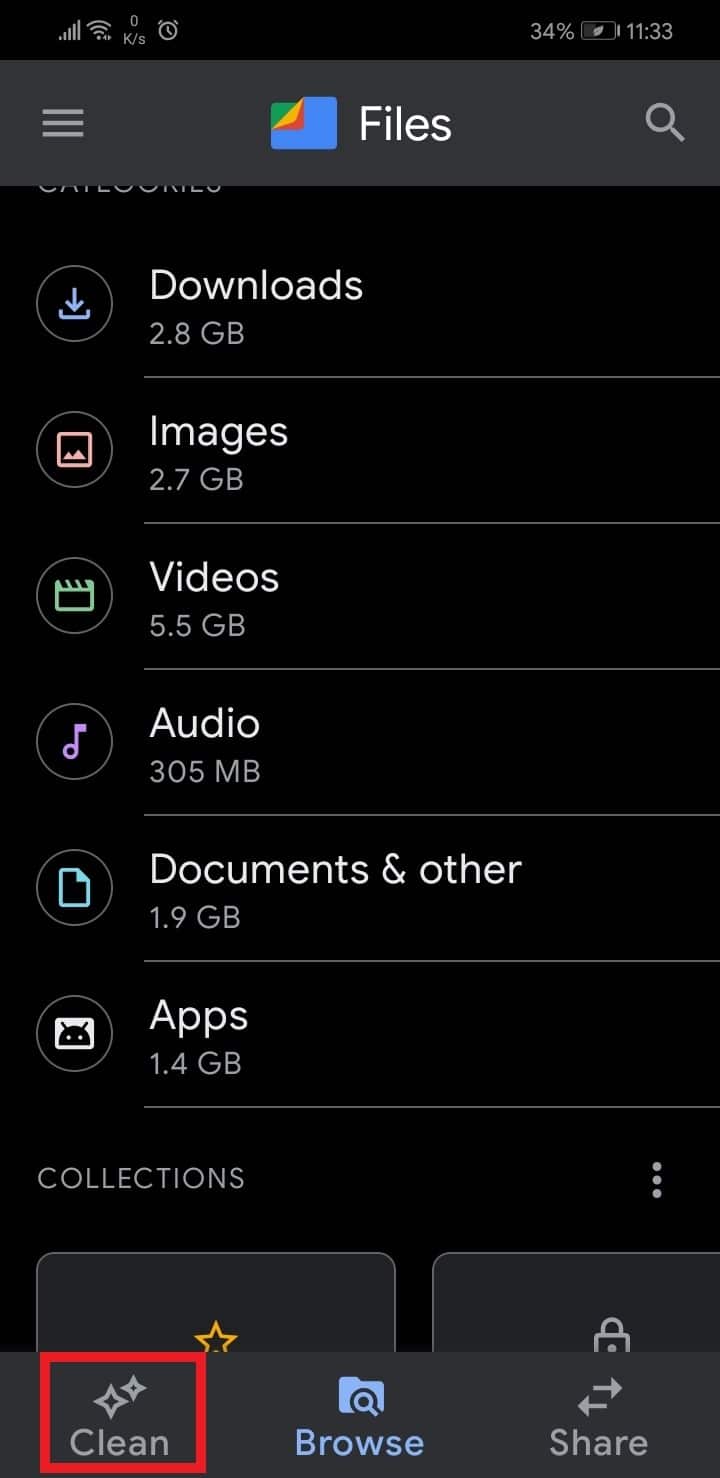
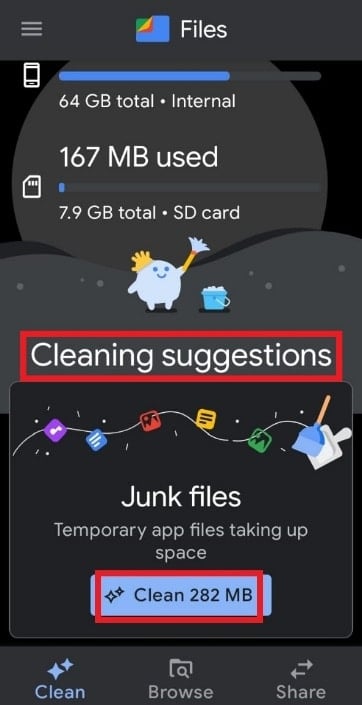
3. Swipe down to Cleaning suggestions and tap on Clean, as depicted.
4. On the next screen, tap on Select files, as shown.
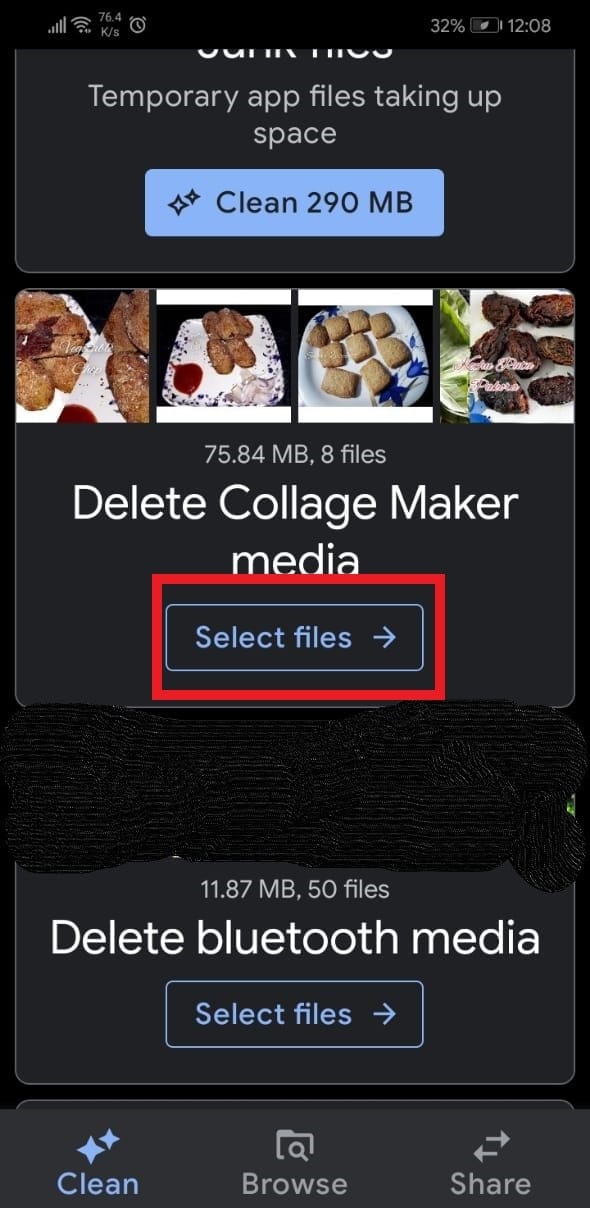
5. Tap on Duplicate files and tap Delete.
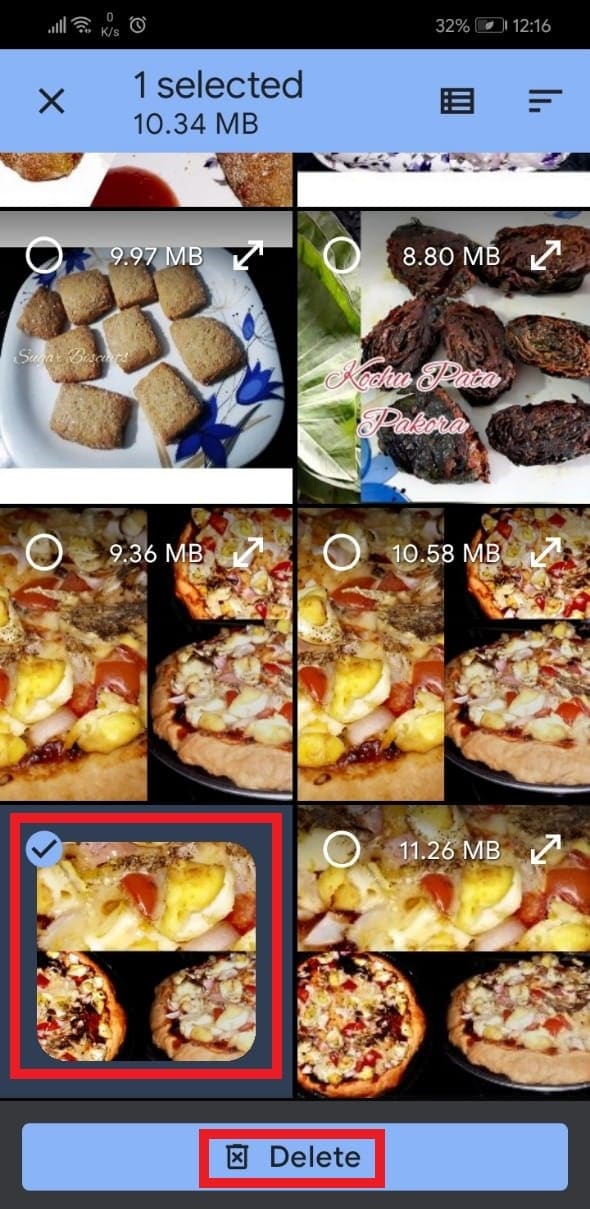
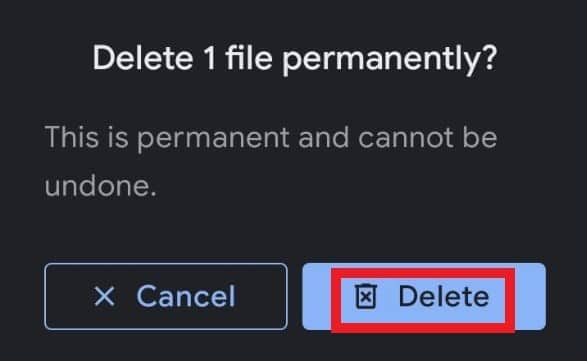
6. Confirm the deletion by tapping Delete again.
Method 4: Use Third-Party Applications
Google itself does not have an integrated automatic duplicate file detection system. So, most people prefer using third-party applications and software to do the cleaning up for them. We have made a list of some third-party services that you can use to find and remove duplicate files from your Google Drive:
Here’s how to remove duplicate files in Google Drive cloud storage using Duplicate File Finder and Cloud Duplicate Finder:
Duplicate File Finder
1. Launch Duplicate File Finder and search for Duplicate files as shown in Method 3.
2. Next, click on Check All followed by Trash all.
Cloud Duplicate Finder
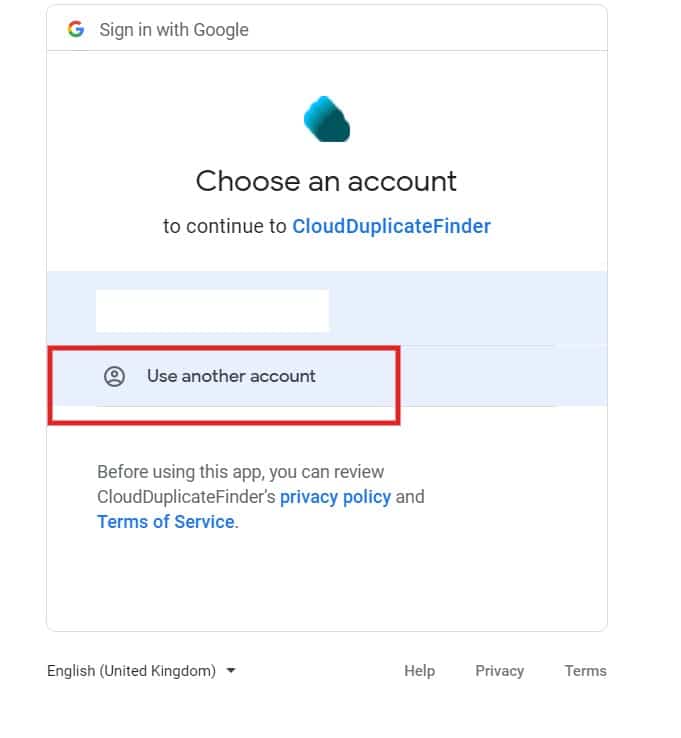
1. Open Cloud Duplicate Finder on any web browser. Here, either Sign Up Using Google or Sign Up Using Microsoft.
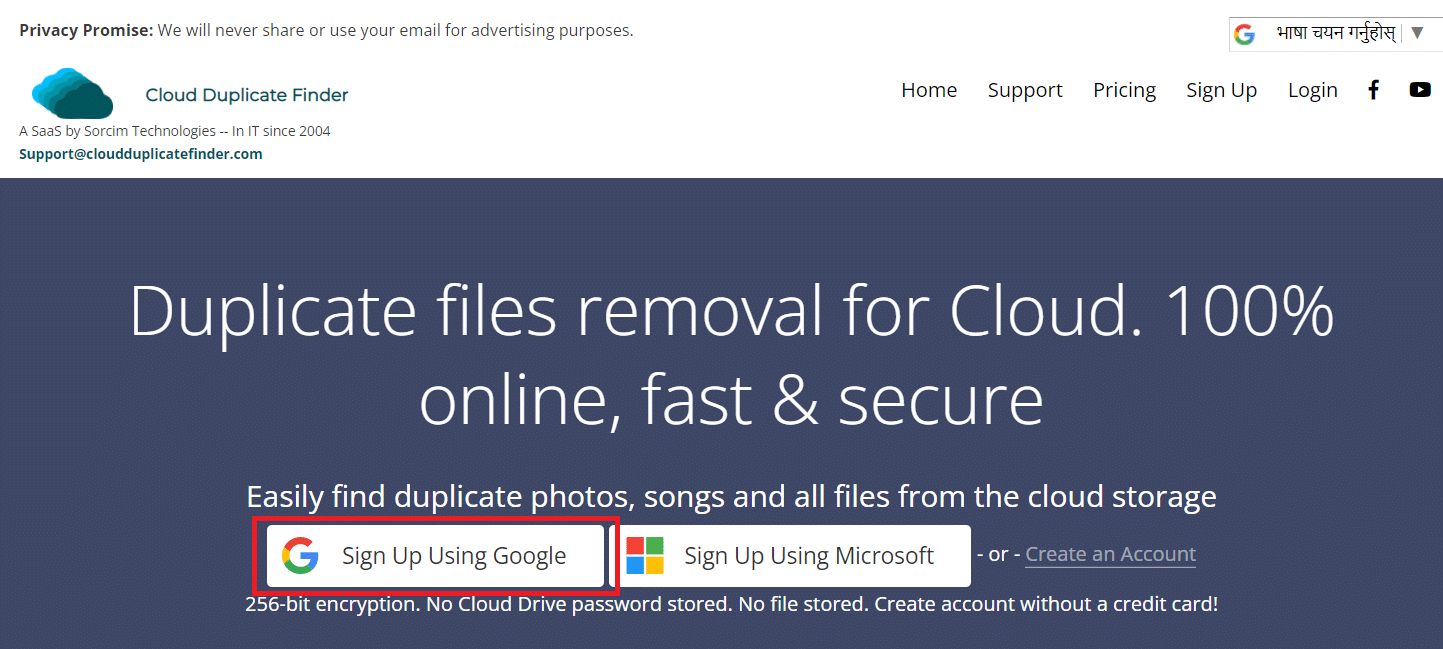
2. We have shown Sign Up Using Google process below.
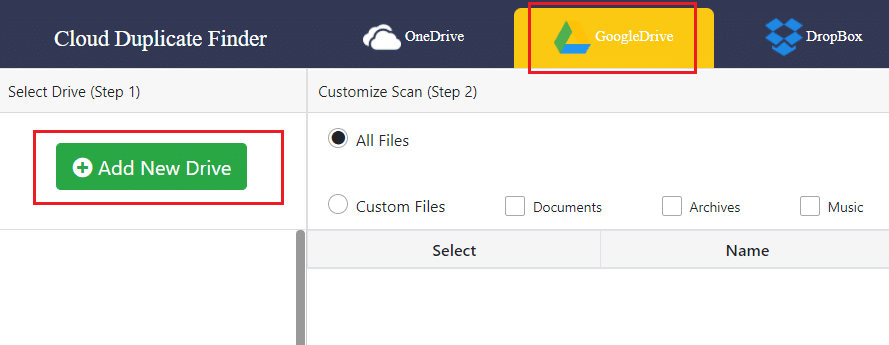
3. Select Google Drive and click on Add New Drive, as shown.
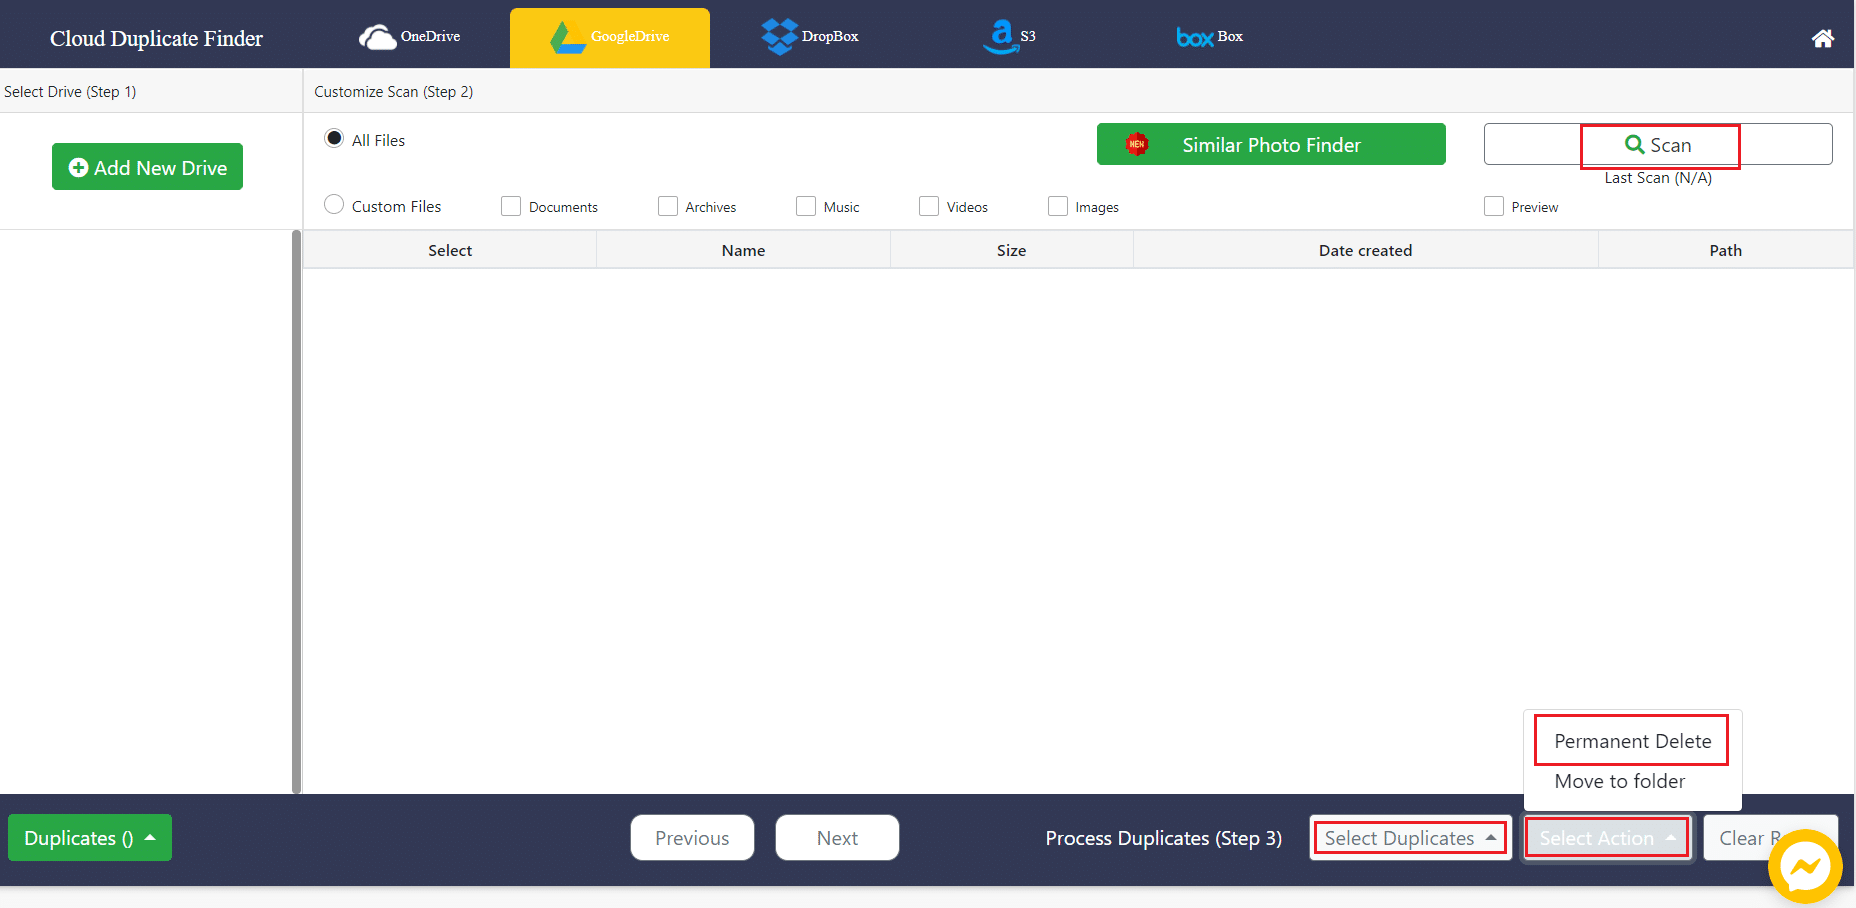
4. Sign in to your account and scan your Folder for duplicates.
5. Here, click Select Duplicates.
6. Now, click on Select Action and choose Permanent Delete option, shown highlighted.
Also Read: Merge Multiple Google Drive & Google Photos Accounts
How to Prevent Google Drive From Duplicating Files
Since prevention is better than cure, so let us discuss how to avoid duplication of files.
Method 1: Do Not Upload Copies of Same File
This is a common mistake made by people. They keep re-uploading files which creates duplicate copies. Avoid doing this and check your drive before uploading something.
Method 2: Uncheck Offline Settings in Google Drive
Google Drive cloud storage can detect files of the same name automatically and overwrite them. To use this feature:
1. Launch Google Drive on a web browser.
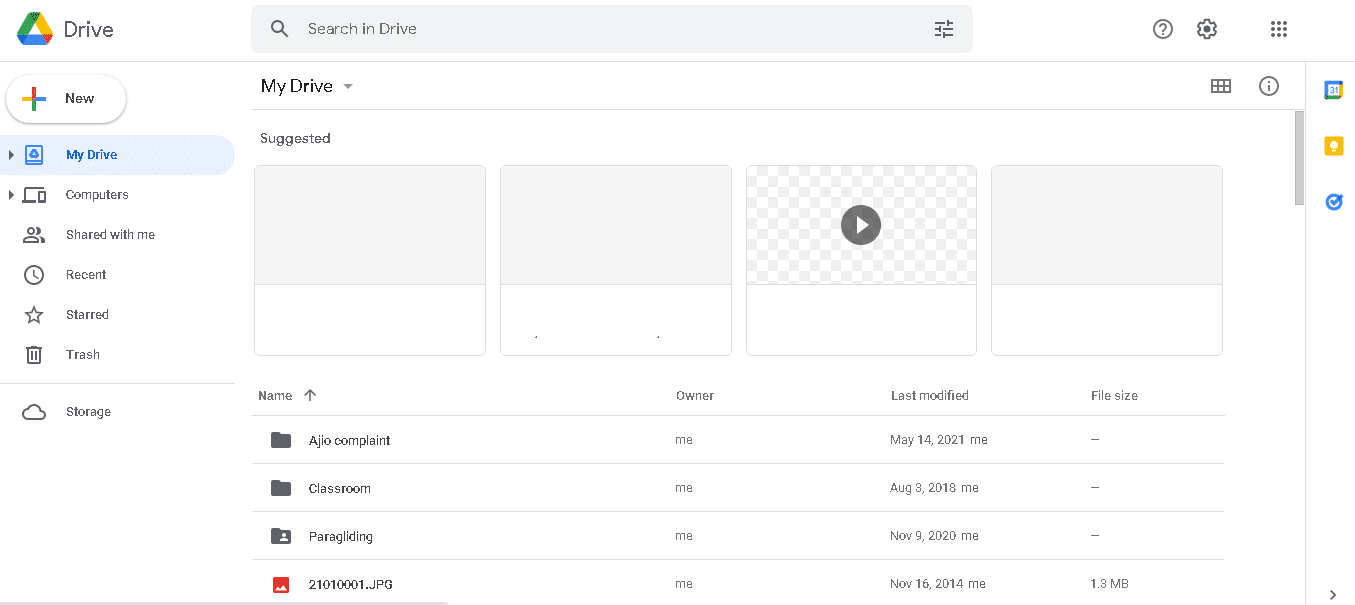
2. Click on gear icon > Settings, as shown below.
![]()
3. Uncheck the option marked Convert uploaded files to Google Docs editor format.
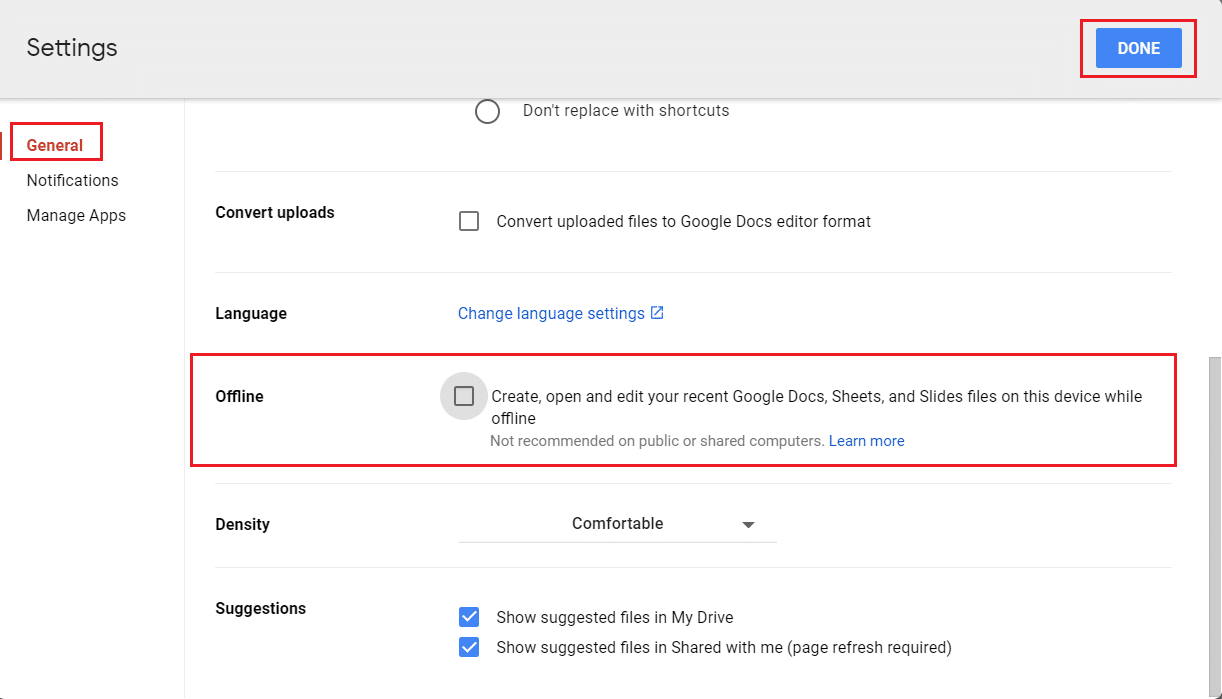
This will help to prevent duplicate files that occupy unnecessary space in Google Drive Cloud storage.
Also Read: Sync Multiple Google Drive Accounts In Windows 10
Method 3: Turn Off Backup and Sync in Google Drive
Here is how to prevent duplicating files by pausing the syncing of files:
1. Go to the Windows Taskbar.
2. Right-click on the Google Drive icon, as shown.
![]()
3. Here, open Settings and select the Pause syncing option.
![]()
Recommended:
We hope that this guide helped you fix Google Drive cloud storage duplicate files problem by teaching you how to prevent, find and remove duplicate files in Google Drive. If you have any queries, suggestions, or feedback regarding this article, then feel free to share it in the comment section.
