In a rapidly progressing world towards becoming completely digital, emails are an irreplaceable part of our work lives. All our essential messages, task briefings, official statements, announcements, etc. occur via email. Out of all the email options available, Gmail is the most widely used in the world. Every Android smartphone has a mobile app for Gmail. It allows users to check their messages quickly, sends a quick reply, attaches files, and a lot more.
However, it would be really unfortunate if Gmail stopped doing what it is meant to do, i.e., sending and receiving mails. Just like any other app, Gmail is prone to bugs and glitches, and sometimes it fails to execute its purpose. If you are not receiving emails on your Gmail app, then it is a major concern. There is no need to explain the importance of emails, especially if you are working professionally. This problem needs to be fixed at the earliest, and that is exactly what we are going to do. In this article, you will find a series of solutions ranging from simple to complicated. Start with the simple ones, and if that doesn’t help, then you can proceed further.
Fix Gmail not receiving emails on Android
You should always back up your Android phone before doing any troubleshooting, just in case, if something happens then you can always restore your phone from the backup.
Method 1: Check your Internet connection
It is very important that you have a stable internet connection to receive emails. Maybe the reason behind Gmail not receiving emails is the poor internet speed. It would help if you made sure that the Wi-Fi that you are connected to is working correctly. The easiest way to check your internet speed is to open YouTube and see if a video is playing without buffering. If it does, then the Internet is not the reason behind Gmail not working. However, if it does not, you need to either reset your Wi-Fi or connect to a different network. You can also switch to your mobile system if that is possible.
See Also:
11 Solutions to Fix Outlook Error This Item Cannot Be Displayed in Reading Pane
How Much Does it Cost to Fix a Cracked Phone Screen on Android
Fix WhatsApp File Format Not Supported on Android
Fix iPhone Calendar Invitation Cannot be Sent Error
Method 2: Update the Gmail App
The next thing that you can do is update your Gmail app. A simple app update often solves the problem as the update might come with bug fixes to resolve the issue.
1. Open Playstore on your phone.
2. On the top left-hand side, you will find three horizontal lines. Click on them.
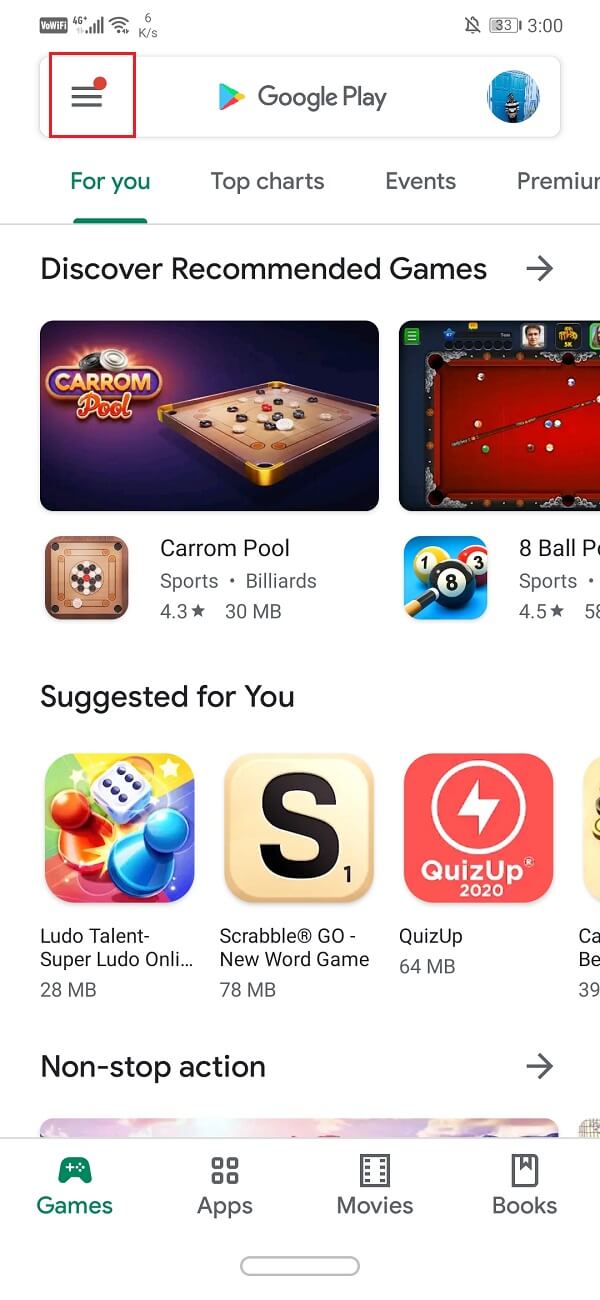
3. Now click on the “My Apps and Games” option.
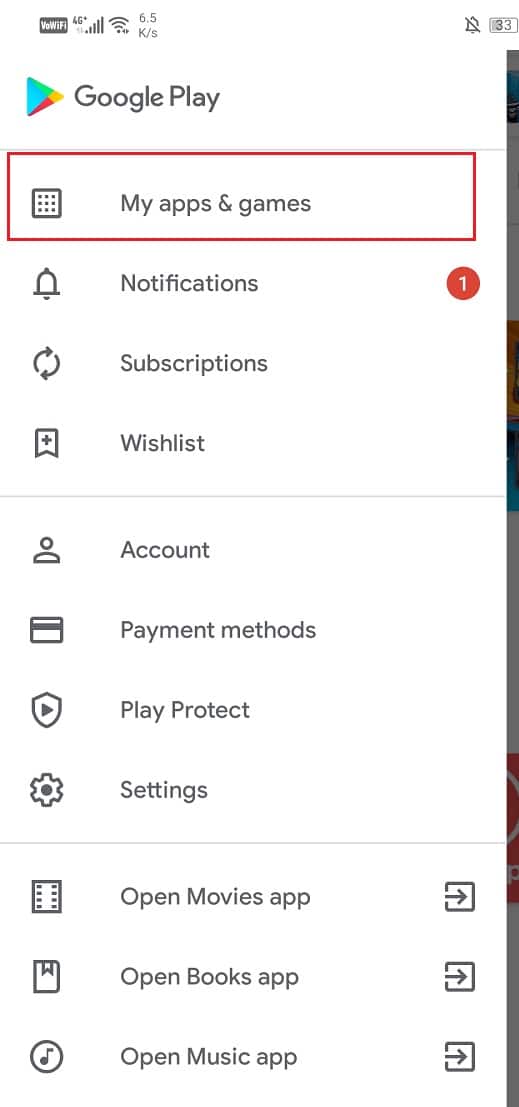
4. Search for the Gmail app and check if there are any pending updates.
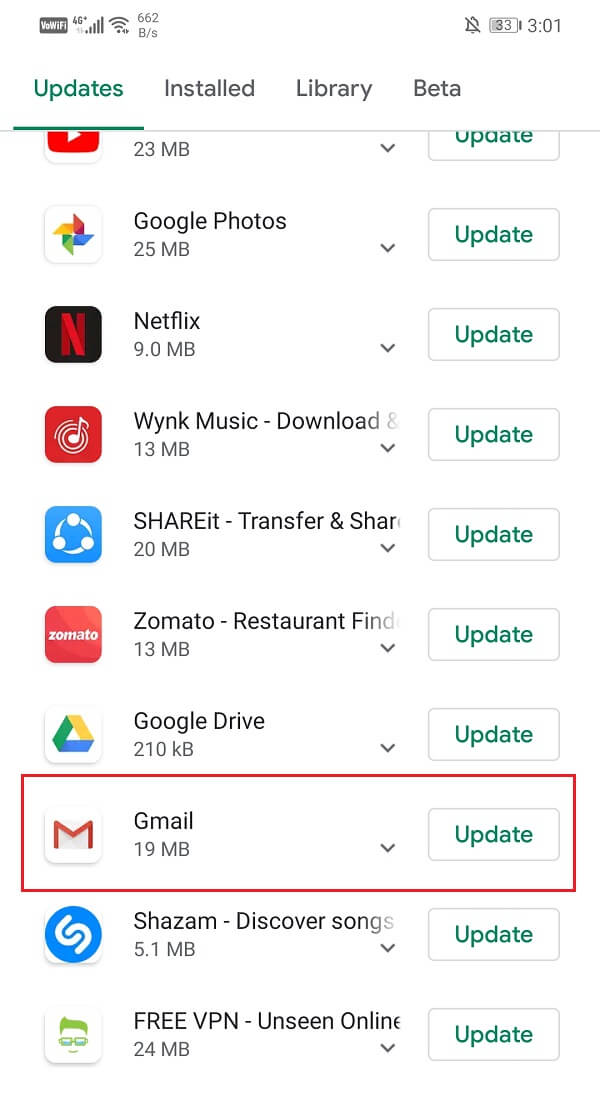
5. If yes, then click on the update button.
6. Once the app gets updated, check if you’re able to fix Gmail not receiving emails on the Android.
Method 3: Try Opening Gmail in a Browser
In order to make sure that the problem is with the app and not Gmail itself, you need to open the app in a web browser, like Chrome or Firefox. Follow the steps given below to see how:
1. Firstly, open Google Chrome (you can use any other browser if you want).
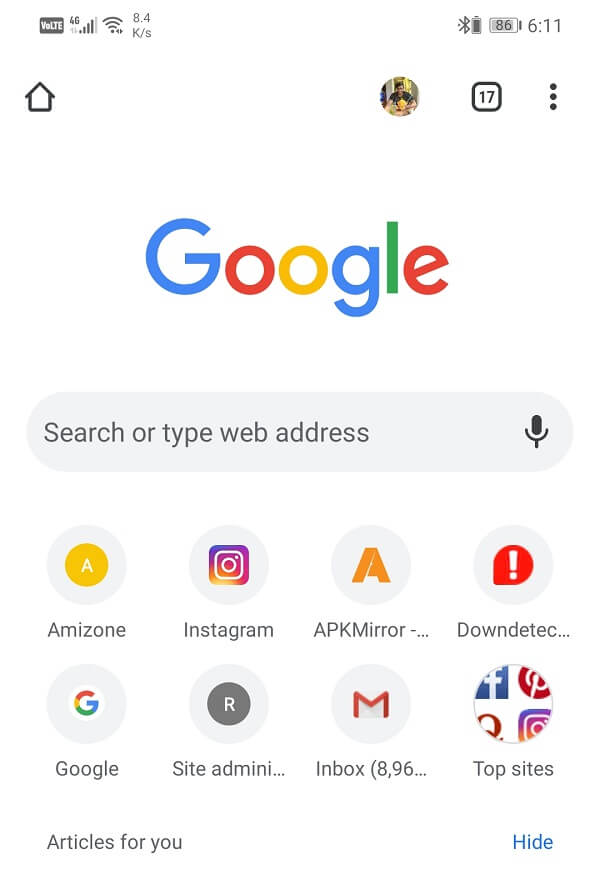
2. Now tap on the Home icon on the top left-hand side of the screen.
![]()
3. Here, click on the Apps icon.
4. Select Gmail from the expanded menu.
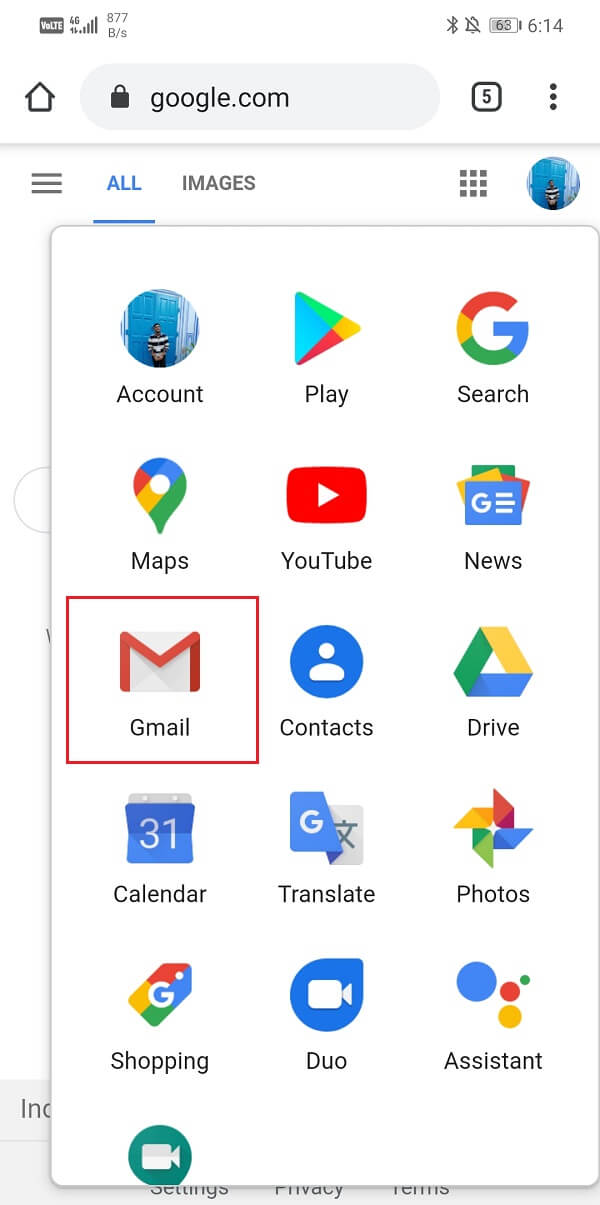
5. If you are already logged in to Chrome using your Google account, then it will directly open the Gmail’s Inbox. Otherwise, you will have to sign in with your username and password.
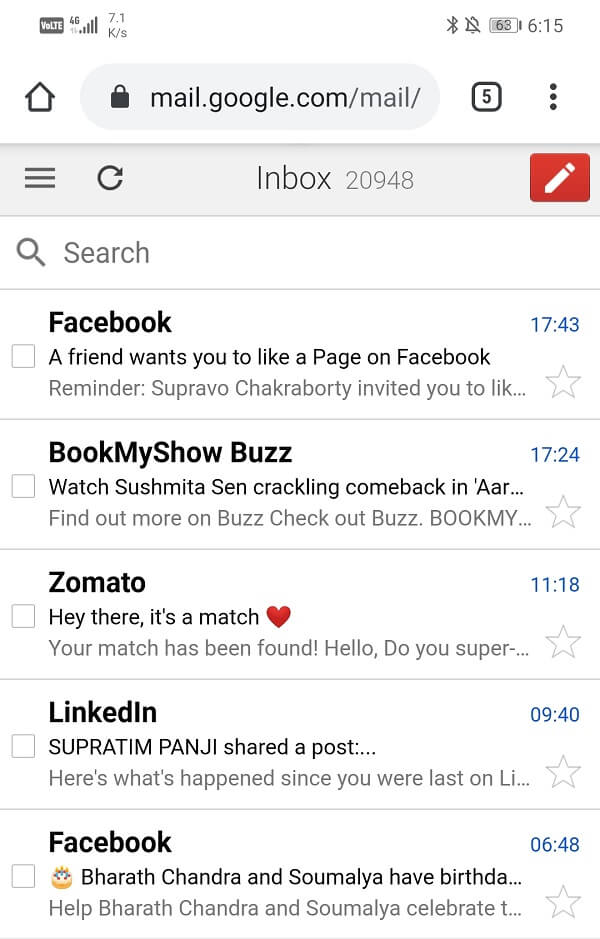
6. After this, tap on the Refresh button on the top left-hand side of the screen.
7. If you see that emails are being received normally, then the problem is with the app, or else the problem is with Gmail itself. We will discuss this in the next section.
Also Read: Fix Gmail Notifications Not Working On Android
Method 4: Check for Problems in Google Server
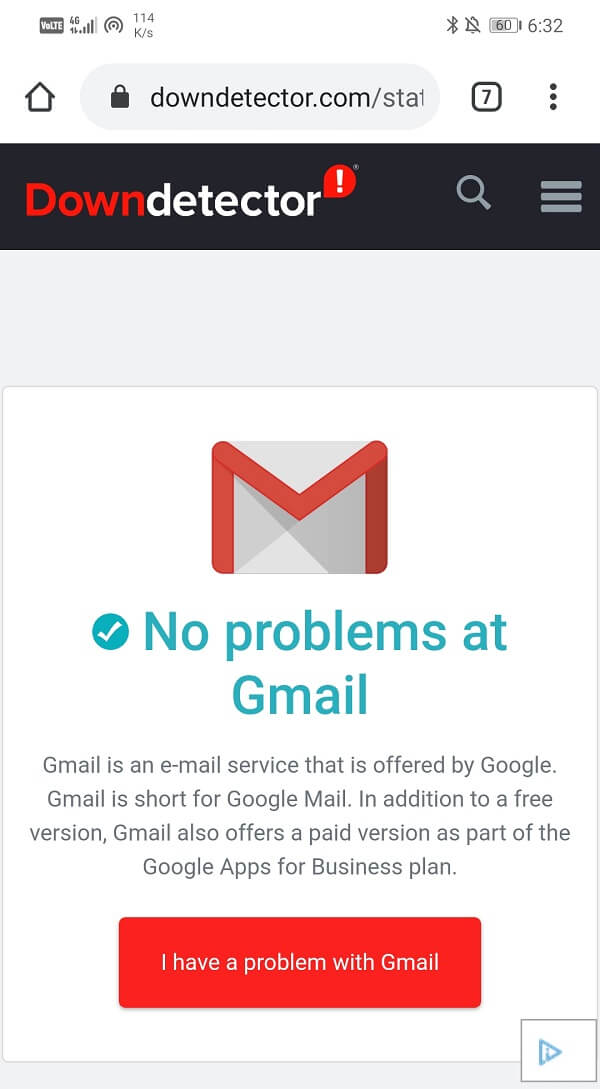
As mentioned earlier, it is possible that the problem is with Gmail itself. Gmail uses Google servers to send and receive emails. It is quite unusual, but sometimes Google’s servers are down, and as a result, Gmail does not work properly. This, however, is a temporary problem and will be resolved at the earliest. The only thing that you can do besides waiting is to check if Gmail’s service is down or not. There are a number of Down detector sites that allow you to check Google server status. Follow the steps given below to see how to use one:
1. Visit the website Downdetector.com.
2. The site will ask you for permission to store Cookies. Click on the Accept option.
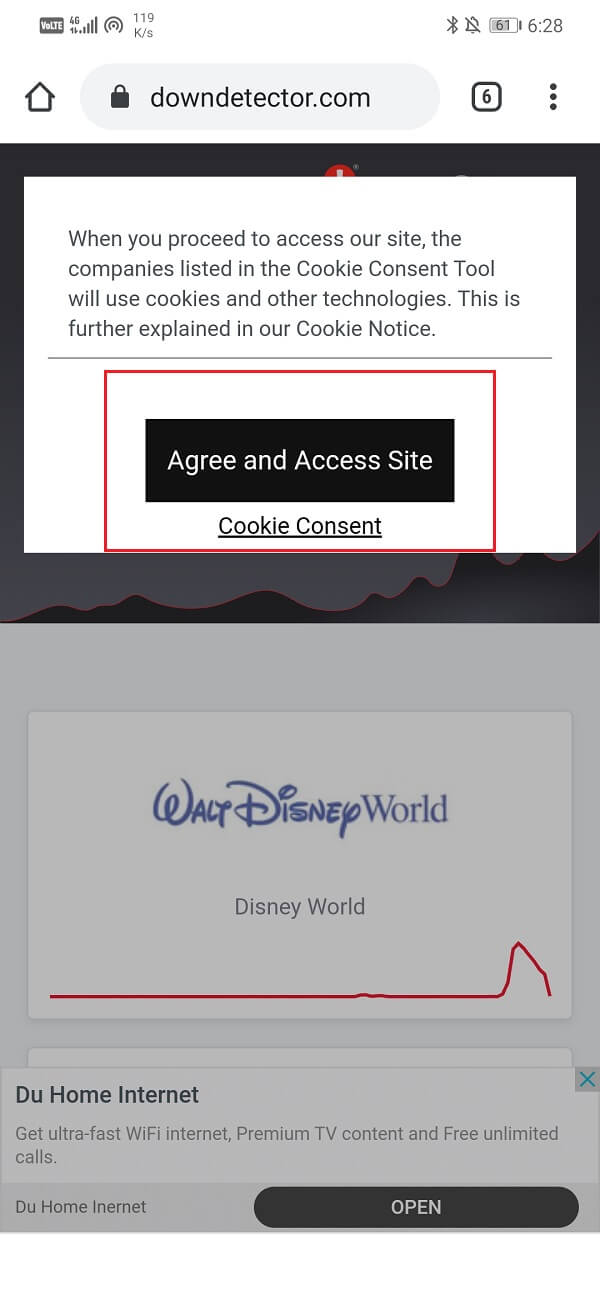
3. Now, tap on the Search bar and search for Gmail.
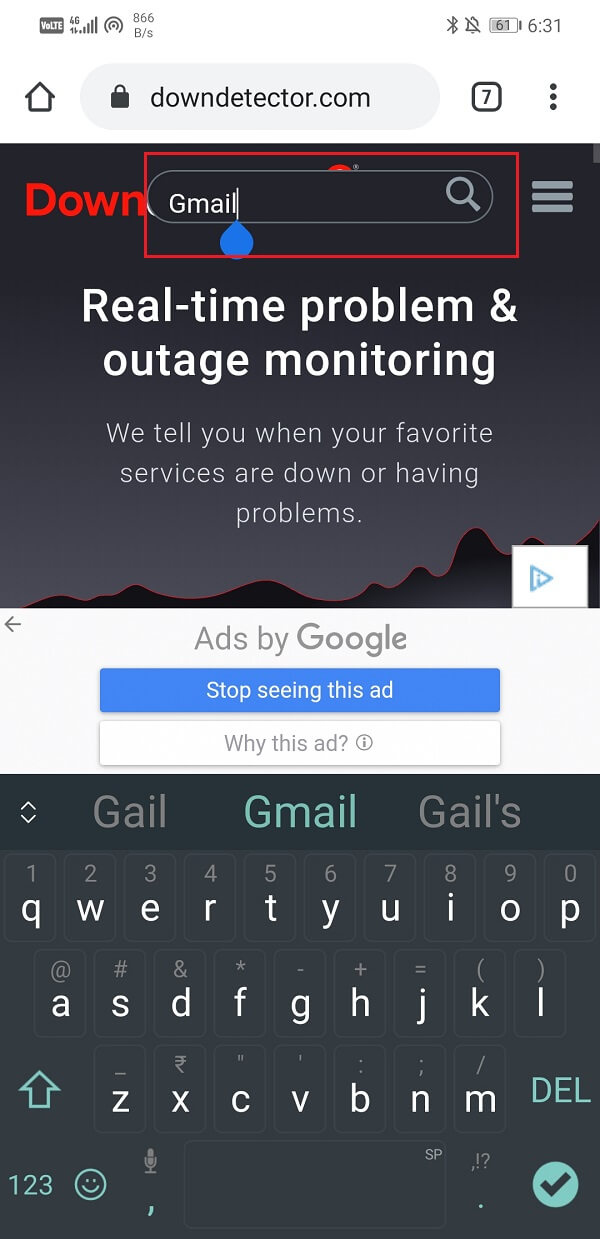
4. Click on the Gmail icon.
5. The site will now tell you whether or not there exists a problem with Gmail.
Method 5: Clear App Cache and Data
Sometimes residual cache files get corrupted and cause the app to malfunction. When you are experiencing the problem of Gmail not receiving emails on Android phone, you can always try clearing the cache and data for the app. Follow these steps to clear the cache and data files for Gmail:
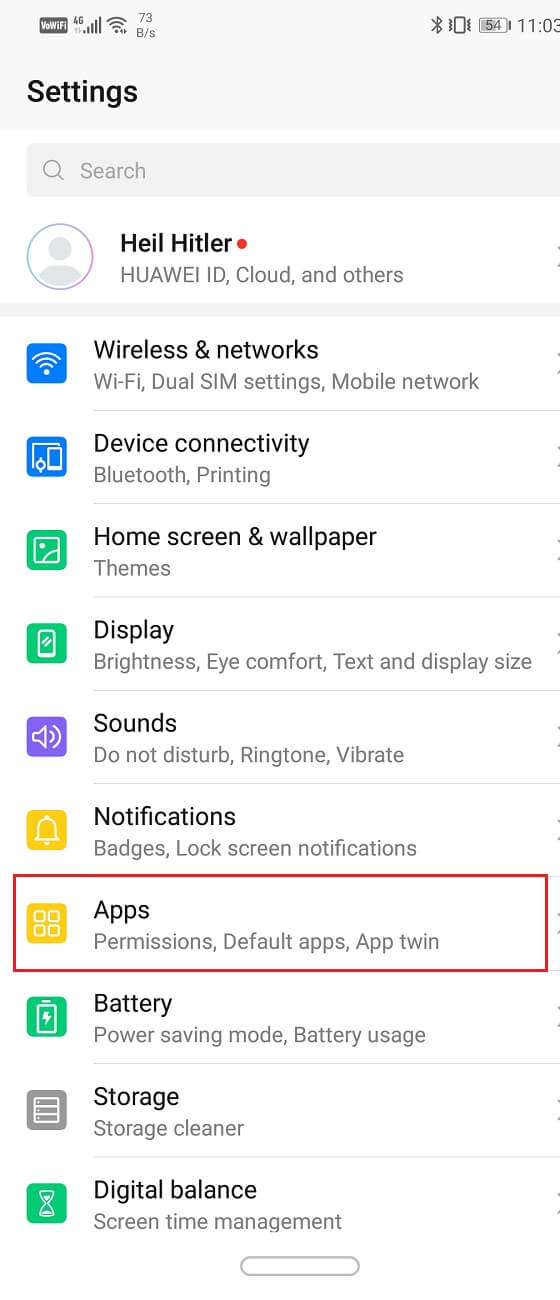
1. Go to the Settings of your phone.
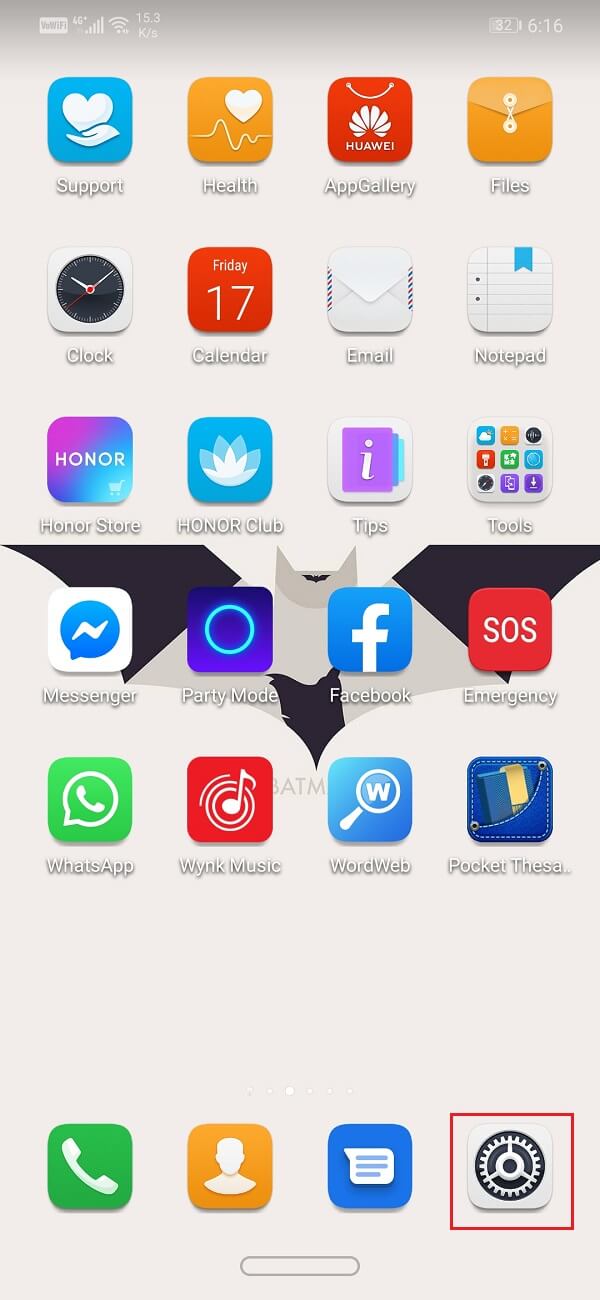
2. Tap on the Apps option.
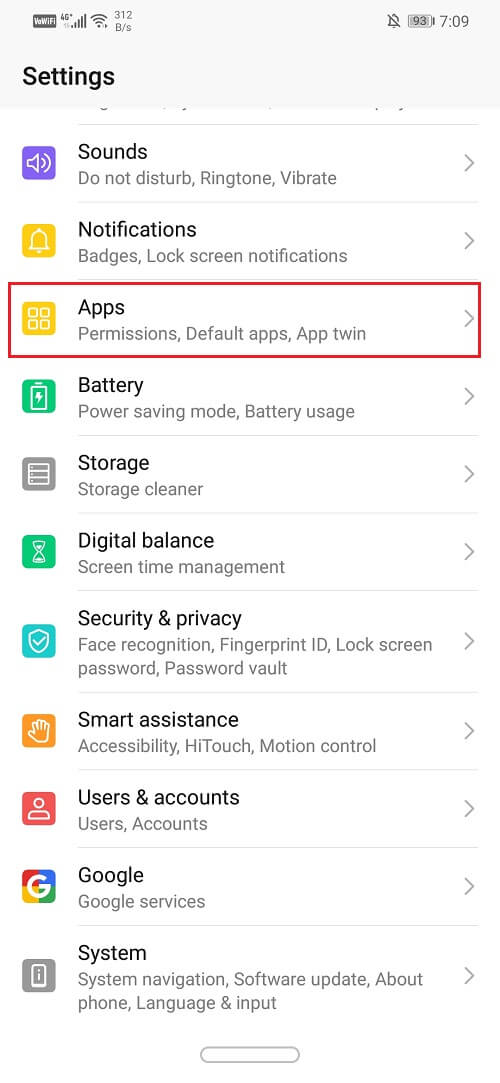
3. Now select the Gmail app from the list of apps.
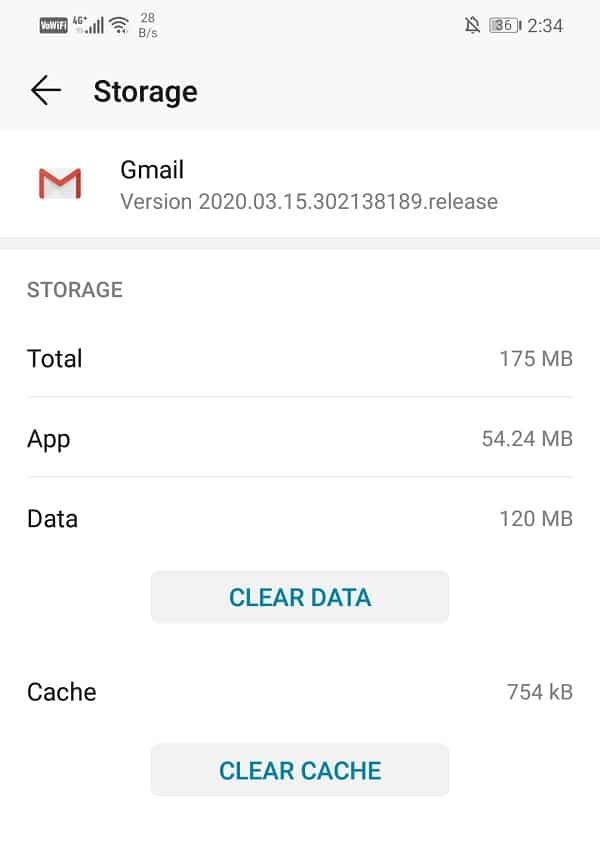
4. Now click on the Storage option.
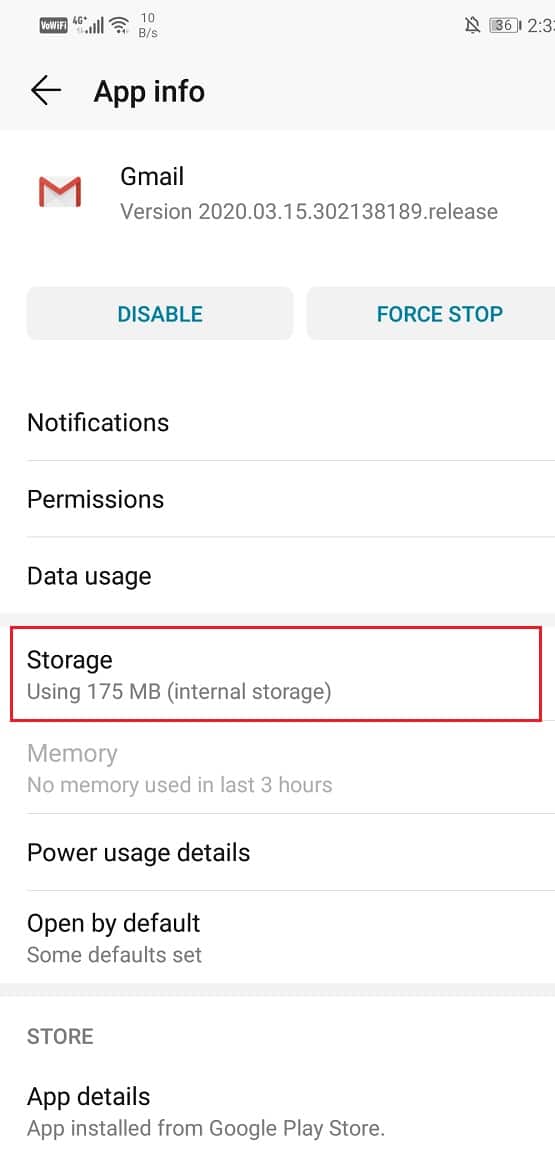
5. You will now see the options to clear data and clear cache. Tap on the respective buttons and the said files will be deleted.
Method 6: Make Sure that you logged in to the Right Account
It is possible that you have multiple accounts saved on your Gmail app. In this situation, it is completely normal to make a mistake and be logged into a different account. Since the account is already saved, you didn’t even have to enter the password, and thus, unknowingly, you were logged into a different account all this while. As a result, an email that you were expecting never came through. Follow the steps given below to check if you are logged in to the right account or not:
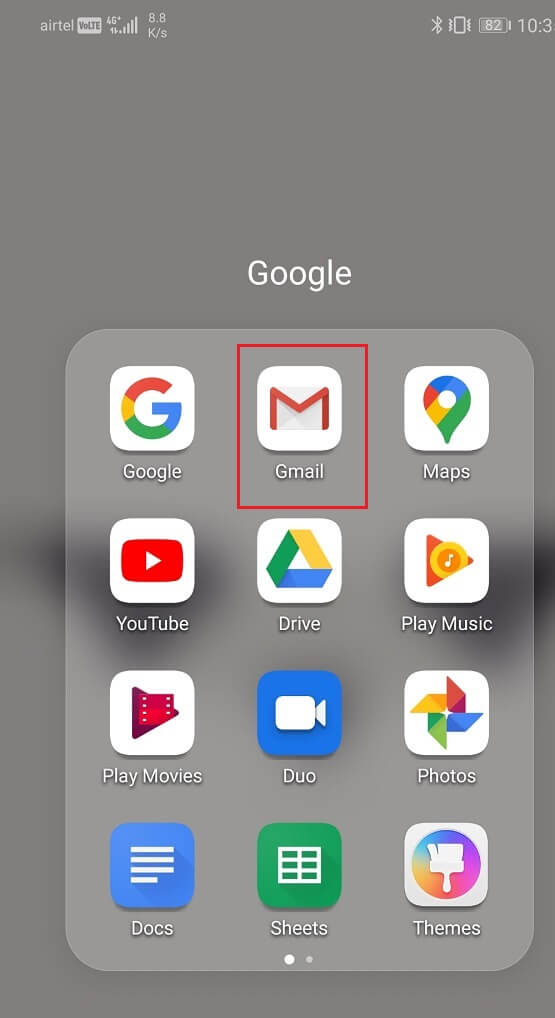
1. Open the Gmail on your Android smartphone.
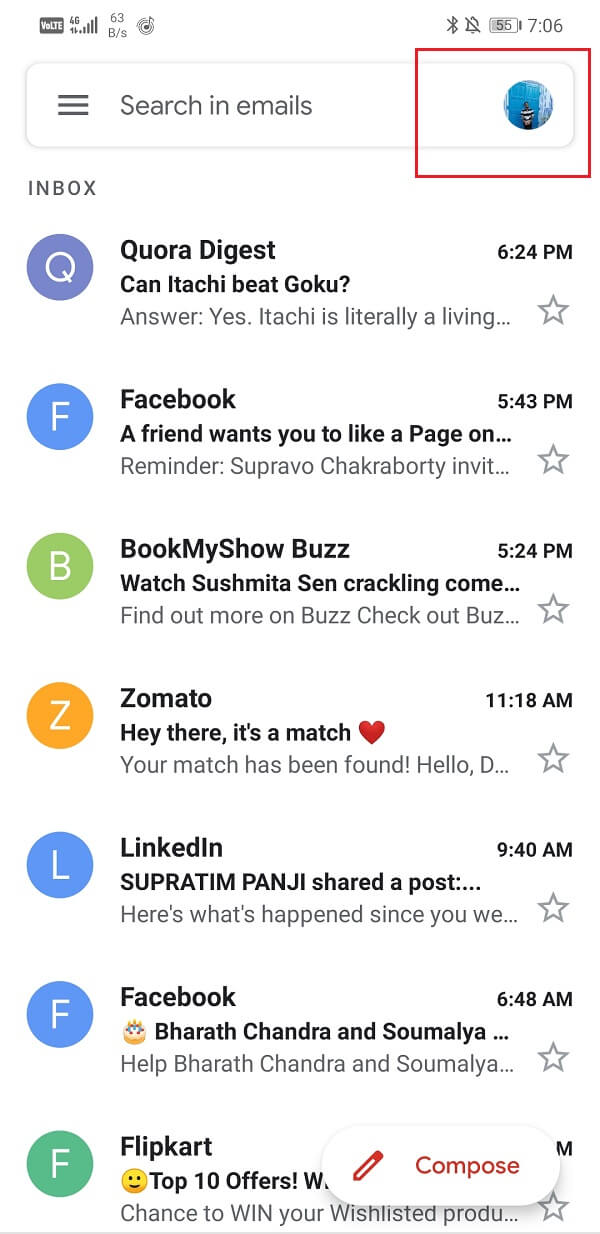
2. Now, tap on the profile picture that is present on the top-right corner.
3. You will now be able to see the list of Gmail accounts saved on your device.
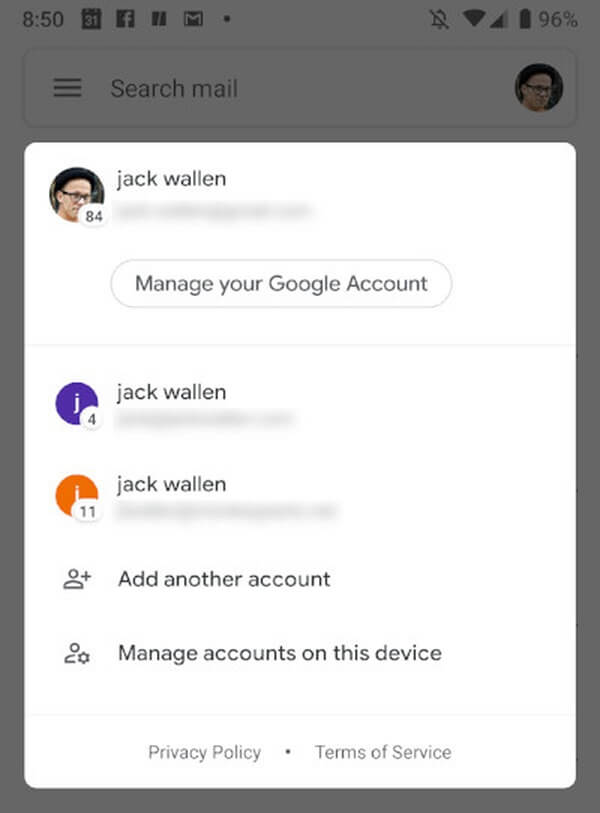
4. Check if you are logged into the right account or not (the one on the top is the active account).
5. If not, then select your account from the list of saved accounts, and it will be active.
6. You will now be able to receive mails normally.
Also Read: How to Sign Out or Log Out Of Gmail?
Method 7: Enable Auto-Sync for Gmail
The next thing that you can do is enable automatic sync for your Gmail account. You might have switched off auto-sync to save data, and battery and that could be the reason behind Gmail not receiving emails. Follow the steps given below to see how:
1. Firstly, open the Gmail app on your smartphone.
2. Now, tap on the Hamburger icon on the top left-hand side of the screen.
![]()
3. Scroll down and click on the Settings option.
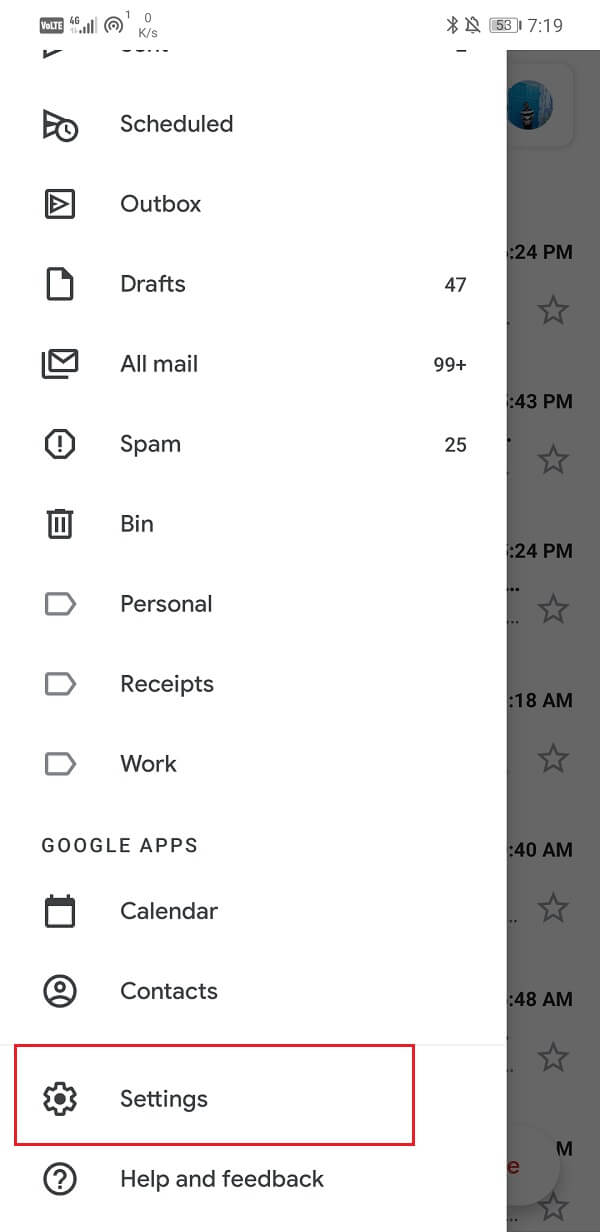
4. Here, search for the Sync Gmail option and make sure that the checkbox next to it is selected.
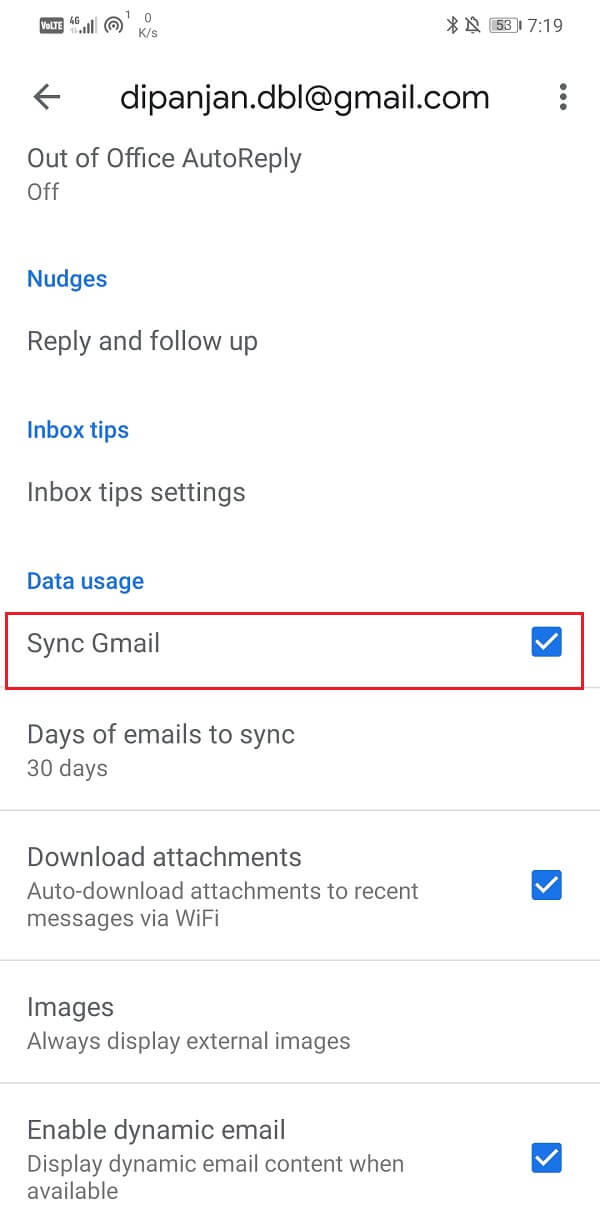
5. Once auto-sync is enabled, Gmail will automatically refresh its Inbox, and you will start receiving emails as and when someone sends them.
Method 8: Check Available Storage Space
Google services like Gmail, Google Drive, and Google Photos provide limited storage of 15 GB to each Google Account. This 15 GB of space is the total space allocated for all three apps. If you have already used up the entire space, then you won’t be able to receive any new mails as there is no space to save them on your cloud storage. Follow the steps given below to check available storage:
1. The easiest way to check the available storage is from your Google Drive. Therefore, open Google Drive on your Android device.
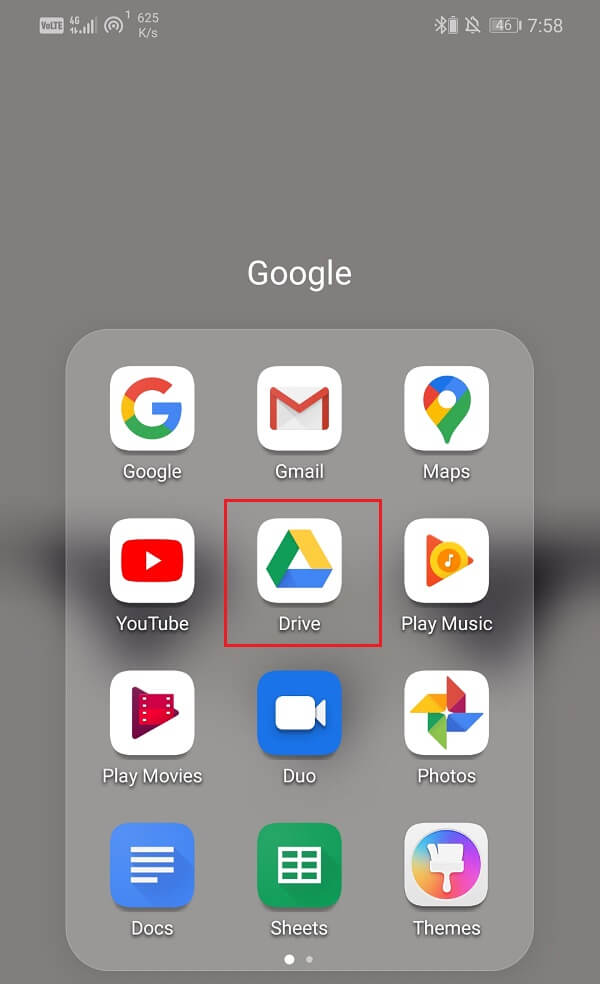
2. Now, tap on the Hamburger icon on the top left-hand side of the screen.
![]()
3. After that, click on the Storage option.
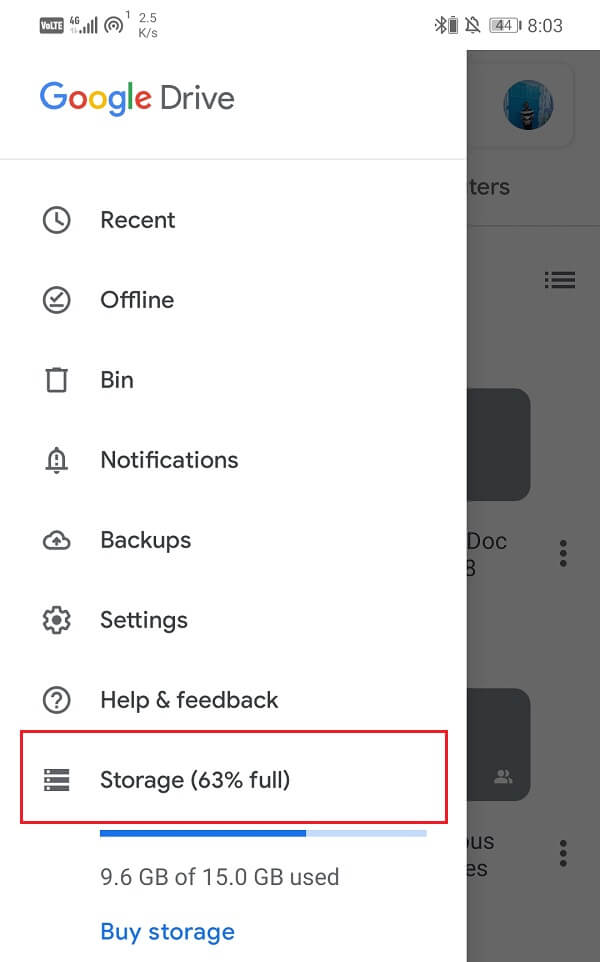
4. You will get the exact storage analytics as to which app is taking how much space.
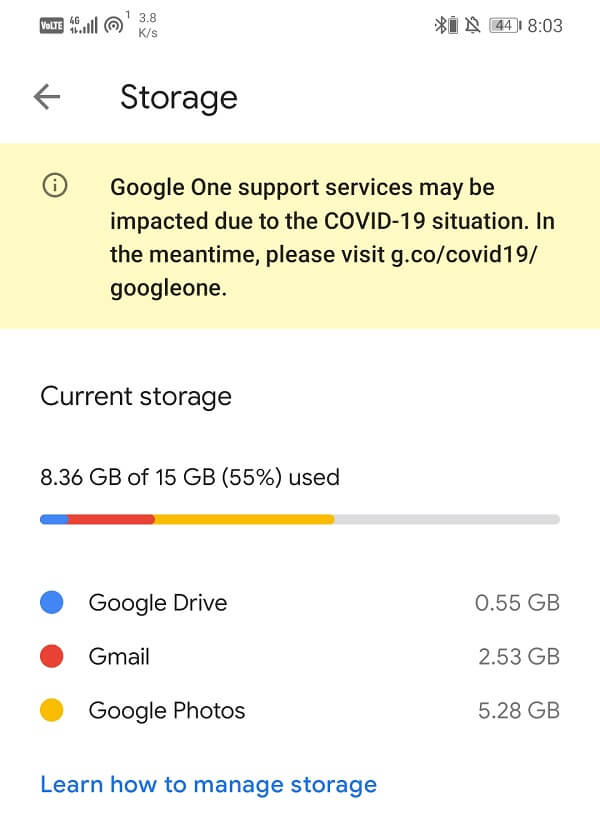
5. If you have run out of storage space, you need to either free up space or buy more storage space.
6. Delete old emails, spams, photos, and files from your cloud storage to make space for new ones.
7. Make sure to clear the bin after doing so because deleted emails usually end up in the bin, and it still occupies space.
8. Once you have freed up space, you will be able to receive emails without any problem.
Method 9: Remove Email Filters
Another reason behind Gmail not receiving emails on Android is Filters. Filters are set to avoid junk and unwanted emails to flood our inbox. However, if they are not set properly, they can cause important and useful emails to be redirected to the Spam folder or All Mail folder.
You need to make sure that good emails end up in your Inbox, and to do so, you need to recheck your Filter settings. Now, filter settings can’t be accessed from your mobile app, and you need to log in to Gmail on a computer to do so. Follow the steps given below to see how:
1. Firstly, open the internet browser on your computer (say Google Chrome)
2. Now, click on the Gmail option that is present on the top right-hand side of the screen.
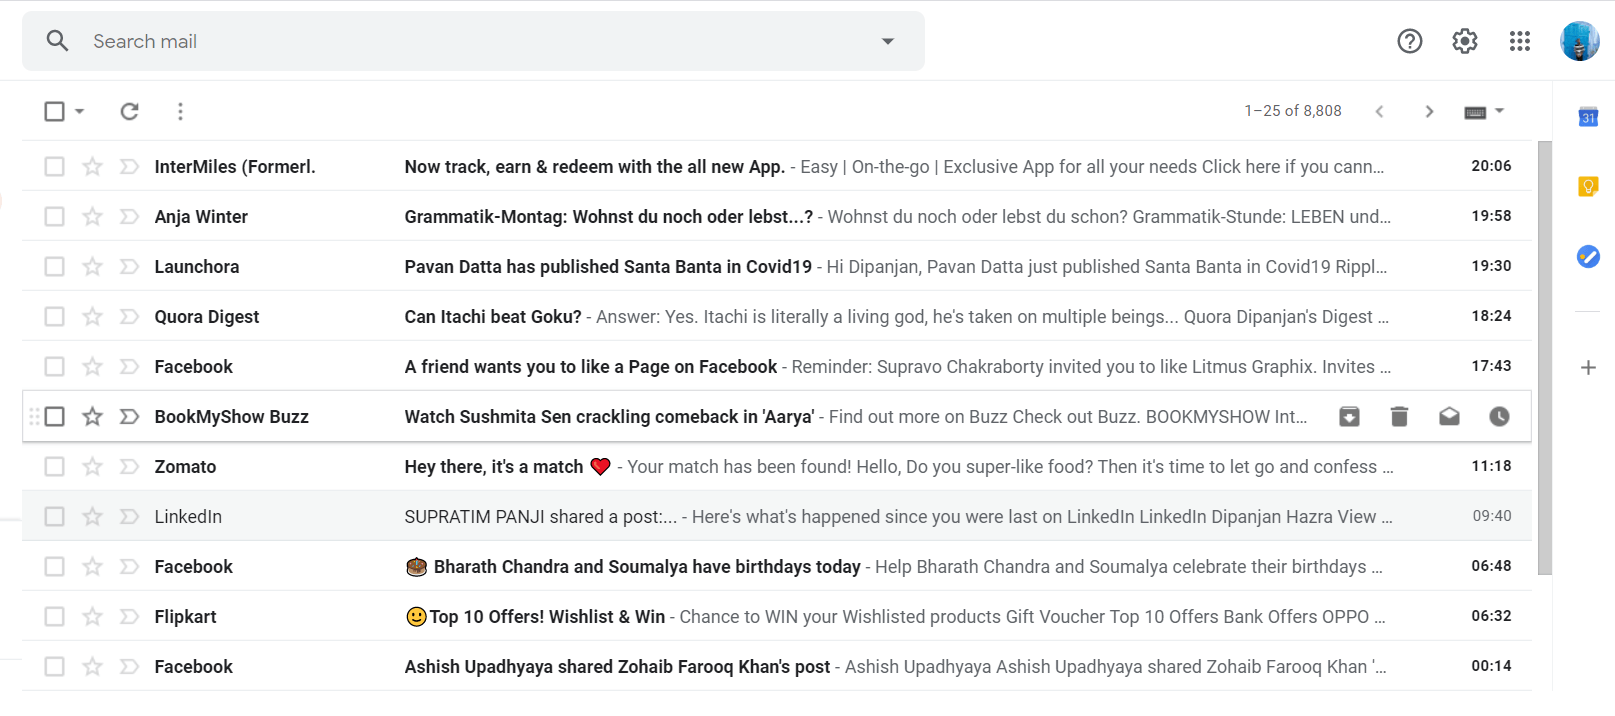
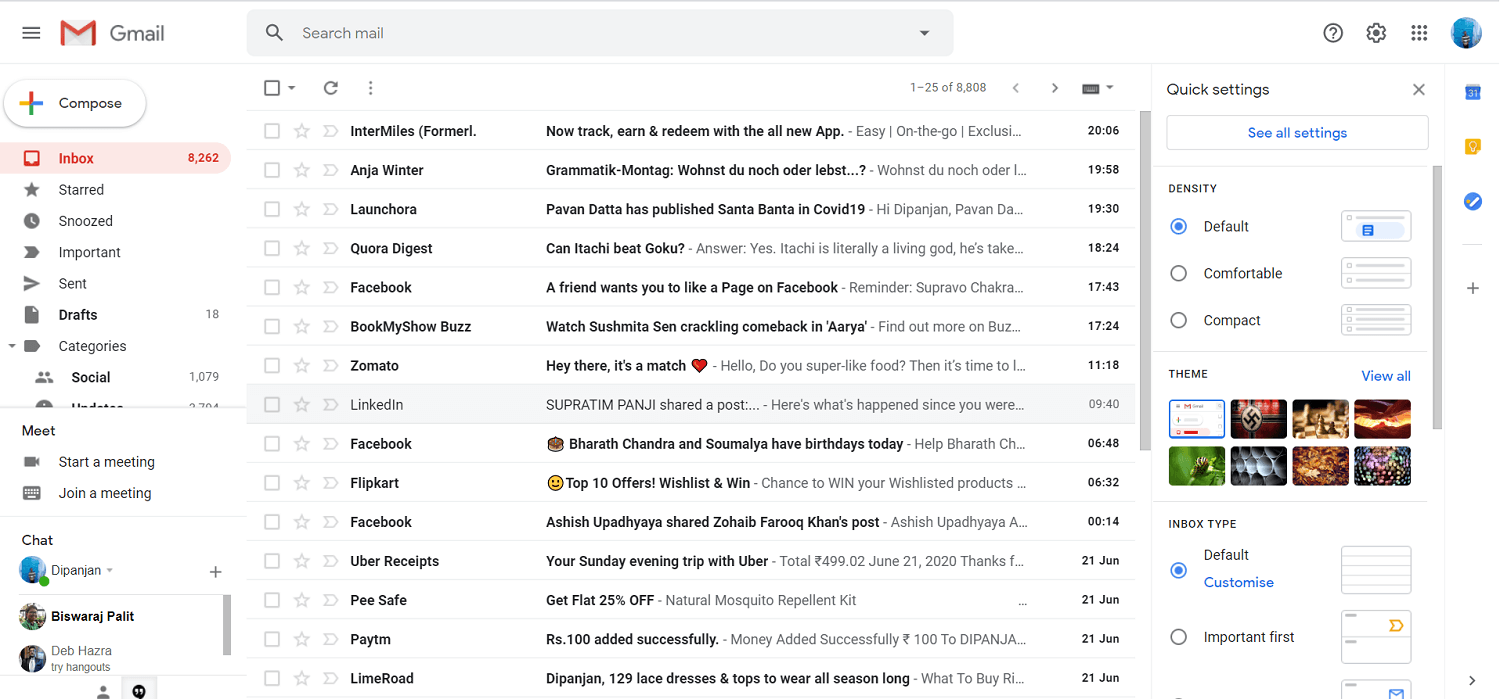
3. Click on the Settings option and tap on the See all Settings button.
4. Now, go to the “Filters and Blocked Addresses” tab.
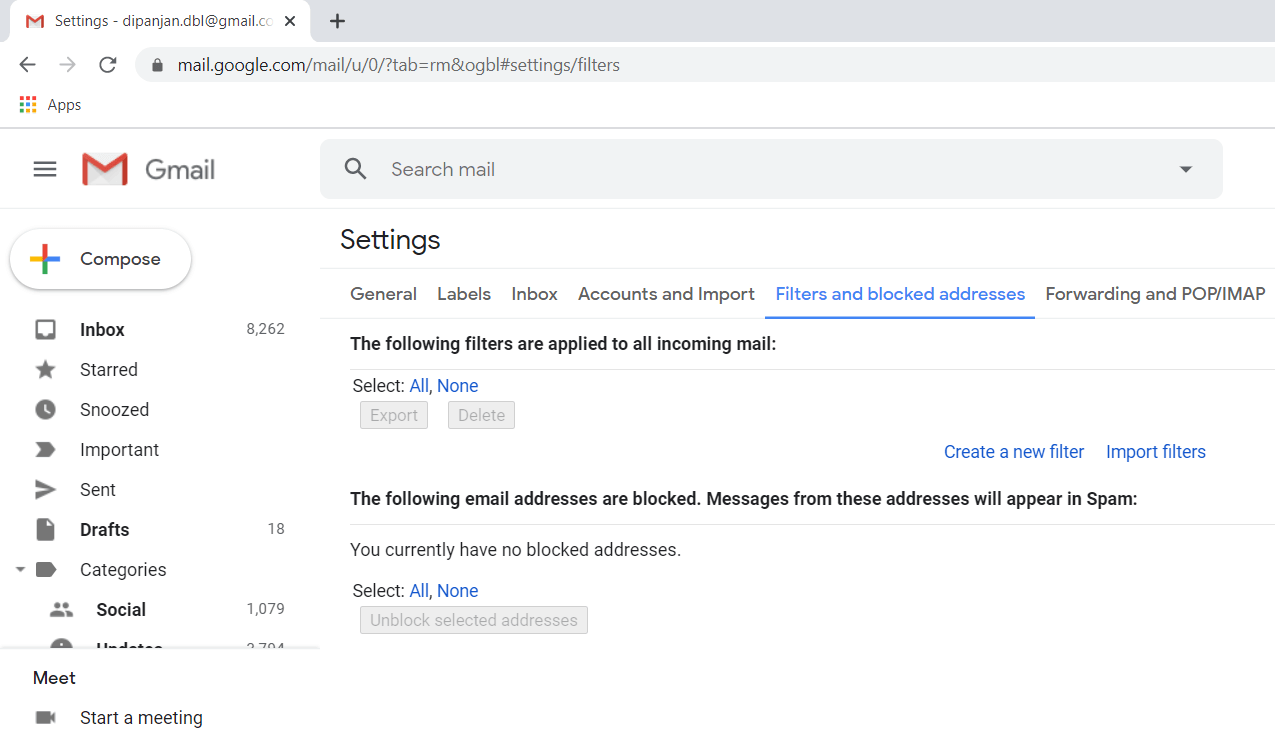
5. Remove all the existing filters.
6. From now on, all the subsequent emails that you receive will be directed to your Inbox. However, for the previous mails, you have to do it manually.
7. You need to go to the spam folder or the All Mail folder to access previously blocked emails.
Method 10: Sign Out of your Google Account
The next method in the list of solutions is that you sign out of the Gmail account on your phone and then sign in again. It is possible that by doing so it would set things in order and the notifications will start working normally.
1. Open the settings on your phone.

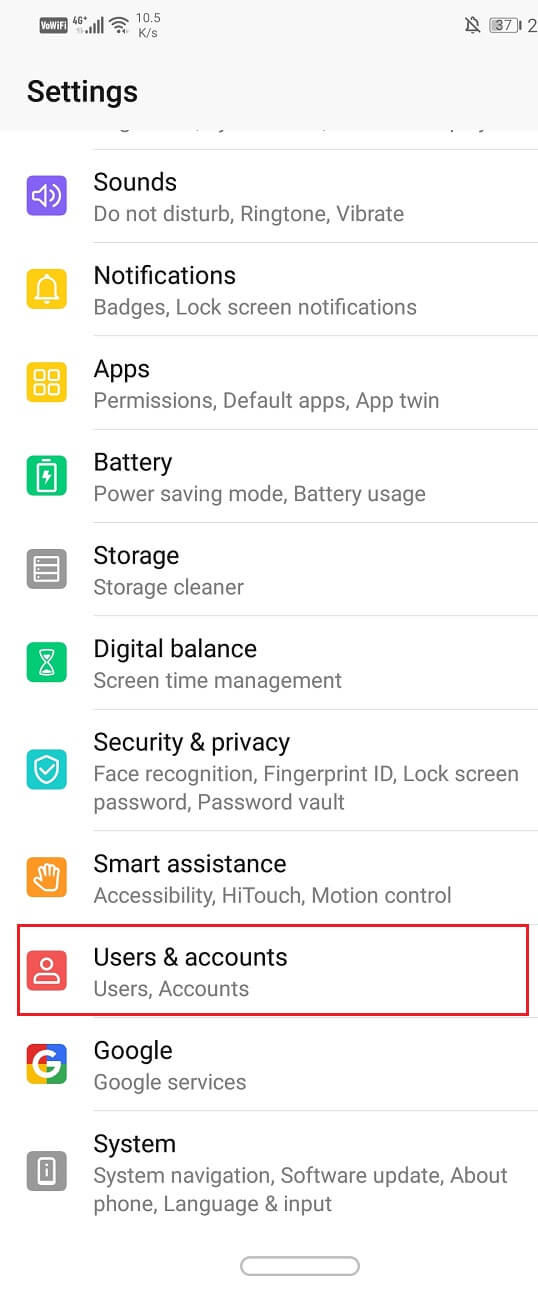
2. Now click on the Users & accounts.
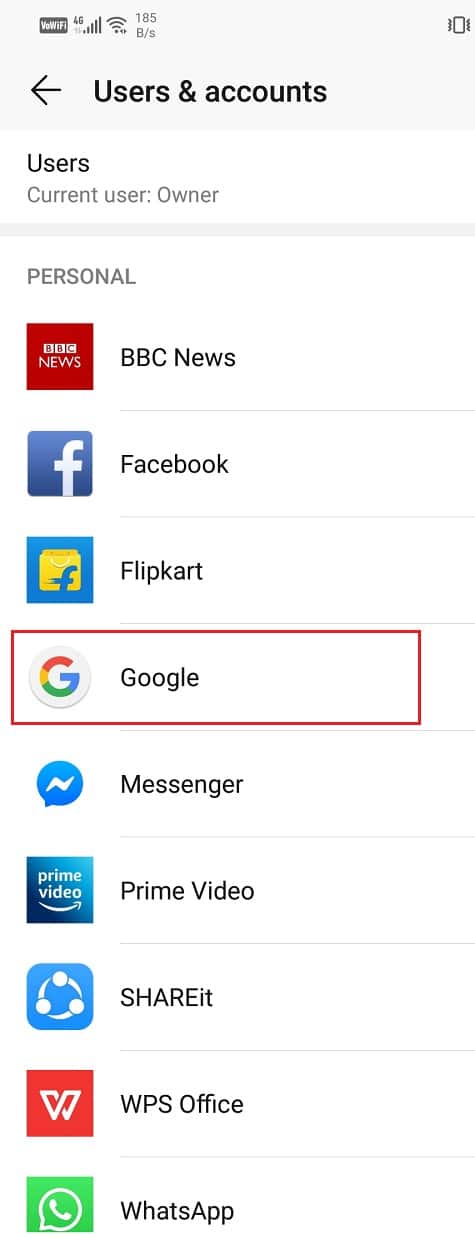
3. Now select the Google option.
4. At the bottom of the screen, you will find the option to Remove account, click on it.
5. This will sign you out of your Gmail account. Now Sign in once again after this and see if you’re able to fix Gmail not receiving emails on Android.
Method 11: Exempt Gmail from Data Saver Restrictions
All Android smartphones come with an in-built data saver that restricts the data consumption for installed apps. If you have limited data and would like to use it conservatively then the data saver is a great aid. However, it might be the reason behind Gmail not receiving emails. The simplest solution to this problem is to add Gmail to the list of exempted apps from data saver restrictions. Doing so will allow Gmail to function normally. Follow the steps given below to see how:
1. Open the Settings on your phone.

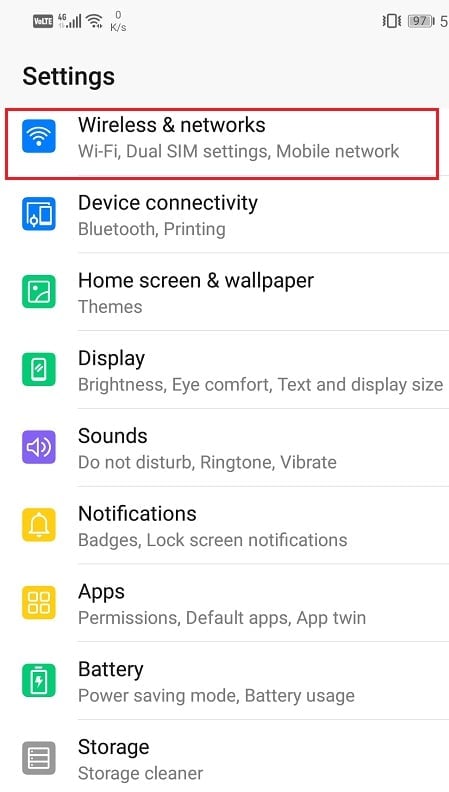
2. Now, click on the Wireless and networks option.
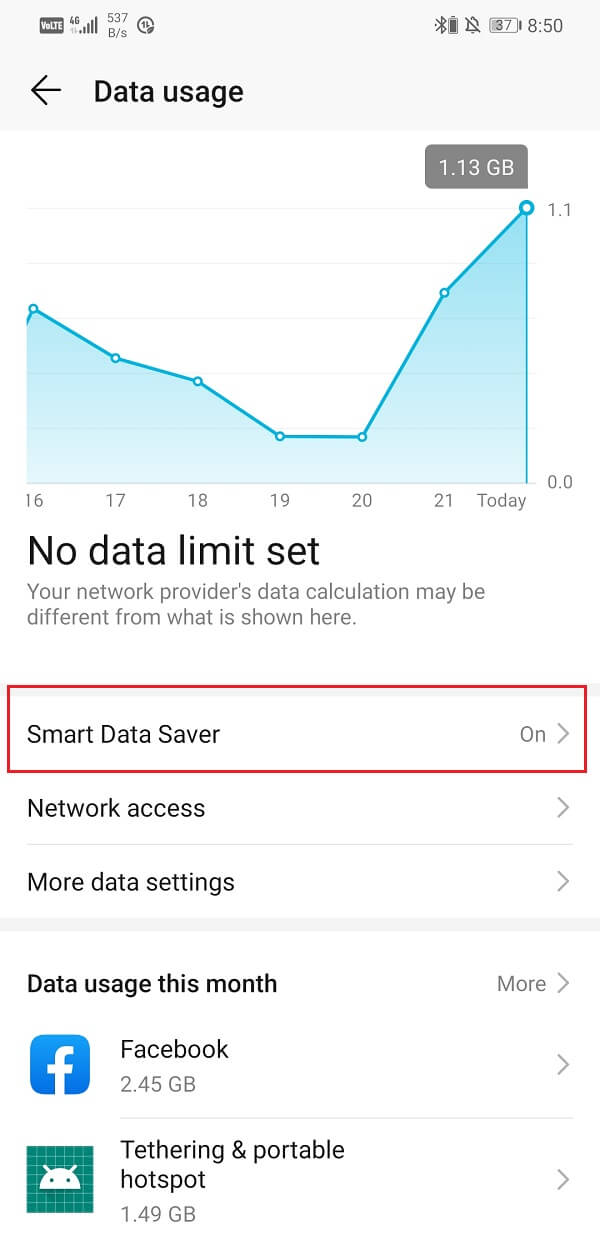
3. After that, tap on the data usage option.
4. Here, click on Smart Data Saver.
5. Now, under Exemptions, select System apps and search for Gmail.
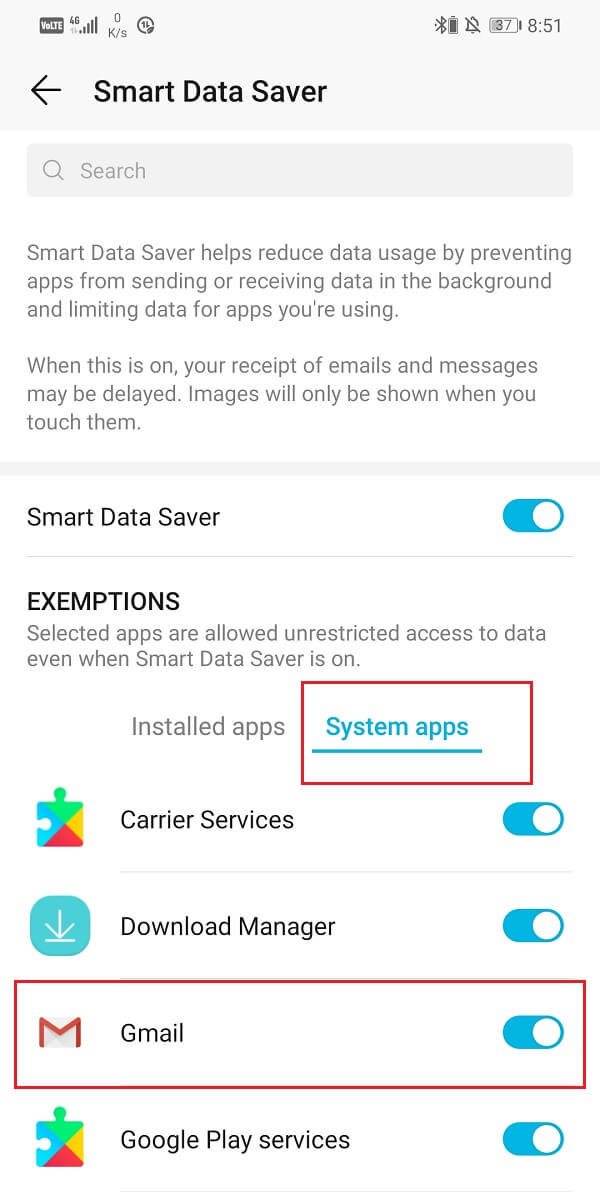
6. Make sure that the toggle switch next to it is ON.
7. Once data restrictions are removed, Gmail will be able to sync its inbox regularly, and your problem will be solved.
Method 12: Turn OFF Email Forwarding
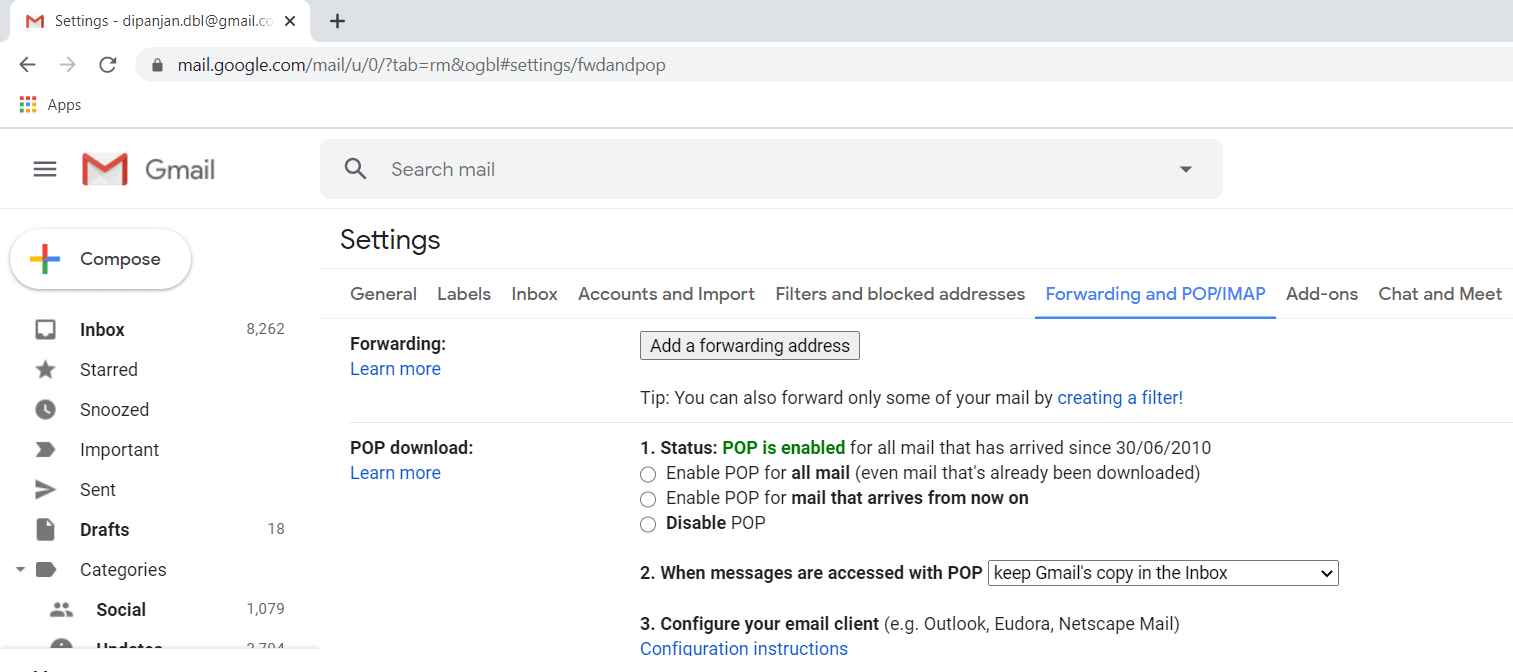
It is possible that your messages are getting delivered to a different email id. Many people use the email forwarding option to forward their mails to their associates or colleagues when they are unavailable and unable to attend to work-related emails. However, they forget to switch it off and as a result, they no longer receive emails in their own account. Follow the steps given below to learn how to turn off email forwarding:
1. Firstly, open the internet browser on your computer (say Google Chrome). This is because email forwarding settings can’t be accessed on your phone.
2. Now click on the Gmail option that is present on the top right-hand side of the screen.
3. Click on the Settings option and tap on the See all Settings button.
4. Now, go to the “Forwarding and POP/IMAP” tab.
5. Here, click on the “Disable Forwarding” option.
6. Finally, tap on the Save Changes button.
Recommended:
I hope this guide was useful and you were able to fix Gmail not receiving emails on the Android issue. But if you still have any questions or comments then feel free to reach out using the comment section.
