How To Delete Temporary Files In Windows 10: You all know that PCs or desktops also act as a storage device where several files are stored. Many applications and programs are also installed. All these files, apps and other data occupy the space on the hard disk which leads to hard disk memory being full to its capacity.
Sometimes, your hard disk doesn’t even contain that many files & apps, but still it shows hard disk memory is almost full. Then, in order to make some space available so that new files and apps can be stored, you need to delete some data even if it is important to you. Have you ever wondered why this happens? Even though your hard disk has sufficient memory but when you store some files or apps then it will show you that the memory if full?
If you ever try to find out why this happens but not being able to get to any conclusion then don’t worry as today we are going to fix this issue in this guide. When the hard disk does not contain much data but still shows memory full, then this happens because the apps & files already stored on your hard disk have created some temporary files which are needed to temporarily store some information.
Temporary Files: Temporary files are the files that apps store on your computer to hold some information temporarily. In Windows 10, there are some other temporary files available like leftover files after upgrading the operating system, error reporting, etc. These files are referred to as temp files.
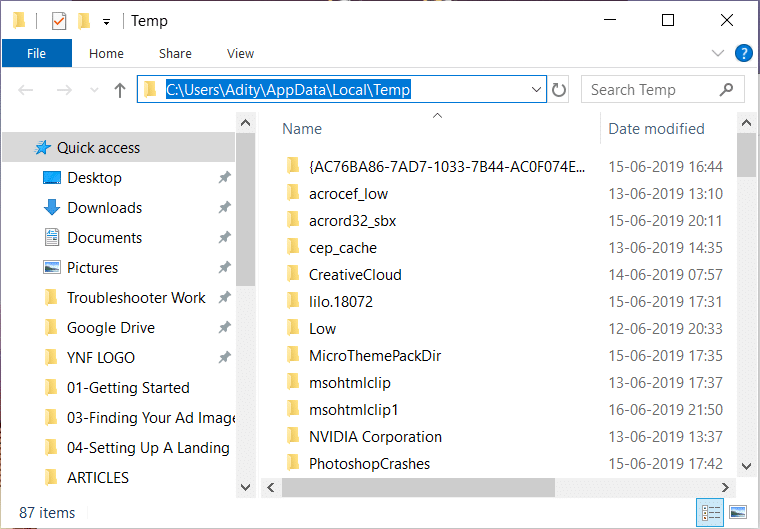
So, if you want to free up some space which is wasting by temp files, you need to delete those temp files which are mostly available in Windows Temp folder which varies from the operating system to operating system.
How To Delete Temporary Files In Windows 10
Make sure to create a restore point just in case something goes wrong.
You can delete temporary files manually by following below steps:
1.Press Windows Key + R then type %temp% in the Run dialog box and hit Enter.
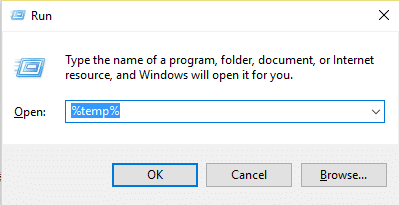
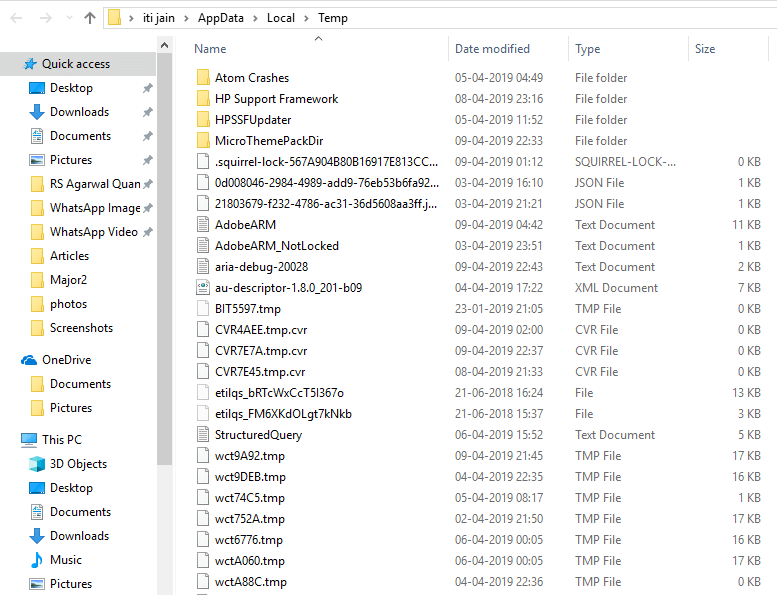
2.This will open the Temp folder containing all the temporary files.
3.Select all the files and folders you want to delete.
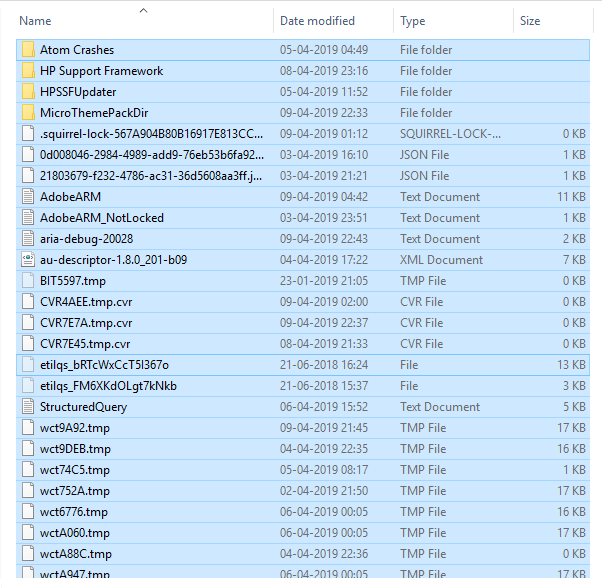
4.Delete all the selected files by clicking the delete button on the keyboard. Or select all the files then right-click and select Delete.
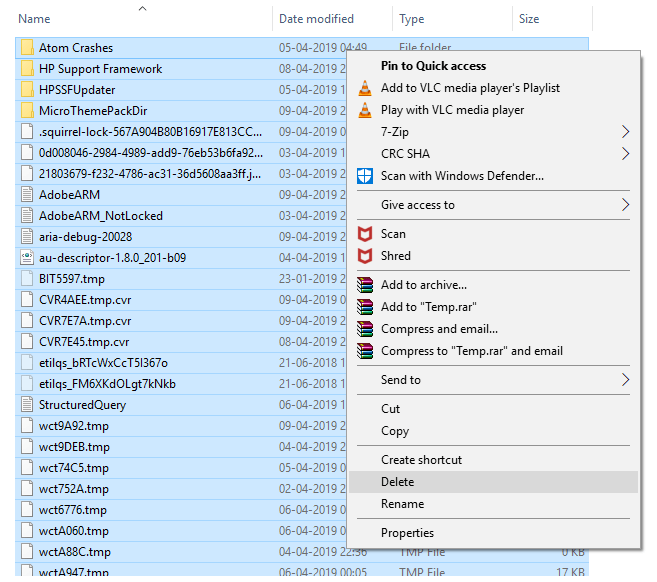
5.Your files will start deleting. It may take a few seconds to a few minutes depending on the number of temporary files.
Note: While deleting if you get any warning message like this file or folder cannot be deleted as it is still in use by the program. Then Skip that file and by clicking on Skip.
6.After Windows finish deleting all the temporary files, the temp folder will become empty.

But the above method is very time-consuming as you are manually deleting all the Temp files. So, in order to save your time, Windows 10 provides some safe and secure methods using which you can easily delete all your Temp files without installing any additional software.
Method 1 – Delete Temporary Files Using Settings
On Windows 10, you can safely and easily delete temporary files using settings by following the steps below:
1.Press Windows Key + I to open Windows Settings then click on System icon.
![]()
2.Now from the left-hand window pane select Storage.
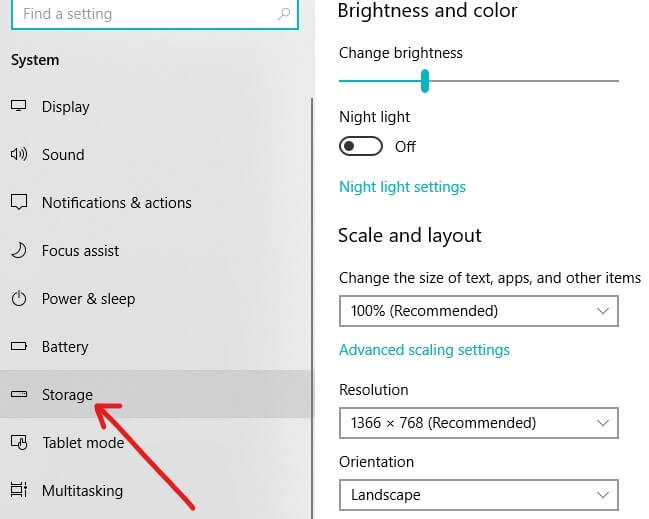
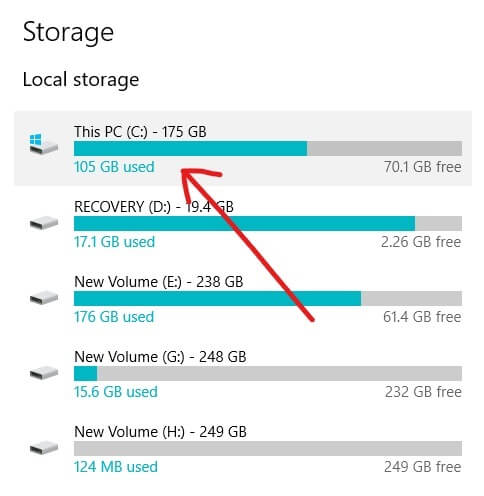
3.Under Local Storage click on the drive where Windows 10 is installed. If you do not know on which drive Windows is installed then just look for the Windows icons next to the available drives.
4.Below screen will open up which shows how much space is occupied by different apps and files like Desktop, Pictures, Music, Apps and Games, temporary files, etc.
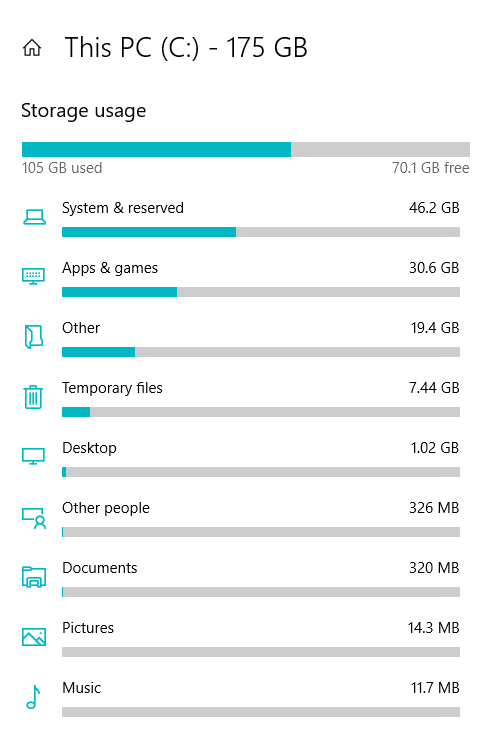
5.Click on the Temporary files available under the Storage usage.
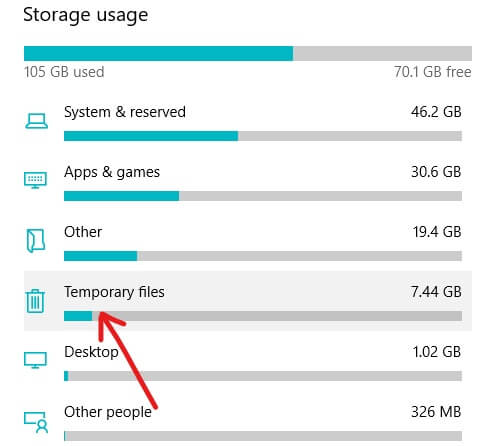
6.On the next page, checkmark the Temporary files option.
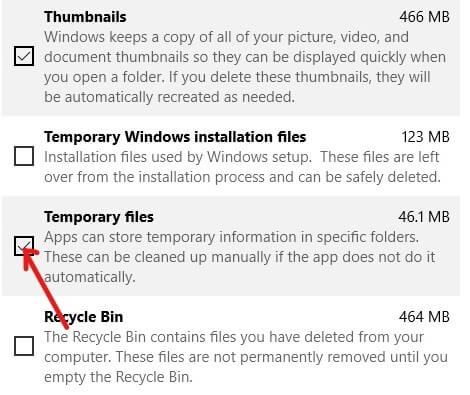
7.After selecting Temporary files click on Remove Files button.
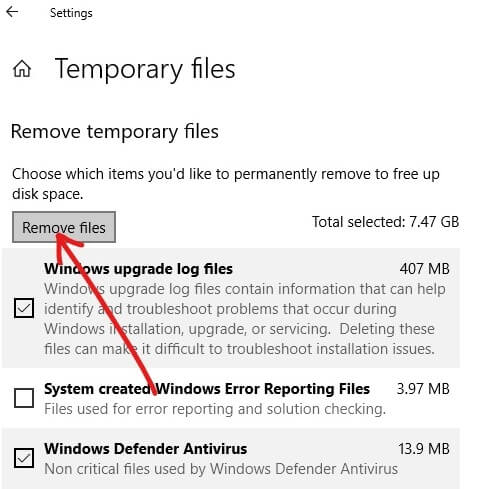
After completing the above steps, your all your temporary files will be deleted.
Method 2 – Delete Temporary Files Using Disk Cleaner
You can delete the Temporary files from your computer by using the Disk Cleanup. To delete the temporary files from your computer using Disk Cleanup follow the below steps:
1.Open File Explorer by clicking on the icons available on the taskbar or press Windows key + E.
2.Click on This PC available from the left panel.
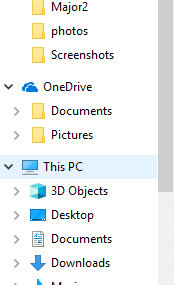
3.A screen will open up which shows all the available drives.

4.Right-click on the drive where Windows 10 is installed. If you are not sure on which drive Windows 10 is installed then look for the Windows logo available next to the available drives.
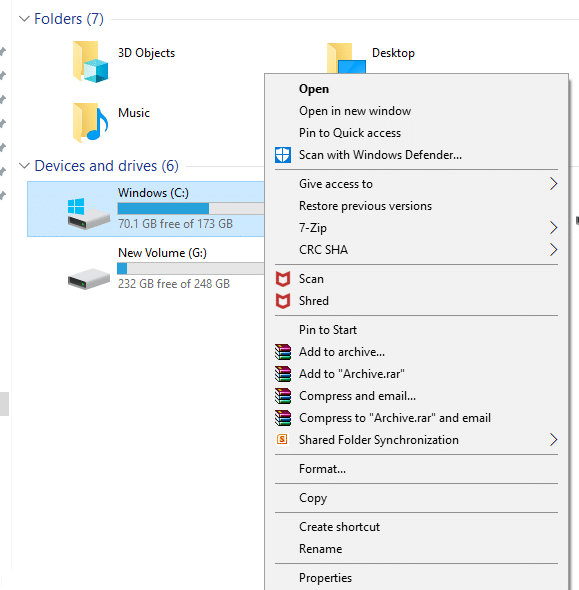
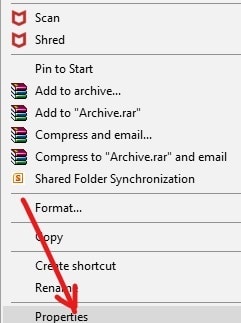
5.Click on Properties.
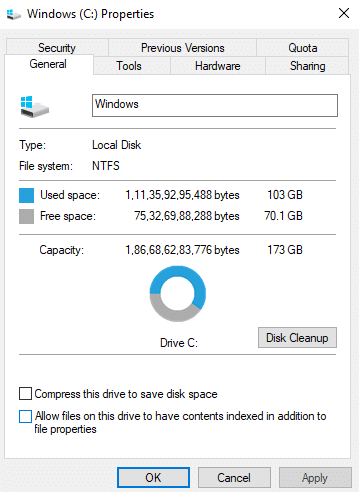
6.Below dialog box will appear.
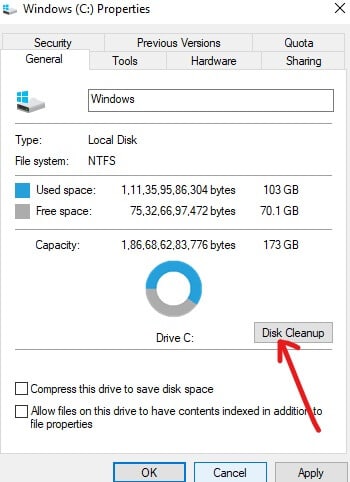
7.Click on Disk Cleanup button.
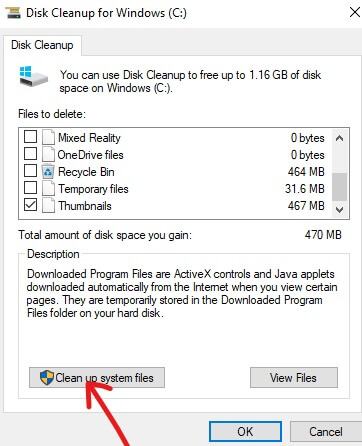
8.Click on Clean up system files button.
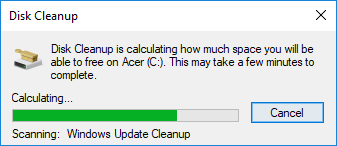
9.Disk Cleanup will start calculating how much space you can free from your Windows.
10.Under Files to delete, check the boxes next to the files you want to delete like Temporary files, Temporary Windows installation files, Recycle bin, Windows upgrade log files, etc.
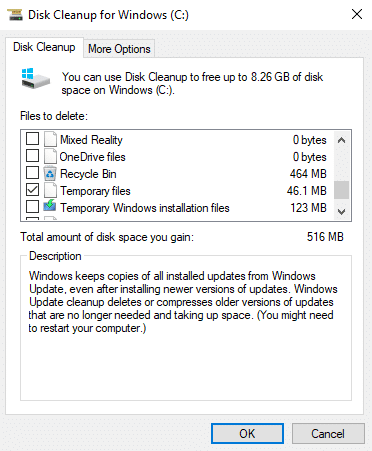
11.Once all the files you want to delete has been checked, click on Ok.
12.Click on delete Files.
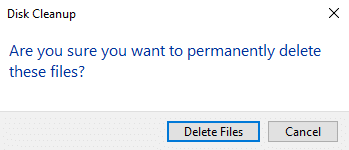
After completing the above steps, all your selected files will be deleted including Temporary files.
Method 3 – Automatically Delete Temporary Files
If you wish that your Temporary files will be deleted automatically after some days and you do not have to delete them from time to time then you can do so by following below steps:
1.Press Windows Key + I to open Windows Settings then click on System icon.
![]()
2.Now from the left-hand window pane select Storage.

3.Toggle the button ON under Storage Sense.
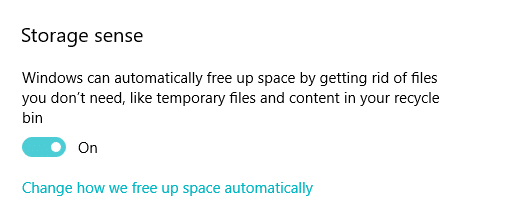
After completing the above steps, your temporary files and files which are no longer needed will be automatically deleted by the Windows 10 after 30 days.
If you want to set the time after which your Windows will clean files then click on Change how we free up space automatically and choose the number of days by clicking on the below drop-down menu.
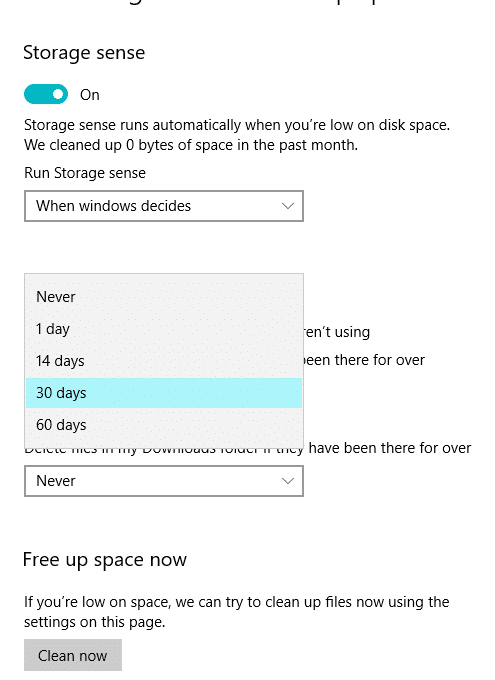
You can also clean the files at the same time by clicking on Clean Now and all the temporary files will be deleted cleaning up the disk space.
Recommended:
I hope this article was helpful and you can now easily Delete Temporary Files In Windows 10, but if you still have any questions regarding this tutorial then feel free to ask them in the comment’s section.

