Improving your PC’s performance is very important for proper functioning and to help with this Windows 10 performs disk defragmentation once a week for hard drives. By default, disk defragmentation runs automatically on a weekly schedule at a particular time set in automatic maintenance. But this doesn’t mean that you can’t manually optimize or defrag your drives on your PC.
Now Disk defragmentation re-arranges all the pieces of data that are spread across your hard drive and stored them together again. When the files are written to disk, it is broken into several pieces as there is not enough contiguous space to store the complete file; hence the files become fragmented. Naturally, reading all these pieces of data from different places will take some time, in short, it will make your PC slow, long boot times, random crashes and freeze-ups etc.
Defragmentation reduces file fragmentation, thus improving the speed by which data is read and written to disk, which ultimately increases the performance of your PC. Disk defragmentation also cleans the disk, thus increasing the overall storage capacity. So without wasting any time, let’s see How to Optimize and Defragment Drives in Windows 10 with the help of the below-listed tutorial.
How to Optimize and Defragment Drives in Windows 10
Make sure to create a restore point just in case something goes wrong.
Method 1: Optimize and Defragment Drives in Disk Drive Properties
1. Press Windows Key + E to open File Explorer or double-click on This PC.
2. Right-click on any hard drive partition you want to run defragmentation for, and select Properties.
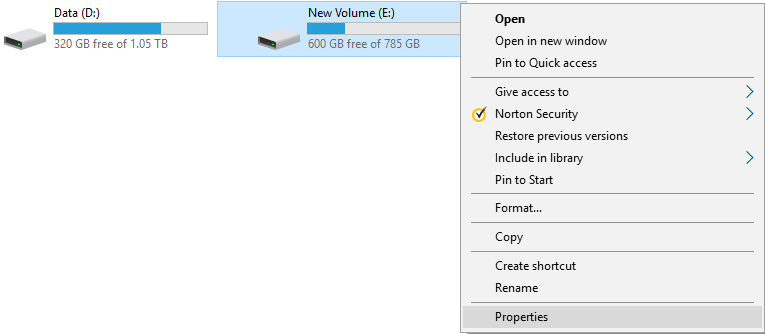
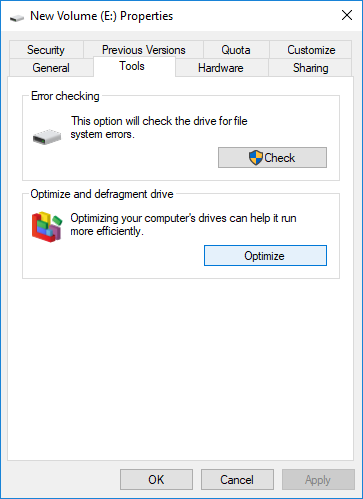
3. Switch to Tool tab then click on “Optimize” under Optimize and defragment the drive.
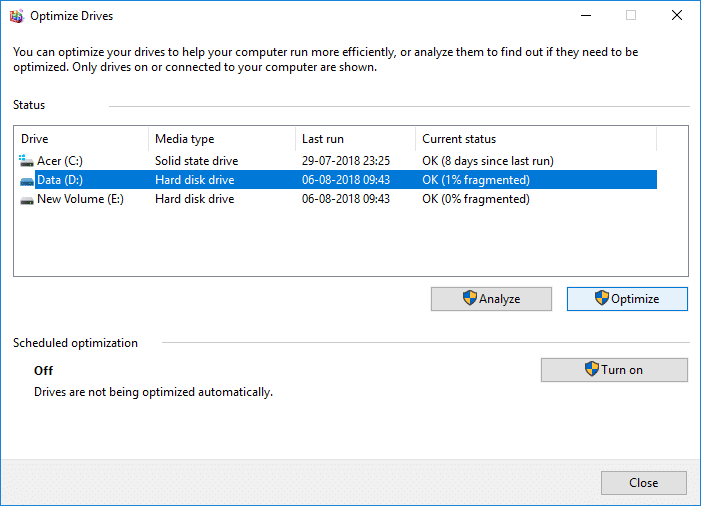
4. Select the drive for which you want to run defragmentation and then click the Analyze button to see if it needs to be optimized.
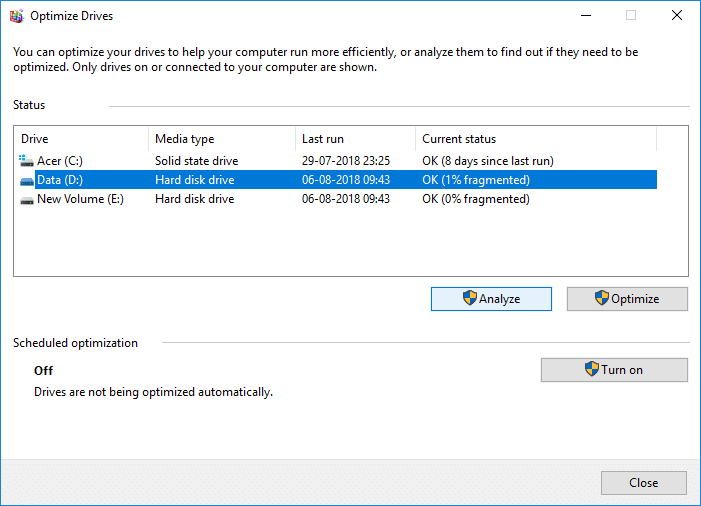
Note: If the drive is more than 10% fragmented, then it should be optimized.
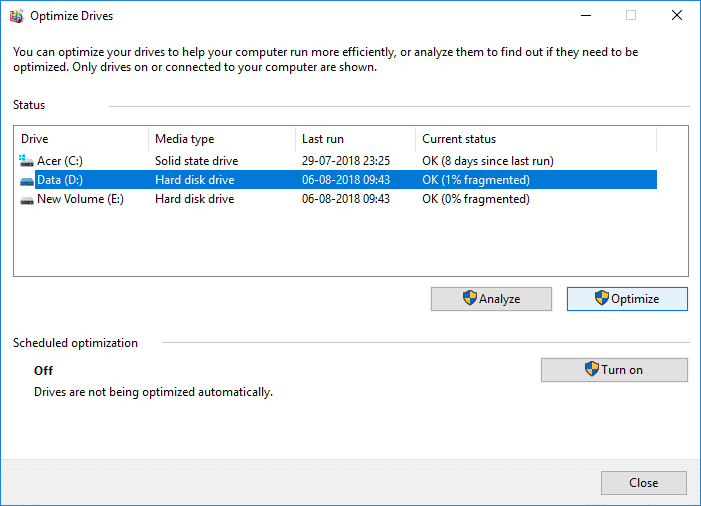
5. Now, to optimize the drive, click the Optimize button. Defragmentation can take some time depending upon your disk’s size, but you can still use your PC.
6. Close everything, then restart your PC.
This is How to Optimize and Defragment Drives in Windows 10, but if you are still stuck, then skip this method and follow the next one.
Method 2: How to Optimize and Defragment Drives in Windows 10 Using Command Prompt
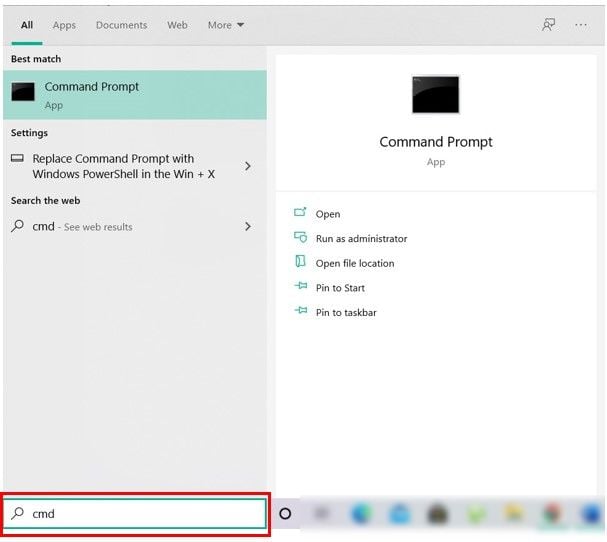
1. Open Command Prompt. The user can perform this step by searching for ‘cmd’ and then press Enter.
2. Type the following command into cmd and hit Enter:
defrag drive_letter: /O
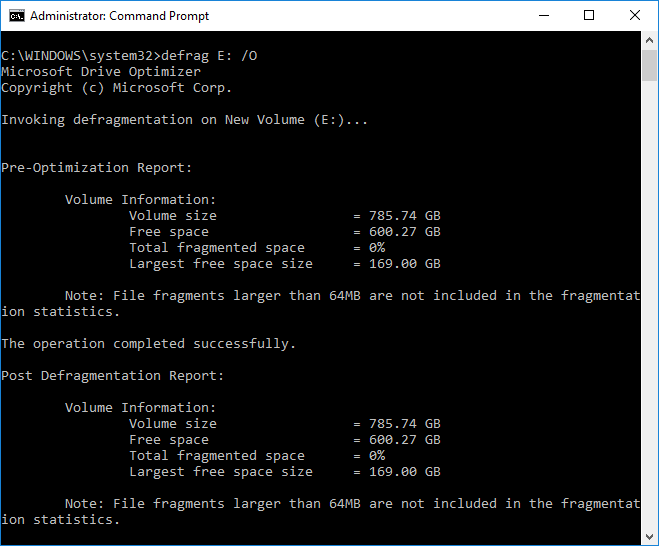
Note: Replace the drive_letter with the drive letter of the drive you want to run disk defragmentation. For example to optimize the C: drive the command would be: defrag C: /O
3. Now, to optimize and defrag all your drives at once use the following command:
defrag /C /O
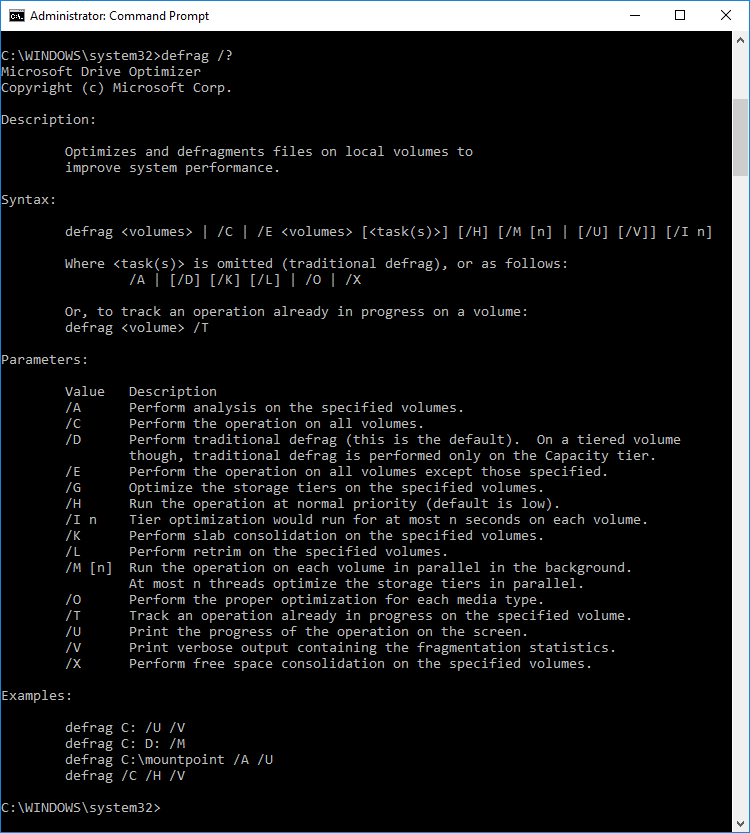
4. The defrag command supports the following command-line arguments and options.
Syntax:
defrag <volumes> | /C | /E <volumes> [<task(s)>] [/H] [/M [n] | [/U] [/V]] [/I n]
Where <task(s)> is omitted (traditional defrag), or as follows: /A | [/D] [/K] [/L] | /O | /X
Or to track an operation already in progress on a volume: defrag <volume> /T
Parameters:
| Value | Description |
| /A | Perform analysis on the specified volumes. |
| /B | Perform boot optimization to defrags the boot sector of the boot volume. This will not work on an SSD. |
| /C | Operate on all volumes. |
| /D | Perform traditional defrag (this is the default). |
| /E | Operate on all volumes except those specified. |
| /H | Run the operation at normal priority (default is low). |
| /I n | Tier optimization would run for at most n seconds on each volume. |
| /K | Perform slab consolidation on the specified volumes. |
| /L | Perform retrim on the specified volumes, only for an SSD. |
| /M [n] | Run the operation on each volume in parallel in the background. At most n threads optimize the storage tiers in parallel. |
| /O | Perform the proper optimization for each media type. |
| /T | Track an operation already in progress on the specified volume. |
| /U | Print the progress of the operation on the screen. |
| /V | Print verbose output containing the fragmentation statistics. |
| /X | Perform free space consolidation on the specified volumes. |
This is How to Optimize and Defragment Drives in Windows 10 using Command Prompt, but you can also use PowerShell in place of CMD, follow the next method to see How to Optimize and Defragment Drives using PowerShell.
Method 3: Optimize and Defragment Drives in Windows 10 Using PowerShell
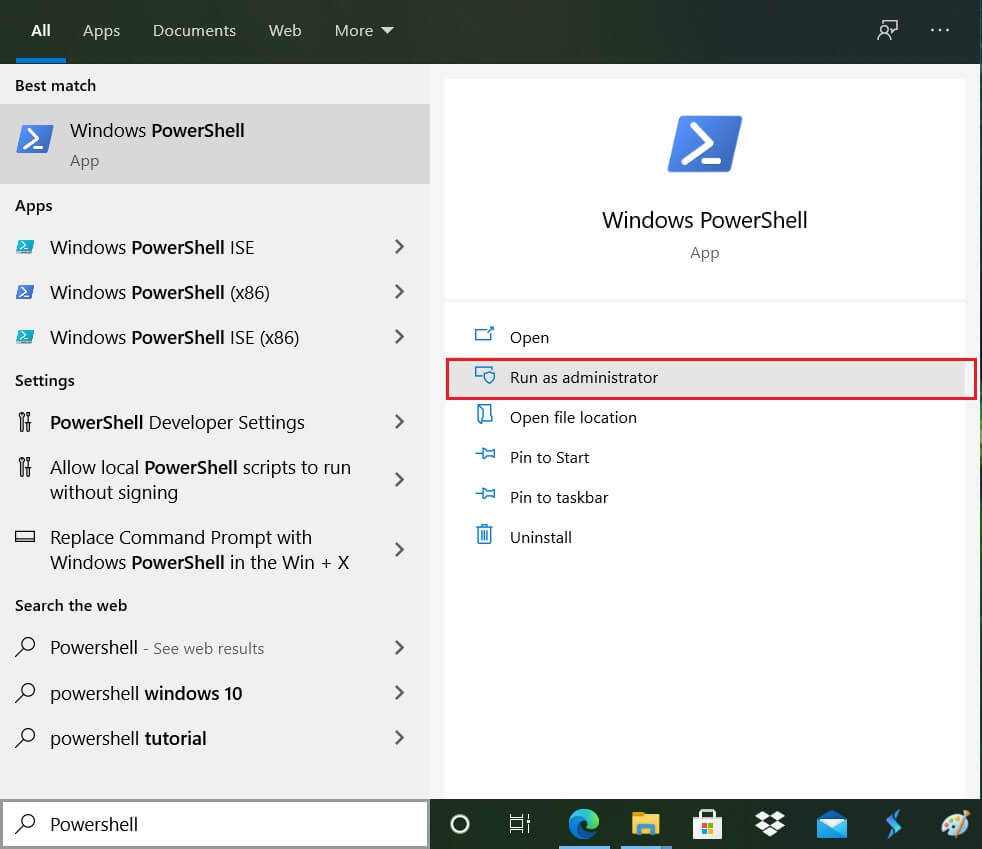
1. Type PowerShell in Windows Search then right-click on PowerShell from the search results and select Run as Administrator.
2. Now type the following command into PowerShell and hit Enter:
Optimize-Volume -DriveLetter drive_letter -Verbose
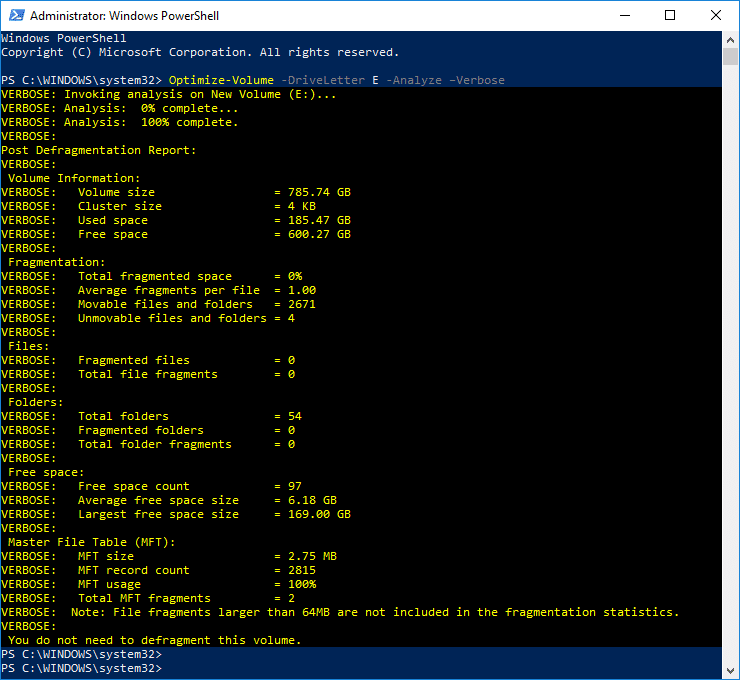
Note: Replace drive_letter with the drive letter of the drive you want to run disk defragmentation.
For example to optimize the F: drive the command would be: defrag Optimize-Volume -DriveLetter F -Verbose
3. If you want first to analyze the drive, then use the following command:
Optimize-Volume -DriveLetter drive_letter -Analyze -Verbose
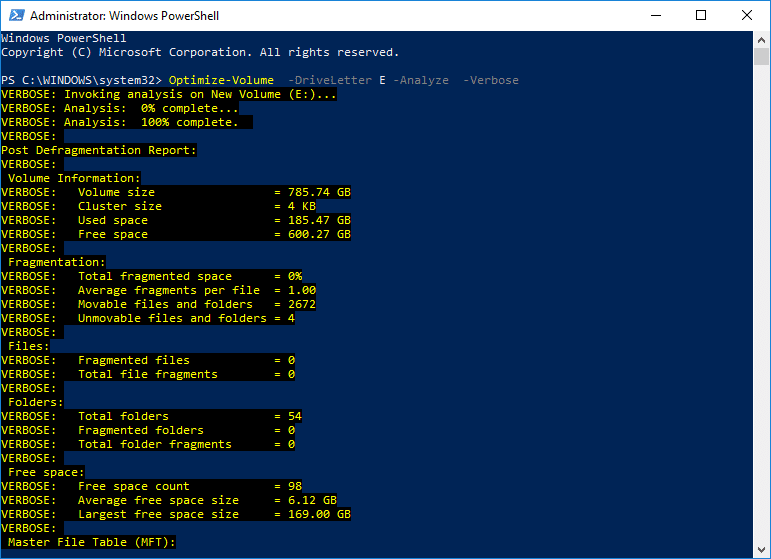
Note: Replace drive_letter with the actual drive letter, ex: Optimize-Volume -DriveLetter F -Analyze -Verbose
4. This command should only be used on an SSD, so only proceed if you’re sure that you are running this command on an SSD drive:
Optimize-Volume -DriveLetter drive_letter -ReTrim -Verbose
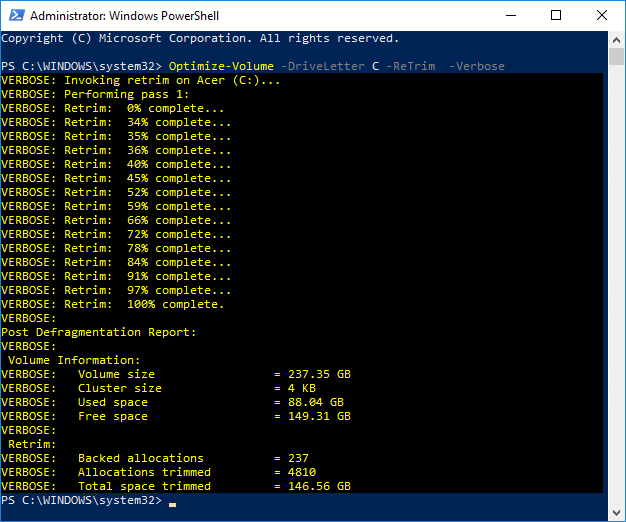
Note: Replace drive_letter with the actual drive letter, ex: Optimize-Volume -DriveLetter D -ReTrim -Verbose
5. Reboot your PC to save changes.
Recommended:
That’s it you have successfully learned How to Defer Feature and Quality Updates in Windows 10 but if you still have any queries regarding this tutorial then feel free to ask them in the comment’s section.
