Every Android smartphone allows you to change the screen’s orientation from portrait to landscape by simply rotating your device. Depending on the type of content, the user has to liberty to choose the display orientation. Rotating your device horizontally allows you to best utilize the big display, which is customary of all modern Android smartphones. Android phones are designed so that they can pretty easily overcome the complications that might arise due to change in the aspect ratio. The transition from portrait to landscape mode is seamless.
However, sometimes this feature does not work. No matter how many times we rotate our screen, its orientation does not change. It is quite frustrating when your Android device won’t rotate automatically. In this article, we will discuss various reasons behind Auto-rotate not working on your Android device and see how to fix them. So, without any further ado, let’s get started.
6 Ways to Fix Auto-Rotate Not Working on Android
Method 1: Make sure Auto-Rotate Feature is Enabled.
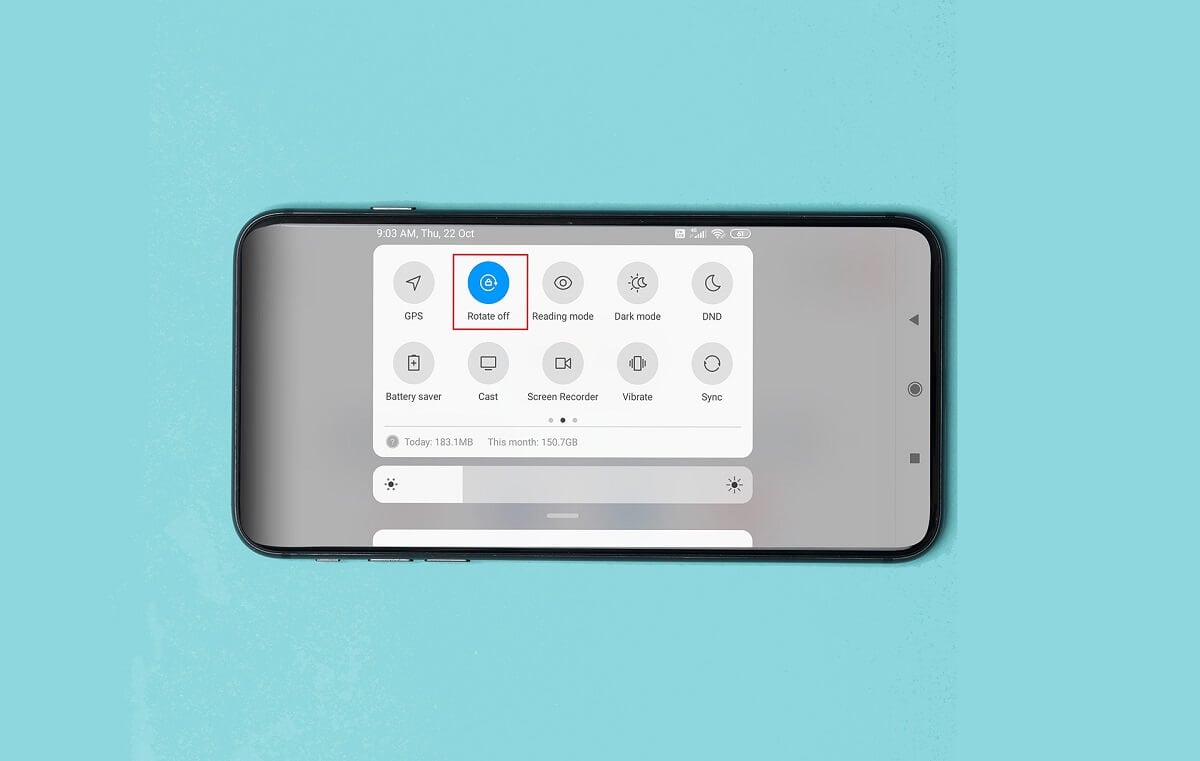
Android allows you to control whether you want your display to change its orientation when you rotate your device. It can be controlled by a simple one-tap switch in the Quick settings menu. If Auto-rotate is disabled, then your screen’s contents won’t rotate, no matter how much you rotate your device. Before proceeding with the other fixes and solutions, make sure that Auto-rotate is enabled. Follow the steps given below to see how.
1. Firstly, go to your home screen and drag down from the notification panel to access the Quick Settings menu.
See Also:
10 Ways to Fix TikTok Videos Not Playing Issue
10 Ways to Fix Error Performing Query on Facebook
7 Ways to Fix Can’t Change Profile Picture on TikTok
6 Ways to Fix HP Software Framework is Not Installed Issue
How to See if Someone Read Your Text on Android
2. Here, locate the Auto-rotate icon and check if it is enabled or not.
![]()
3. If it is disabled, then tap on it to turn Auto-rotate on.
4. Now, your display will rotate as when you rotate your device.
5. However, if that doesn’t solve the problem, then proceed with the next solution.
Method 2: Restart your Phone
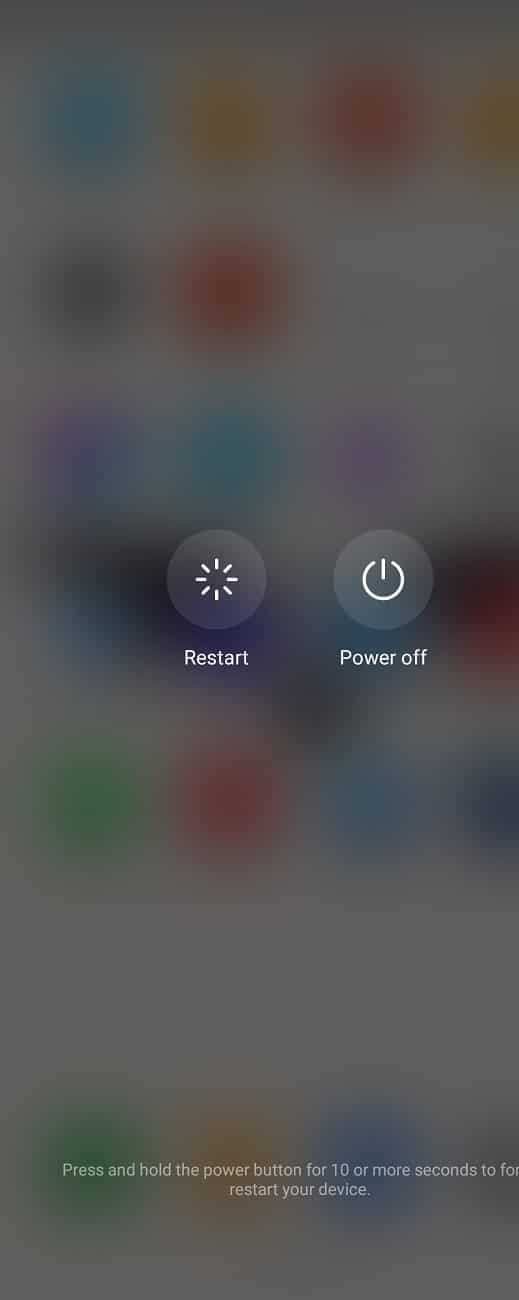
It might seem vague and general, but restarting or rebooting your phone can help solve multiple problems, including auto-rotate not working. It is always a good idea to give the old “have to try turning it on and off again” a chance to solve your problem. Therefore, before moving on, we would suggest you restart your device and see if auto-rotate starts working or not. Press and hold the power button until the power menu pops up on your screen. Now tap on the Restart button. When the device reboots again, see if you’re able to fix auto-rotate not working on Android issue.
Method 3: Re-Calibrate G-Sensor and Accelerometer
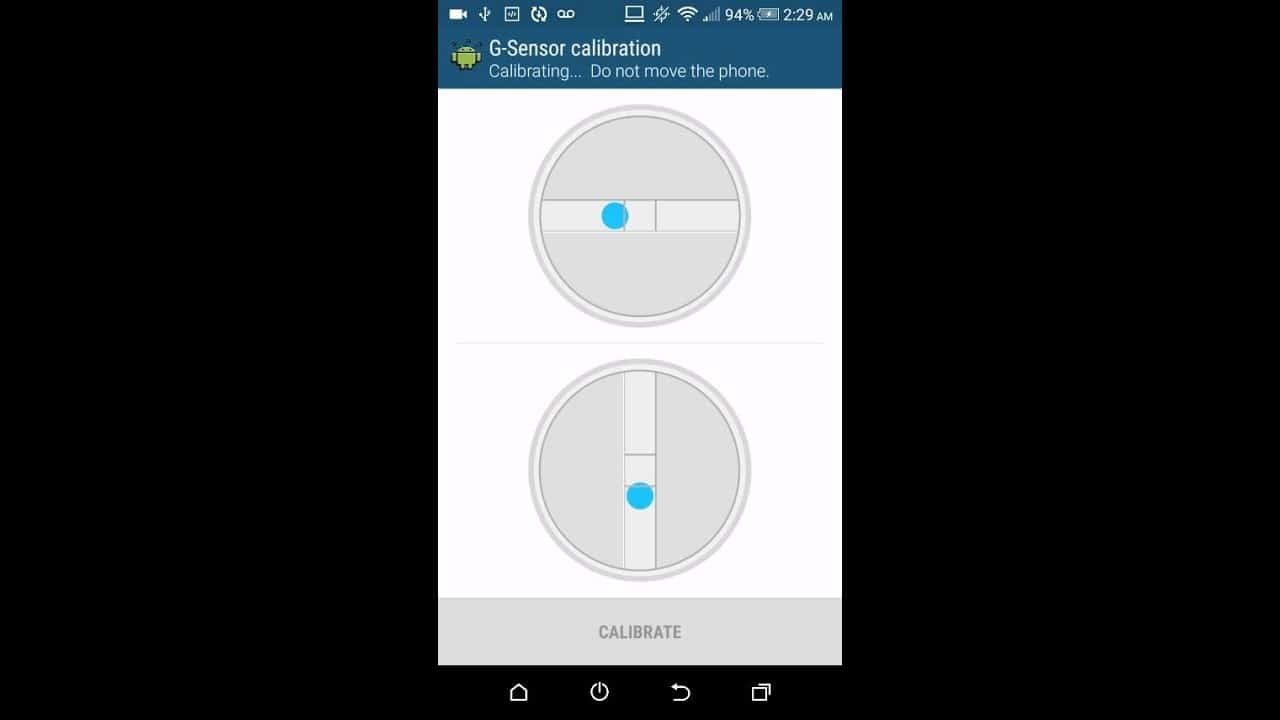
Another possible reason behind auto-rotate not working is malfunctioning G-Sensor and Accelerometer. However, this problem can be easily solved by re-calibrating them. Most Android smartphones allow you to do so via phone settings. However, if that option is not available, you can always use third-party apps like GPS Status and Toolbox. These apps are available for free on the Play Store. Follow the steps given below to see how to re-calibrate your G-Sensor and Accelerometer.
1. Firstly, open Settings on your device.
2. Now select the Display option.
3. Here, look for the Accelerometer Calibration option and tap on it. Depending on the device’s OEM, it might have a different name as a simple Calibrate or Accelerometer.
4. After that, place your device on a flat smooth surface like a table. You will see a red dot on the screen, which should appear right in the center of the screen.
5. Now carefully tap on the Calibrate button without moving the phone or disturbing its alignment.
Method 4: Third-Party Apps might cause Interference with Auto-Rotate
Sometimes, the problem is not with the device or its settings but some third-party apps. The auto-rotate feature does not work correctly on some apps. This is because the app developers haven’t paid a lot of attention to optimize their code.
As a result, the G-sensor does not work properly for these apps. Since third-party app developers don’t work in close association or collaboration with device manufacturers while coding their app, it leaves room for many bugs and glitches. Issues with the transition, aspect ratio, audio, auto-rotate are quite common. Some apps are so poorly coded that they crash on multiple Android devices.
It is even possible that the last app that you downloaded was malware that is interfering with your auto-rotate feature. To make sure that the problem is caused by a third-party app, you need to boot up your device in Safe mode and see if auto-rotate works or not. In safe mode, only the default system apps and the pre-installed apps work; thus if any third-party app causes the problem, then it can be easily detected in Safe mode. Follow the steps given below to see how.
1. To reboot in Safe mode, press and hold the power button until you see the power menu on your screen.
2. Now continue pressing the power button until you see a pop-up asking you to reboot in safe mode.
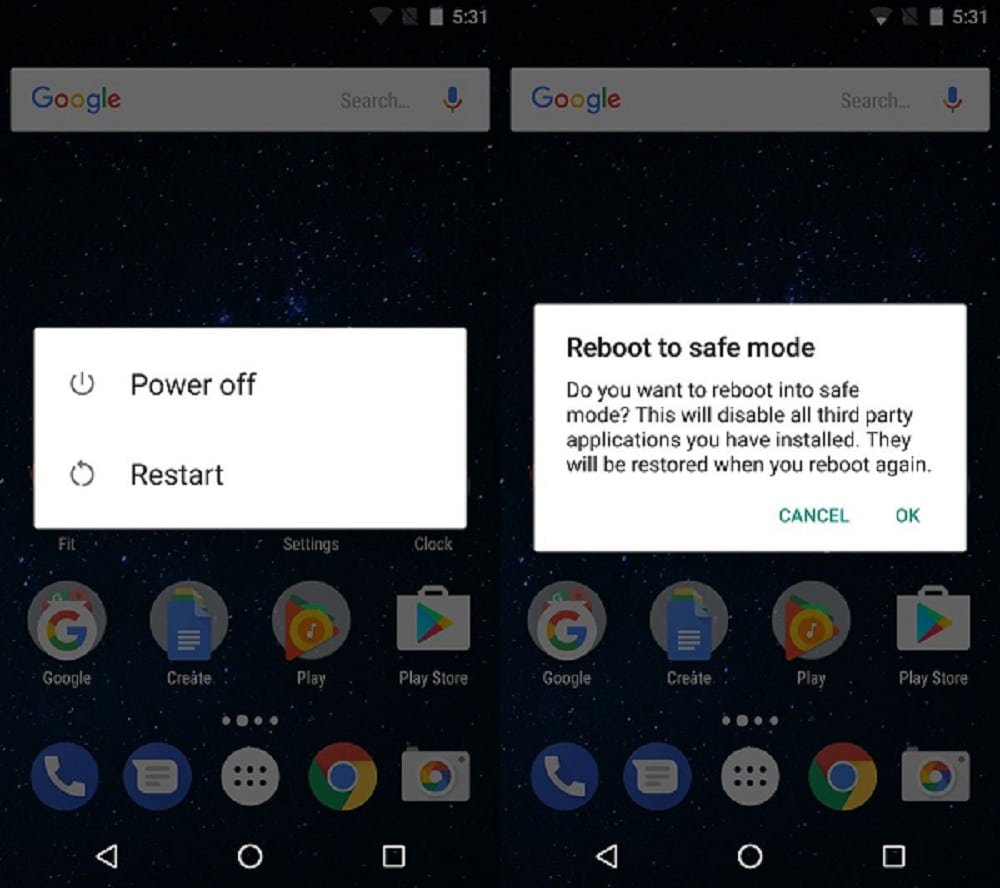
3. Click on okay, and the device will reboot and restart in safe mode.
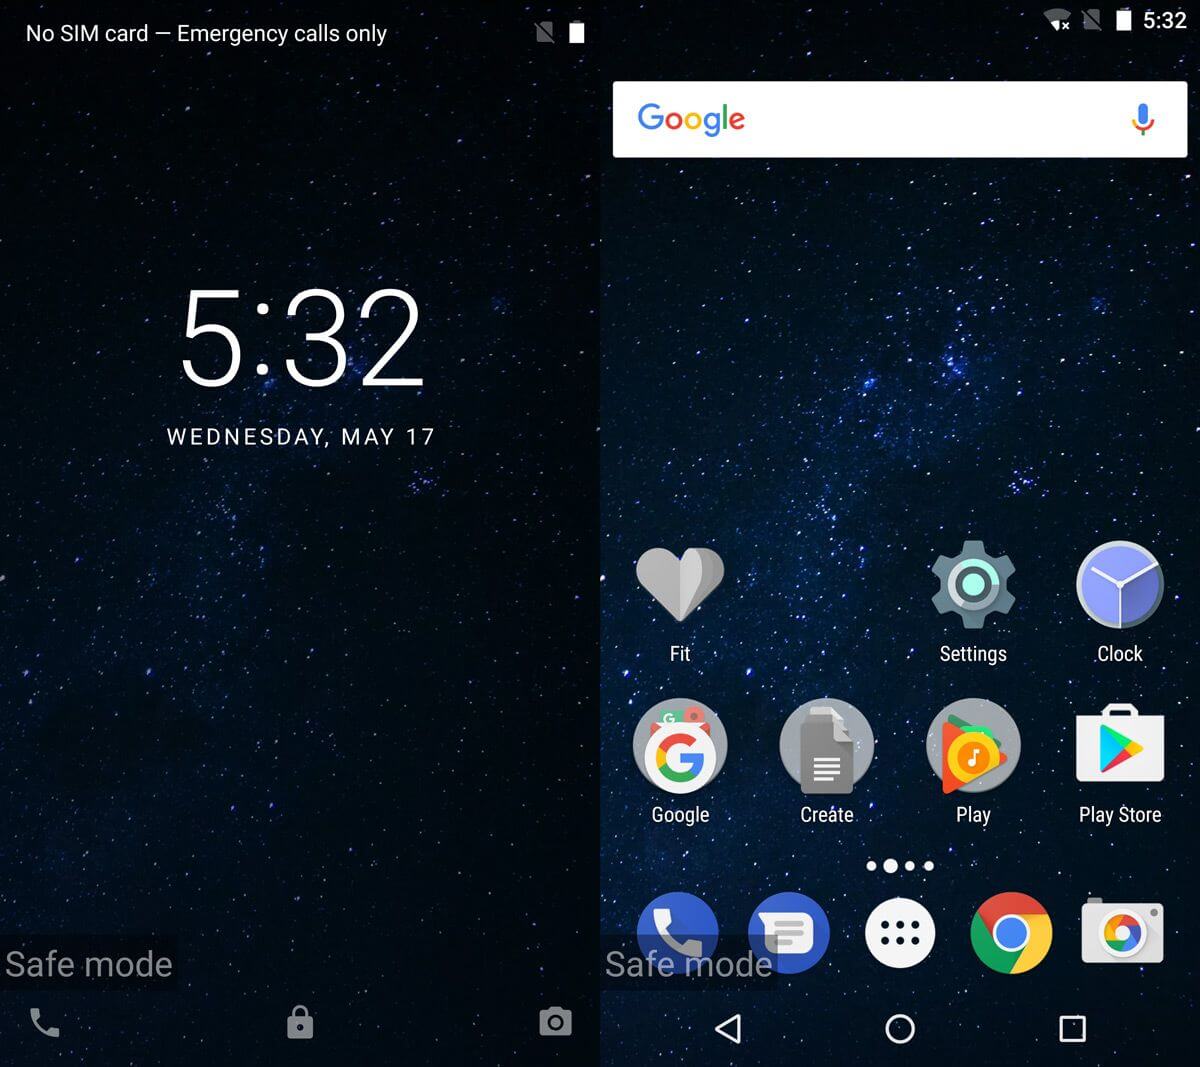
4. Now, depending on your OEM, this method might be slightly different for your phone; if the steps mentioned above do not work, then we will suggest you to Google your device’s name and look for steps to reboot in Safe mode.
5. After that, open your gallery, play any video, and see if you’re able to resolve the Android auto-rotate not working issue.
6. If it does, then it is confirmed that the culprit is indeed a third-party app.
Now, the step involves the elimination of the third-party app that is responsible for the error. Now it is not possible to exactly pinpoint any particular app. The next best thing is to remove any or all apps that you installed around the time when this bug started to occur. Additionally, you should also remove all the cache and data files associated with these apps. Follow the steps given below to remove malfunctioning or malicious apps altogether.
1. Firstly, open Settings on your device.
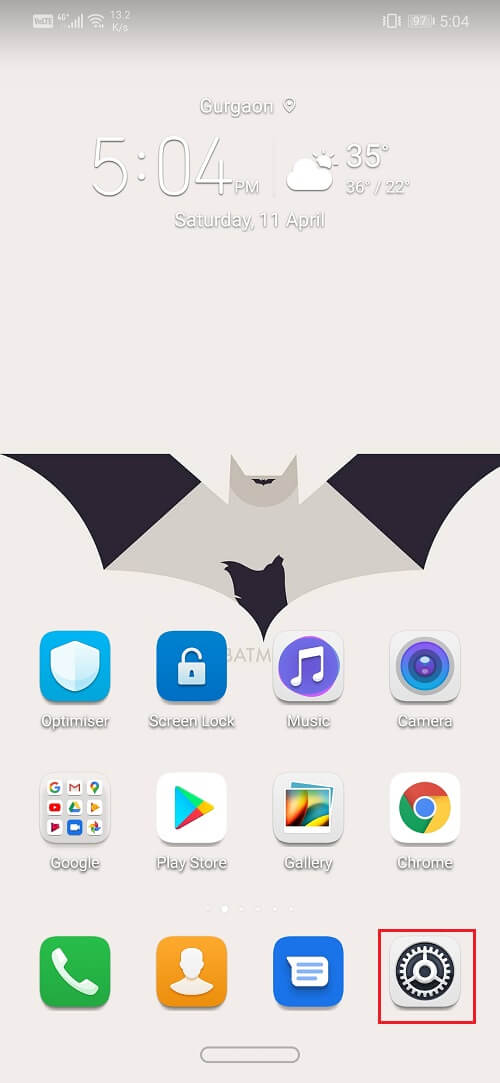
2. Now tap on the Apps option.
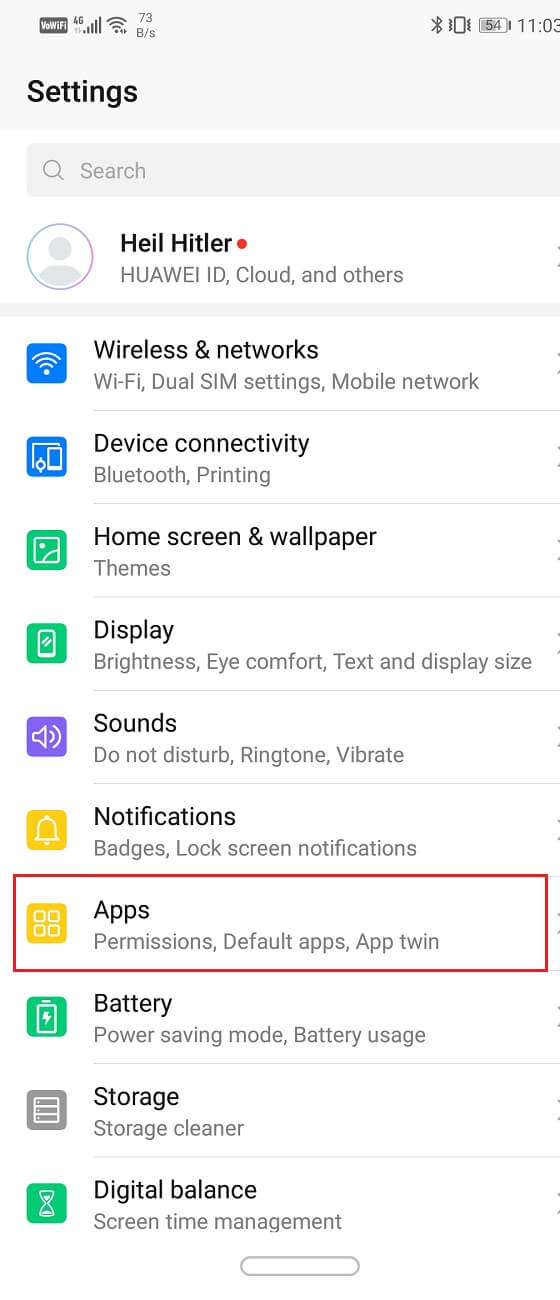
3. From the list of all the installed apps, select the app that you wish to uninstall.
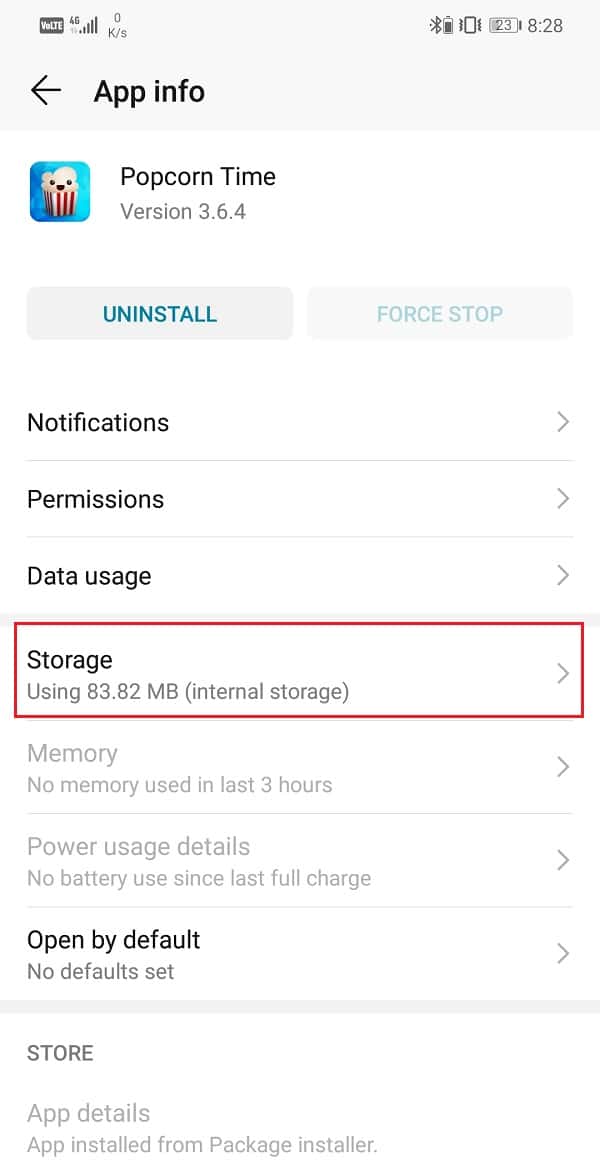
4. Here, tap on the Storage option.
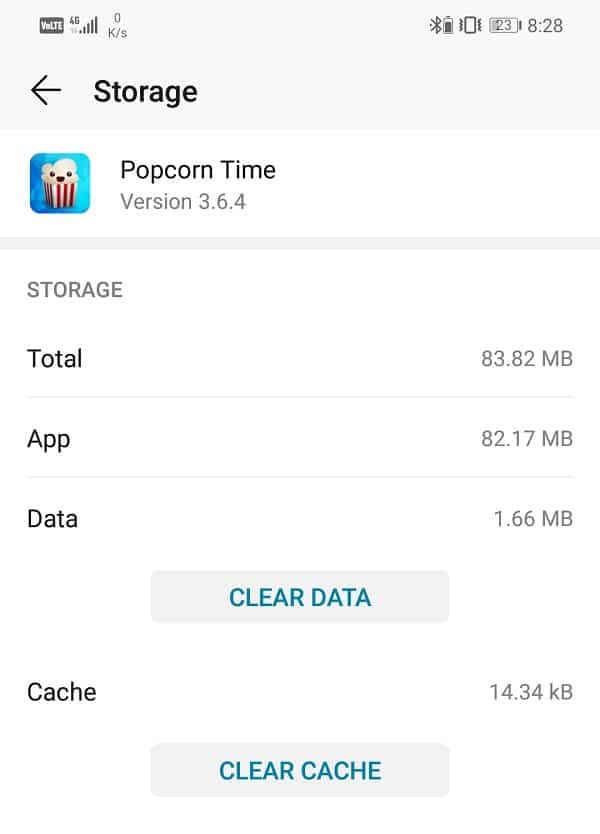
5. After that, simply click on the Clear Cache and Clear data buttons to remove any data files associated with the app from your device.
6. Now, come back to the App settings and tap on the Uninstall button.
7. The app will now be completely removed from your device.
8. After that, check whether auto-rotate is working properly or not. If not, then you might have to delete some more apps. Repeat the steps given above to remove all the recently installed apps.
Method 5: Update the Android Operating System
It is always a good practice to keep your device updated to the latest Android version. Sometimes, bugs and glitches like these can be easily solved by updating your Android operating system. The new update not only comes with different kinds of bug fixes and new features but also optimizes the performance of your device. Therefore, if the auto-rotate on your device is not working properly, then try updating your Android operating system and see if that solves the problem. Follow the steps given below to see how.
1. Firstly, open Settings on your device.
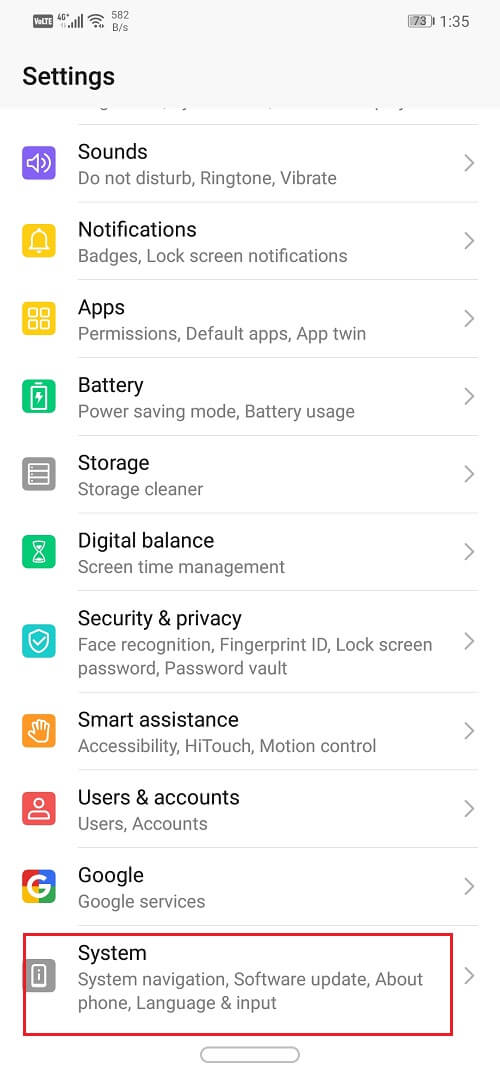
2. Now click on the System option.
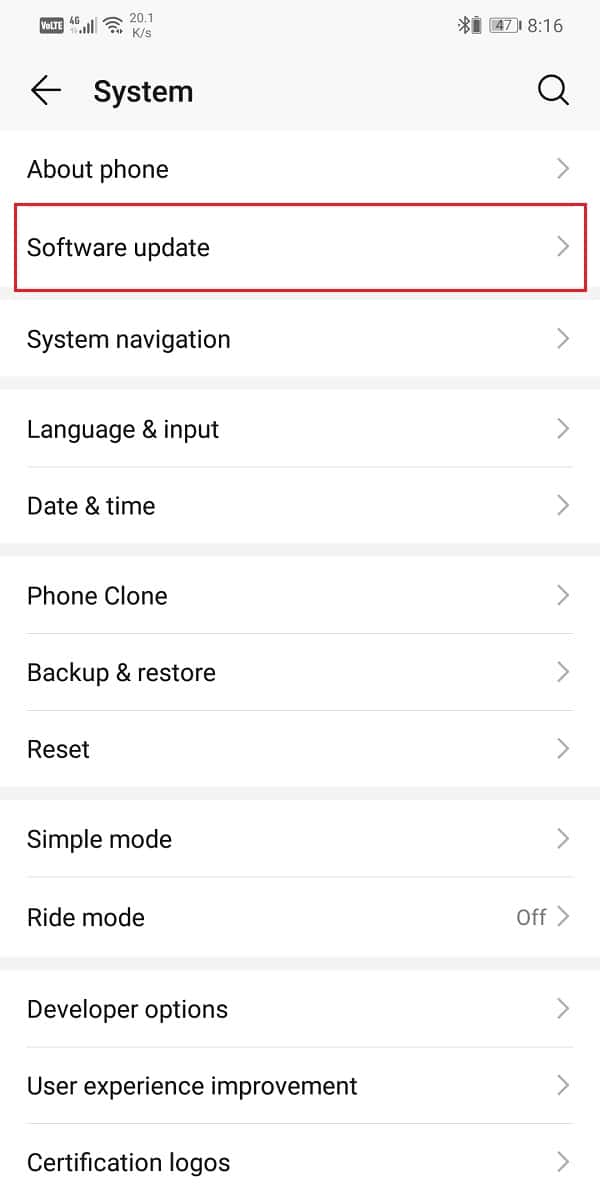
3. Here, select the Software update option.
4. Your device will now automatically start searching for software updates.
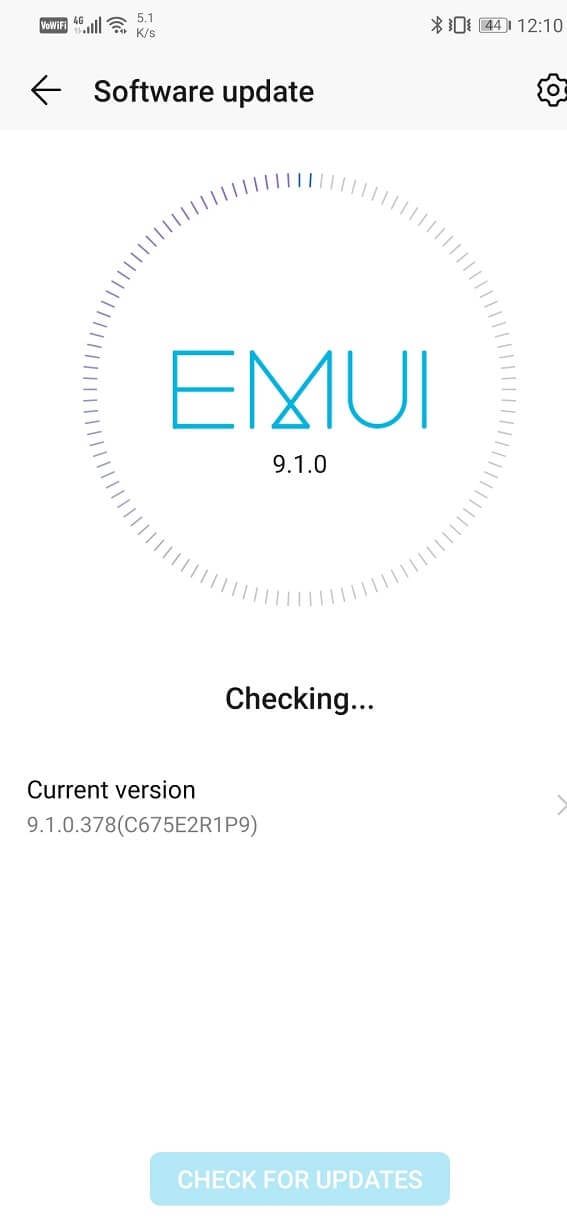
5. If you find that any update is pending, then download and install it.
6. Your device will automatically restart once the device has been updated. Check if you’re able to fix Android auto-rotate not working issue.
Method 6: Hardware Malfunction
If none of the above methods work, it seems like the error is due to some hardware malfunction. Any smartphone uses several sensors and delicate electronic circuits. Physical shocks caused by dropping your phone or knocking it against a hard object can cause these parts to get damaged. Additionally, if your Android device is old, it is normal for individual components to stop working.
In this situation, the methods mentioned above will not be sufficient to fix the problem. You need to take your device to an authorized service center and have them take a look at it. The chances are that it can be solved by certain relacing components like the damaged G-sensor. Seek professional assistance, and they will guide you with the exact steps you need to take to solve the problem at hand.
Recommended:
With that, we come to the end of this article. We hope that you find this information helpful. You only realize how useful a little feature like Auto-rotate is when it stops working. As mentioned earlier, sometimes the problem is software related, and that can be solved quite easily.
However, if that is not the case, then replacing hardware components will significantly cost you. In the worst-case scenario, you might have to switch to a new device. Ensure that you back up your data either on the cloud or some external hard drive before giving it out for servicing. This will ensure that you get back all your data even if you have to replace your old device with a new one.
