Notepad++ is a multi-language source code editor and replacement of Notepad. There are several additional features that are not available in Windows built-in Notepad. If you are a developer or someone who needs a text editor, it is a great alternative. The steps below will guide you on how to install and set Notepad++ as default text editor in Windows 11. Doing so would mean that it will open automatically when you want to read or edit text, code, or other file types.
How to Set Notepad++ As Default Text Editor in Windows 11
Notepad is the default text editor in Windows 11. If you do not want to use notepad then, you can make Notepad++ as your default text editor. But, firstly you need to install Notepad++ in your system.
Step I: Install Notepad++ on Windows 11
Follow the given steps to install Notepad++ in Windows 11:
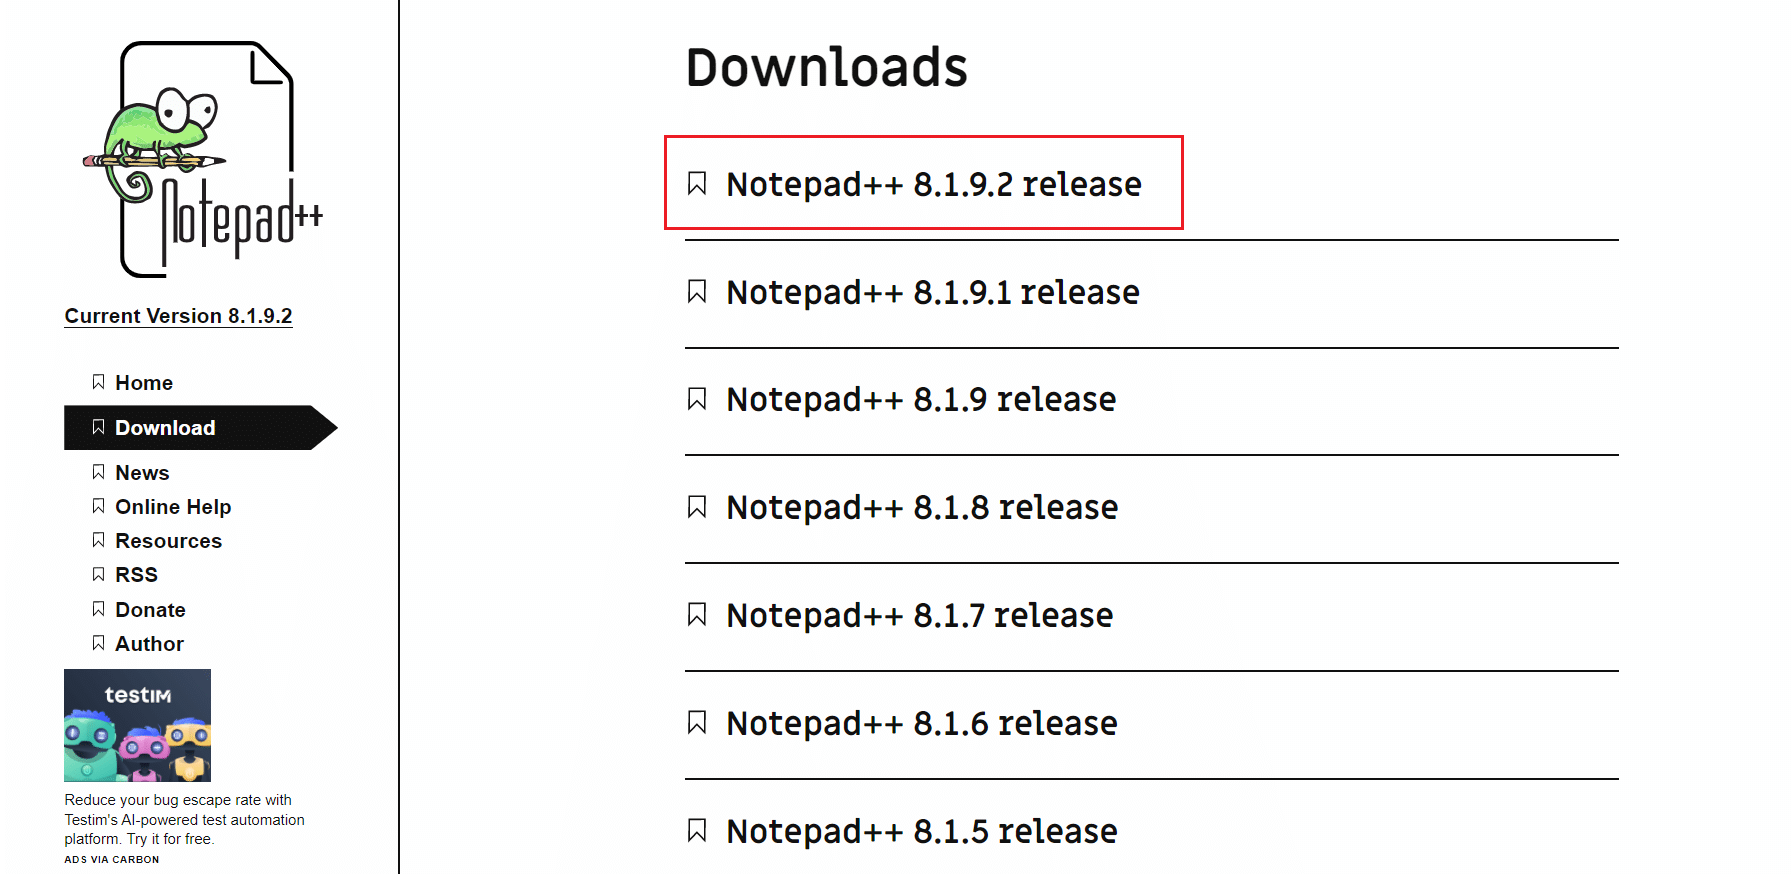
1. Go to the Notepad++ download page. Choose any release of your choice.
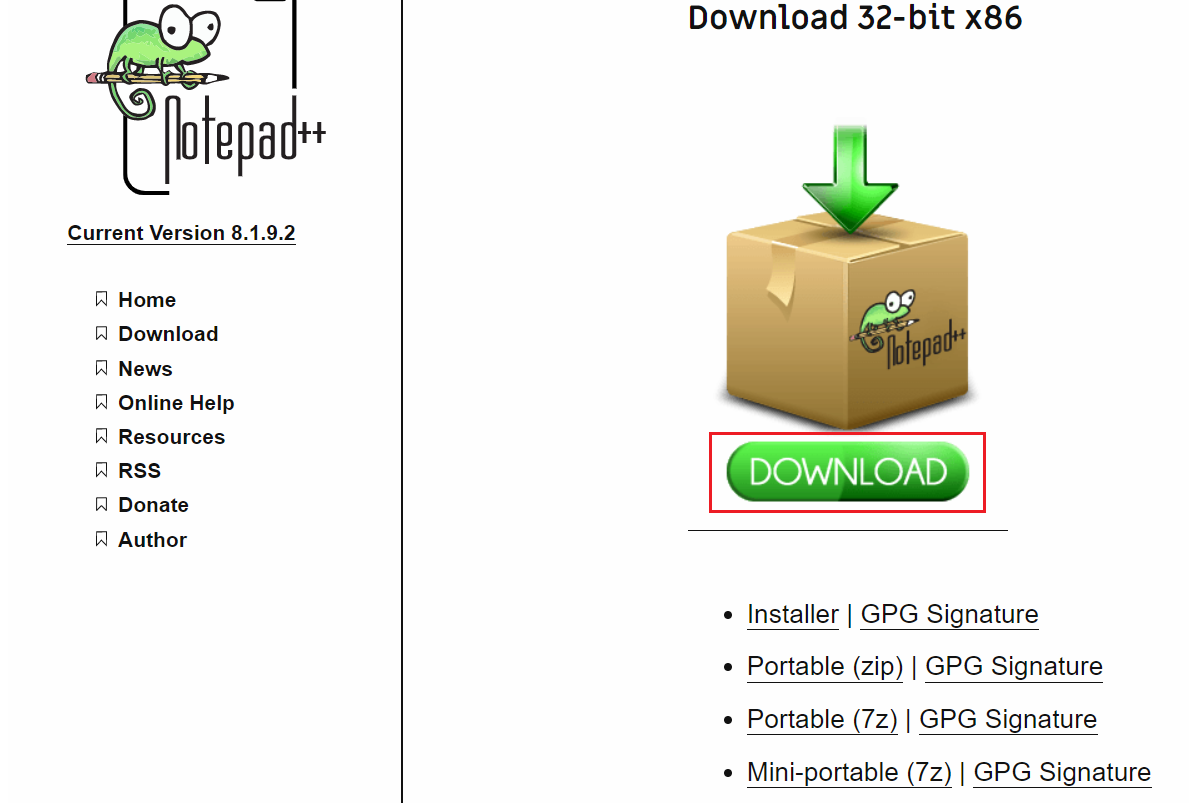
2. Click on the green DOWNLOAD button shown highlighted to download the chosen version.
3. Go to the Downloads folder and double-click on the downloaded .exe file.
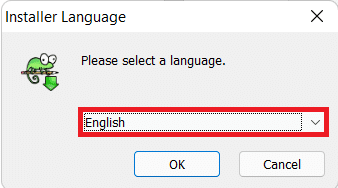
4. Choose your language (e.g. English) and click OK in Installer Language window.
5. Then, click on Next.
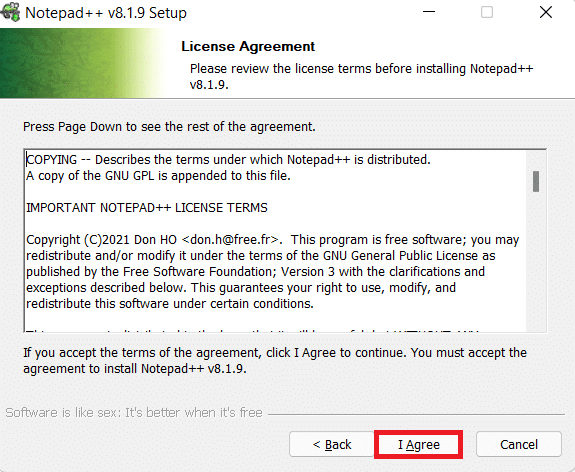
6. Click on I Agree to state your acceptance of the License Agreement.
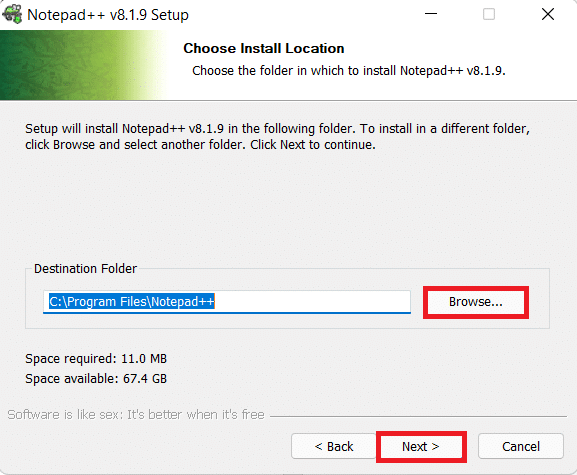
7. Click on Browse… to choose the Destination Folder viz installation location of your preference and click on Next.
Note: You can choose to keep the Default location as it is.
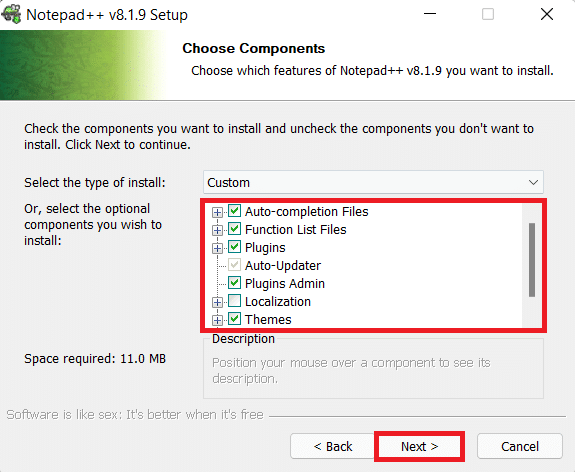
8. Select the optional components you wish to install by checking the box next to them. Click on Next.
9. Finally, click on Install to initiate the installation.
Note: Check the box marked Create Shortcut on Desktop option to add Desktop shortcut.
Also Read: 6 Ways To Create A Computer Virus (Using Notepad)
Step II: Set it as Default Text Editor
Note: This method to set this application as default applies to other text editors as well.
Method 1: Via Windows Settings
Here’s how to set Notepad++ as default text editor in Windows 11 using Settings app:
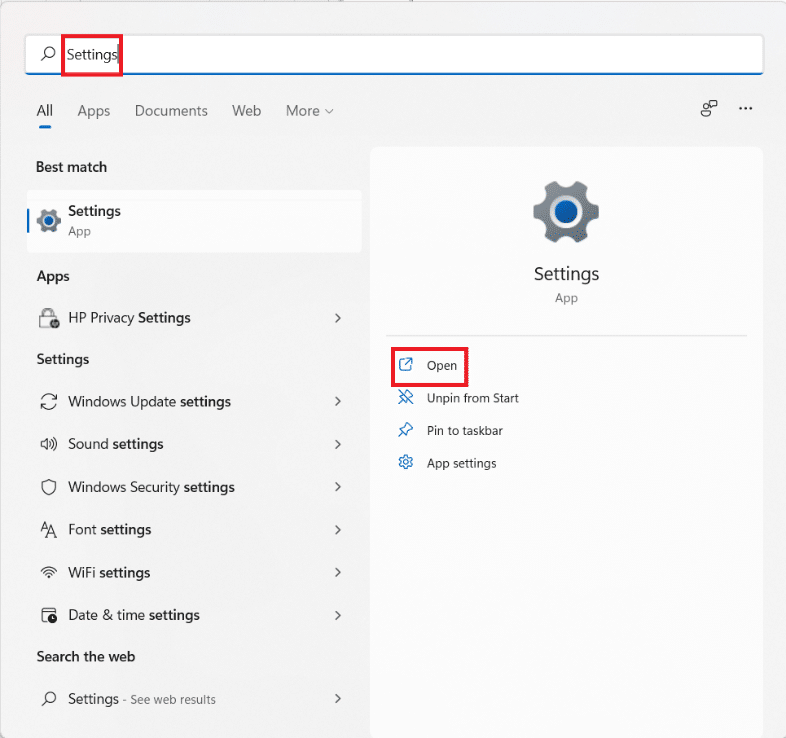
1. Click on the Search icon and type Settings.
2. Then, click on Open, as shown.
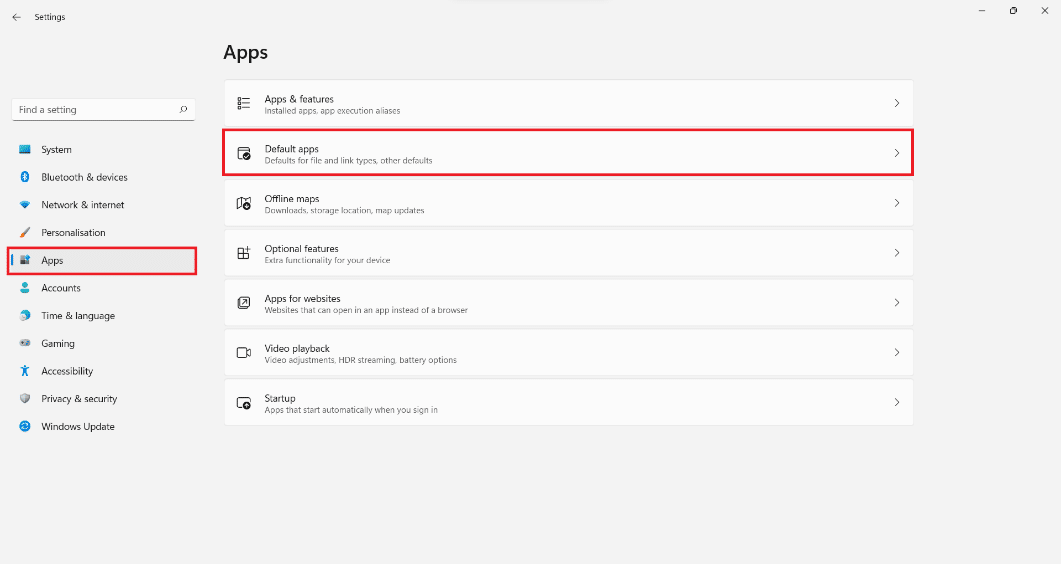
3. Click on Apps in the left pane.
4. Here, click on Default apps in the right pane.
5. Type Notepad in the Search box provided.
6. Click on the Notepad tile to expand it.

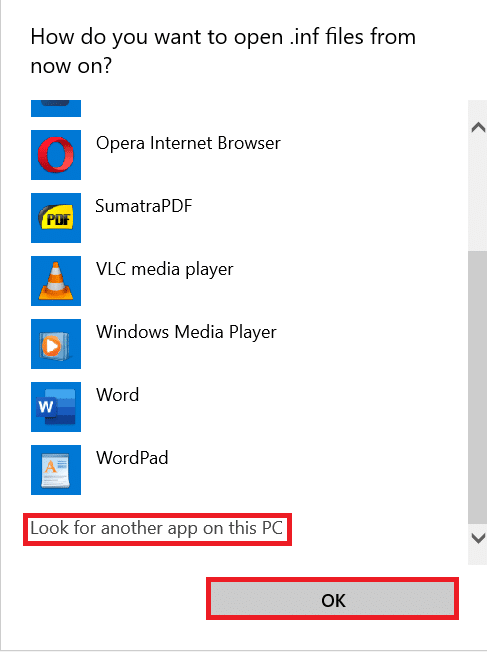
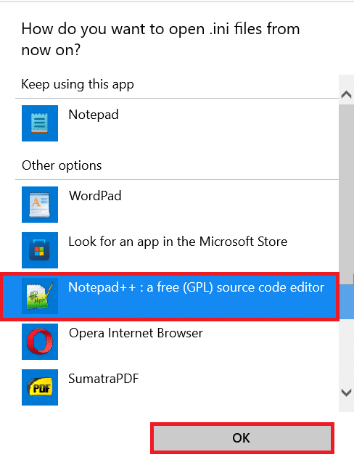
7A. Click on individual file types and change the default app to Notepad++ from the list of installed alternatives in the How do you want to open ___ files from now on? window.
7B. In case you do not find Notepad++ in the list, click on Look for another app on this PC.
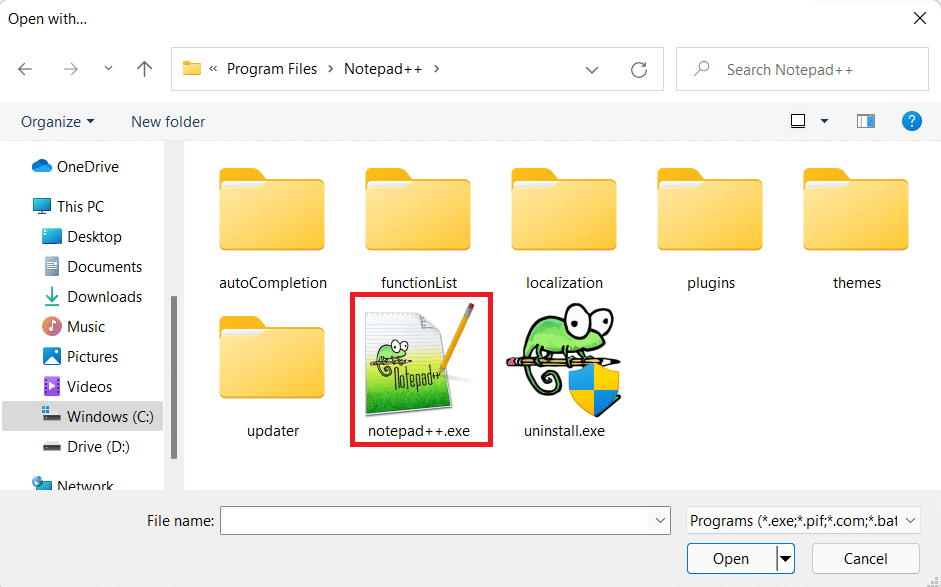
Here, navigate to the installed location of Notepad++ and select notepad++.exe file. Then, click on Open, as shown.
8. Finally, click on OK to save the changes, as depicted below.
Also Read: How to Remove Watermarks From Word Documents
Method 2: Via Command Prompt
Here’s how to make Notepad++ default text editor on Windows 11 through Command Prompt:
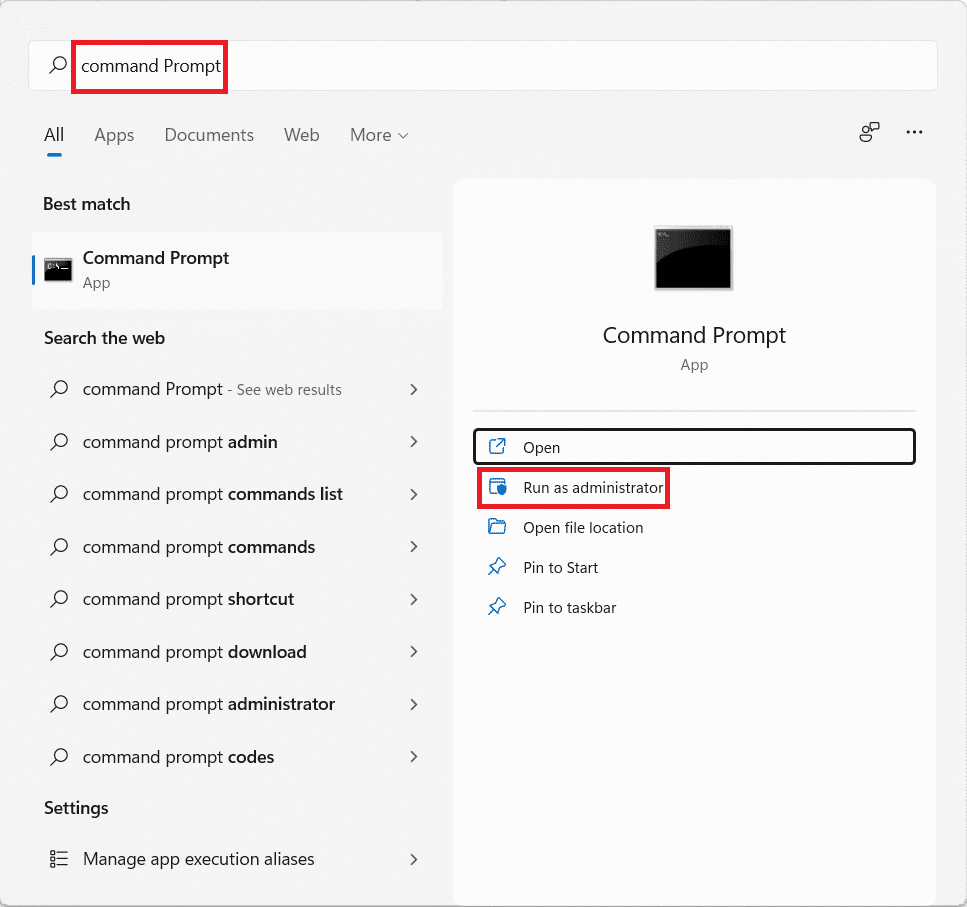
1. Click on the Search icon and type Command Prompt.
2. Then, click on Run as administrator.
3. In the Command Prompt window, type the following command and press the Enter key.
REG ADD “HKLMSOFTWAREMicrosoftWindows NTCurrentVersionImage File Execution Optionsnotepad.exe” /v “Debugger” /t REG_SZ /d “”%ProgramFiles%Notepad++notepad++.exe” -notepadStyleCmdline -z” /f

Also Read: How to Remove desktop.ini File From Your Computer
Pro Tip: Remove Notepad++ as Default Text Editor
1. Run the Command Prompt with administrative privileges, as earlier.

2. Type the given command and hit Enter to execute:
REG DELETE “HKLMSOFTWAREMicrosoftWindows NTCurrentVersionImage File Execution Optionsnotepad.exe” /v “Debugger” /f

Recommended:
We hope you learnt how to make Notepad++ default text editor in Windows 11. Drop your suggestions and queries in the comment section below. We would reply as soon as possible.
